Loading ...
Loading ...
Loading ...
Information
34
Cleaning the lens
If there is any dust or stain on the surface of the lens, you must clean the lens. Use an air spray or cleaning cloth for
product exterior, provided with the product, to lightly clean the product. Please use a recommended air spray or lens
cleaning product. To clean the lens, spray a small amount of cleaning agent on a swab or a soft cloth and the clean the
lens. Please be aware that liquid may flow pass into the lens if the product is sprayed on lens directly.
Cleaning the Projector Case
Cleaning the Filter
To clean the projector case, first unplug the power cable. To remove dirt or dust, wipe the casing the provided polishing
cloth. Do not use alcohol, benzene, thinners or other chemical detergents as these can cause the casing to be warped or
discolored.
It is recommend to filter cleaning to maintain the performance of the proejector.
When prompted to clean the filter, take the following steps to clean it.
* You should keep the lens, case and air vent clean because any dirt or stains may appear on the screen. If any parts
need to be replaced, contact your dealer. When cleaning any part of the projector, always turn the power off and unplug
the projector first.
Maintenance
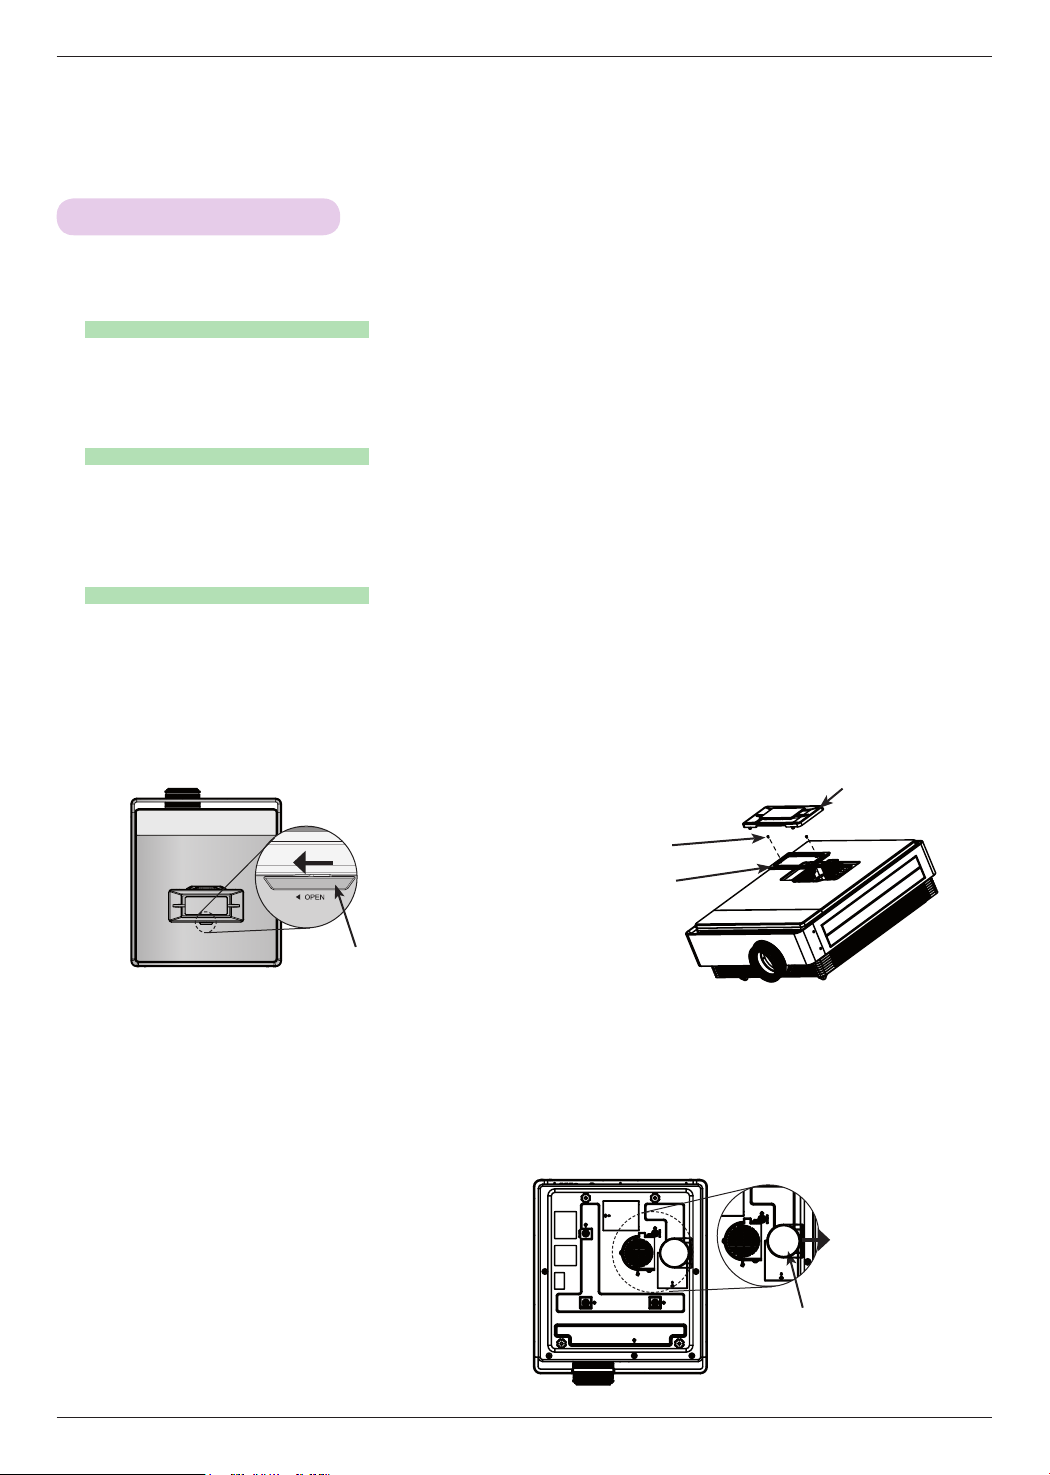
< Cleaning the top filter >
1. Turn off the projector and unplug the power cable. Place it on a table or flat surface.
2. Open the filter cover by pushing the filter cover
lock to the direction of the arrow as of the picture.
3. After separating the filter cover, remove the screw.
Filter Cover Lock
Filter Cover
Filter
Screw
4. Take out the filter and dust off lightly. (When the filter is damaged, use a new filer.)
5. After installing the filter and filter cover, push the filter cover lock to the reverse direction of the arrow until a click
sound.
< Cleaning the bottom filter >
1. Turn off the projector and unplug the power cable. Turn it upside down and place it on a table or flat sur-
face.
2. Take out the filter by pulling the bottom filter to
the direction of the arrow as of the picture.
3. Dust off the filter lightly. (When the filter is damaged,
use a new filer.)
4. Install the filter in the reverse order.
Filter
Loading ...
Loading ...
Loading ...