Loading ...
Loading ...
Loading ...
9
UNPACKING AND REMOVING SHIPPING MATERIAL
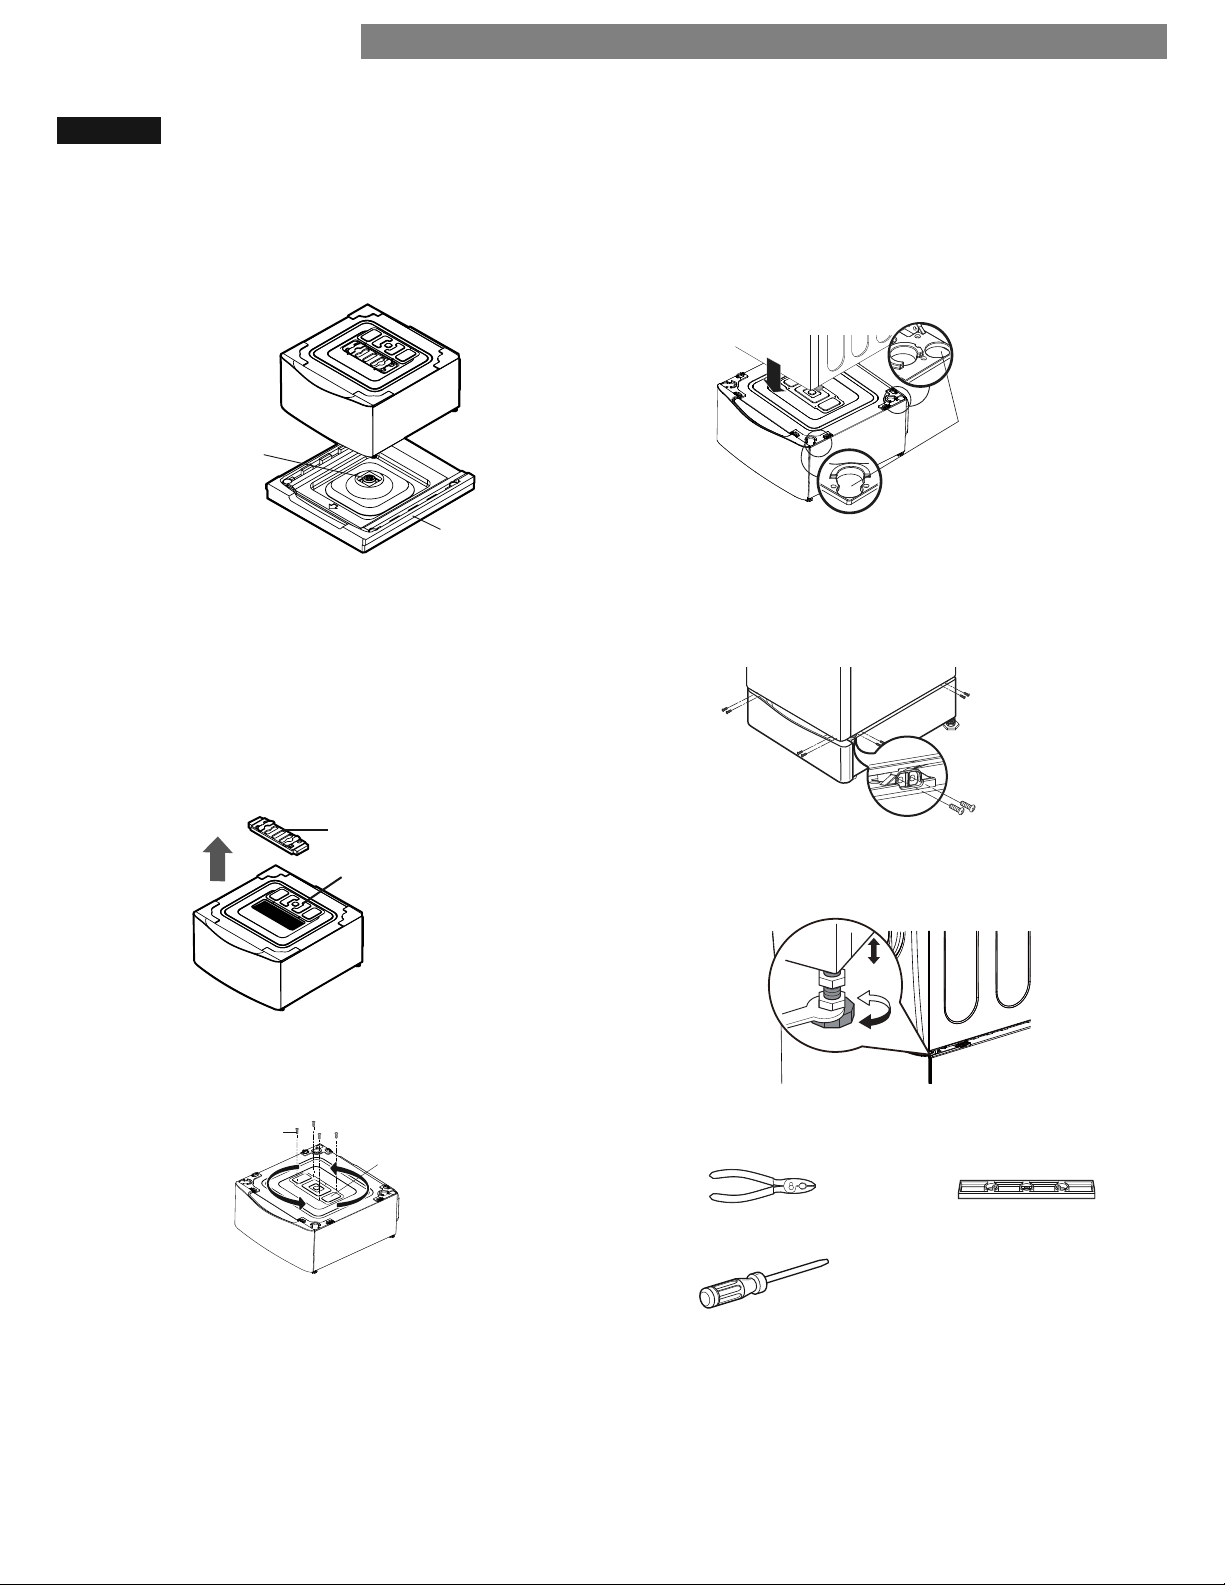
1. After removing the carton and shipping material, lift
the washer off the foam base. Make sure the plastic tub
support comes off with the base and is not stuck to the
bottom of the washer.
Plastic Tub Support
Carton Base
If you must lay the washer down to remove the base
packaging materials, always protect the side of the
washer and lay it carefully on its side. DO NOT lay the
washer on its front or back.
2. Save the foam block for future use. If the washer must
be moved in the future, the foam block will help prevent
damage to the washer during transportation.
NOTE: To prevent damage, do not remove the foam tub
insert until the washer is at the fi nal location.
Foam Tub Insert
Top Cover
3. Turn the top cover about 180 degrees. Cover the upper
hole with the top cover and install 4 short screws
(included in packing box) to fi x it in place.
Top cover
Short
screws
WARNING: The top cover must be installed to avoid the
risk of electric shock or short circuit. Failure to do so can
cause serious injury, fi re, electric shock or death.
4. Make sure the leveling legs on the front-loading
washer are fully retracted before stacking it on top of
the pedestal washer. Position the appliance on top of
the pedestal washer.
Washer legs
5. Make sure the holes on the pedestal washer align
with the holes in the front-loading washer, then
install 4 long screws (included in box) at each corner
to securely attach the front-loading washer to the
pedestal washer.
Long screws
6. Extend the legs of the front-loading washer slightly
until it is snugged up against the pedestal washer.
TOOLS YOU WILL NEED
• Adjustable Pliers • Carpenter’s Level
• Screwdriver
INSTALLATION INSTRUCTIONS
Loading ...
Loading ...
Loading ...