Loading ...
Loading ...
Loading ...
5
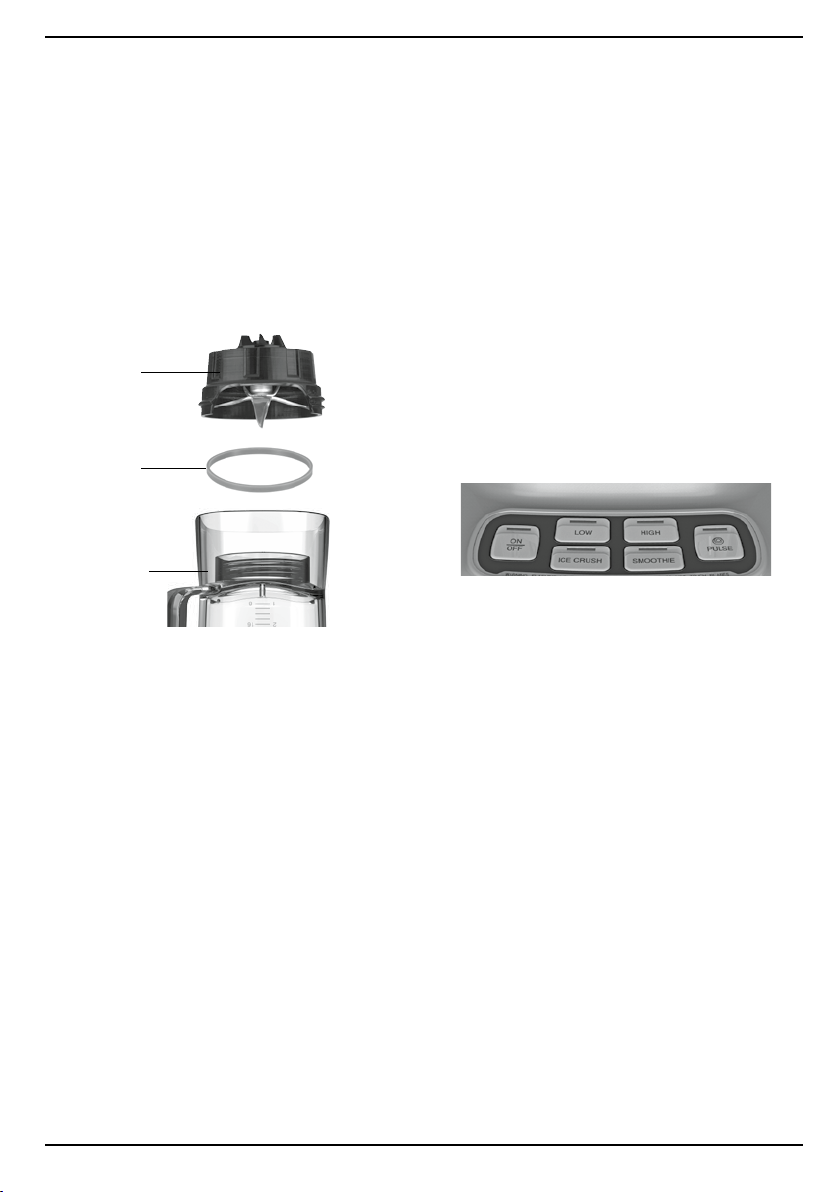
ASSEMBLY
To use your Cuisinart
®
VELOCITY Ultra 1HP Blender,
begin by assembling the blender jar.
1. Turn the blender jar (a) upside down and place it
flat on a sturdy surface.
Note: You may need to position the rubber gasket
(b) into the groove of the blade assembly if not
tightly in place
2. Turn the blade assembly (c) upside down and
place the blade end in the blender jar opening.
Note: Blades are sharp. Handle carefully.
3. Twist blade assembly (c) clockwise until secure.
HELPFUL REMINDERS
• Once the cover is in position, additional
ingredients can be added during blending by
simply lifting the measured pour lid, adding
ingredients and replacing the measured pour lid.
•
Cover should always be in place while the unit is
on
.
• Warning: Do not place blender jar on base while
motor is running.
• Do not remove blade assembly from blender jar
when removing blender jar from base. Simply lift
blender jar from motor base.
• Never put b
oiling liquids or solid frozen foods (with
the exception of ice cubes or ½-inch [1.3 cm] pieces
of frozen fruit) in the blender jar.
• Do not put ice, frozen foods or very cold liquids
into a blender jar that has come directly out of
a hot dishwasher.
• Do not put very hot liquids or foods into a
blender jar that has come directly out of the
freezer. Cool boiling liquids for 5 minutes before
pouring into blender jar.
• Follow Cleaning and Maintenance instructions on
page 6 prior to your first use.
OPERATION
1. Place the motor base of your Cuisinart
®
VELOCITY
Ultra 1HP Blender on a flat, sturdy surface.
It is important that the surface be clean and
dry. Assemble the blender jar by following the
Assembly instructions. Once the jar is assembled
and is in position on the motor base, plug the unit
into an electrical outlet.
2.
Put all necessary ingredients into the blender jar and
replace the cover. You may add more ingredients
by lifting the measured pour lid and dropping
ingredients through the fill area. Replace the
measured pour lid after adding ingredients. Do not
put hands into blender jar with blender plugged in.
Note: Add liquid ingredients first, then follow with
solid ingredients. This will provide more consistent
blending and prevent unnecessary stress on the
motor.
Note: To remove blender jar cover, lift edge of
cover upward. Lifting measured pour lid will not
remove cover.
3. Start blending:
Press the On/Off button. The red LED indicator
light will illuminate and flash, indicating that the
blender is turned on, but no speed has been
selected.
4. Choose blending action:
A. If selecting a blending speed, press Low or
High button to determine the speed at which
you would like to blend the ingredients. Both
the On indicator light and the activated speed
indicator lights will glow. The blender will now
be functioning at the desired speed.
B. If selecting a pre-programmed function,
press the Ice Crush or Smoothie button to
determine the function you would like to blend
the ingredients. Both the On indicator light and
the activated pre-programmed indicator lights
will glow. The blender will now be functioning
at the desired pre-programmed function. The
blender will stop running once the
pre-programmed function times out and
completes the blending cycle.
C. If selecting Pulse mode you can create a burst
of power for quick, efficient blending.
To use the Pulse function, push the Pulse
button and the blue Pulse LED indicator light
will blink. Press and release either the Low
or High buttons. Repeat as desired. You
determine the duration of each pulse. While
pulsing, the blue LED indicator light will glow.
The Pulse function can be used to break apar
-
c.
a.
b.
Loading ...
Loading ...
Loading ...