Loading ...
Loading ...
Loading ...
802258 - B, BA, BHA, BAHA, - HydroTap User Guide - July 2015- V2.00 Page 13 of 24
LCD Screen operation - Section C
C
Install
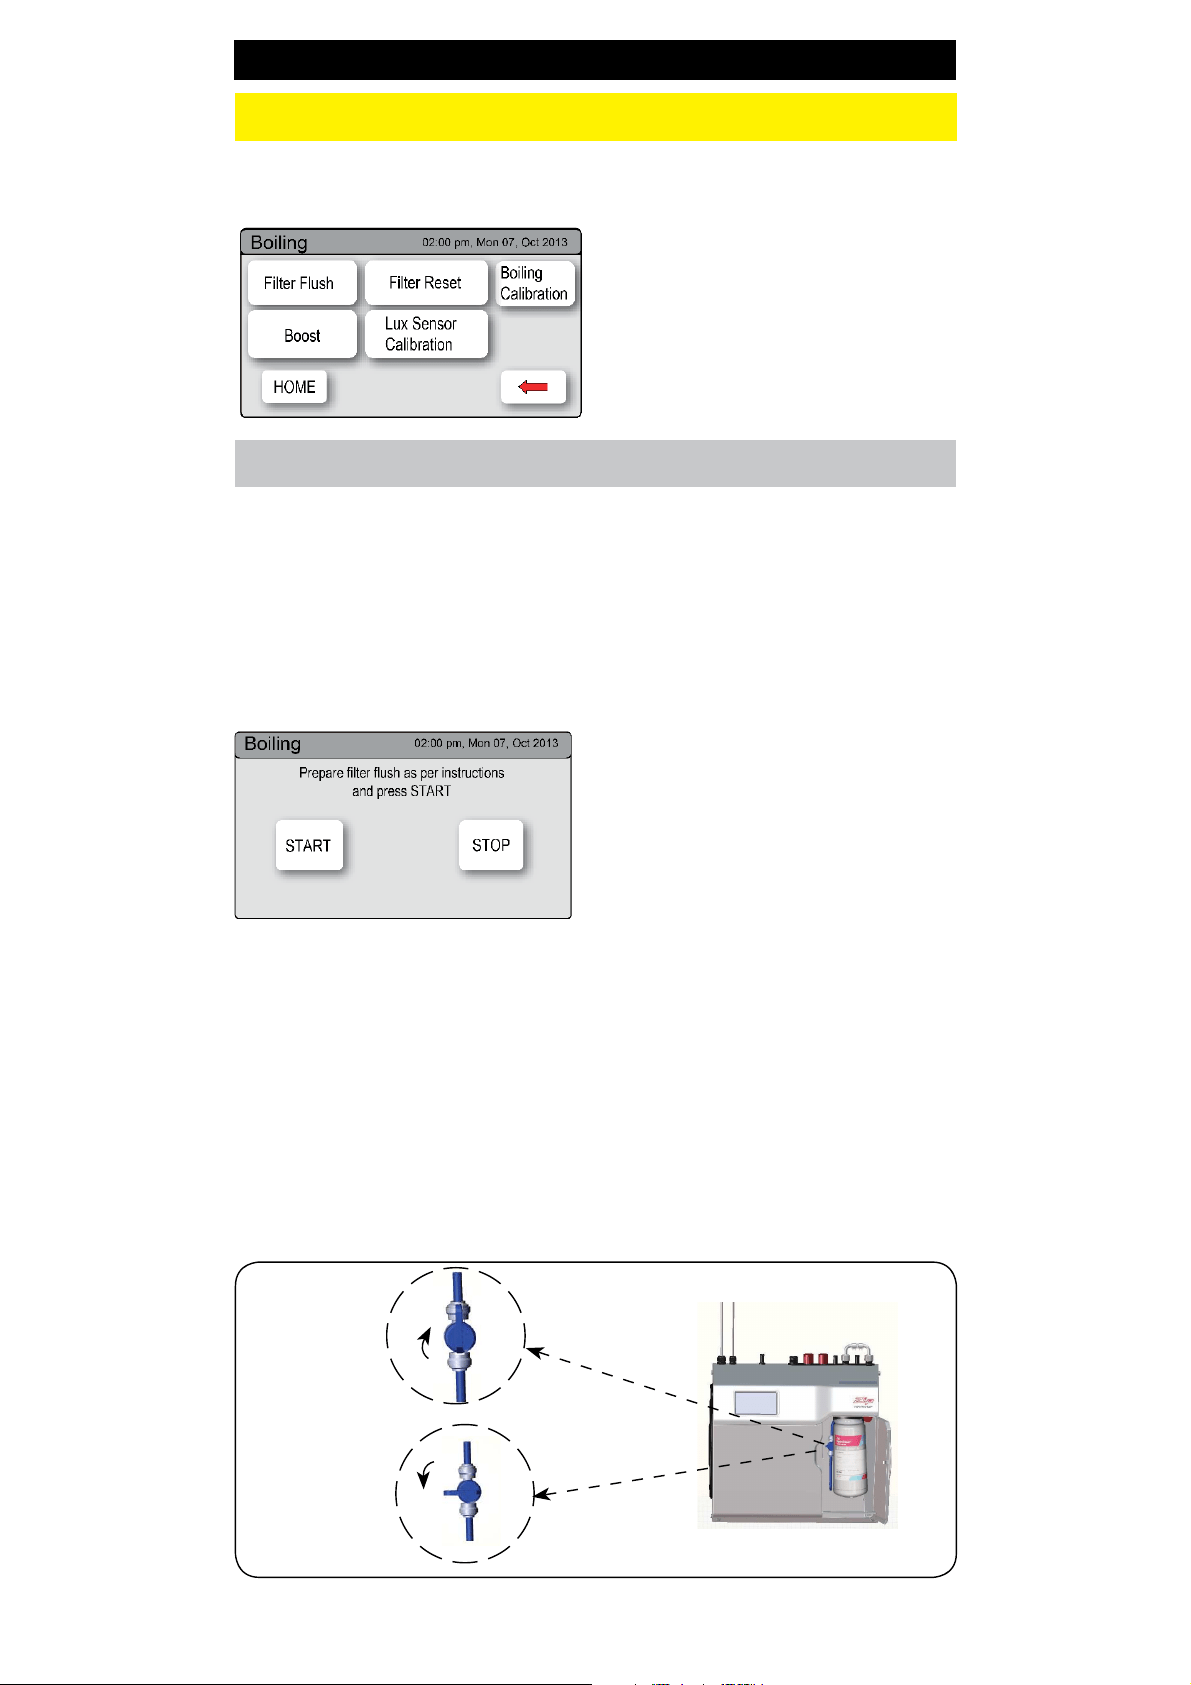
Have a 10L bucket or similar container (not supplied) at the ready to hold
a quantity of water that will be ejected while the Filter Flush Mode is in
operation. Open the filter access door on the front of the HydroTap and the
filter cartridge will be exposed. Located to the rear RHS of the cartridge is a
flush line, approx 600mm long and the flush line stop cock. Place the valve
end of the flush line into the bucket or container.
Once your Zip HydroTap G4 unit has been installed, Go to Install menu to
configure the system settings for your product.
1 - Filter Flush
Note:
Run at least 10 Litres
of water through to flush the
filter of any excess black carbon
particles (this is normal). Once
the filter flush has finished,
press the Stop button to display
the main menu
Sub menu:
1.
- Filter Flush
2.
- Filter Reset
3.
- Boiling Calibration
4.
- Booster
5.
- Lux Sensor Calibration
OPEN
Position
CLOSED
Position
ON
OFF
1.
Press [MENU] button for main
menu.
2.
Press [Install] button. Turn the stop
cock ON.
3.
Press [Filter Flush] button.
4.
Press [Start] button to start filter
flush. Once the filter flush is
finished, Turn the stop cock OFF
first (to ensure the cock is properly
closed) then press [Stop] to end
filter flush mode.
5.
Press [<=] button for the previous
menu or press [Home] button to
return to the home screen.
6.
After initial installation, Turning
OFF the Filter Flush Mode puts the
HydroTap into calibration mode.
With subsequent filter changes, the
system reverts to the main menu.
The Zip HydroTap allows the user to adjust the filter life and to edit the filter
usage. (See filter details on Page 17 ).
Loading ...
Loading ...
Loading ...