Loading ...
Loading ...
Loading ...
en Before using for the first time
12
Notes
■ Ensure that you always insert the accessories into
the cooking compartment the right way round.
■ Always insert the accessories fully into the cooking
compartment so that they do not touch the appliance
door.
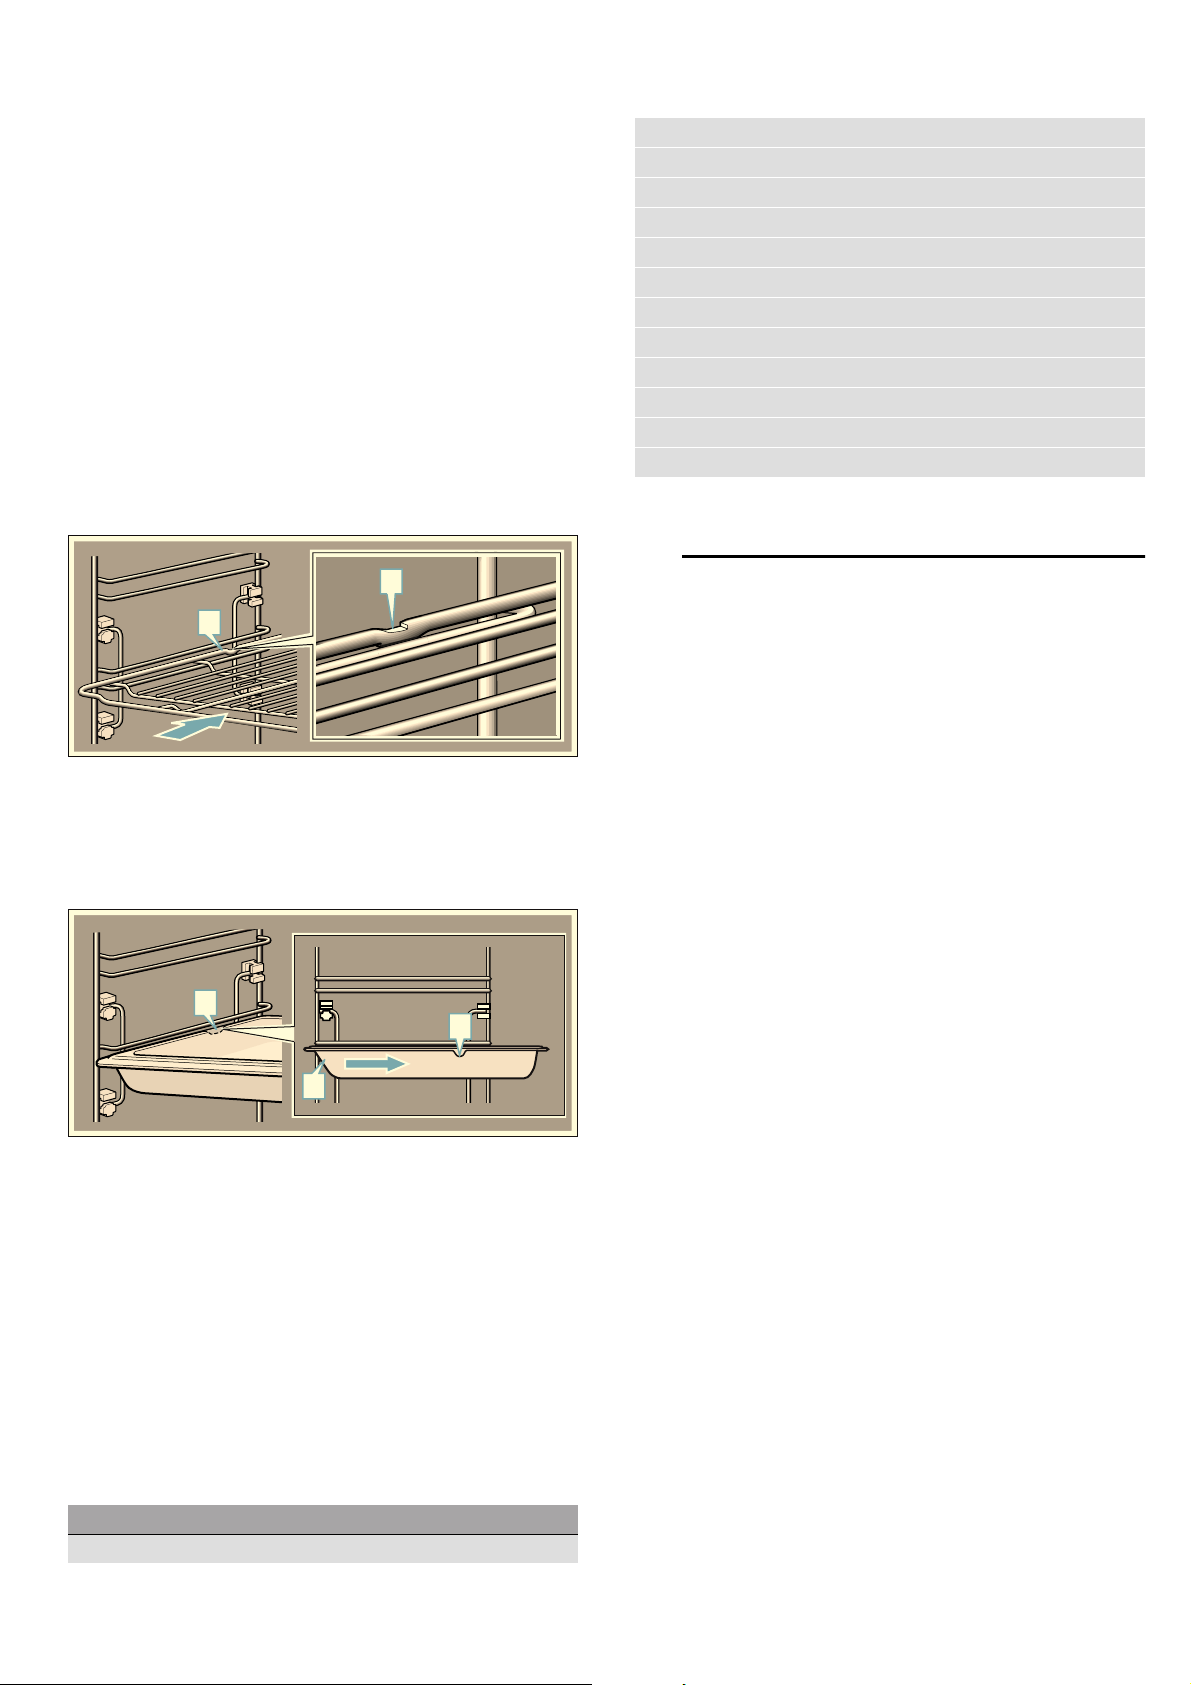
Locking function
The accessories can be pulled out approximately
halfway until they lock in place. The locking function
prevents the accessories from tilting when they are
pulled out. The accessories must be inserted into the
cooking compartment correctly for the tilt protection to
work properly.
When inserting the wire rack, ensure that the catch
tappet ‚ is at the rear and is facing downwards. The
lettering "microwave" must be at the front and the outer
rail must face downwards ¾.
When inserting baking trays, ensure that the catch
tappet ‚ is at the rear and is facing downwards. The
sloping edge of the accessory ƒ must be facing
forwards towards the appliance door.
Example in the picture: Universal pan
Optional accessories
You can purchase optional accessories from the after-
sales service and specialist retailers, or on the Internet.
You will find a comprehensive range of products for
your appliance in our brochures and on the Internet.
Both availability and whether it is possible to order
online differ between countries. Please see your sales
documents for more details.
Note: Not all optional accessories are suitable for every
appliance. When purchasing, please always quote the
exact designation (E no.) of your appliance.
~ "Customer service" on page 27
--------
KBefore using for the first
time
Before using for the first time
Before you can use your new appliance, you must
make some settings. You must also clean the cooking
compartment and accessories.
Initial use
As soon as the appliance is connected to the power
supply, the first setting "Language" appears on the
display.
Setting the language
1. Use the & button to navigate to the bottom line.
2. Use the ( or ) button to select the language.
3. Use the % button to return to "Language".
4. Use the ) button to select the next setting.
Setting the time
1. Use the & button to navigate to the bottom line.
2. Use the ( or ) button to select the current hour.
3. Use the & button to navigate to the next line.
4. Use the ( or ) button to select the current minute.
5. Press the % button repeatedly until "Time" appears.
6. Use the ) button to select the next setting.
Setting the date
1. Use the & button to navigate to the bottom line.
2. Use the ( or ) button to select the current day.
3. Use the & button to navigate to the next line.
4. Use the ( or ) button to select the current month.
5. Use the & button to navigate to the next line.
6. Use the ( or ) button to select the current year.
7. Press the % button repeatedly until "Date" appears.
8. Use the ) button to apply the settings.
The initial use is complete.
Accessories
Baking and roasting shelf
D
D
D
E
D
Baking tray, suitable for pyrolytic cleaning
Universal pan, suitable for pyrolytic cleaning
Extra-deep pan, suitable for pyrolytic cleaning
Profi pan, suitable for pyrolytic cleaning
Lid for the Profi pan
Pizza tray
Grill tray, suitable for pyrolytic cleaning
Bread-baking stone, suitable for pyrolytic cleaning
Glass roasting dish, 5.1 litres
Glass pan
Steaming set for ovens
Decorative strip
Loading ...
Loading ...
Loading ...