Loading ...
Loading ...
Loading ...
7
OPERATING INSTRUCTIONS
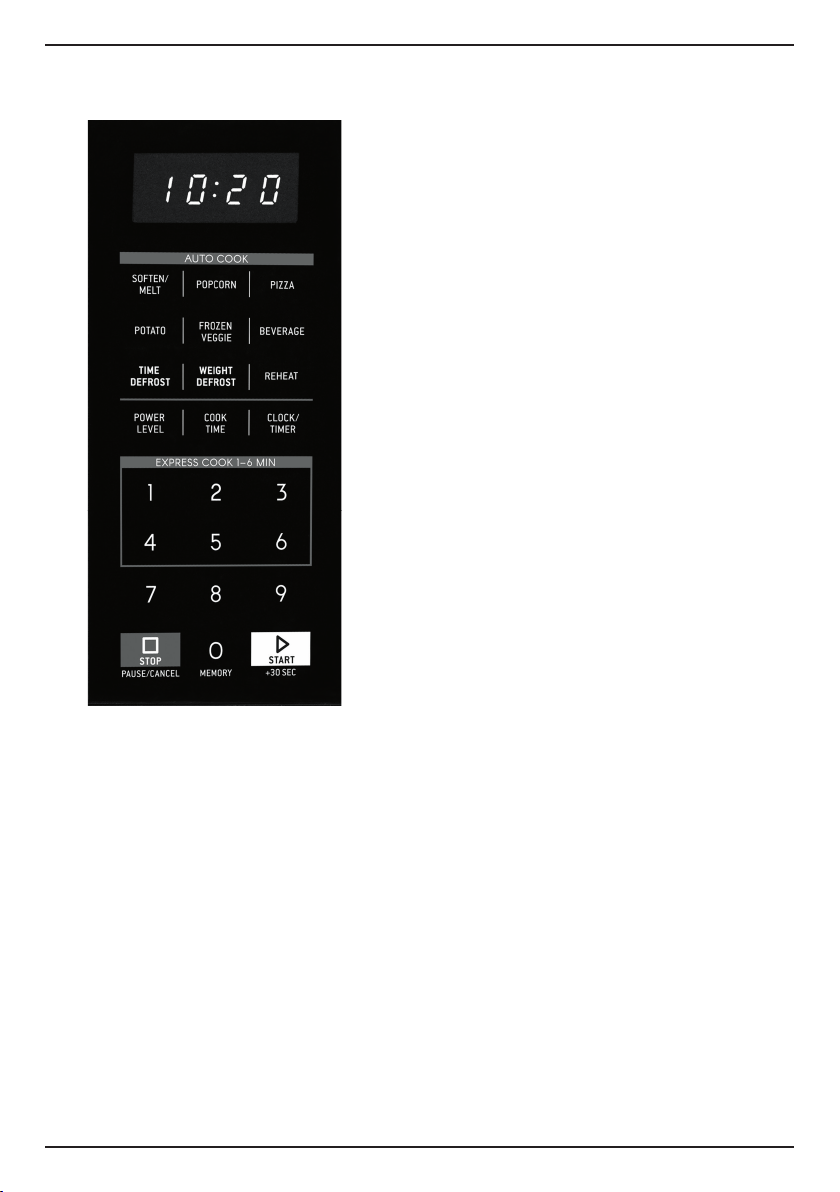
Setting the Clock
1. Press CLOCK/TIMER once, the display will
show “00:00” or the previously set time. The
first digit will flash.
2. Press the number buttons to set time.
Example: To set 12:30, press 1–2–3–0.
NOTE: This is a 12-hour clock. Time will
display from 01:00–12:59.
3. Once time is selected, press CLOCK/TIMER
to set, [:] will flash in display.
NOTE: While setting the clock, if the
STOP PAUSE/CANCEL button is pressed or if
nothing is selected for more than 1 minute,
the clock will go back to the previous setting.
Setting the Timer
1. Press CLOCK/TIMER twice, the display will
show “00:00.”
Press the number buttons to set the timer.
Example: To set 12 minutes and 15 seconds,
press 1–2–1–5.
NOTE: Timer can be set for up to 99 minutes
and 99 seconds, 99:99.
2. Press the START +30 SEC button to confirm
the setting. Time will begin to count down on
the display.
3. When time has elapsed, the tone will beep
5 times.
NOTE: When the kitchen timer is engaged, the
oven will not start with any program and the
oven light will not light.
Stop Pause/Cancel
Touch the STOP PAUSE/CANCEL button to:
• Start over if you make a mistake while
programming.
• Cancel the timer.
• Stop the oven during operation.
(Press START +30SEC to resume.)
• Cancel a program during operation
(press twice).
COOKING OPTIONS
Manual Cook
You can manually program your desired cooking
time and power level.
1. Press COOK TIME once, the screen will display
“00:00.”
2. Use the number buttons to input desired
cooking time, up to 99 minutes and 99
seconds.
3. Select power level from the chart on page 8.
Press POWER LEVEL, the screen will display
PL10 (default power level: 100%). To select
a different power level, press a number button,
1 through 9.
4. Once cook time and power level are
programmed, press START +30SEC to start
cooking. Time will begin to count down in
the display.
Browning Dish
Use a browning dish in this microwave only if supplied with a microwave trivet that will lift the browning dish
³∕
16-inch above the turntable. Incorrect usage may cause the turntable to break.
Dinnerware Microwave-safe only. Follow manufacturer’s instructions. Do not use cracked or chipped dishes.
Glass Jars Always remove lid. Use only to warm food. Most glass jars are not heat resistant and may break.
Glassware Heat-resistant oven glassware with no metallic trim only. Do not use if cracked or chipped.
Oven Cooking Bags Follow manufacturer’s instructions. Do not close with metal tie.
Paper Plates and Cups
Use for short-term cooking/warming only. Do not leave oven unattended while cooking.
Should be labeled for use in microwave — with no color/dye.
Paper Towels Cover food for reheating and absorbing fat. Use with supervision for short-term cooking only.
Parchment Paper Use as a cover to prevent splattering or as a wrap for steaming.
Plastic Microwave-safe only. Follow manufacturer’s instructions.
Plastic Wrap Microwave-safe only. Do not allow plastic wrap to touch food. Vent or pierce before cooking.
Thermometers Microwave-safe only.
Wax Paper Use as a cover to prevent splattering and retain moisture inside.
Loading ...
Loading ...
Loading ...