Loading ...
Loading ...
Loading ...
DAILY USE
1. SELECT A FUNCTION
Press to switch on the oven: the display will show
the last running main function or the main menu.
The functions can be selected by pressing the icon
for one of the main functions or by scrolling through
a menu.
To select a function contained in a menu, press
or
to select the desired one, then press to confirm.
FORCED AIR+MW
Please note: Once a function has been selected, the display
will recommend the most suitable level for each function.
2. SET THE FUNCTION
After having selected the function you require, you
can change its settings. The display will show the
settings that can be changed in sequence. Pressing
allows you to change the previous setting again.
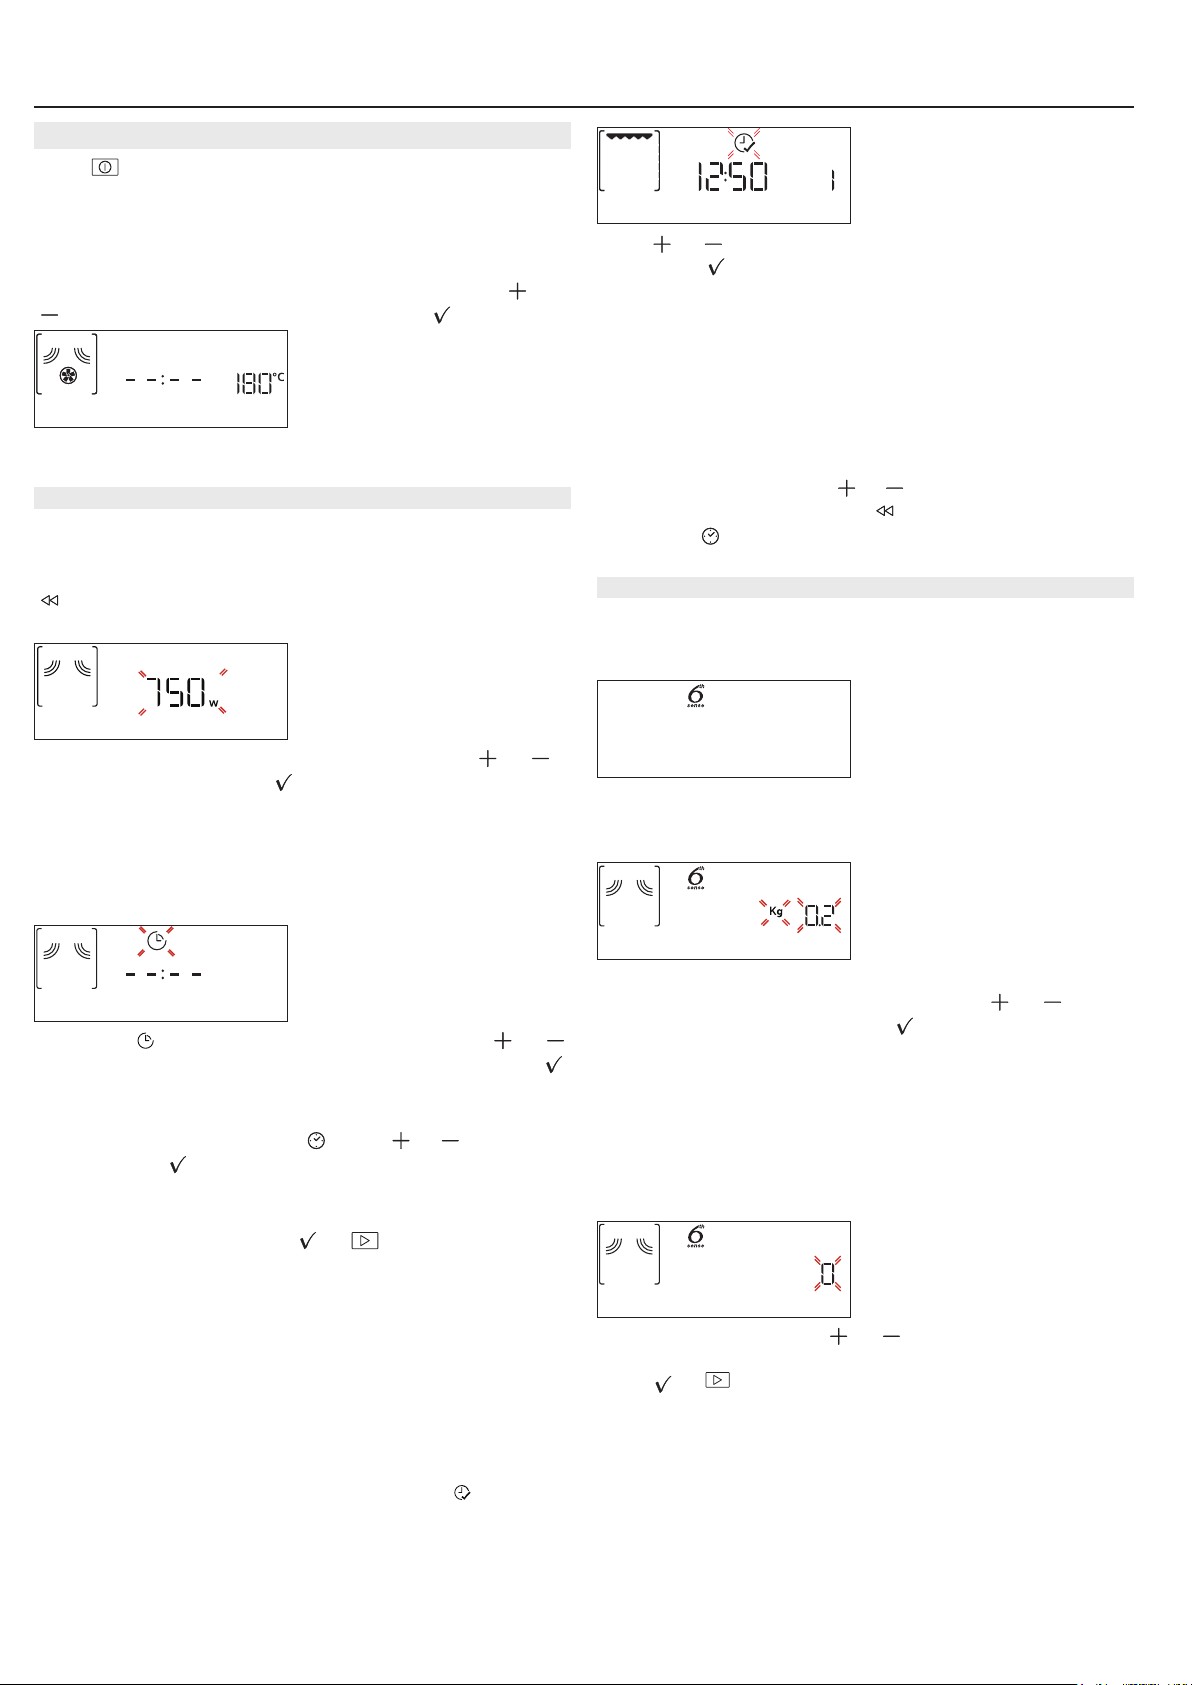
POWER / TEMPERATURE / GRILL LEVEL
MW POWER
When the value flashes on the display, press or
to change it, then press to confirm and continue
with the settings that follow (if possible).
In the same way, it is possible to set the grill level:
There are three defined power levels for grilling: 3
(high), 2 (mid), 1 (low).
DURATION
DURATION
When the icon flashes on the display, press or
to set the cooking time you require and then press
to confirm.
Please note: You can adjust the cooking time that has been
set during cooking by pressing
: press or to amend it
and then press
to conrm.
In non-microwave functions you do not have to set
the cooking time if you want to manage cooking
manually (untimed): Press
or to confirm and
start the function.
By selecting this mode, you cannot program a
delayed start.
END TIME (START DELAY)
In functions which do not activate the microwave
such as “Grill” or “Turbogrill”, once you have set a
cooking time you can delay starting the function by
programming its end time. In microwave functions
the end time is equal to the duration.
The display shows the end time while the
icon
flashes.
END TIME
Press or to set the time you want cooking to end,
then press
to confirm and activate the function.
Place the food in the oven and close the door: The
function will start automatically after the period of
time that has been calculated in order for cooking to
finish at the time you have set.
Please note: Programming a delayed cooking start time will
disable the oven preheating phase: The oven will reach the
temperature your require gradually, meaning that cooking
times will be slightly longer than expected. During the
waiting time, you can press
or to amend the
programmed end time or press
to change other settings.
By pressing
, in order to visualize information, it is possible
to switch between end time and duration.
. 6
th
SENSE
These functions automatically select the best cooking
mode, power, temperature and duration for all the
dishes available.
2. MEAT
When required, simply indicate the characteristic of
food to obtain an optimal result.
WEIGHT / PORTIONS
KILOGRAMS
To set the function correctly, follow the indications on
the display, when prompted, and press
or to set
the required value then press
to confirm.
Some 6
th
Sense functions do not require quantity
inputs: thanks to a smart humidity sensor, the oven
can automatically adjust the cooking time to the food
amount.
DONENESS
In 6
th
Sense functions it is possible to adjust the
doneness level.
DONENESS
When prompted, press or to select the desired
level between Light/Low (-1) and Extra/High (+1).
Press
or to confirm and start the function.
Loading ...
Loading ...
Loading ...