| PROBLEM | POSSIBLE CAUSES | WHAT TO DO |
Pressing ‘POWER’  does not turn on the dryer does not turn on the dryer | Fault with household power supply. | Try plugging in and turning on another electrical appliance. |
| Dryer does not heat. | Dryer set to ‘Air Dry’ cycle. | Check what cycle the dryer is set to (refer to page 18). Change to preferred cycle. |
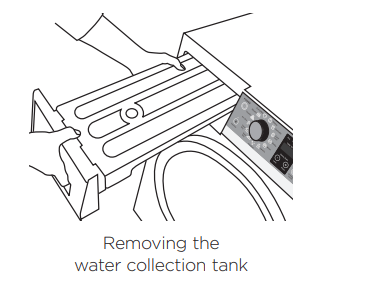
| Full water tank. | Empty the water tank (refer to page 24). |
| The dryer has progressed to ‘Cool’. | Check the progress lights – are the ‘Cool’ and ‘End’ lights illuminated? Refer to page 19. |
Touching  does not start the drying cycle. does not start the drying cycle. | Dryer door not closed properly. | Open and reclose the door. Check that the lint filter is correctly in place and not obstructing the door. |
| Is the dryer displaying a user warning or fault code? | Refer to pages 26 and 27. |
| Water tank full or not properly in place. | Empty the water tank (refer to page 24). Ensure the water tank is properly in place. |
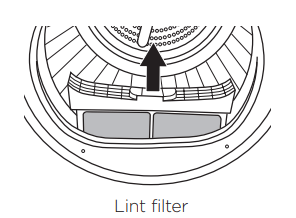
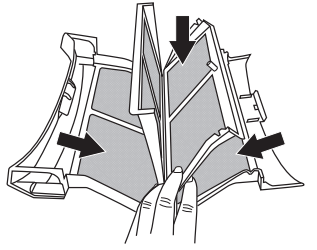
| Lint filter needs to be emptied. | Empty the lint filter and ensure it is correctly in place. |
| Dryer is overloaded. | Remove some items from the dryer. |
| ‘Delay Start’ function is set. | Refer to page 21 for more information. |
| Dryer keeps stopping and starting. | The ‘Wrinkle Free’ option has been selected. | Refer to page 20 for more information. |
| Dryer stops working midcycle. | Power failure. | Press ‘POWER’ and restart the desired cycle. |
| Dryer has been paused. | Touch the button to restart the cycle. |
| Dryer door is open. | Ensure the door is firmly shut. |
| Dryer is taking too long/results were not satisfactory. | Drying cycle selected not appropriate for the load. | Select an appropriate cycle for the load. Refer to pages 15 and 18. |
| Dryness level selected not appropriate for the load. | Select a higher dryness level. Refer to page 19. |
| Selected drying temp, not appropriate for the load. | Select a higher drying temp. Refer to page 20. |
| Dryer overloaded for the cycle. | Some cycles have a lower max load size. Refer to page 18. |
| Try dividing the load in half and dry half at a time. |
| Lint filter is blocked. | Clean the lint filter. |
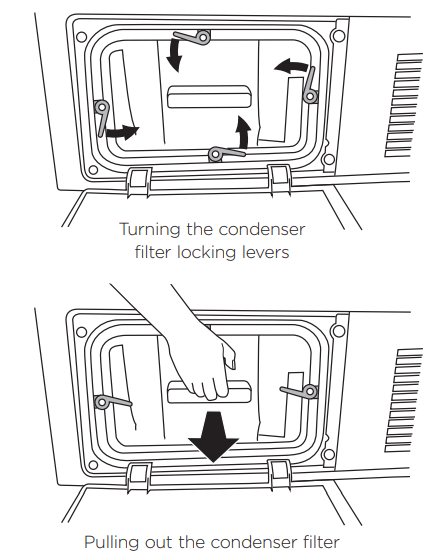
| Condenser filter is blocked. | Clean the condenser filter. Refer to page 25. |
| Water tank is full. | Empty the water tank. Refer to page 24. |
| Environmental conditions may be affecting dryer operation. | In hot, humid conditions the dryer will take longer to dry a load and be less efficient. |
| Load overly wet at the start of cycle. | Remove more water from the load before placing it in the dryer, eg select a faster spin speed on your washer, if appropriate for your load. |
| Dryer not draining water out properly. | Check the drain hose (if connected) for blockages or damage. You may need to call for service refer to page 36. |
| Items got tangled. | Try separating items and drying similar items together. Open items out when you place them in the dryer. Do not fold them. Untangle items, eg pull long sleeves out so they are not stuck/trapped on the inside of the garment. |
| Dryer is not draining. | Drain hose not connected to the water tank. | Ensure the drain hose is connected correctly. Refer to page 8. |
| Water tank not in place correctly. | Ensure water tank is properly in place. |
| Drain hose or drain blocked or damaged. | Check drain hose (if connected) and drain for blockages or damage. |
| Clothes getting too hot or damaged. | Cycle selected not appropriate for the load. | Ensure the cycle selected is appropriate for items in the load. Refer to pages 15 and 18. |
| Items removed from dryer before the end of cycle cool down had finished. | Removing items before cool down may damage clothing if it is not spread out and exposed to air to cool once removed from the dryer. |
| Dryer is beeping, displaying unfamiliar light patterns and/or a message on the digital display. | Dryer has a fault. | Try turning the dryer off and waiting 30 seconds before turning it back on. Refer to pages 26 and 27. |
| Small puddle of water coming from under the machine. | Water tank not correctly in place. | Ensure the water tank is correctly in place. |
| Water tank may need to be emptied. | Empty the water tank. |
| Water tank may be damaged. | Check the water tank for any signs of damage. |
| Drain hose may not be attached properly at the machine end. | Ensure the drain hose is attached properly. Refer to page 8. |
| Drain hose could be damaged. | Check the drain hose for damage. |
| Drain hose has slipped out of the drain. | Ensure the drain hose is securely fixed in place. Sometimes drain hoses can move or get displaced, which may lead to water draining onto the floor. |
| Drain may be blocked. | Check the drain for any blockages. |
| Dryer door not closing properly, affecting the seal. | Ensure the dryer door is closed properly and there is nothing obstructing the door opening. |
| Small amount of water in the drum at end of cycle. | Water tank needs to be emptied. | Empty the water tank. |
| Environmental conditions may be affecting dryer operation. | If conditions are particularly hot and humid, it is possible vaporised water may re-condense in the drum or on the inside of the door. |
| Noises. | Dryer is overloaded. | Remove some items from the dryer. |
| Dryer has a fault. | Continuous beeping or a musical series of beeps with a message displayed on digital display. Refer to pages 26 and 27. |
| Beeps signalling the end of a drying cycle. | End of cycle beeps can be turned off refer to page 20. |
| Dryer has not been levelled properly. | Refer to page 7. |
| Dryer makes unfamiliar noises. | At the start of the cycle the dryer may make some unfamiliar noises when the compressor turns on |
| Vibration | Dryer is not installed on a stable surface. | Ensure the dryer is installed on a flat, stable surface. Refer page 6. |
| Dryer is not level. | Ensure the dryer is correctly levelled. Refer page 7. |
| Dryer is overloaded. | Remove some items from the dryer. |
| Creasing | Cycle selection not appropriate for the load. | Select the ‘Easy Iron’ cycle to minimise creasing. |
| Dryer is overloaded. | Remove some items from the dryer. |
| ‘Dry Temp’ and/or ‘Dryness Level’ selected too hot/too long for load type. | Try selecting a lower ‘Dry Temp’ and ‘Dryness Level’. |
| ‘Wrinkle Free’ option not selected. | Select the ‘Wrinkle Free’ option to rotate the load at the end of the drying cycle. Refer to page 20. |
| Linting | Lint filter not cleaned or replaced. | Ensure the lint filter is cleaned after every cycle and replaced correctly. Refer to page 23. |
| Loads not sorted correctly. | Dry lint givers separately from lint receivers. Also, dry similar colours together eg light coloured items with light coloured items, dark items with dark items. Refer to page 17. |
| Clothes over dried. | Over drying clothes in the dryer can cause them to attract lint. Use an auto sensing cycle or ensure you check your load if using the time dry cycles to avoid over drying. Refer to pages 18 and 19. |
| New items have been dried in the dryer recently. | Clean the lint filter and use ‘Air dry’ cycle to clear any remaining lint from the dryer. |
| New towels or flannelette sheets can leave lint in the dryer, which may be picked up by subsequent loads. |
| Fabric damage. | Instructions on care label not followed. | Follow the instructions on the care label of the items. |
| ‘Dry Temp’ or ‘Dryness Level’ selected not appropriate for the fabric type. | Ensure the ‘Dry Temp’ and ‘Dryness Level’ selected is appropriate for the fabric type. Refer to the items care label. Refer to pages 19 and 20. |
| Metal parts on the items or in the load. | Fasten zips and other clasps before placing items in the dryer. |
| Items not separated or dried on an appropriate cycle for the fabric type. | Dry similar items together. Ensure an appropriate cycle is selected. Refer to pages 15 and 18. |
| Items fell off the rack when using ‘Rack Dry’. | Ensure the rack is installed correctly (refer to page 17) and only one or two garments are placed on the rack at a time. |
| ‘Dry Temp’ or ‘Dryness Level’ selected not appropriate for the fabric type. | Ensure the ‘Dry Temp’ and ‘Dryness Level’ selected is appropriate for the fabric type. Refer to the items care label. Refer to pages 19 and 20. |
| Used a ‘Time Dry’ cycle and did not monitor the dryness of clothes during the cycle. | Ensure that clothes are checked for dryness during the cycle when using the timed programmes to avoid over drying. Refer to page 19. |
| Dye transfer. | White/light and coloured items not separated before drying. | Remember to separate white/light and coloured items before placing them in the dryer |
| Wet items left sitting in the dryer for long periods of time before drying. | Do not leave wet items sitting in the dryer for long periods of time before drying, if they may be prone to colour run. If you do intend to leave them for long periods before drying, then separate the load and put those items that may cause colour run aside. |
| Tangling. | Loads not separated during loading. | Try separating out larger items from smaller items. |
| Items loaded into the dryer incorrectly. | Load items individually into the dryer. Do not place folded items in the dryer. |
| Incorrect cycle selection. | Try using the ‘Easy Iron’ cycle to dry shirts and the ‘Sheets’ cycle to dry sheets. Refer to pages 15 and 18. |
| Load size too large. | Try drying smaller load sizes. Some cycles have a lower maximum load size. Refer to page 18. |
| Delicate items not dried on ‘Rack Dry’. | Dry pantyhose, bras, stockings and any other delicate items prone to tangling on the ‘Rack Dry’ cycle with a ‘Low’ heat setting. |
| Sheets and duvet /doona covers due to their size, are prone to tangling. | Dry sheets and duvet/doona covers separately from other laundry, apart from towels. Ensure duvet/doona covers are buttoned or fastened closed before drying. Try adding a knotted towel to sheets loads if you are experiencing a lot of tangling. |


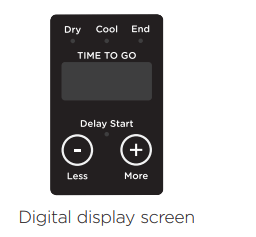
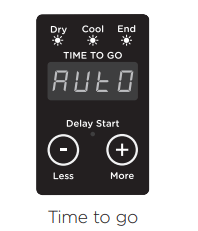
 will appear on the screen until it reaches the cool down phase, at which time the dryer will display how long the cycle has left to go.