Loading ...
Loading ...
Loading ...
12 English
Before you start
Before you start
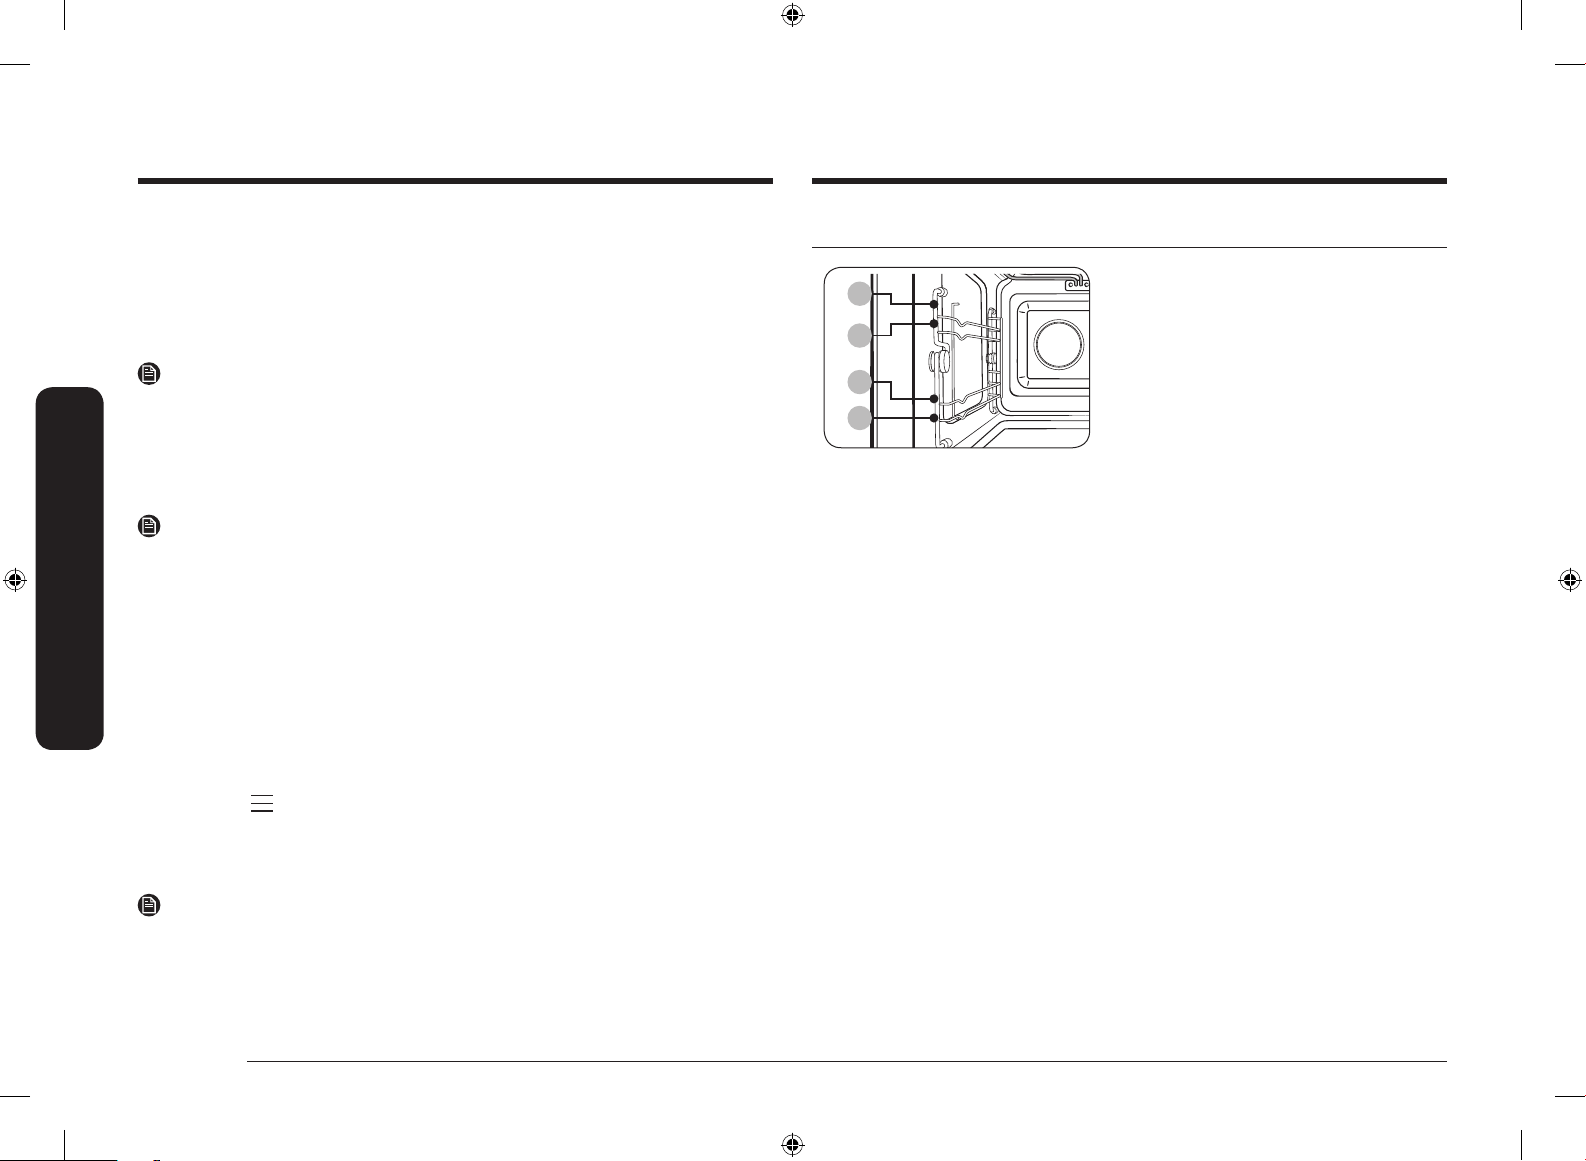
Side racks
01
02
03
04
01 Level 1
02 Level 2
03 Level 3
04 Level 4
• Insert the accessory to the correct
position inside of the oven.
• Take caution in removing cookware
and/or accessories out of the oven. Hot
meals or accessories can cause burns.
6. Select the time zone.
a. Swipe the screen up and down and then tap your time zone.
b. Tap Next.
7. Set the date.
a. Tap the day, month, and year.
b. Tap Next.
NOTE
Skip this step if you have connected your appliance to the SmartThings app or Wi-
Fi network.
8. Set the time.
a. Tap the hour and minute.
b. Tap Next.
NOTE
• Skip this step if you have connected your appliance to the SmartThings app or
Wi-Fi network.
• Default time format is set to 24-hour format. You can change the time format
to 12-hour format in Settings menu.
9. Tap Done to complete the setting.
• Guide for rst use screen appears. You can tap LEARN MORE to see the guide
or tap LATER to skip this step.
Setting the screen to stay always on
The screen automatically turns off after a certain time. If you want to set the
screen to stay on all the time, follow the below instructions.
1. Touch the button on the control panel, and then tap Settings.
2. On the Settings screen, tap Display.
3. On the Display screen, tap Timeout.
4. Swipe up to move down the list of options, and then tap Always on.
NOTE
• Energy consumption may increase depending on your setting.
• When the timeout setting is set to "Always on", the brightness of the LCD
automatically changes to level 2 if there is no action for 3 minutes.
• “Always on” setting is available only when the screen saver is set to On.
NQ8300T_NQ50T9939BD_EU_DG68-01194D-00_EN.indd 12 2020-01-23 12:26:03
Loading ...
Loading ...
Loading ...