User Manual
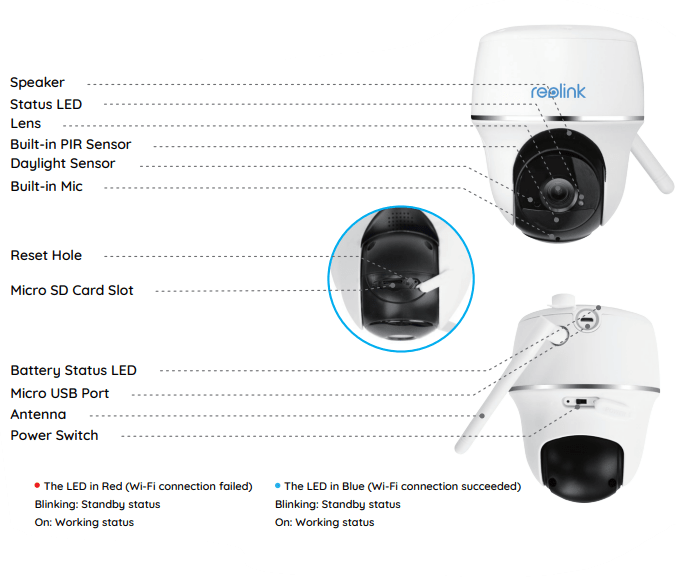
General Introduction
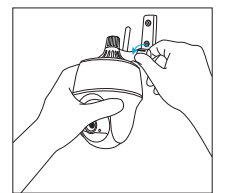
Install the Antenna
Please install the antenna to the camera. Rotate the antenna base in a clockwize motion. Leave the antenna in a vertical position for the best reception
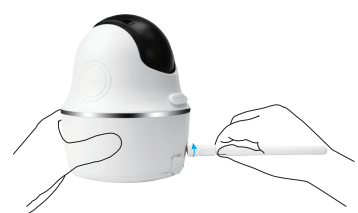
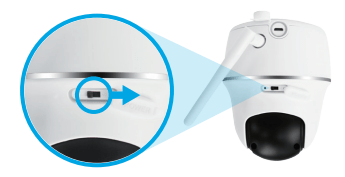
Turn on the Power Switch Install the Antenna
The power switch of Reolink Argus PT is off by default. Please turn it on before setting up the camera.
Note: If you don’t use the camera for a long time, please turn off the power switch
Set up Camera on Reolink App (For Smartphones)
Please follow the prompt tones to configure the camera.
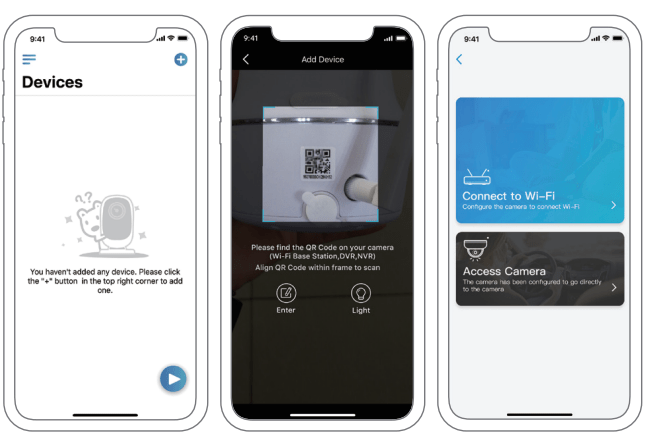
1. Please click the “ ” button in the top right corner to add the camera.
2. Scan the QR code on the back of the camera.
3. Click “Connect to Wi-Fi” to configure the Wi-Fi settings.
Note:
- Reolink Argus PT only supports 2.4 GHz Wi-Fi band, 5 GHz band is not supported currently.
- Your family can click "Access Camera" for live view after the initial setup
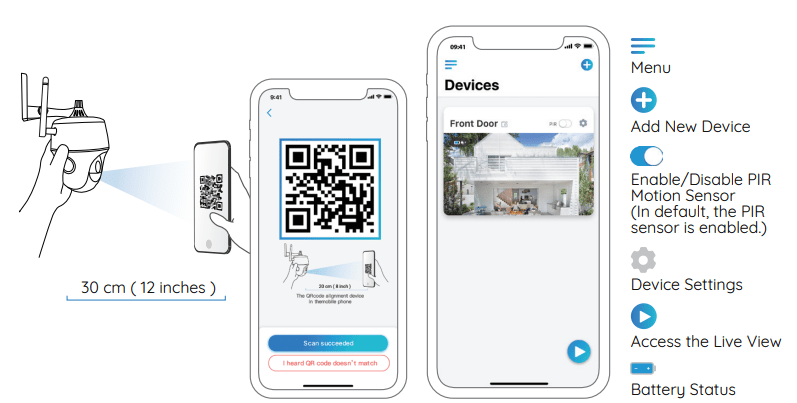
4. A QR code will be generated on the phone. Please place the QR code on your phone towards Reolink Argus PT camera’s lens at a distance of about 30cm (12 inches) to let the camera scan the QR code. Please make sure that you’ve ripped the protection film from the camera’s lens.
Note: To help scanning, please click the QR code to display the code in full screen.
5. Follow the steps to finish the Wi-Fi settings.
6. After you’ve created a password for your camera, please follow the steps to sync the time, and then start live view or go to “Device Settings”.
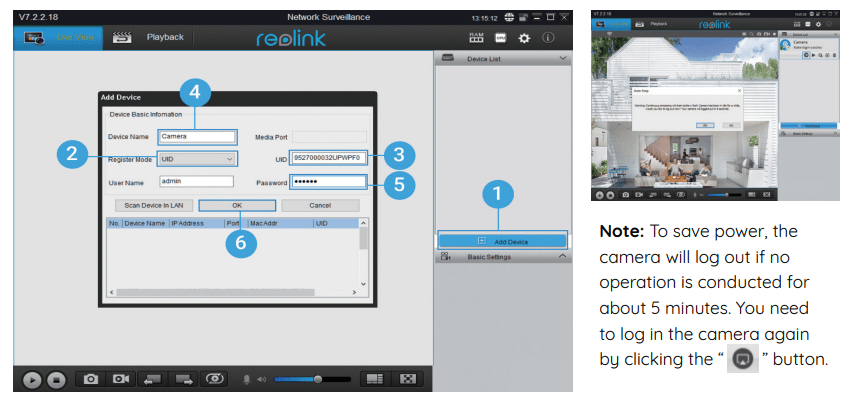
Set up Camera on Reolink Client (For PC)
Launch the Reolink Client software and manually add the camera to the Client. Please follow the steps below.
In LAN
1. Click “Add Device” on the right-side menu.
2. Click "Scan Device in LAN".
3. Double click on the camera you want to add. The information will be filled in automatically.
4. Input the password created on Reolink App to log in.
5. Click “OK” to log in.
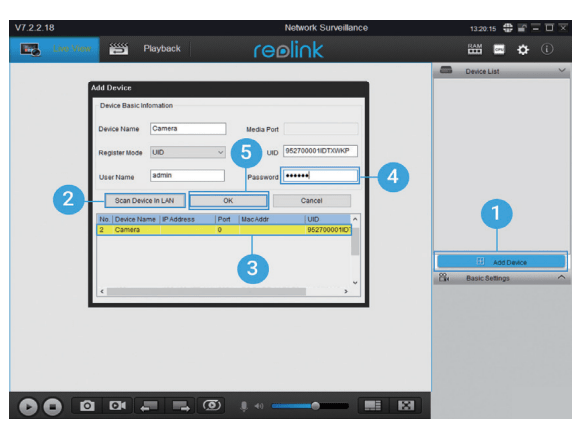
In WAN
1. Click “Add Device” on the right-side menu.
2. Choose “UID” as the Register Mode.
3. Type in the UID of your camera.
4. Create a name for the camera displayed on Reolink Client.
5. Input the password created on Reolink App to log in.
6. Click “OK” to log in
Important Notes of Camera Installation
For outdoor use, please install the Argus PT upside down in order to maximize the waterproof performance and the PIR motion sensor’s efficiency.
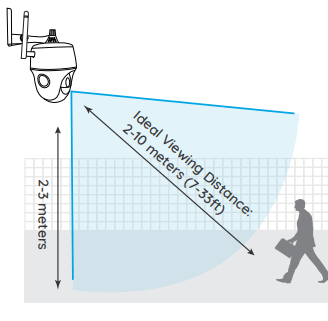
For indoor use, the camera can be placed upright, but please make sure to place it at a maximum of 2.5 meters from the ground.
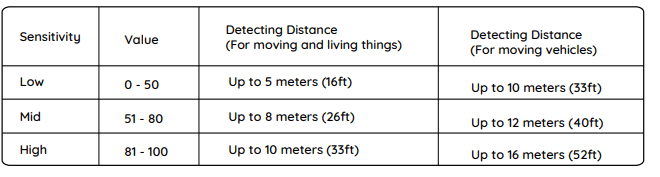
PIR Sensor Detecting Distance
The PIR senor has 3 sensitivity levels for your adjustment: Low/Mid/High. Higher sensitivity offers longer detecting distance. The default sensitivity of the PIR sensor is at “Mid”
Important Notes for Reducing False Alarms
- To reduce false alarms, please note that:
- Do not install the camera facing any objects with bright lights, including sunshine, bright lamp lights, etc.
- Do not place the camera too close to a place where there are frequently moving vehicles. Based on our numerous tests, the recommended distance between the camera and the vehicle is 16 meters (52ft).
- Stay away from the outlets, including the air conditioner vents, humidifier outlets, the heat transfer vents of projectors, etc.
- Do not install the camera where there are strong winds.
- Do not install the camera facing the mirror.
- Keep the camera at least 1 meter away from any wireless devices, including Wi-Fi routers and phones in order to avoid wireless interference.
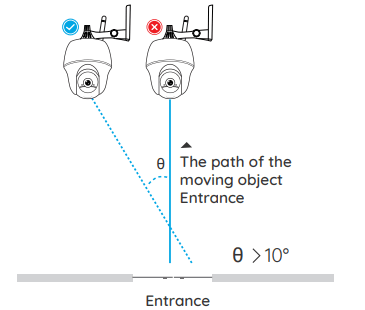
PIR Sensor Installation Angle
When installing the camera, please install the camera angularly (the angle between the sensor and the detected object is larger than 10°) for effective motion detection. If the moving object approaches the PIR sensor vertically, the sensor may not detect the motion events.
FYI:
- The PIR sensor’s detecting distance: 26ft (in default)
- The PIR sensor’s detecting angle: 90° (H)
The Camera’s Ideal Viewing Distance
The ideal viewing distance is 2-10 meters (7-33ft), which enables you to recognize a human.
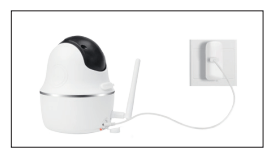
Charge the Battery
1. Charge the battery with a power adapter.
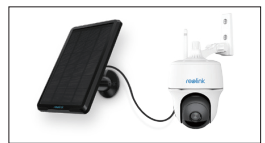
2 . Charge the battery with the Reolink Solar Panel.

Note:
- The battery is built-in, please do not remove it from the camera.
- Please note that the solar panel is NOT included in the package. You can buy the solar panel on Reolink official online store
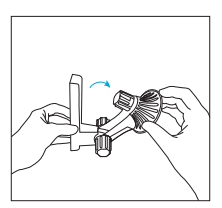
How to Install Camera Bracket
Step 1
Loose the screw cap and unfold the camera bracket
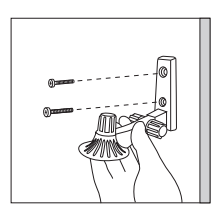
Step 2
Screw the camera bracket into the wall.
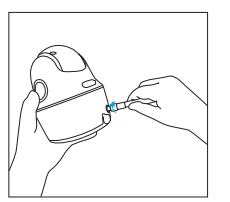
Step 3
Screw the antenna to the camera
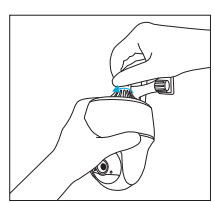
Step 4
Screw the camera to the bracket
Step 5
Loose the screw cap and adjust the camera to the proper direction.
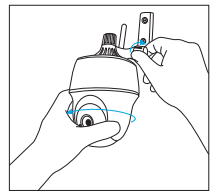
Step 6
Tighten the screw .