HD9650 series
Specifications are subject to change without notice
Les caractéristiques sont susceptibles d'être modifiées sans préavis
© 2017 Koninklijke Philips N.V.
All rights reserved.
Tous droits réservés. 3000 002 18251 A
EN User manual 5
ES Manual del usuario 22
FR Guide d’utilisation 42
1
B
A HI
C
D
F
G
E
2
3
4
5 6
7
9
8
10
11
1
Open ap
Abrir solapa
Ouvrez le rabat

61FRANÇAIS
2
6
10
14
26
18
30
1
2
38
22
34
24
1
2
36
3
7
11
15
27
19
1
2
31
39
23
1
2
35
25
37
4
8
12
16
28
20
32
1
2
40
5
1
2
9
13
17
29
21
33
41
Garantie
Si vous avez besoin de renseignements supplémentaires, d'assistance ou si vous
avez un problème particulier, visitez notre site Web www.philips.com/support ou
composez le 1 866 309-8817 pour obtenir de l'aide (aux États-Unis ou au Canada
seulement).
Garantie limitée d'un an
Philips garantit que ce produit sera exempt de défauts de matériaux, de
main-d'œuvre et de fabrication, dans des conditions normales d'utilisation,
conformément aux spécications et aux avertissements, pendant un an à compter
de la date d'achat. La présente garantie s'applique uniquement à l'acheteur
d'origine du produit et n'est pas cessible. Pour exercer vos droits en vertu de la
présente garantie, vous devez fournir une preuve d'achat sous la forme d'un reçu
de caisse original sur lequel gurent le nom du produit et la date d'achat. Pour
communiquer avec le service à la clientèle ou faire appel au service de garantie,
visitez notre site www.philips.com/support. IL N'EXISTE AUCUNE AUTRE GARANTIE
EXPRESSE OU IMPLICITE. La responsabilité de Philips se limite à la réparation,
ou à son entière discrétion, au remplacement du produit. Philips décline toute
responsabilité quant aux dommages accidentels, spéciaux ou induits, lorsque la
loi l'autorise. La présente garantie vous donne des droits précis reconnus par la loi,
auxquels peuvent s'ajouter des droits qui varient selon les États ou les provinces.
États-Unis seulement
Fabriqué pour :
Santé personnelle Philips
Une division de Philips North America LLC
P.O. Box 10313, Stamford, CT 06904
États-Unis d’Amérique
Canada seulement
Fabriqué pour :
Philips Electronics Ltée
281 Hillmount Road
Markham (Ontario) L6C 2S3
Pour obtenir du soutien, visitez le site www.philips.com/support
PHILIPS et le blason Philips sont des marques déposées de Koninklijke Philips N.V.
© 2017 Philips North America LLC.
Tous droits réservés.
LISTED
Ce symbole apparaissant sur la plaque nominale du produit signie
qu'il est enregistré par Underwriter's Laboratories, Inc.
IOS est une marque de commerce ou une marque déposée de Cisco aux États-
Unis et dans d'autres pays.
Android est une marque de commerce de Google Inc.

5ENGLISH
IMPORTANT SAFEGUARDS
When using electrical appliances, basic safety precautions should always be
followed including the following:
1 Read all instructions.
2 Do not touch hot surfaces. Use handles or knobs.
3 To protect against electrical shock do not immerse cord, plugs or
appliance in water or other liquid.
4 Close supervision is necessary when any appliance is used by or near children
or invalids. Children should be supervised by a responsible person to ensure
they do not play with the appliance.
5 Unplug from outlet when not in use and before cleaning. Allow to cool before
putting on or taking o parts.
6 Do not operate any appliance with a damaged cord or plug or after the
appliance malfunctions or has been damaged in any manner. For assistance in
the U.S. and Canada only, call 1-866-309-8817.
7 The use of accessory attachments not recommended by the appliance
manufacturer may cause injuries.
8 Do not block any ventilation openings. Install in accordance with the
manufacturer’s instructions.
9 Do not use outdoors.
10 Do not let cord hang over edge of table or counter, or touch hot surfaces.
11 Do not place on or near a hot gas or electric burner, or in a heated oven.
12 Extreme caution must be used when moving an appliance containing hot oil or
other hot liquids.
13 Plug the cord into the wall outlet. To disconnect, turn the power On/O button
to “O”, then remove plug from wall outlet.
14 Do not use appliance for other than intended use.
15 Use extreme caution when removing the pan, fat reducer, or basket and
disposing hot grease.
16 Do not clean with metal scouring pads. Pieces can break o the pad and touch
electrical parts, creating a risk of electric shock.
17 Use only on properly grounded outlet.
18 A short power-supply (or detachable power-supply cord) should be used to
reduce the risk resulting from becoming entangled in or tripping over a longer
cord.
19 Extension cords may be used if care is exercised in their use. If an extension
cord is used:
- The marked electrical rating of the cord must be as great as the rating of
the appliance.
- The cord should be arranged so that it will not drape over the edge of the
counter or table top where it could be pulled by children or tripped over
unintentionally.
- If the appliance is of grounded type, the extension cord should be a
grounded-type 3-wire cord.

6 ENGLISH
20 This appliance has a polarized plug (one blade is wider than the other). To
reduce the risk of electric shock, this plug is intended to t into a polarized
outlet only one way. If the plug does not t fully in the outlet, reverse the plug. If
it still does not t, contact a qualied electrician. Do not attempt to modify the
plug in any way.
21 Oversize foods or oversize metal utensils must not be inserted in the appliance
as they may create a re or risk of electric shock.
22 A re may occur if the appliance is covered or touching ammable material,
including curtains, draperies, walls, and the like, when in operation. Do not store
any item on top of the appliance when in operation.
23 Do not place any of the following materials in the appliance: paper, cardboard,
non-heat resistant plastic, and the like.
24 If you are using baking or parchment paper to avoid food from sticking to the
mesh basket, never put in the paper without placing the food you are cooking
on top of the paper. Otherwise the lightweight baking paper could be lifted by
the air ventilation and touch the heater.
25 Immediately unplug the appliance if you see dark smoke coming out of it. Wait
for smoke emission to stop before pulling the pan out of appliance.
26 Use on a at stable, heat-resistant surface away from water or any heat source.
27 Do not leave appliance unattended while it is operating.
28 This appliance operates at high temperatures which may cause burns.
Do not touch hot surfaces, parts or the inside of the appliance while it is
operating. Let the appliance cool down completely before you handle or
clean it.
29 During hot airfrying, hot steam is released through the hot air outlet openings.
Keep your hands and face away from the steam and air outlet openings.
30 Avoid contact with moving parts.
31 This appliance works with hot air only; food is not fried in oil or fat! Never ll the
pan with fat or oil.
32 This product is for household use only.
33 Never use the airfryer without the pan, basket or fat reducer in place.
34 Do not use the plug in or near a power outlet that contains an electric air
freshener to prevent damage to the plug.
SAVE THESE INSTRUCTIONS
Consuming raw or undercooked meats, poultry, seafood, shellsh or eggs may
increase your risk of foodborne illness.
Make sure ingredients prepared in this appliance come out golden-yellow instead
of dark brown.
Remove burnt remnants. For the best results, do not fry fresh potatoes at a
temperature above 180°C/350°F or beyond golden-yellow.


8 ENGLISH
Introduction
Congratulations on your purchase and welcome to Philips!
To fully benet from the support that Philips oers, register your product at
www.philips.com/welcome.
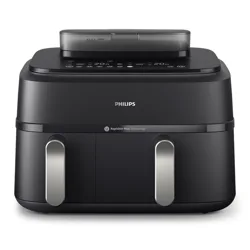
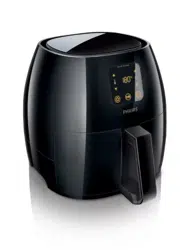
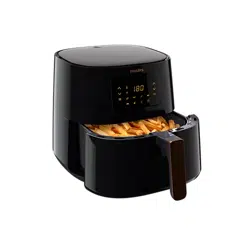
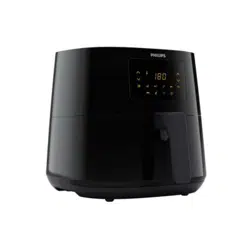
Philips Airfryer XXL uses hot air to fry your favorite food with little or no added oil. It
is built to fry as crispy as deep fried with minimum amount of fat.
By combining a powerful heater and motor with new Twin TurboStar technology,
the hot air in the Airfryer XXL swirls fast, like a tornado – throughout the entire
cooking basket. This extracts fat from food, and captures it all in the fat reducer at
the bottom of the Airfryer.
Fat released from the food is captured in one place at the bottom of the pan for
easy disposal and cleaning.
You can now enjoy perfectly cooked fried food – crispy on the outside tender on
the inside – Fry, grill, roast and bake to prepare a variety of tasty dishes in a healthy,
fast and easy way.
For more inspiration, recipes and information about the Airfryer, visit
www.philips.com/kitchen or download the free Airfryer App for IOS
®
or Android™.
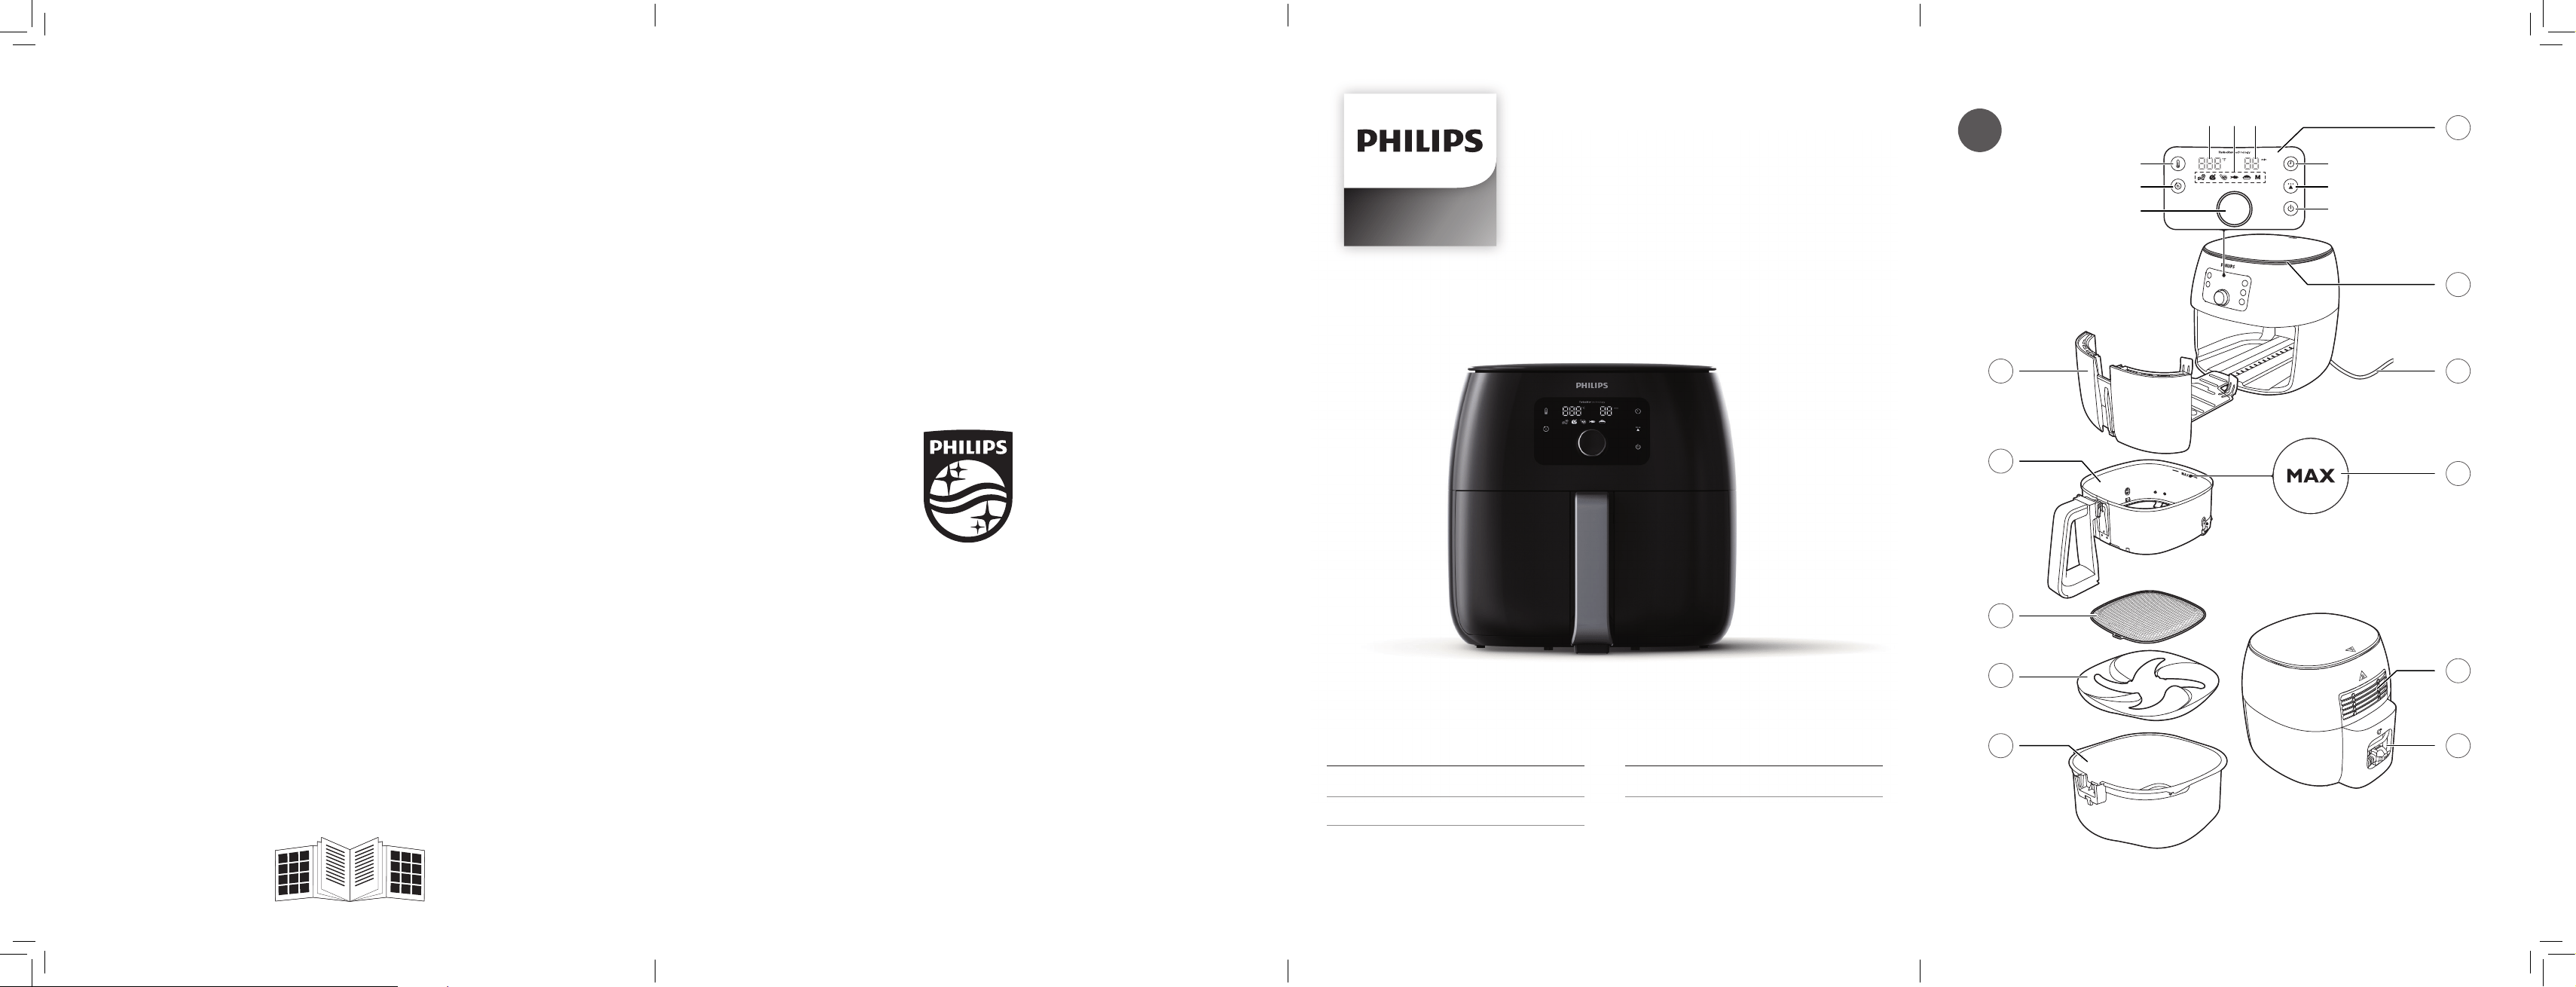
General description (Fig. 1)
a Drawer
b Basket with removable mesh bottom
c Removable mesh bottom
d Fat reducer
e Pan
f Cord storage compartment
g Air outlets
h MAX indication
i Power cord
j Air inlet
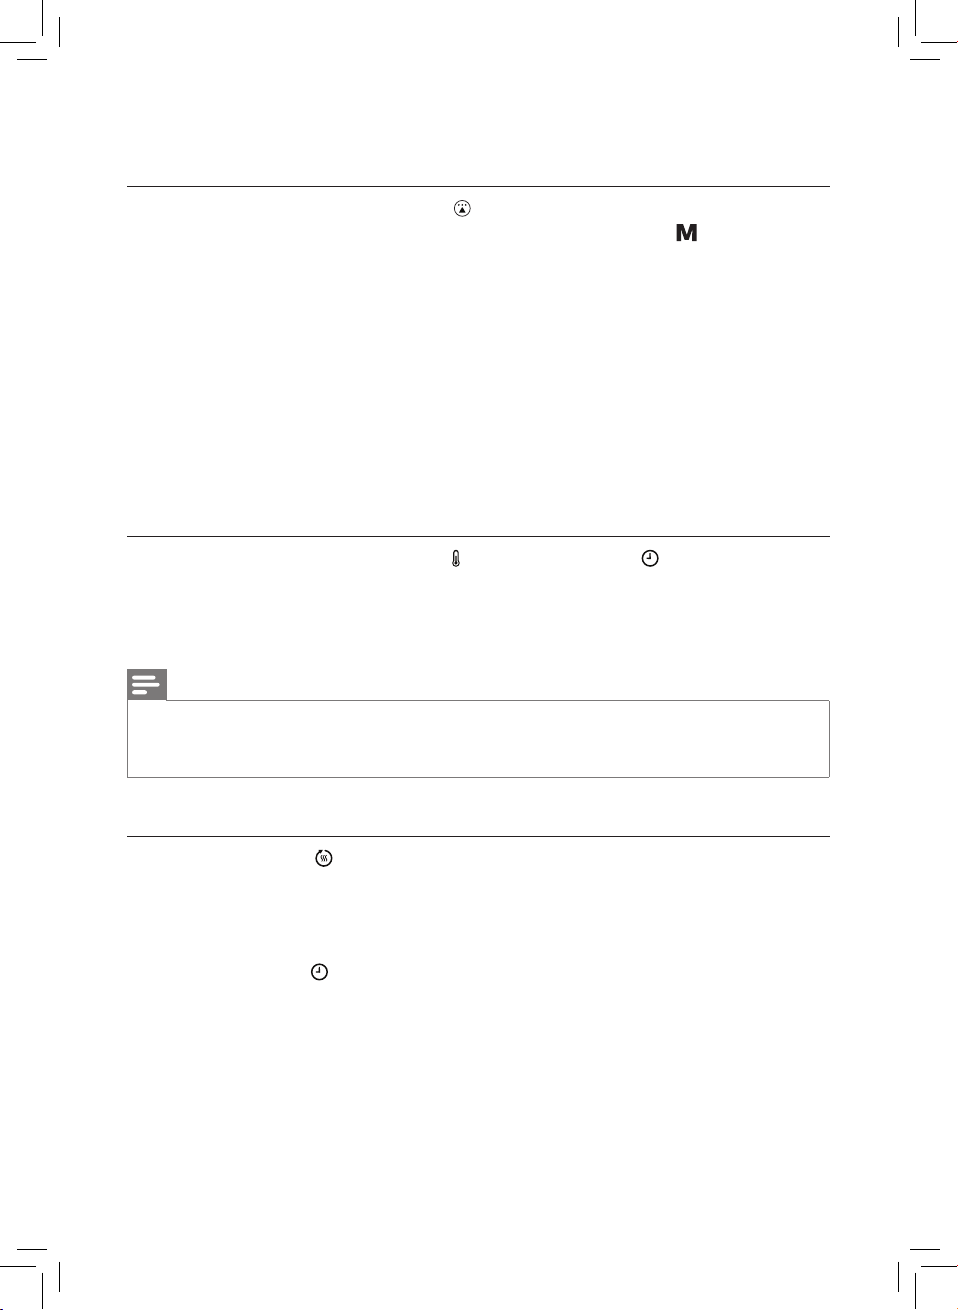
k Control panel
A. Temperature indication
B. Temperature button
C. Keep warm button
D. QuickControl dial
E. Power On/O button
F. Preset button
G. Timer button
H. Time indication
I. Presets: French fries/frozen snacks, chicken, meat, sh, baking and manual
9ENGLISH
Before rst use
1 Remove all packing material.
2 Remove any stickers or labels from the appliance.
3 Thoroughly clean the appliance before rst use (see chapter ‘Cleaning”).
Preparing for use
Placing the removable mesh bottom and fat reducer
1 Open the drawer by pulling the handle. (Fig. 2)
2 Remove the basket by lifting the handle. (Fig. 3)
3 Place the fat reducer into the pan. (Fig. 4)
4 Insert the removable mesh bottom into the slot on the right bottom side of the
basket. Push the mesh bottom down until it locks into position (“click” on both
sides). (Fig. 5)
5 Put the basket in the pan. (Fig. 6)
6 Slide the drawer back into the Airfryer by the handle. (Fig. 7)
Note
• Never use the pan without the fat reducer and the basket in it.
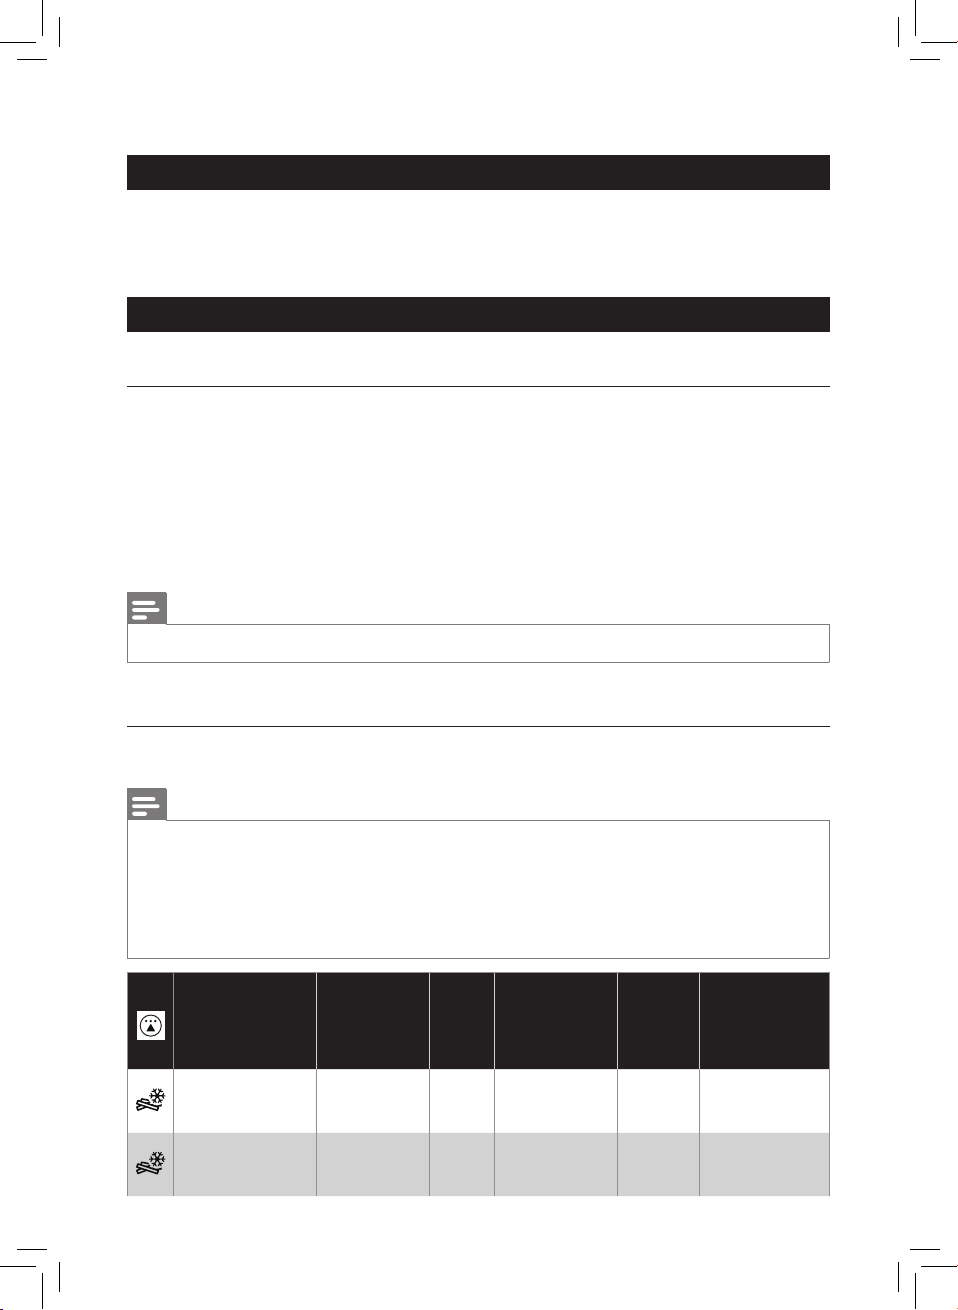
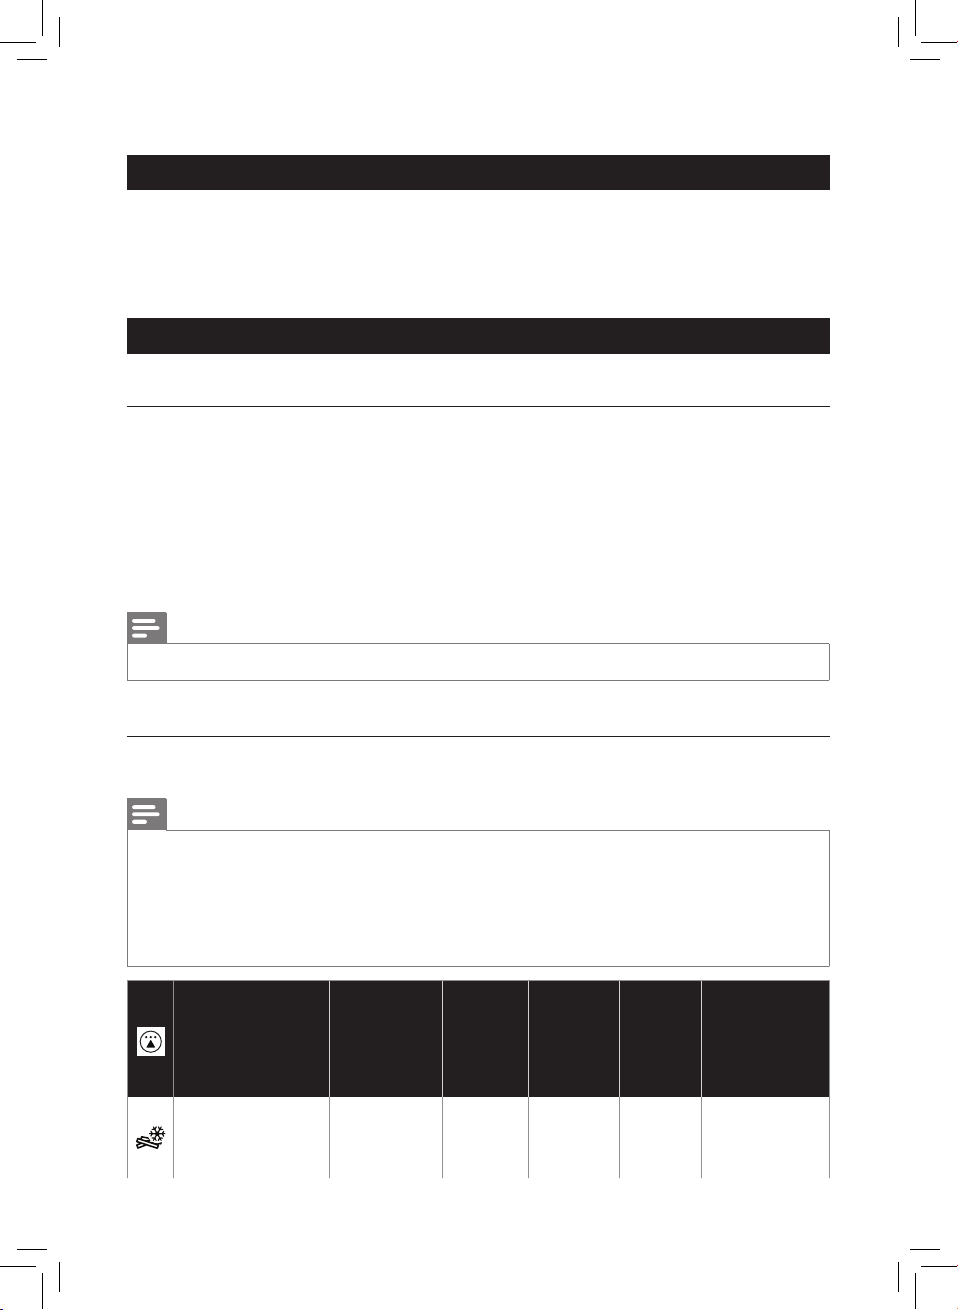
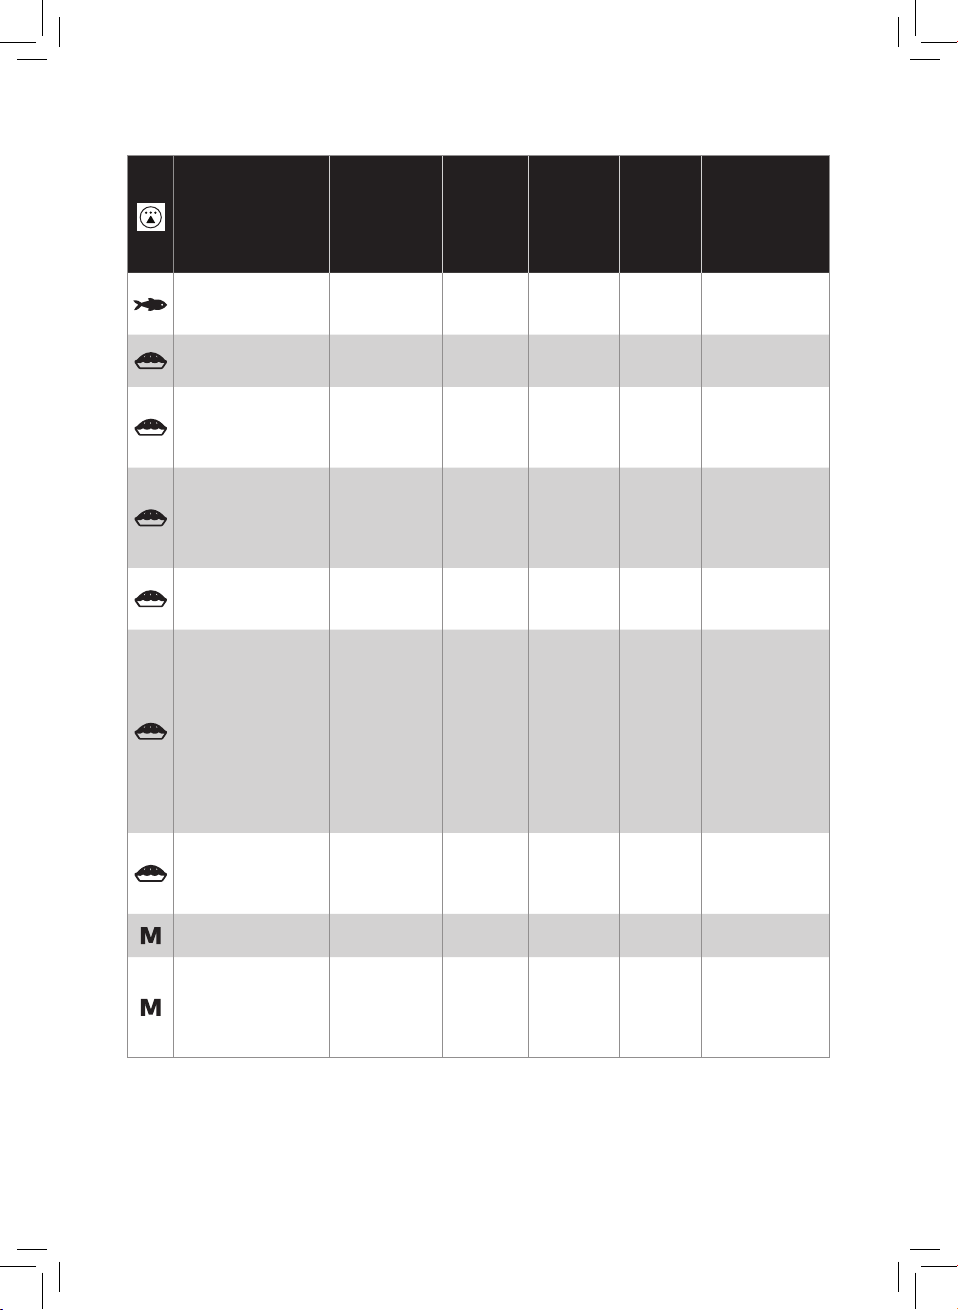
Food table
The table below helps you select the basic settings for the types of food you want
to prepare.
Note
• Keep in mind that these settings are suggestions. As ingredients dier in origin,
size, shape as well as brand, we cannot guarantee the best setting for your
ingredients.
• When preparing larger amount of food (e.g. fries, prawns, drumsticks, frozen
snacks), shake, turn, or stir the ingredients in the basket 2 to 3 times in order to
achieve a consistent result.
Ingredients
Min.- max.
amount
(g/oz)
Time
(min)
Tem per a ture
(°C/°F)
Shake,
turn,
or stir
halfway
Note
Thin frozen fries
(7x7 mm / 9/32 x
9/32 in)
200-1400 g
7-50 oz
13-32 180°C/350°F Yes
Thick frozen fries
(10x10 mm /
13/32 x 13/32 in)
200-1400 g
7-50 oz
13-33 180°C/350°F Yes

10 ENGLISH
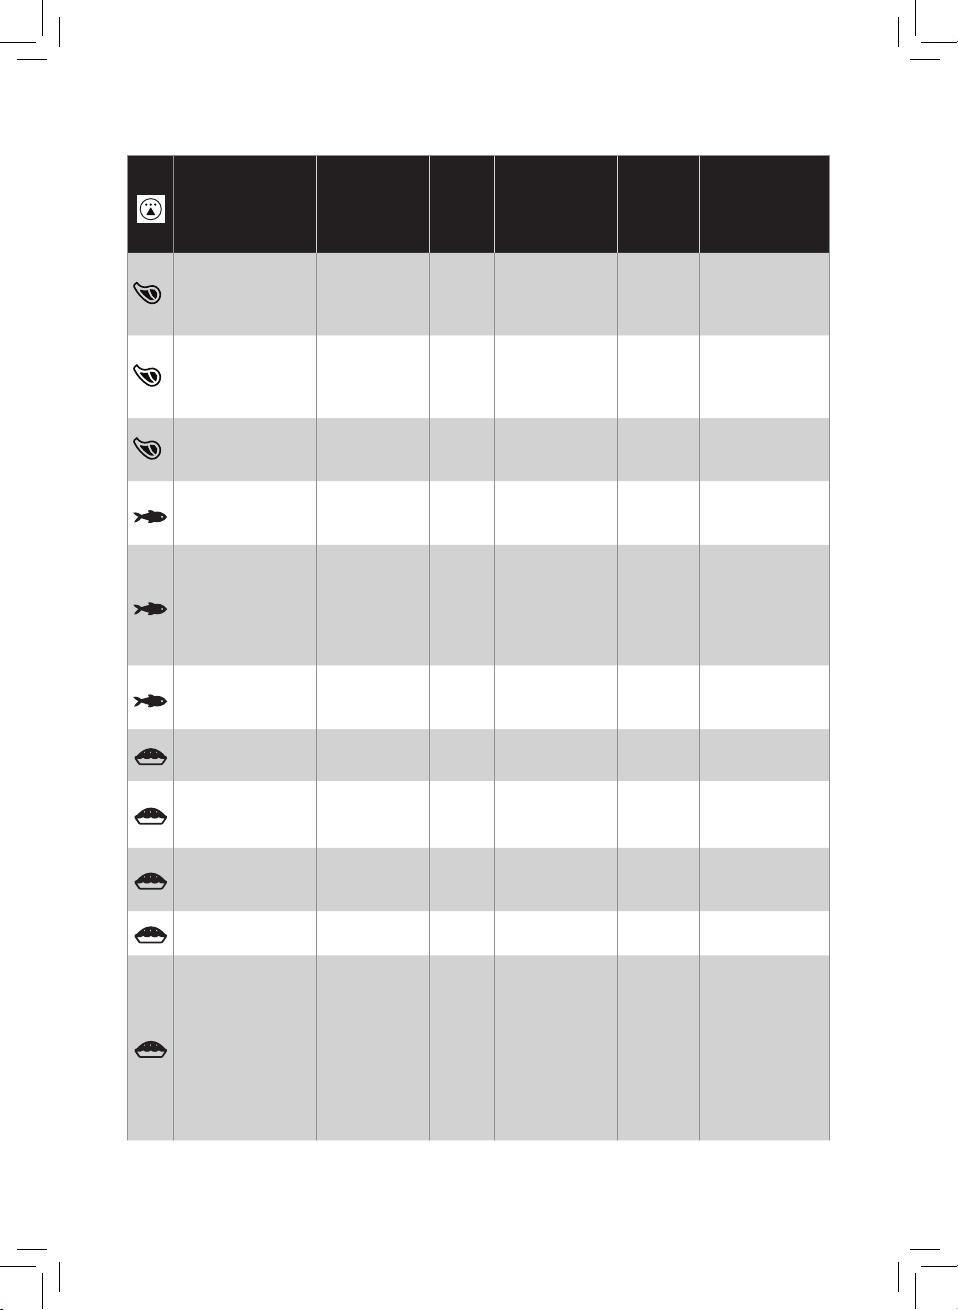
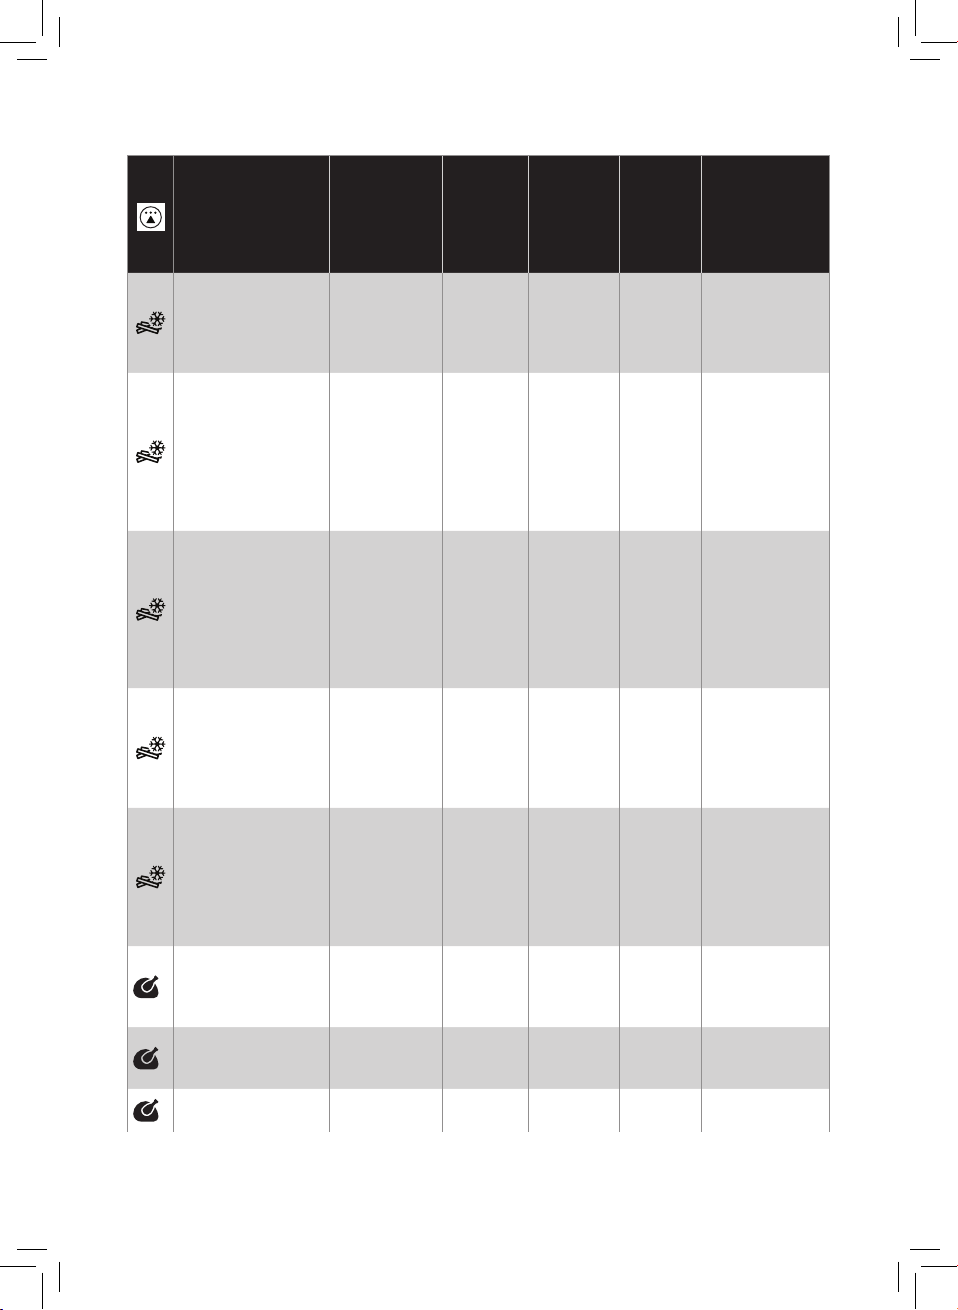
Ingredients
Min.- max.
amount
(g/oz)
Time
(min)
Tem per a ture
(°C/°F)
Shake,
turn,
or stir
halfway
Note
Home-made
fries (10x10 mm /
13/32 x 13/32 in)
200-1400 g
7-50 oz
18-35 180°C/350°F Yes
Soak 30
minutes in
water, dry
then add
1/4 to 1 tbsp of
oil.
Homemade
potato wedges
200-1400 g
7-50 oz
20-42 180°C/350°F Yes
Soak 30
minutes in
water, dry
then add
1/4 to 1 tbsp of
oil.
Frozen snacks
(chicken
nuggets)
80-1300 g
3-46 oz
(6-50 pieces)
7-18 180°C/350°F Yes
Ready when
golden yellow
and crispy
outside.
Frozen snacks
(small spring rolls
around 20 g /
0.7 oz)
100-600 g
3-21 oz
(5-30 pieces)
14-16 180°C/350°F Yes
Ready when
golden yellow
and crispy
outside.
Whole chicken
1200-1500 g
42-53 oz
50-55 180°C/350°F
Avoid that
legs touch
the heating
element.
Chicken breast
Around 160 g /
5-6 oz
1-5 pieces 18-22 180°C/350°F
Drumsticks
200-1800 g
7-63 oz
18-35 180°C/350°F Yes
Chicken ngers
bread crumbed
3-12 pieces
(1 layer)
10-15 180°C/350°F
Add oil to the
breadcrumbs.
Ready when
golden yellow.
Chicken wings
Around 100 g /
3-4 oz
2-8 pieces
(1 layer)
14-18 180°C/350°F Yes
Meat chops
without bone
Around 150 g /
5 oz
1-5 chops 10-13 200°C/400°F
Hamburger
Around 150 g /
5 oz (diameter
10 cm/4 in)
1-4 patties 10-15 200°C/400°F
11ENGLISH
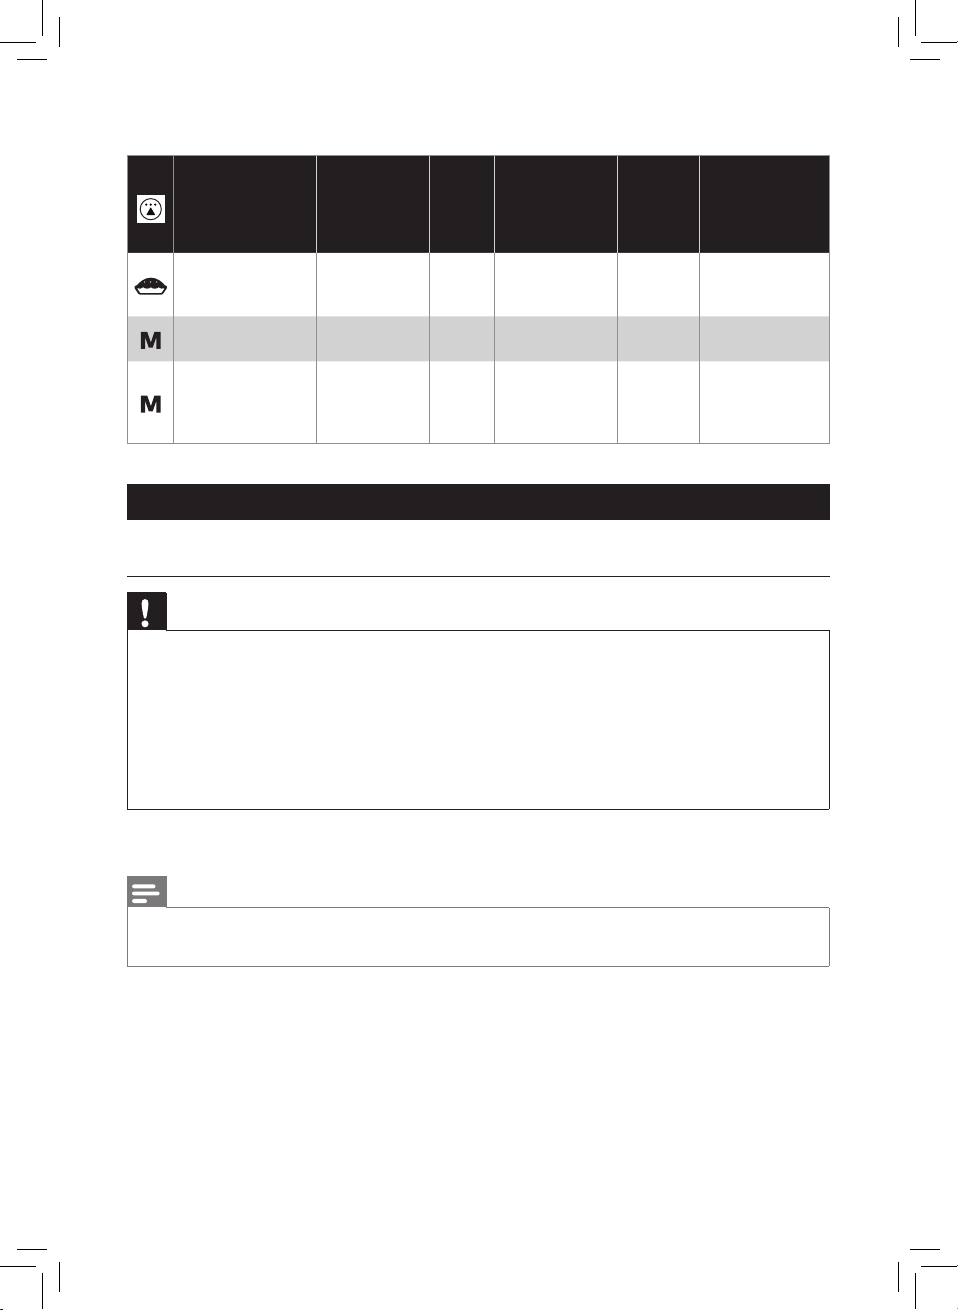
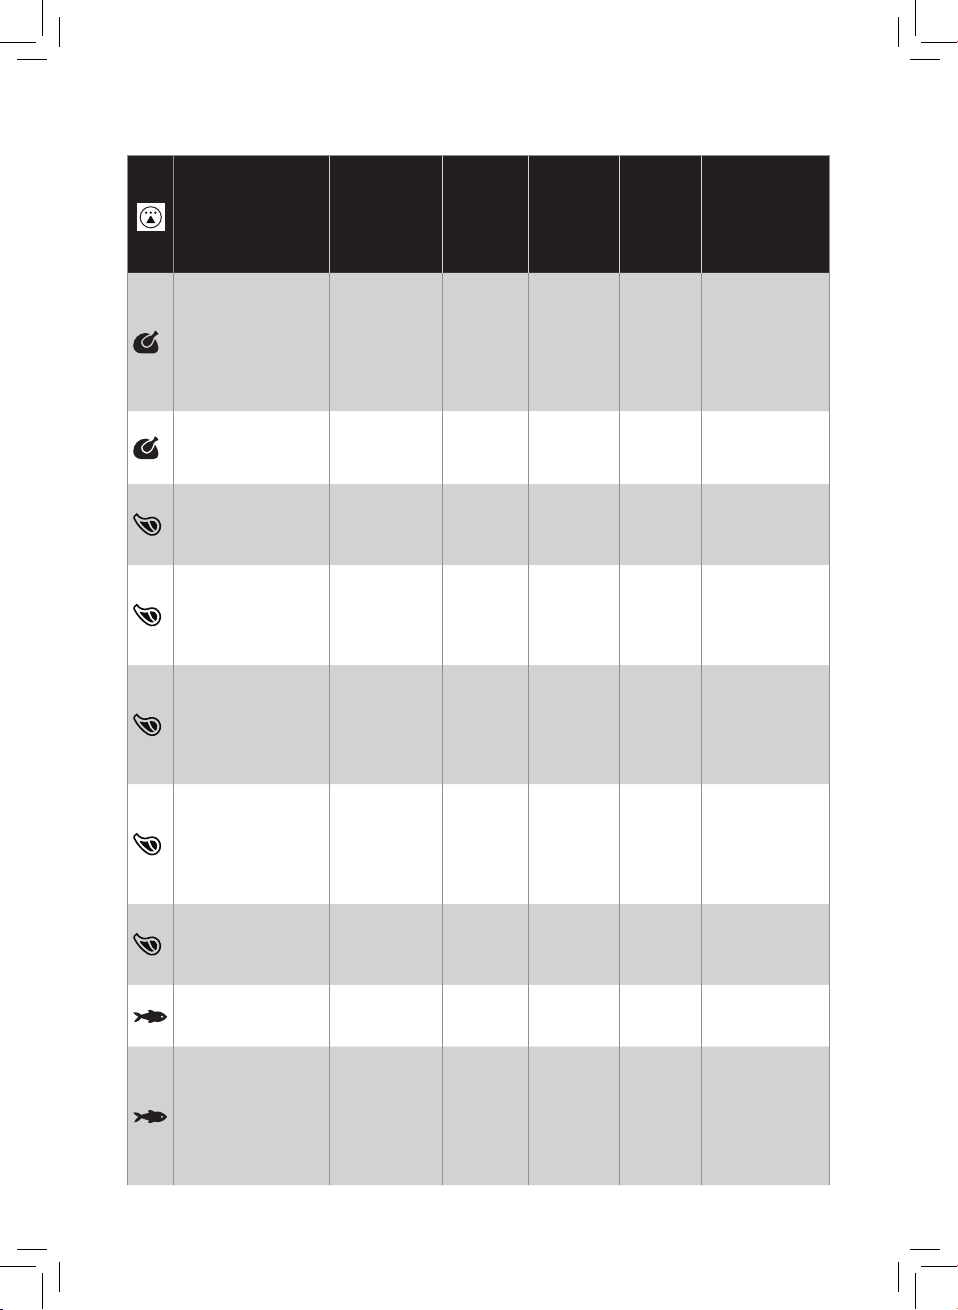
Ingredients
Min.- max.
amount
(g/oz)
Time
(min)
Tem per a ture
(°C/°F)
Shake,
turn,
or stir
halfway
Note
Thick sausages
Around 100 g /
3-4 oz (diameter
4 cm / 1 1/2 in)
1-6 pieces
(1 layer)
12-15 200°C/400°F
Thin sausages
Around 70g /
2-3 oz (diameter
2 cm / 3/4 in)
1-7 pieces 9-12 200°C/400°F
Pork roast
500-1000 g
18-35 oz
40-60 180°C/350°F
Let it rest for 5
minutes before
cutting.
Whole sh
Around 300 -
400 g / 11-14 oz
1-2 18-22 200°C/400°F
Cut o the tail
if it does not t
into the basket.
Fish lets
Around 120 g /
4 oz
1-3
(1 layer)
9-12 200°C/400°F
In order to
avoid sticking,
place the skin
side to the
bottom and
add some oil.
Shellsh
Around 25-30 g
/ 0.9-1.1 oz
200-1500 g
7-53 oz
10-25 200°C/400°F Yes
Cake
500g
18 oz
28 180°C/350°F Use a cake pan.
Muns
Around 50 g /
2 oz
1-9 12-14 180°C/350°F
Use heat-proof
silicone mun
cups.
Quiche (diameter
21 cm / 8 1/3 in)
1 15 180°C/350°F
Use a baking
tray or oven
dish.
Pre-baked toast
/ bread rolls
1-6 6-7 180°C/350°F
Fresh bread 700 g / 25 oz 38 160°C/325°F
The shape
should be
as at as
possible to
avoid that the
bread touches
the heating
element when
rising.
12 ENGLISH
Ingredients
Min.- max.
amount
(g/oz)
Time
(min)
Tem per a ture
(°C/°F)
Shake,
turn,
or stir
halfway
Note
Fresh rolls
Around 80 g /
3 oz
1-6 pieces 18-20 160°C/325°F
Chestnuts
200-2000 g
7-70 oz
15-30 200°C/400°F Yes
Mixed vegetable
(roughly
chopped)
300-800 g
11-28 oz
10-20 200°C/400°F Yes
Set the cooking
time according
to your own
taste.
Using the appliance
Airfrying
Caution
• This is an Airfryer that works on hot air. Do not ll the pan with oil, frying fat
or any other liquid. (Fig. 8)
• Do not touch hot surfaces. Use handles or knobs. Handle the hot pan and fat
reducer with oven-safe gloves.
• This appliance is for household use only.
• This appliance may produce some smoke when you use it for the rst time.
This is normal.
• Preheating of the appliance is not necessary.
1 Place the appliance on a stable, horizontal, level and heat-resistant surface.
Make sure the drawer can be opened completely.
Note
• Do not put anything on top or on the sides of the appliance. This could disrupt
the airow and aect the frying result.
2 Pull the power cord out of the cord storage compartment at the back of the
appliance. (Fig. 9)
3 Put the plug in the wall outlet. (Fig. 10)
4 Open the drawer by pulling the handle. (Fig. 11)
5 Put the ingredients in the basket. (Fig. 12)

13ENGLISH
Note
• The Airfryer can prepare a large range of ingredients. Consult the ‘Food table’
for the right quantities and approximate cooking times.
• Do not exceed the amount indicated in the ‘Food table’ section or overll the
basket beyond the ‘MAX’ indication as this could aect the quality of the end
result.
• If you want to prepare dierent ingredients at the same time, make sure you
check the suggested cooking time required for the dierent ingredients before
you start to cook them simultaneously.
6 Slide the drawer back into the Airfryer by the handle. (Fig. 13)
Caution
• Never use the pan without the fat reducer or basket in it. If you heat up the
appliance without basket, use oven gloves to open the drawer. The edges and
inside of the drawer become very hot.
• Do not touch the pan, fat reducer or basket during and for some time after
use, as they get very hot.
7 Press the Power On/O ( ) button to switch on the appliance. (Fig. 14)
8 To change the preset, turn the QuickControl dial to the desired setting. (Fig. 15)
» To conrm the selected preset, push the QuickControl dial. The cooking time
indication blinks on the screen. (Fig. 16)
Note
• After the cooking has started, press the preset button if you want to exit one
preset and change to another one (see page 15 - ‘Changing to another
preset during cooking’).
9 To change the cooking time, turn the QuickControl dial to the desired setting.
(Fig. 17)
» To conrm the selected cooking time, push the QuickControl dial. (Fig. 18)
Note
• Refer to the food table with basic cooking settings for dierent types of food.
10 The appliance starts cooking after the cooking time has been conrmed.
Tip
• To pause the cooking process, push the QuickControl dial. To resume the
cooking process, push the QuickControl dial again.
14 ENGLISH
Note
• If you do not set the required cooking time within 30 minutes, the appliance
automatically shuts o for safety reasons.
• If “- -” is selected as the time indication, the appliance goes into preheating
mode.
• Some ingredients require shaking or turning halfway through the cooking
time (see ‘Food table’). To shake the ingredients, press the QuickControl dial
to pause cooking, open the drawer and lift the basket out of the pan and
shake it over the sink (Fig. 19). Then slide the pan with the basket back into the
appliance, and press the QuickControl dial to resume cooking.
• If you set the timer to half the cooking time, when you hear the timer bell it is
time to shake or turn the ingredients. Be sure to reset the timer to the remaining
cooking time.
11 When you hear the timer bell, the set preparation time has elapsed. (Fig. 20)
12 Open the drawer by pulling the handle and check if the ingredients are ready.
(Fig. 21)
Note
• If the ingredients are not ready yet, simply slide the drawer back into the
Airfryer by the handle and add a few extra minutes to the set time.
13 To remove small ingredients (e.g. fries), lift the basket out of the pan by the
handle. (Fig. 22)
Caution
• After the cooking process, the pan, the fat reducer, the basket, interior
housing and the ingredients are hot. Depending on the type of ingredients in
the Airfryer, steam may escape from the pan.
14 Empty the basket contents into a bowl or onto a plate. Always remove the
basket from the pan to empty contents as hot oil may be in bottom of the pan.
(Fig. 23)
Note
• To remove large or fragile ingredients, use a pair of tongs to lift out ingredients.
• Excess oil or rendered fat from the ingredients is collected on the bottom of the
pan below the fat reducer.
• Depending on the type of ingredients cooking, you may want to carefully
pour o any excess oil or rendered fat from the pan after each batch or before
shaking or replacing the basket in the pan. Place the basket on a heat-resistant
surface. Wearing oven-safe gloves, lift the pan o tracks and place on heat-
resistant surface. Carefully remove the fat reducer from the pan using rubber
tipped tongs. Pour o excess oil or rendered fat. Return the fat reducer to the
pan, the pan to the drawer and the basket to the pan.
When a batch of ingredients is ready, the Airfryer is instantly ready for preparing
another batch.
15ENGLISH
Note
• Repeat steps 1 to 14 if you want to prepare another batch.
Changing to another preset during cooking
1 Press the preset ( ) button. (Fig. 24)
2 Turn the QuickControl dial to select another preset. (Fig. 25)
3 To conrm the selected preset, push the QuickControl dial. The cooking time
indication blinks on the screen. (Fig. 26)
4 To change the cooking time, turn the QuickControl dial. (Fig. 27)
» To conrm the selected cooking time, push the QuickControl dial. (Fig. 28)
Using the manual mode
1 Press the preset ( ) button. (Fig. 24)
2 Turn the QuickControl dial to select the manual mode ( ). (Fig. 29)
3 Push the QuickControl dial to enter the manual mode. (Fig. 30)
» The default temperature is 350°F/180°C.
4 To change the temperature, turn the QuickControl dial.
» To conrm the temperature, push the QuickControl dial. (Fig. 31)
5 After the temperature is conrmed, the time indication “- -” starts blinking.
6 To change the cooking time, turn the QuickControl dial.
» To conrm the cooking time, push the QuickControl dial. (Fig. 32)
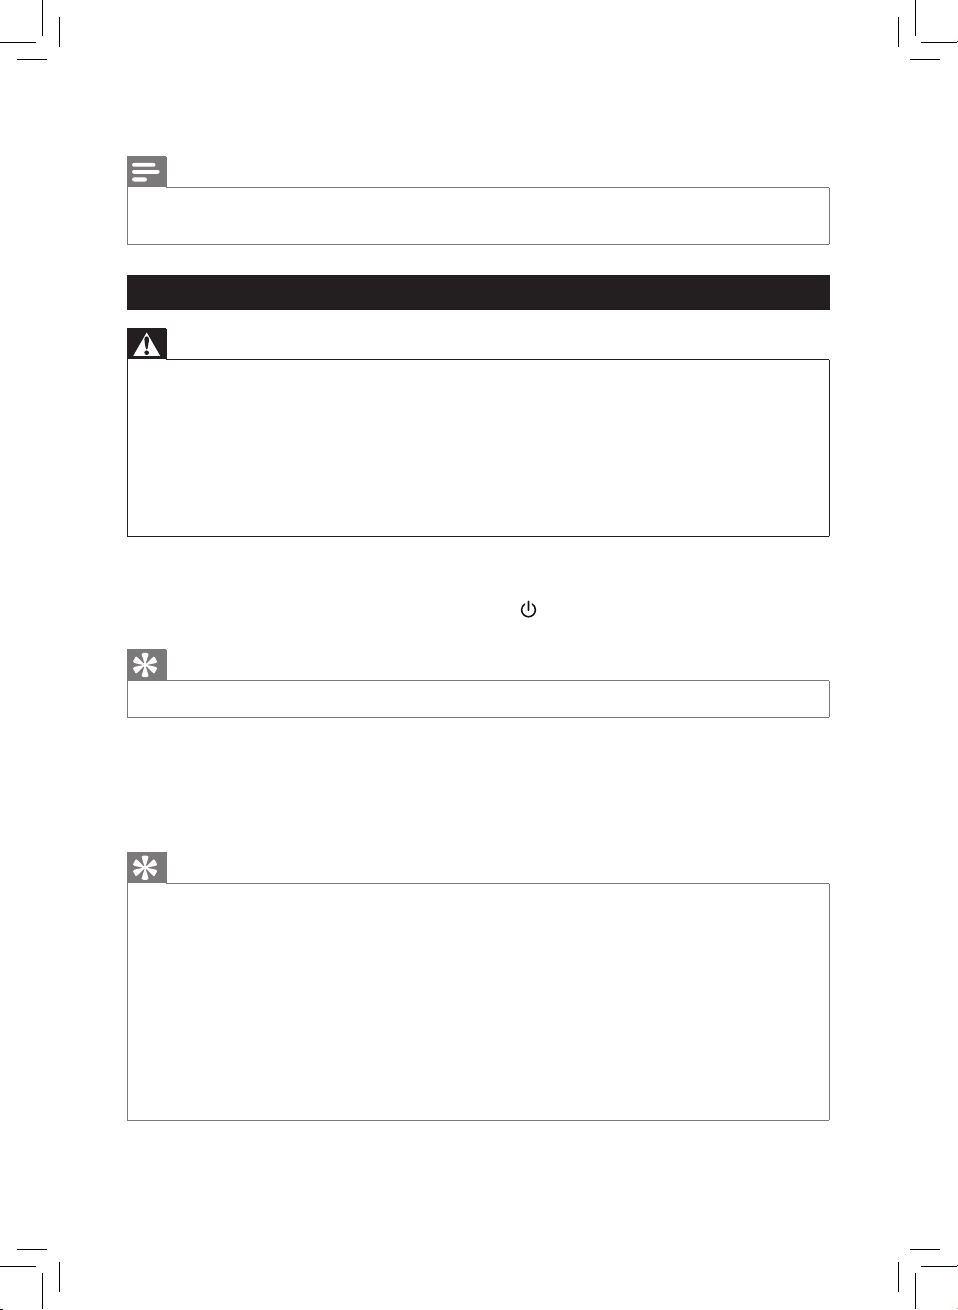
Changing the cooking temperature or time at any time
1 Press the temperature ( ) or timer ( ) button (Fig. 33/34).
2 To change the cooking temperature or time, turn the QuickControl dial.
» To conrm the cooking temperature or time, push the QuickControl dial or
the temperature/timer button again. (Fig. 35/36)
Note
• If you do not press the QuickControl dial or the temperature/timer button to
conrm the changes, they will be automatically conrmed after 10 seconds.
Choosing the keep warm mode
1 Press the keep warm ( ) button (you can activate the keep warm mode at any
time). (Fig. 37)
» The keep warm button lights up with pulsing eect.
» The keep warm timer is set to 30 minutes. To change the keep warm time
(1-30 min), press the timer button ( ), turn the QuickControl dial and then
push it to conrm (Fig. 38). You cannot adjust the keep warm temperature.
2 To pause the keep warm mode, push the QuickControl dial. To resume the keep
warm mode, push the QuickControl dial again.
16 ENGLISH
3 To exit the keep warm mode, press one of the following buttons: preset button,
temperature button, or On/O button.
Tip
• If food like French fries loses too much crispness during the keep warm mode,
either shorten the keep warm time by switching o the appliance earlier or
crisp them up for 2-3 minutes at the temperature of 350°F/180°C.
Note
• If you activate the keep warm mode during cooking (the keep warm button
lights up with pulsing eect), the appliance will keep your food warm for 30
minutes after the cooking time has elapsed.
• During the keep warm mode, the fan and heater inside of the appliance turn
on from time to time.
• The keep warm mode is designed to keep your dish warm immediately after it
is cooked in the Airfryer. It is not meant for reheating.
Making home-made fries
To make great home-made fries in the Airfryer:
- Choose a potato variety suitable for making fries, e.g. fresh russet potatoes.
- It is best to air fry the fries in portions of up to 1000 grams / 35 oz for an even
result. Larger fries tend to be less crispy than smaller fries.
- Shake the basket 2-3 times during the airfrying process.
1 Peel the potatoes and cut into sticks (8x8mm / 5/16 x 5/16 in thick).
2 Soak the potato sticks in a bowl of water for at least 30 minutes.
3 Empty the bowl and dry the potato sticks with a dish towel or paper towel.
4 Pour a half tablespoon of cooking oil in the bowl, put the sticks in the bowl and
mix until the sticks are coated with oil.
5 Remove the sticks from the bowl with your ngers or a slotted kitchen utensil so
excess oil remains in the bowl.
Note
• Do not tilt the bowl to pour all the sticks in the basket at once to prevent excess
oil from going into the pan.
6 Put the sticks in the basket.
7 Fry the potato sticks and shake the basket halfway through the airfrying
process. Shake 2-3 times if you prepare more than 500g/17.6 oz of fries.
Note
• Consult the chapter “Food table” for the right quantities and cooking times.

17ENGLISH
Cleaning
Warning
• Let the basket, pan, fat reducer and the inside of the appliance cool down
completely before you start cleaning.
• Remove the fat reducer from the pan using rubber tipped tongs. Do NOT
remove using your ngers as hot fat or oil collects under the fat reducer.
• The pan, basket, fat reducer and inside of the appliance have a non-stick
coating. Do not use metal kitchen utensils or abrasive cleaning materials as
this may damage the non-stick coating.
Clean the appliance after every use. Remove oil and fat from the bottom of the pan
after every use to prevent smoke.
1 Press the power On/O ( ) button to switch o the appliance, remove the plug
from the wall outlet and let the appliance cool down.
Tip
• Remove the pan and basket to let the Airfryer cool down more quickly.
2 Remove the fat reducer from the pan using rubber tipped tongs. Dispose of
rendered fat or oil from the bottom of the pan.
3 Clean the pan, basket and fat reducer in a dishwasher. You can also clean them
with hot water, dishwashing liquid and a non-abrasive sponge (see ‘cleaning
table’).
Tip
• If food residues stick to the pan, fat reducer or basket, you can soak them in
hot water and dishwashing liquid for 10-15 minutes. Soaking loosens the food
residues and makes it easier to remove. Make sure you use a dishwashing
liquid that can dissolve oil and grease. If there are grease stains on the pan, fat
reducer or basket and you have not been able to remove them with hot water
and dishwashing liquid, use a liquid degreaser.
• If necessary, food residues stuck to the heating element can be removed with
a soft to medium bristle brush. Do not use a steel wire brush or a hard bristle
brush, as this might damage the coating on the heating element.
4 Wipe the outside of the appliance with a moist cloth. (Fig. 39)
Note
• Make sure no moisture remains on the control panel. Dry the control panel with
a cloth after you have cleaned it.
5 Clean the heating element with a cleaning brush to remove any food residues.
(Fig. 40)
6 Clean the inside of the appliance with hot water and a non-abrasive sponge.
(Fig. 41)
18 ENGLISH
This appliance has no other user-serviceable parts. For assistance in the U.S. or
Canada only, call 1-866-309-8817.
Storage
1 Unplug the appliance and let it cool down.
2 Make sure all parts are clean and dry before you store the appliance.
3 Insert the cord into the cord storage compartment.
Note
• Always hold the Airfryer horizontally when you carry it. Make sure that you also
hold the drawer on the front part of the appliance as it can slide out of the
appliance if accidentally tilted downwards. This can lead to damaging of the
drawer.
• Always make sure that the removable parts of the Airfryer e.g. removable mesh
bottom, etc. are xed before you carry and/or store it.
Disposal
Your product is designed and manufactured with high quality materials and
components, which can be recycled and reused. For recycling information, please
contact your local waste management facilities or visit www.recycle.philips.com
Troubleshooting
This chapter summarizes the most common problems you could encounter with
the appliance. If you are unable to solve the problem with the information below,
visit www.philips.com/support or in the US or Canada only call 1-866-309-8817 for
assistance.
Problem Possible cause Solution
The outside of
the appliance
becomes hot
during use.
The heat inside
radiates to the outside
walls.
This is normal. All handles and knobs
that you need to touch during use
stay cool enough to touch.
The pan, basket, fat reducer, and
the inside of the appliance always
become hot when the appliance is
switched on to ensure the food is
properly cooked. These parts are
always too hot to touch.

19ENGLISH
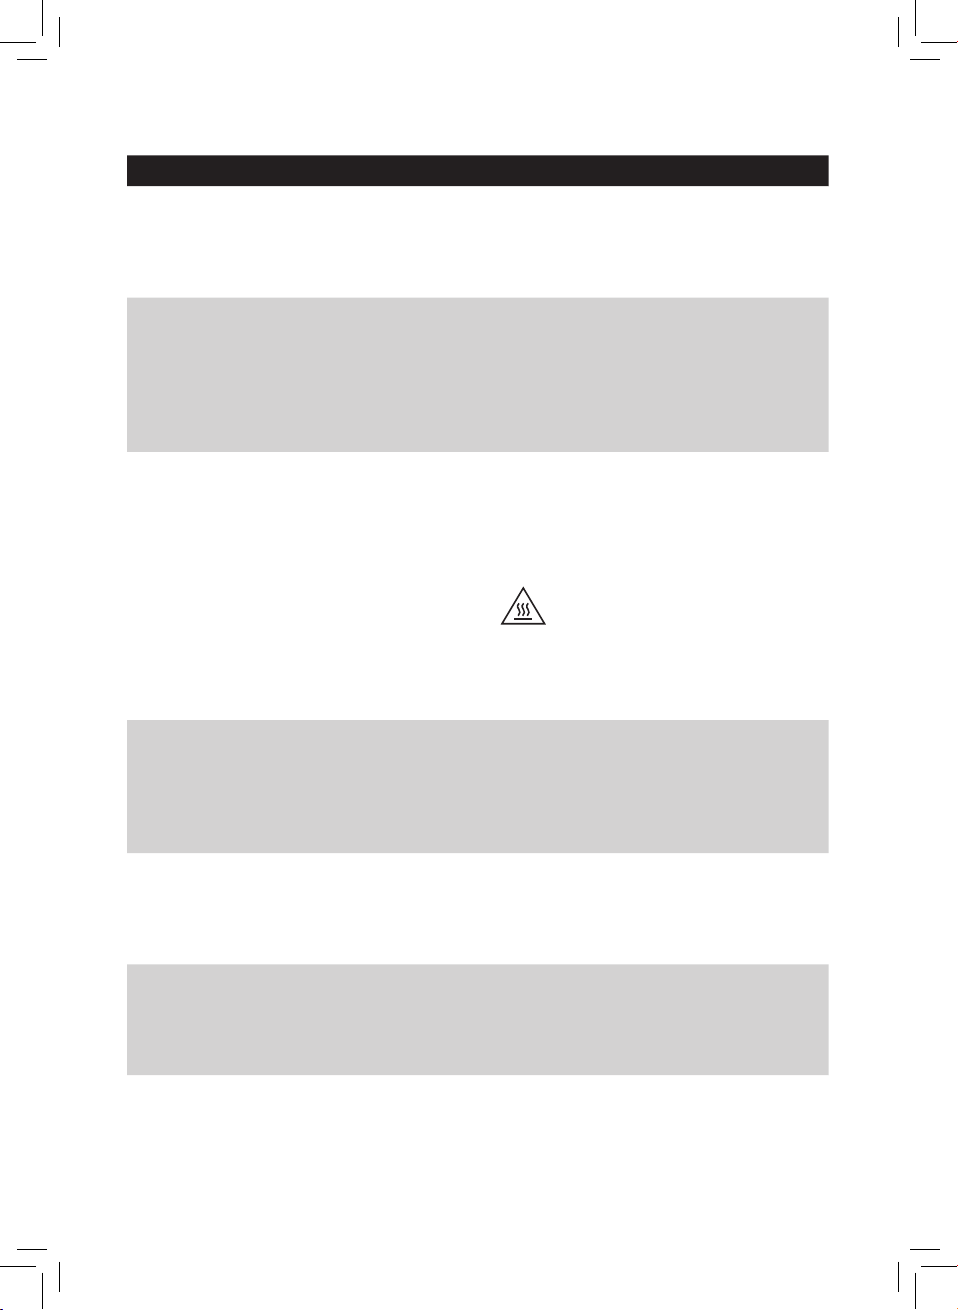
Problem Possible cause Solution
If you leave the appliance switched
on for a longer time, some areas get
too hot to touch. These areas are
marked on the appliance with the
following icon:
As long as you are aware of the hot
areas and avoid touching them, the
appliance is completely safe to use.
My home-made
fries do not turn
out as expected.
You did not use the
right potato type.
To get the best results, use fresh
russet potatoes. If you need to store
the potatoes, do not store them in
a cold environment like in a fridge.
Choose potatoes whose package
states that they are suitable for frying.
The amount of
ingredients in the
basket is too big.
Follow the instructions in this user
manual to prepare home-made fries
(see ‘Food table’ or download the
free Airfryer App).
Certain types of
ingredients need to
be shaken halfway
through the cooking
time.
Follow the instructions in this user
manual to prepare home-made fries
(see ‘Food table’ or download the
free Airfryer App).
The Airfryer does
not switch on.
The appliance is not
plugged in.
When you switch on the appliance,
you hear the sound of the working
fan. If you do not hear this sound,
check if the plug is inserted in the wall
outlet properly.
Several appliances
are connected to one
outlet.
The Airfryer has a high wattage. Try a
dierent outlet and check the fuses.
I see some
peeling o spots
inside my Airfryer.
Some small spots can
appear inside the pan
of the Airfryer due to
the incidental touching
or scratching of the
coating (e.g. during
cleaning with harsh
cleaning tools and/
or while inserting the
basket).
You can prevent damage by lowering
the basket into the pan properly. If
you insert the basket at an angle, its
side may knock against the wall of the
pan, causing small pieces of coating
to chip o. If this occurs, please be
informed that this is not harmful as all
materials used are food-safe.

20 ENGLISH
Problem Possible cause Solution
White smoke
comes out of the
appliance.
You are cooking fatty
ingredients and the
fat reducer is not put in
the pan.
Carefully pour o any excess oil or fat
from the pan, place the fat reducer in
the pan and then continue cooking.
(Fig. 4)
The pan still contains
greasy residues from
previous use.
White smoke is caused by greasy
residues heating up in the pan.
Always clean the pan, basket and fat
reducer thoroughly after every use.
Breading or coating did
not adhere properly to
the food.
Tiny pieces of airborne breading
can cause white smoke. Firmly press
breading or coating to food to ensure
it sticks.
Marinade, liquid
or meat juices are
splattering in the
rendered fat or grease
Pat food dry before placing it in the
basket.
My display shows
5 dashes as
illustrated in the
picture below.
Safety feature has
been activated due
to overheating of the
appliance.
Unplug the appliance and let it cool
down for 1 minute before plugging in
again.

21ENGLISH
Warranty
If you need information, support, or if you have a problem, please visit
www.philips.com/support or in the US or Canada only call 1-866-309-8817 for
assistance.
One year limited warranty
Philips warrants that this product shall be free from defects in material,
workmanship and assembly, under normal use, in accordance with the
specications and warnings, for a period of one year from the date of purchase.
This warranty extends only to the original purchaser of the product, and is not
transferable. To exercise your rights under this warranty, you must provide proof of
purchase in the form of an original sales receipt that shows the product name and
the date of purchase. For customer support or to obtain warranty service, please
visit our website www.philips.com/support. THERE ARE NO OTHER EXPRESS OR
IMPLIED WARRANTIES. Philips’ liability is limited to repair or, at its sole option,
replacement of the product. Incidental, special and consequential damages are
disclaimed where permitted by law. This warranty gives you specic legal rights.
You may also have other rights that vary from state to state, province to province or
country to country.
In U.S. only
Manufactured for:
Philips Personal Health
A division of Philips North America LLC
P.O. Box 10313, Stamford, CT 06904
United States of America
Canada only
Manufactured for:
Philips Electronics Ltd.
281 Hillmount Road
Markham, ON L6C 2S3
For support, please visit www.philips.com/support
PHILIPS and Philips Shield are registered trademarks of Koninklijke Philips N.V.
©2017 Philips North America LLC.
All Rights Reserved.
LISTED
This symbol on the product’s nameplate means it is listed by
Underwriters Laboratories, Inc.
IOS is a trademark or registered trademark of Cisco in the U.S. and other countries.
Android is a trademark of Google Inc.

22 ESPAÑOL
PRECAUCIONES
IMPORTANTES
Si utiliza un artefacto eléctrico siempre debe tomar medidas de seguridad básicas,
tales como:
1 Lea todas las instrucciones.
2 No toque las supercies calientes. Use los mangos o las perillas.
3 No sumerja el cable de alimentación, los conectores ni el artefacto en
agua u otros líquidos para evitar descargas eléctricas.
4 Es indispensable supervisar de manera estricta a los niños o a las personas
con discapacidad cuando usan cualquier artefacto o cuando este se usa cerca
de ellos. Es necesario que una persona responsable supervise a los niños para
asegurarse de que no jueguen con el artefacto.
5 Desconéctelo del tomacorriente cuando no está en uso y antes de limpiarlo.
Deje enfriar antes de poner o quitar las piezas.
6 Nunca use el artefacto si el cable de alimentación o el conector están dañados,
si funciona mal o si sufrió algún tipo de daño. Para asistencia solo en los EE.
UU. y Canadá, llame al 1-866-309-8817.
7 Evite el uso de accesorios no recomendados por el fabricante del artefacto
para prevenir lesiones.
8 No bloquee las aperturas de ventilación. Realice la instalación de acuerdo con
las indicaciones del fabricante.
9 No utilice el dispositivo al aire libre.
10 No deje que el cable cuelgue del borde de la supercie sobre la que se
encuentra apoyado, ni permita que toque supercies calientes.
11 No lo coloque sobre quemadores eléctricos o que funcionen con gas caliente
ni cerca de ese tipo de artefactos. Tampoco lo coloque dentro de hornos
calientes.
12 Tome las medidas de precaución necesarias cuando mueva un artefacto que
contenga aceite caliente u otros líquidos calientes.
13 Conecte el cable al tomacorriente. Para desconectar, gire el botón de
encendido/apagado hasta la posición “Apagado” y desconecte el enchufe del
tomacorriente.
14 Utilice el aparato solamente para el n con el que fue creado.
15 Tome todas las medidas de precaución necesarias cuando retire el sartén, el
reductor de grasa o la cesta, y cuando deseche el aceite caliente.
16 No limpie con esponjas metálicas. Se puede producir una descarga eléctrica si
las piezas rompen la esponja o si se tocan las partes eléctricas.
17 Solo utilice este artefacto en un tomacorriente con una apropiada conexión a
tierra.
18 Debe usarse una fuente de alimentación de corta longitud (o un cable de
alimentación extraíble) para reducir el riesgo de enredarse o tropezar por usar
un cable largo.

23ESPAÑOL
19 Puede utilizar un cable de extensión si toma las precauciones debidas. Si usa
un cable de extensión:
- La clasicación eléctrica del cable debe ser igual a la clasicación del
artefacto.
- El cable debe instalarse de tal manera que no cuelgue del borde de la
supercie de apoyo, para así evitar caídas y enredos.
- Si el aparato está clasicado con conexión a tierra, el cable de extensión
deberá tener la misma clasicación con tres hilos conectores.
20 Este artefacto tiene un enchufe polarizado (una hoja es más ancha que la otra).
Este enchufe se fabricó para ajustarse a un tomacorriente polarizado de una
sola manera para reducir el riesgo de una descarga eléctrica. Si el enchufe no
entra completamente en el tomacorriente, invierta el enchufe. Si aun así no
encaja, póngase en contacto con un electricista calicado. No intente modicar
el enchufe.
21 No debe introducir en el artefacto alimentos o utensilios de metal de gran
tamaño, ya que pueden provocar un incendio o riesgo de descarga eléctrica.
22 Si el artefacto está cubierto o en contacto con un material inamable, como
cortinas, tapicería, paredes o similares, durante su funcionamiento, esto puede
provocar un incendio. No almacene objetos sobre el artefacto cuando esté en
funcionamiento.
23 No coloque ninguno de los siguientes materiales en el artefacto: papel, cartón,
plástico no resistente al calor y otros similares.
24 Si usa papel manteca o para hornear para evitar que se peguen los alimentos a
la cesta de malla, nunca olvide poner los alimentos que está cocinando sobre
el papel. De lo contrario, la ventilación de aire podría levantar el papel para
hornear, puesto que es ligero, y que este toque el calentador.
25 Desconecte inmediatamente el artefacto si ve que sale humo negro. Espere
que se detenga la emisión de humo antes de retirar el sartén del artefacto.
26 Use el artefacto sobre una supercie rme y plana que sea resistente al calor,
alejada del agua o cualquier fuente de calor.
27 No deje el aparato desatendido mientras está en funcionamiento.
28 Este artefacto funciona a altas temperaturas, lo que puede provocar
quemaduras. No toque el interior de artefacto ni las piezas ni las
supercies calientes mientras esté en funcionamiento. Deje que el
artefacto se enfríe completamente antes de manipularlo o limpiarlo.
29 Cuando se fríe con aire caliente, se libera vapor caliente a través de las
aberturas de ventilación de aire caliente. Mantenga las manos y el rostro
alejados del vapor y de las aberturas de ventilación.
30 No toque las piezas en movimiento.
31 Este artefacto solo funciona con aire caliente, por lo que la comida no se fríe en
aceite o grasa. Nunca llene el sartén con grasa o aceite.
32 Este producto está destinado únicamente para su uso doméstico.
33 Nunca utilice su Airfryer si el sartén, la cesta o el reductor de grasa no están
colocados en su lugar.
34 No utilice el enchufe en una toma de corriente o cerca de una que contenga un
ambientador eléctrico para evitar que se dañe el enchufe.

24 ESPAÑOL
CONSERVE ESTAS
INSTRUCCIONES
El consumo de carnes, aves, pescados y mariscos o huevos crudos o sin cocinar
puede incrementar el riesgo de contraer enfermedades transmitidas por los
alimentos.
Asegúrese de que los ingredientes que se preparen en este artefacto tomen un
color amarillo dorado en lugar de un color café oscuro.
Retire los restos quemados. Para obtener los mejores resultados, fría papas frescas
a una temperatura de 180 °C (350°F) o menor, o bien fríalas hasta que tomen un
color amarillo dorado.
25ESPAÑOL
Tabla de contenido
PRECAUCIONES IMPORTANTES 22
Introducción 26
Descripción general (g. 1) 26
Antes del primer uso 27
Preparación inicial 27
Uso del artefacto 31
Limpieza 36
Almacenamiento 37
Eliminación 37
Resolución de problemas 37
Garantía 40
Consulte las fotografías de las páginas plegadas en la parte delantera y
trasera del manual del usuario.

26 ESPAÑOL
Introducción
Felicitaciones por su compra y bienvenido a Philips.
Para acceder a los servicios de asistencia técnica de Philips, registre su producto
en www.philips.com/welcome.
La Airfryer XXL de Philips utiliza aire caliente para freír sus alimentos favoritos con
muy poco o nada de aceite. Está hecha para freír de forma tan crujiente como si
hubiesen sido expuestos a fritura profunda, pero con una cantidad mínima de grasa.
Mediante la combinación de un calentador y un motor potentes y la tecnología
Twin TurboStar, el aire caliente de la Airfryer XXL forma remolinos rápidos, como
un tornado, en toda la cesta de cocción. Lo que permite extraer la grasa de los
alimentos y capturarla en el reductor de grasa que se encuentra en la parte inferior
de la Airfryer.
La grasa que se libera de los alimentos se captura en un lugar al fondo del sartén
para facilitar la eliminación residual y la limpieza.
Ahora puede disfrutar alimentos perfectamente fritos: crujientes por fuera, tiernos
por dentro. Fría, prepare al grill, ase y hornee una variedad de platos deliciosos de
manera saludable, rápida y fácil.
Para obtener más ideas, recetas e información acerca de Airfryer, visite
www.philips.com/kitchen o descargue la aplicación gratuita Airfryer para iOS
®
o
Android™.
Descripción general (g. 1)
a Gaveta
b Cesta con fondo de malla extraíble
c Fondo de malla extraíble
d Reductor de grasa
e Sartén
f Compartimento para guardar el cable
g Salidas de aire
h Indicación MAX
i Cable de alimentación
j Entrada de aire
k Panel de control
A. Indicador de temperatura
B. Botón de temperatura
C. Botón de conservación del calor
D. Dial QuickControl
E. Botón de encendido/apagado
F. Botón de preajuste
G. Botón del temporizador
H. Indicador de tiempo
I. Preajustes: patatas fritas/aperitivos congelados, pollo, carne, pescado,
horneado y manual
27ESPAÑOL
Antes del primer uso
1 Retire todos los materiales de embalaje.
2 Retire cualquier adhesivo o etiqueta del artefacto.
3 Limpie completamente el artefacto antes de usarlo por primera vez (consulte el
capítulo “Limpieza”).
Preparación inicial
Instalación del fondo extraíble de malla y el reductor de grasa
1 Tire del mango para abrir la gaveta. (gura 2)
2 Para sacar la canasta, levante el mango. (gura 3)
3 Coloque el reductor de grasa en el sartén. (gura 4)
4 Introduzca la parte inferior extraíble de malla en la ranura sobre el costado
inferior derecho de la cesta. Presione el fondo de malla hasta que se ajuste en
la posición correcta (se escuchará un "clic" en ambos lados). (gura 5)
5 Coloque la cesta en el sartén. (gura 6)
6 Utilice el mango para volver a colocar la gaveta en la Airfryer. (gura 7)
Nota
• Nunca utilice el sartén si la cesta y el reductor de grasa no están en su interior.
Tabla de alimentos
La siguiente tabla le ayudará a seleccionar la conguración básica para los tipos
de alimentos que desee preparar.
Nota
• Tenga en cuenta que estas conguraciones son sugerencias. No podemos
garantizarle cuál es la mejor conguración para los ingredientes, ya que estos
tienen origen, tamaño, forma y marca diferentes.
• Cuando prepare una mayor cantidad de comida (por ejemplo, patatas fritas,
camarones, alitas de pollo, aperitivos congelados), agite, voltee o revuelva los
ingredientes en la cesta 2 o 3 veces para obtener un resultado consistente.
Ingredientes
Min.- máx.
cantidad
(g/oz)
Tiempo
(minu-
tos)
Tem-
peratura
(°C/°F)
Sacuda,
gire o
revuel-
va en la
mitad
Nota
Patatas fritas
congeladas
(7x7 mm/9/32 x
9/32 pulg.)
200-1400 g
7-50 oz
13-32
180 °C/
350 °F
Sí
28 ESPAÑOL
Ingredientes
Min.- máx.
cantidad
(g/oz)
Tiempo
(minu-
tos)
Tem-
peratura
(°C/°F)
Sacuda,
gire o
revuel-
va en la
mitad
Nota
Patatas fritas
gruesas
congeladas
(10x10 mm/13/32 x
13/32 pulg.)
200-1400 g
7-50 oz
13-33
180 °C/
350 °F
Sí
Patatas
fritas caseras
(10x10 mm/13/32 x
13/32 pulg.)
200-1400 g
7-50 oz
18-35
180 °C/
350 °F
Sí
Remoje en
agua durante
30 minutos,
seque, y
luego agregue
entre 1/4 y 1
cucharada de
aceite.
Patatas fritas
caseras
200-1400 g
7-50 oz
20-42
180 °C/
350 °F
Sí
Remoje en
agua durante
30 minutos,
seque, y
luego agregue
entre 1/4 y 1
cucharada de
aceite.
Aperitivos
congelados
(nuggets de pollo)
80-1300 g
3-46 oz
(6-50
unidades)
7-18
180 °C/
350 °F
Sí
Estará listo
cuando el
interior esté
dorado y
el exterior
crujiente.
Aperitivos
congelados
(arrollados
de primavera
pequeños de
aproximadamente
20 g/0.7 oz)
100-600 g
3-21 oz
(5-30
unidades)
14-16
180 °C/
350 °F
Sí
Estará listo
cuando el
interior esté
dorado y
el exterior
crujiente.
Pollo entero
1200-1500 g
42-53 oz
50-55
180 °C/
350 °F
Evite que las
piernas toquen
el elemento
térmico.
Pechuga de pollo
Alrededor de
160 g/5-6 oz
1-5 unidades 18-22
180 °C/
350 °F
Muslos
200-1800 g
7-63 oz
18-35
180 °C/
350 °F
Sí
29ESPAÑOL
Ingredientes
Min.- máx.
cantidad
(g/oz)
Tiempo
(minu-
tos)
Tem-
peratura
(°C/°F)
Sacuda,
gire o
revuel-
va en la
mitad
Nota
Tiras de pollo
apanado con
migas de pan
3-12
unidades
(1 capa)
10 - 15
180 °C/
350 °F
Agregue el
aceite y el pan
rallado. Estará
listo cuando
tenga un
color amarillo
dorado.
Alitas de pollo
Alrededor de
100 g/3-4 oz
2-8 unidades
(1 capa)
14-18
180 °C/
350 °F
Sí
Trozos de carne sin
hueso:
alrededor de
150 g/5 oz
1-5 trozos 10-13
200 °C/
400 °F
Hamburguesa
aproximadamente,
150 g/5 oz
(10 cm/4 pulg. de
diámetro)
1-4 ham-
burguesas
10 - 15
200 °C/
400 °F
Salchichas
gruesas:
Alrededor de
100 g/3-4 oz
(4 cm/1 1/2 pulg.
de diámetro)
1-6 unidades
(1 capa)
12 - 15
200 °C/
400 °F
Salchichas
delgadas:
Alrededor de
70 g/2-3 oz
(2 cm/3/4 pulg. de
diámetro)
1-7 unidades 9-12
200 °C/
400 °F
Puerco asado:
500-1000 g
18-35 oz
40-60
180 °C/
350 °F
Deje reposar
durante
5 minutos
antes de cortar.
Pescado entero
Alrededor de 300
o 400 g/11-14 oz
1 - 2 18-22
200 °C/
400 °F
Corte la cola si
no cabe en la
cesta.
Filetes de
pescado:
Alrededor de
120 g/4 oz
1 - 3
(1 capa)
9-12
200 °C/
400 °F
Para evitar
que se pegue,
coloque el
lado de la piel
en el fondo
y agregue un
poco de aceite.
30 ESPAÑOL
Ingredientes
Min.- máx.
cantidad
(g/oz)
Tiempo
(minu-
tos)
Tem-
peratura
(°C/°F)
Sacuda,
gire o
revuel-
va en la
mitad
Nota
Moluscos
Aproximadamente,
25-30 g/0.9-1.1 oz
200-1500 g
7-53 oz
10-25
200 °C/
400 °F
Sí
Bizcocho
500 g
18 oz
28
180 °C/
350 °F
Use un molde
para pasteles.
Magdalenas
Alrededor de
50 g/2 oz
1 a 9 12-14
180 °C/
350 °F
Utilice moldes
de silicona
resistentes al
calor.
Quiche
(21 cm/8 1/3 pulg.
de diámetro)
1 15
180 °C/
350 °F
Use una
bandeja para
hornear o un
plato para
horno.
Tostadas/
bollitos de pan
precocinados
1 - 6 6-7
180 °C/
350 °F
Pan recién hecho 700 g/25 oz 38
160 °C/
325 °F
La forma
debiera ser
lo más plana
posible para
evitar que el
pan toque
el elemento
térmico
cuando la
masa se eleva.
Bollos recién
hechos:
Alrededor de
80 g/3 oz
1-6 unidades 18 - 20
160 °C/
325 °F
Castañas
200-2000 g
7-70 ml
15-30
200 °C/
400 °F
Sí
Verduras mixtas
(apenas picadas)
300-800 g
11-28 oz
10-20
200 °C/
400 °F
Sí
Ajuste el
tiempo de
cocción según
su propio
gusto.
31ESPAÑOL
Uso del artefacto
Fritura con aire caliente (Airfrying)
Precaución
• Esta es una Airfryer que funciona con aire caliente. No llene el sartén con
aceite, manteca ni cualquier otro líquido. (gura 8)
• No toque las supercies calientes. Use los mangos o las perillas. Manipule el
sartén caliente y el reductor de grasa con guantes para horno.
• Este artefacto es solo para uso doméstico.
• Puede que este artefacto emita algo de humo cuando lo utilice por primera
vez. Esto es normal.
• No es necesario precalentar el artefacto.
1 Coloque el artefacto en una supercie resistente al calor, nivelada, horizontal y
estable. Asegúrese de que la gaveta pueda abrirse completamente.
Nota
• No coloque nada encima o en los costados del artefacto. Esto podría alterar el
ujo de aire y afectar el resultado de la fritura.
2 Desconecte el cable de alimentación de su compartimento ubicado en la parte
posterior del artefacto. (gura 9)
3 Conecte el enchufe en el tomacorriente. (gura 10)
4 Tire del mango para abrir la gaveta. (gura 11)
5 Ponga los ingredientes en la cesta. (gura 12)
Nota
• La Airfryer puede preparar una gran variedad de ingredientes. Consulte la
"Tabla de alimentos" para conocer las cantidades adecuadas y los tiempos de
cocción aproximados.
• No exceda la cantidad indicada en la sección "Tabla de alimentos" ni permita
que los ingredientes de la cesta sobrepasen la marca "MAX", ya que esto
podría afectar la calidad del resultado nal.
• Si desea preparar ingredientes diferentes al mismo tiempo, asegúrese de
comprobar el tiempo de cocción sugerido para los diferentes ingredientes
antes de cocinarlos al mismo tiempo.
6 Utilice el mango para volver a colocar la gaveta en la Airfryer. (gura 13)
Precaución
• Nunca utilice el sartén si la cesta ni el reductor de grasa están en su interior.
Si calienta el artefacto sin la cesta, utilice guantes para abrir la gaveta. Los
bordes y el interior de la gaveta se calientan mucho.
• No toque el sartén, el reductor de grasa ni la cesta durante el proceso, ni
después de algún tiempo de su uso, ya que se calientan mucho.
32 ESPAÑOL
7 Presione el botón de "encendido/apagado" ( ) para encender el artefacto.
(gura 14)
8 Para cambiar el preajuste, gire la perilla QuickControl hasta la posición deseada.
(gura 15)
» Para conrmar el preajuste seleccionado, presione la perilla QuickControl.
El indicador de tiempo de cocción parpadea en la pantalla. (gura 16)
Nota
• Después de que inicie la cocción, presione el botón de preajustes si desea salir
de un preajuste y cambiar a otro (consulte la page 33: “Cambio de preajuste
durante la cocción”).
9 Para cambiar el tiempo de cocción, gire el dial QuickControl hasta la posición
deseada. (gura 17)
» Para conrmar el tiempo de cocción, presione la perilla QuickControl. (gura
18)
Nota
• Consulte la tabla de alimentos con ajustes de cocina básicos para diferentes
tipos de alimentos.
10 El artefacto empieza a cocinar después de conrmar el tiempo de cocción.
Sugerencia
• Para poner en pausa el proceso de cocción, presione el dial QuickControl. Para
reanudar el proceso de cocción, presione de nuevo el dial QuickControl.
Nota
• Si no ajusta el tiempo de cocción necesario antes de 30 minutos, el artefacto
se apagará automáticamente por motivos de seguridad.
• Si la indicación de tiempo seleccionada corresponde a “- -”, el artefacto pasará
al modo Precalentar.
• Algunos ingredientes se deben sacudir o girar a mitad del tiempo de cocción
(consulte la "Tabla de alimentos"). Para sacudir los ingredientes, presione la
perilla QuickControl para pausar la cocción; abra la gaveta, levante la cesta
del sartén y sacúdala sobre el fregadero. (Fig. 19). Luego, vuelva a introducir
el sartén en el artefacto y presione la perilla QuickControl para reanudar la
cocción.
• Si ajusta el temporizador a la mitad del tiempo de cocción, cuando escuche
el timbre sabrá que es el momento de sacudir o dar vuelta los ingredientes.
Asegúrese de restablecer el temporizador e ingresar el tiempo de cocción
restante.
11 Cuando escuche el timbre del temporizador, habrá terminado el tiempo de
cocción. (gura 20)
12 Para abrir la gaveta, tire del mango y compruebe si los ingredientes están listos.
(gura 21)
33ESPAÑOL
Nota
• Si los ingredientes aún no están listos, tome el mango para volver a introducir
la gaveta en la Airfryer y agregue unos pocos minutos adicionales al tiempo
ajustado.
13 Para extraer ingredientes pequeños (por ejemplo, patatas fritas), extraiga la
cesta del sartén mediante el asa. (gura 22)
Precaución
• Después del proceso de cocción, el sartén, el reductor de grasa, la cesta,
el recipiente interior y los ingredientes estarán calientes. Según el tipo de
ingrediente que se coloque en la Airfryer, puede que salga vapor del sartén.
14 Vacíe el contenido de la cesta en un recipiente o en un plato. Retire siempre la
cesta del sartén para vaciar su contenido, ya que podría haber aceite caliente
en el fondo del sartén. (gura 23)
Nota
• Use unas pinzas para retirar los ingredientes grandes o frágiles.
• El exceso de aceite o grasa de los ingredientes se acumula en el fondo del
sartén, debajo del reductor de grasa.
• Según el tipo de ingredientes que esté cocinando, elimine cuidadosamente el
exceso de aceite o grasa utilizada del sartén después de cada tanda, o bien
antes de sacudir o reemplazar la cesta del sartén. Coloque la cesta sobre una
supercie resistente al calor. Extraiga el sartén completamente y colóquelo
sobre una supercie resistente al calor. Extraiga cuidadosamente el reductor
de grasa del sartén con pinzas con punta de goma. Vierta el exceso de aceite
o grasa utilizada. Vuelva a colocar el reductor de grasa en el sartén, este en la
gaveta y la cesta en el sartén.
Cuando un lote de ingredientes está listo, la Airfryer está instantáneamente
preparada para cocinar otro lote.
Nota
• Repita los pasos del 1 al 14 si desea cocinar otro lote.
Cambio de preajuste durante la cocción
1 Presione el botón de preselección ( ). (gura 24)
2 Gire la perilla QuickControl para seleccionar otro preajuste (gura 25)
3 Para conrmar el preajuste seleccionado, presione la perilla QuickControl. El
indicador de tiempo de cocción parpadea en la pantalla. (gura 26)
4 Para cambiar el tiempo de cocción, gire el dial QuickControl. (gura 27)
» Para conrmar el tiempo de cocción, presione la perilla QuickControl.
(gura 28)
34 ESPAÑOL
Uso del modo Manual
1 Presione el botón de preselección ( ). (gura 24)
2 Gire la perilla QuickControl para seleccionar el modo Manual ( ). (gura 29)
3 Presione la perilla QuickControl para ingresar al modo Manual. (gura 30)
» La temperatura predeterminada es 180 °C/350 °F.
4 Para cambiar la temperatura, gire el dial QuickControl.
» Para conrmar la temperatura, presione el dial QuickControl. (gura 31)
5 Cuando conrme la temperatura, el indicador de tiempo "- -" comenzará a
parpadear.
6 Para cambiar el tiempo de cocción, gire el dial QuickControl.
» Para conrmar el tiempo de cocción, presione el dial QuickControl.
(gura 32)
Cambio del tiempo o la temperatura de cocción en cualquier
momento
1 Presione el botón de temperatura ( ) o del temporizador ( ) (Fig. 33/34).
2 Para cambiar el tiempo o la temperatura de cocción, gire la perilla QuickControl.
» Para conrmar el tiempo o la temperatura de cocción, presione la perilla
QuickControl o vuelva a presionar el botón de la temperatura/temporizador.
(gura 35/36)
Nota
• Si no presiona la perilla QuickControl o el botón de temperatura/temporizador
para conrmar los cambios, se conrmarán automáticamente después de 10
segundos.
Selección del modo de conservación del calor
1 Presione el botón ( ) de conservación del calor (puede activar el modo
Conservación del calor en cualquier momento). (gura 37)
» El botón de conservación del calor se ilumina con un efecto intermitente.
» El temporizador de conservación del calor se ajusta en 30 minutos. Para
cambiar el tiempo de conservación del calor (1-30 min.), pulse el botón
Temporizador ( ), gire la perilla QuickControl y presiónela para conrmar.
(Fig. 38). No es posible ajustar la temperatura de conservación del calor.
2 Para pausar el modo de conservación del calor, presione la perilla QuickControl.
Para reanudar el modo de conservación del calor, vuelva a presionar la perilla
QuickControl.
3 Para salir del modo de conservación del calor, presione una vez los siguientes
botones: Preajustes, Temperatura o Encendido/apagado.

35ESPAÑOL
Sugerencia
• Si los alimentos como las patatas fritas pierden mucho su punto crujiente
durante el modo de conservación del calor, apague antes el artefacto para
disminuir el tiempo de conservación del calor o dórelos durante 2 o 3 minutos
a 180 °C.
Nota
• Si activa el modo de conservación del calor durante la cocción (el botón de
conservación del calor se ilumina con un efecto intermitente), el artefacto
mantendrá los alimentos calientes durante 30 minutos después de haber
nalizado el tiempo de cocción.
• Durante el modo de conservación del calor, el ventilador y el calentador
internos del artefacto se activarán de vez en cuando.
• El modo de conservación del calor se ha diseñado para mantener los platos
calientes inmediatamente después de cocinarlos en la Airfryer. No está
pensado para recalentar.
Preparación de patatas fritas caseras
Para hacer patatas fritas caseras deliciosas en la Airfryer:
- Elija una variedad de patata que sea adecuada para hacer patatas fritas; por
ejemplo, las patatas frescas rojizas.
- Para obtener un resultado uniforme, es mejor freír con aire las patatas fritas en
porciones de hasta 1000 g/35 oz. Generalmente, las patatas fritas más grandes
son menos crujientes que las pequeñas.
- Sacuda la cesta 2 a 3 veces durante el proceso de fritura con aire.
1 Pele las patatas y córtelas en tiras (8x8 mm/5/16 x 5/16 pulg. de grosor).
2 Remoje las tiras de patata en un recipiente hondo con agua durante al menos
30 minutos.
3 Vacíe el recipiente hondo y seque las tiras de patatas con un paño para platos
o un paño de papel.
4 Vierta media cucharada de aceite en un recipiente, coloque las tiras en el
interior y mezcle todo hasta que las tiras estén cubiertas de aceite.
5 Retire las patatas del recipiente hondo con los dedos o una espumadera, así el
exceso de aceite permanecerá en él.
Nota
• No incline el recipiente hondo para colocar todas las tiras en la cesta de una
sola vez; así evitará que exceso de aceite se vierta en el sartén.
6 Coloque las tiras en la cesta.
7 Fría las tiras de patatas y sacuda la cesta a la mitad del proceso de fritura con
aire. Si prepara más de 500 g/17,6 oz de patatas fritas, sacuda la cesta 2 a 3
veces.
36 ESPAÑOL 36ESPAÑOL
Nota
• Consulte el capítulo "Tabla de alimentos" para conocer las cantidades y los
tiempos de cocción correctos.
Limpieza
Advertencia
• Antes de limpiar, deje enfriar completamente la cesta, el sartén, el reductor
de grasa y la parte interior del artefacto.
• Extraiga el reductor de grasa del sartén con tenazas con punta de goma. NO
lo extraiga con sus dedos, ya que debajo del reductor de grasa se acumula
aceite o grasa caliente.
• El sartén, la cesta, el reductor de grasa y la parte interior del artefacto tienen
una capa antiadherente. No use utensilios de cocina metálicos o materiales
de limpieza abrasivos, ya que pueden dañar la capa antiadherente.
Limpie siempre el artefacto después de usarlo. Retire el aceite y la grasa del fondo
del sartén después de cada uso para evitar el humo.
1 Presione el botón de encendido/apagado ( ) para apagar el artefacto,
desconecte el enchufe del tomacorriente y déjelo enfriar.
Sugerencia
• Retire el sartén y la cesta para que la Airfryer se enfríe más rápido.
2 Extraiga el reductor de grasa del sartén con tenazas con punta de goma.
Deseche el exceso de aceite o grasa del fondo del sartén.
3 Lave el sartén, la cesta y el reductor de grasa en el lavavajillas. Además, los
puede limpiar con agua caliente, detergente líquido para platos y una esponja
no abrasiva (consulte “Tabla de limpieza”).
Sugerencia
• Si los restos de comida quedan pegados en el sartén, el reductor de grasa o
la cesta, puede remojar todas las partes en agua caliente y detergente líquido
para platos durante 10 a 15 minutos. El remojo despega los restos de comida,
por lo que es más sencillo removerlos. Asegúrese de usar un detergente
líquido para platos que pueda disolver el aceite y la grasa. Use desengrasante
líquido si hay manchas de grasa en el sartén, el reductor de grasa o la cesta si
no puede removerlas con agua caliente y detergente líquido para platos.
• Si es necesario, se pueden retirar los restos de alimentos pegados al elemento
térmico con un cepillo de cerdas blandas o de dureza media. No use un cepillo
de alambre de acero o de cerdas duras, ya que puede dañar el revestimiento
del elemento térmico.
4 Limpie la parte exterior del aparato con un paño húmedo. (gura 39)
37ESPAÑOL
Nota
• Asegúrese de que no haya restos de humedad en el panel de control. Después
de limpiar el panel de control, séquelo con un paño.
5 Limpie la resistencia con un cepillo de limpieza para eliminar cualquier residuo
de alimento. (gura 40)
6 Limpie el interior del artefacto con agua caliente y una esponja no abrasiva.
(gura 41)
Este artefacto no cuenta con piezas que puedan ser reparadas por el usuario. Para
asistencia solo en los EE. UU. o Canadá, llame al 1-866-309-8817.
Almacenamiento
1 Desenchufe el artefacto y déjelo enfriar.
2 Antes de guardar el artefacto compruebe que todas las piezas estén limpias y
secas.
3 Introduzca el cable en el compartimento para guardarlo.
Nota
• Cuando mueva la Airfryer, sosténgala siempre de manera horizontal. Asegúrese
de sostener la gaveta en la parte delantera del artefacto, ya que puede
deslizarse si accidentalmente se inclina hacia abajo. Esto puede dañar la
gaveta.
• Asegúrese siempre de que las piezas desmontables de la Airfryer (por ejemplo,
el fondo de malla extraíble, etc.) estén colocadas de forma segura antes de
transportarla o guardarla.
Eliminación
Este producto ha sido diseñado y fabricado con materiales y componentes de alta
calidad que pueden reciclarse y reutilizarse. Para obtener más información acerca
del reciclaje, visite www.recycle.philips.com.
Resolución de problemas
En este capítulo, se resumen los problemas más frecuentes que pueden surgir al
usar el artefacto. Si no puede resolver el problema con la siguiente información,
visite www.philips.com/support o llame al 1-866-309-8817 (solo en Estados
Unidos y Canadá) para solicitar asistencia.
38 ESPAÑOL
Problema Causa posible Solución
La parte exterior
del artefacto se
calienta durante
el uso.
El calor del interior
se irradia hacia las
paredes exteriores.
Esto es normal. Todos los mangos y
las perillas que debe tocar durante
el funcionamiento del artefacto
se mantienen a una temperatura
sucientemente baja.
El sartén, la cesta, el reductor de
grasa y el interior se calientan siempre
que el artefacto está encendido
para que los alimentos se cocinen
adecuadamente. Estas piezas
siempre están demasiado calientes
para tocarlas.
Si deja el artefacto encendido por
más tiempo, algunas de las partes
se calientan demasiado, por lo que
no se podrán tocar. Estas partes del
artefacto están marcadas con el ícono
siguiente:
El artefacto es seguro de
usar, siempre y cuando tenga
conocimiento de las partes que se
calientan y evite tocarlas.
Las patatas fritas
caseras no se
cocinaron como
esperaba.
No ha utilizado el tipo
correcto de patatas.
Use patatas russet frescas para
obtener los mejores resultados. No
almacene las patatas en un entorno
frío, como un refrigerador. Elija
patatas cuyo envase especique que
son adecuadas para freír.
La cantidad de
ingredientes en la
cesta es demasiada.
Siga las instrucciones de este manual
de usuario para preparar patatas
fritas caseras (consulte la "Tabla de
alimentos" o descargue la aplicación
gratuita Airfryer).
Ciertos tipos de
ingredientes se deben
sacudir a mitad del
tiempo de cocción.
Siga las instrucciones de este manual
de usuario para preparar patatas
fritas caseras (consulte la "Tabla de
alimentos" o descargue la aplicación
gratuita Airfryer).
La Airfryer no
enciende.
El artefacto no está
enchufado.
Cuando enciende el artefacto, se
escucha el sonido del ventilador. Si
no escucha este sonido, revise si el
enchufe está insertado correctamente
en el tomacorriente.

39ESPAÑOL
Problema Causa posible Solución
Varios artefactos
están conectados a un
tomacorriente.
La Airfryer usa un alto voltaje. Pruebe
con un tomacorriente diferente y
revise los fusibles.
Hay algunas
partes
desgastadas
dentro de la
Airfryer.
Aparecen manchas
pequeñas dentro del
sartén de la Airfryer,
debido a que se toca
o raya el revestimiento
de manera accidental
(p. ej., durante
la limpieza con
herramientas ásperas
o al insertar la cesta).
Puede prevenir daños si introduce la
cesta en el sartén adecuadamente. Si
inserta la cesta en un cierto ángulo,
el lado de esta puede golpear la
pared del sartén, lo que provoca que
se levanten pedazos pequeños de
revestimiento. Si esto ocurre, tenga
en cuenta que esto no es dañino, ya
que todos los materiales usados son
seguros para los alimentos.
Sale humo
blanco del
artefacto.
Está cocinando con
ingredientes grasosos
y sin el
reductor de grasa
puesto en el sartén.
Vierta cuidadosamente el exceso de
aceite o grasa, coloque el reductor
de grasa en el sartén y continúe
cocinando. (gura 4)
El sartén todavía
contiene restos de
grasa de la última vez.
Aparece humo blanco cuando se
calientan los restos grasos en el
sartén. Limpie siempre el sartén,
la cesta y el reductor de grasa
cuidadosamente después de cada
uso.
El apanado, rebozado
o marinado no quedó
bien adherido a los
alimentos.
Pequeños pedazos de pan rallado
transportados por el aire pueden
provocar el humo blanco. Presione
rmemente el apanado o la capa de
pan a la comida para que quede bien
pegada.
El exceso de grasa
salpica restos de
adobo, líquido o jugo
de la carne
Golpee suavemente los alimentos
para secarlos antes de colocarlos en
la cesta.
Mi pantalla
muestra 5
guiones como se
ve en la siguiente
imagen.
Se activó la función
de seguridad debido
al sobrecalentamiento
del artefacto.
Desenchufe el artefacto y déjelo
enfriar durante 1 minuto antes de
volver a conectarlo.

40 ESPAÑOL
Garantía
Si necesita más información, asistencia o si tiene un problema, visite
www.philips.com/support o llame al 1-866-309-8817 para solicitar asistencia, solo
disponible en Estados Unidos y Canadá.
Garantía limitada de un año
Philips garantiza que este producto está libre de defectos en el material,
fabricación y ensamblado, en condiciones normales de uso, de acuerdo con
las especicaciones y las advertencias, por un periodo de un año a partir de la
fecha de compra. Esta garantía se aplica únicamente al comprador original del
producto y es intransferible. Para beneciarse de los derechos que le otorga
esta garantía, debe poseer el comprobante de compra en la forma de un recibo
original donde se indique el nombre del producto y la fecha de compra. Para
recibir servicio de atención al cliente u obtener un servicio de garantía, visite
nuestro sitio web www.philips.com/support. NO EXISTEN OTRAS GARANTÍAS
EXPRESAS NI IMPLÍCITAS. La responsabilidad de Philips se limita a reparar o, a
su entero criterio, remplazar el producto. Philips no se responsabiliza por daños
accidentales, especiales ni resultantes dentro de los límites de la ley. Esta garantía
le otorga derechos legales especícos. También tiene otros derechos que varían
dependiendo del estado, provincia o país.
En EE. UU. solamente
Fabricado para:
Philips Personal Health
Una división de Philips North America LLC
P.O. Box 10313 Stamford, CT 06904
Estados Unidos de América
Solo en Canadá
Fabricado para:
Philips Electronics Ltd
281 Hillmount Road
Markham, ON L6C 2S3
Para obtener asistencia, visite www.philips.com/support
PHILIPS y Philips Shield son marcas comerciales registradas de
Koninklijke Philips N.V.
©2017 Philips North America LLC.
Todos los derechos reservados.
Para solicitar asistencia, visite el sitio web de Philips en
http://www.support.philips.com/support/ o llame al:
-- Colombia: 01-800-700-7445
-- Costa Rica: 0800-507-7445
-- República Dominicana: 1-800-751-2673
-- Ecuador: 1-800-10-1045
-- El Salvador: 800-6024

41ESPAÑOL
-- Guatemala: 1-800-299-0007
-- Honduras: 8002-791-9273
-- México: 01800504 6200
-- Nicaragua: 1-800-507-0018
-- Panamá: 800-8300
LISTED
Este símbolo en la placa de características del producto signica
que está registrado por Underwriters Laboratories, Inc.
iOS es una marca comercial o una marca comercial registrada de Cisco en los
EE. UU. y otros países.
Android es una marca comercial de Google Inc.

42 FRANÇAIS
MISES EN GARDE
IMPORTANTES
Quand vous utilisez un produit électrique, suivez toujours les mesures de sécurité
fondamentales, notamment ce qui suit :
1 Lisez toutes les instructions.
2 Ne touchez pas les surfaces chaudes. Servez-vous des manches ou des
boutons.
3 Pour prévenir les risques de chocs électriques, ne plongez pas le cordon,
les prises ou l'appareil dans l'eau ni dans aucun autre liquide.
4 Exercez toujours une surveillance étroite lorsqu'un appareil est utilisé par des
enfants ou des personnes handicapées ou à leur proximité. Les enfants doivent
être surveillés par une personne responsable pour s'assurer qu'ils ne s'amusent
pas avec l'appareil.
5 Assurez-vous de toujours débrancher l'appareil lorsque vous ne l'utilisez pas
et avant de le nettoyer. Laissez-le refroidir avant d'y mettre des pièces ou d'en
retirer.
6 Cessez d'utiliser l'appareil si son cordon d'alimentation ou toute autre
partie venaient à être endommagés ou si vous veniez à constater un
dysfonctionnement, quel qu'il soit. Pour obtenir de l'aide aux États-Unis et au
Canada, composez le 1 866 309-8817.
7 N'utilisez aucun accessoire non recommandé par le fabricant de l'appareil sous
peine de risquer des blessures.
8 N'obstruez aucun orice de ventilation. Installez l'appareil en conformité avec
les instructions du fabricant.
9 N'utilisez pas cet appareil à l'extérieur.
10 Ne laissez pas le cordon d'alimentation dépasser du bord de la table ou du
comptoir sur lequel l'appareil est posé, ni entrer en contact avec des surfaces
chaudes.
11 Ne placez pas l'appareil sur ou à proximité d'un brûleur à gaz ou électrique, ni
sur un four chaud.
12 Faites preuve d'extrême prudence lorsque vous déplacez un appareil contenant
de l'huile chaude ou d'autres liquides chauds.
13 Branchez le cordon dans une prise électrique. Pour le débrancher, tournez le
bouton marche/arrêt à « Arrêt », puis retirez la che de la prise.
14 N'utilisez l'appareil pour aucun autre usage que celui prévu.
15 Faites preuve d’extrême prudence lorsque vous retirez la cuve, le réducteur de
gras et le panier pour éliminer l’huile chaude.
16 Ne vous servez pas de tampons à récurer métalliques pour le nettoyage. Vous
risqueriez de briser des pièces, qui, en touchant des composants électriques,
pourraient vous soumettre à un choc électrique.
17 Branchez cet appareil uniquement sur une prise correctement mise à la terre.
18 Le cordon d'alimentation à utiliser doit être court (ou amovible) pour éviter qu'il
ne s'emmêle ou qu'il ne soit accroché involontairement.

43FRANÇAIS
19 Vous pouvez toutefois utiliser des rallonges en redoublant de vigilance. Si vous
utilisez une rallonge électrique :
- Les caractéristiques électriques du cordon d'alimentation doivent être
aussi élevées que celles de l'appareil.
- La rallonge doit être disposée de façon à ne pas reposer au bord d'une
table ou d'un comptoir, car un enfant pourrait alors facilement l'attraper ou
quelqu'un pourrait se prendre les pieds dedans.
- Si la che de l'appareil est munie d'un l de terre, la rallonge utilisée doit
être un cordon d'alimentation trilaire avec mise à la terre.
20 Cet appareil est doté d'une che polarisée (une broche est plus large que
l'autre). Cette che ne peut être insérée que d'une seule façon dans une prise
polarisée. Si la che ne s'adapte pas parfaitement à la prise, essayez dans
l'autre sens. Si la che n'est toujours pas compatible, communiquez avec un
électricien qualié. Ne tentez en aucun cas de la modier par vous-même.
21 N'insérez ni aliment ni ustensile en métal trop gros dans l'appareil, car
vous risqueriez de provoquer un incendie ou d'être victime d'une décharge
électrique.
22 Un incendie pourrait se déclarer si l'appareil est en contact avec des matériaux
inammables tels que des rideaux, des tentures ou un mur, pendant qu'il
fonctionne. Ne posez aucun objet sur l'appareil en cours d'utilisation.
23 Ne mettez aucun objet en papier, en carton, en plastique qui ne résiste pas à la
chaleur ou matière similaire dans l'appareil.
24 Si vous utilisez du papier parchemin ou de l'essuie-tout pour éviter que de
la nourriture ne colle sur le panier à mailles, ne laissez jamais le papier sans
la nourriture à cuire au-dessus de lui. Sinon, le papier parchemin léger peut
s'élever du fait de la ventilation d'air et toucher l'élément chauant.
25 Débranchez immédiatement l'appareil si vous apercevez de la fumée noire
en sortir. Attendez que l'émission de fumée cesse avant de retirer la cuve de
l'appareil.
26 Utilisez l'appareil sur une surface plane, stable et résistante à la chaleur, loin de
toute source d'eau ou de chaleur.
27 Ne laissez pas l'appareil sans surveillance en cours d'utilisation.
28 Cet appareil fonctionne à des températures élevées qui peuvent
causer des brûlures. Ne touchez pas les surfaces chaudes ni les pièces
à l'intérieur de l'appareil pendant qu'il fonctionne. Laissez refroidir
complètement l'appareil avant de le manipuler ou de le nettoyer.
29 Pendant la friture à l'air chaud, de la vapeur brûlante s'échappe des sorties d'air.
Gardez les mains et le visage susamment éloignés des sorties d'air.
30 Évitez tout contact avec les pièces mobiles.
31 Cet appareil fonctionne à l'air chaud seulement; la nourriture n'est pas frite dans
l'huile ou dans la graisse! Ne remplissez jamais la cuve avec de l'huile ou de la
matière grasse.
32 Cet appareil est destiné à un usage domestique seulement.
33 N’utiliser jamais la friteuse Airfryer sans la cuve, le panier ou le réducteur de gras
en place à l’intérieur.

44 FRANÇAIS
34 N'utilisez pas de module d'extension dans une prise murale ou à proximité de
celle-ci si elle contient un désodorisant électrique, an d'éviter des dommages
à la che.
CONSERVEZ CES
INSTRUCTIONS
La consommation de viande, de volaille, de poissons, de fruits de mer, de crustacés
ou d'œufs crus ou pas assez cuits peut augmenter le risque de maladies d'origine
alimentaire.
Assurez-vous que les aliments cuits dans l'appareil soient dorés et pas bruns ou
noirs.
Enlevez les résidus brûlés. Ne faites pas frire les pommes de terre crues à des
températures supérieures à 180 °C/350 °F ou au-delà de leur aspect doré.
45FRANÇAIS
Table des matières
MISES EN GARDE IMPORTANTES 42
Introduction 46
Description générale (g. 1) 46
Avant la première utilisation 47
Avant l'utilisation 47
Utilisation de la lampe 51
Nettoyage 57
Entreposage 58
Mise au rebut 58
Dépannage 58
Garantie 61
Consultez les illustrations présentées sur les pages pliées à l'avant et à
l'arrière du manuel d'utilisation.

46 FRANÇAIS
Introduction
Félicitations pour votre achat et bienvenue dans l'univers Philips!
Pour proter pleinement des avantages de l'assistance Philips, enregistrez votre
produit à l'adresse www.philips.com/welcome.
La friteuse Airfryer XXL de Philips utilise l’air chaud pour frire vos aliments avec peu
ou pas d’huile ajoutée. Elle est conçue pour donner une friture aussi croustillante
que celle d’une friture à l’huile avec un minimum de matières grasses.
En combinant le chauage et le moteur puissants à la nouvelle technologie Twin
TurboStar, l’air chaud tournoie comme une tornade dans l’ensemble de la friteuse
Airfryer XXL. Cette chaleur extrait des gras de la nourriture et les dépose dans le
réducteur de gras dans la partie inférieure de la friteuse AirFryer.
Le gras libéré des aliments est recueilli en un seul endroit dans la partie inférieure
de la cuve an d'en faciliter l'élimination et le nettoyage de la cuve.
Vous pouvez maintenant apprécier des aliments frits, cuits à la perfection –
croustillants à l’extérieur, tendres à l’intérieur – et frire, griller, rôtir et cuire pour
préparer une foule de plats savoureux d’une manière saine, rapide et facile.
Pour obtenir plus de renseignements sur la friteuse Airfryer ainsi que des idées
de recettes, visitez le site www.philips.com/kitchen ou téléchargez l'application
gratuite Airfryer pour IOS
®
ou Android™.
Description générale (g. 1)
a Tiroir
b Panier avec fond en maille amovible
c Fond en maille amovible
d Réducteur de gras
e Cuve
f Compartiment de rangement du cordon
g Sorties d'air
h Indicateur MAX
i Câble d’alimentation
j Entrée d'air
k Panneau de commande
A. Indicateur de température
B. Bouton de température
C. Bouton de maintien au chaud
D. Cadran QuickControl
E. Bouton marche/arrêt
F. Bouton préréglage
G. Bouton de minuterie
H. Indicateur de temps
I. Préréglages : Frites/collations surgelées, poulet, viande, poisson et manuel
47FRANÇAIS
Avant la première utilisation
1 Retirez tout emballage.
2 Retirez tous les autocollants et étiquettes de l'appareil.
3 Nettoyez soigneusement l'appareil avant la première utilisation (voir le chapitre
« Nettoyage »).
Avant l'utilisation
Mise en place du fond en maille et du réducteur de gras amovibles
1 Ouvrez le tiroir en tirant sur le manche. (Fig. 2)
2 Retirez le panier en soulevant le manche. (Fig. 3)
3 Placez le réducteur de gras dans la cuve. (Fig. 4)
4 Insérez le fond en maille dans la fente du côté droit en bas du panier. Appuyez
sur le fond en maille jusqu'à ce qu'il se verrouille en place (déclic des deux
côtés). (Fig. 5)
5 Insérez le panier dans la cuve. (Fig. 6)
6 Faites glisser le tiroir dans la friteuse Airfryer par le manche. (Fig. 7)
Note
• N’utilisez jamais la cuve sans que le réducteur de gras et le panier ne soient à
l’intérieur.
Tableau des aliments
Le tableau ci-dessous vous aide à choisir les réglages de base pour certains types
d'aliments.
Note
• N'oubliez pas que ces réglages sont donnés à titre de suggestion. Étant donné
que les aliments n'ont pas tous la même origine, la même taille ou la même
forme et qu'ils sont de marques diérentes, nous ne pouvons pas garantir le
meilleur réglage pour leur cuisson.
• Lorsque vous préparez une plus grande quantité d'aliments (par exemple,
frites, crevettes, pilons, collations congelées), secouez ou remuez les aliments
dans le panier 2 ou 3 fois pour une cuisson uniforme.

48 FRANÇAIS
Ingrédients
Quantité
(g/oz)
min. - max.
Temps
(min)
Tempé-
rature
(°C/°F)
Secouez,
tournez
ou mé-
langez à
mi-cuis-
son
Note
Frites minces
surgelées (7 x 7 mm
(9/32 x 9/32"))
200 - 1400 g
7 - 50 oz
13 - 32
180 °C
(350 °F)
Oui
Frites à coupe
grossière surgelées
(10 x 10 mm
(13/32 x 13/32"))
200 - 1400 g
7 - 50 oz
13 - 33
180 °C
(350 °F)
Oui
Frites maison
(10 x 10 mm
(13/32 x 13/32"))
200 - 1400 g
7 - 50 oz
18 - 35
180 °C
(350 °F)
Oui
Faites tremper
pendant
30 minutes
dans l'eau,
asséchez, puis
ajoutez 1/4 à
1 c. à table
d'huile.
Pommes de
terre en quartiers
maison
200 - 1400 g
7 - 50 oz
20 - 42
180 °C
(350 °F)
Oui
Faites tremper
pendant
30 minutes
dans l'eau,
asséchez, puis
ajoutez 1/4 à
1 c. à table
d'huile.
Collations
congelées
(croquettes de
poulet)
80 - 1300 g
3 -46 oz
(6 - 50 pièces)
7 - 18
180 °C
(350 °F)
Oui
Prêtes
lorsqu'elles
prennent
une teinte
dorée et
qu'elles sont
croustillantes
à l'extérieur.
Collations
congelées
(petits rouleaux
de printemps
d'environ
20 g/0,7 oz)
100 - 600 g
3 - 21 oz
(5 - 30 pièces)
14 - 16
180 °C
(350 °F)
Oui
Prêtes
lorsqu'elles
prennent
une teinte
dorée et
qu'elles sont
croustillantes
à l'extérieur.
Poulet entier
1200 - 1500 g
42 - 53 oz
50 - 55
180 °C
(350 °F)
Maintenez
les cuisses
éloignées
de l'élément
chauant.
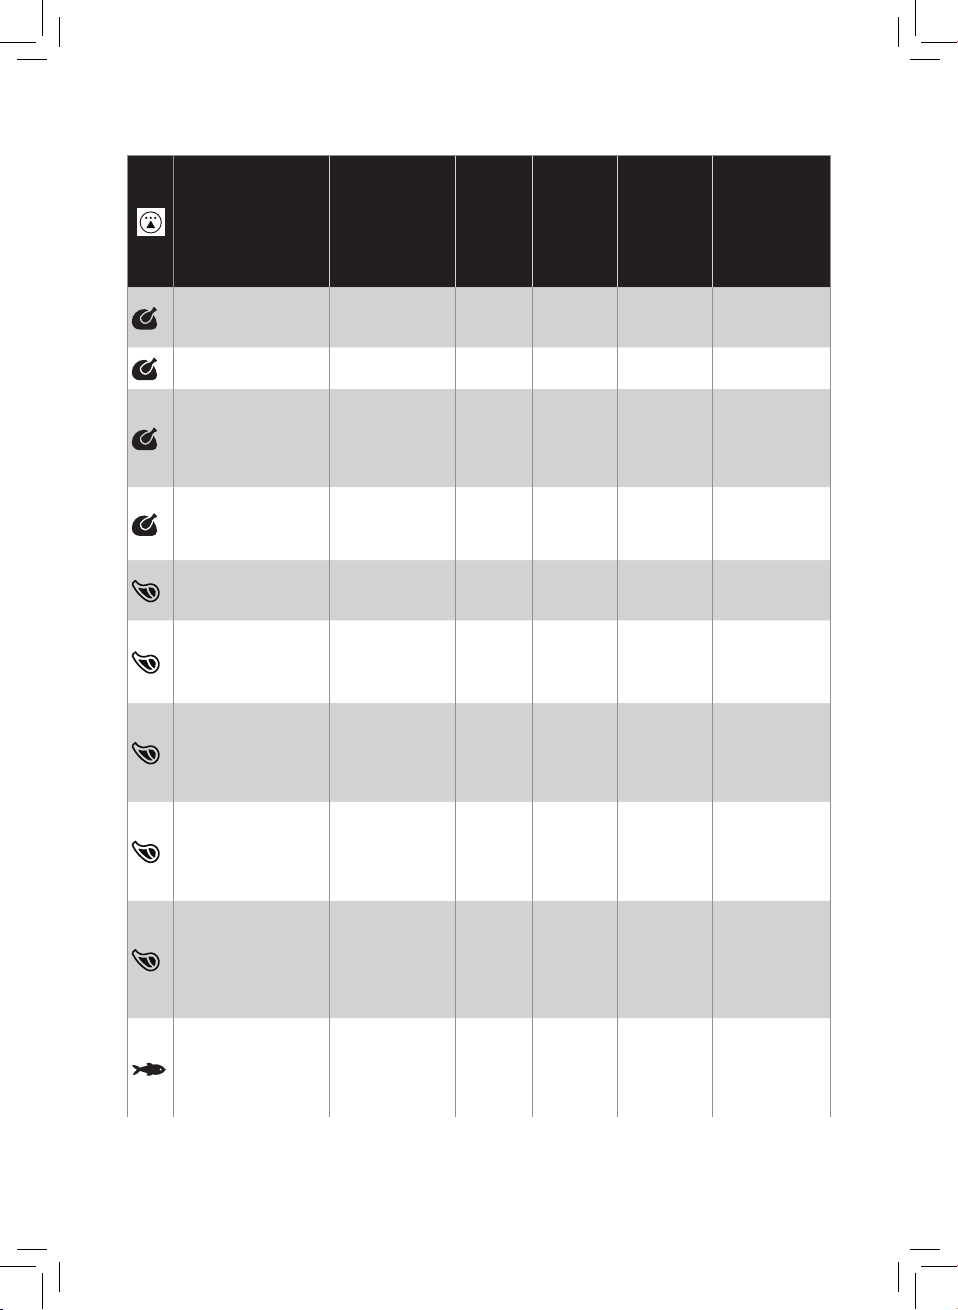
49FRANÇAIS
Ingrédients
Quantité
(g/oz)
min. - max.
Temps
(min)
Tempé-
rature
(°C/°F)
Secouez,
tournez
ou mé-
langez à
mi-cuis-
son
Note
Poitrine de poulet
Environ 160 g/
5 - 6 oz)
1 - 5 pièce(s) 18 à 22
180 °C
(350 °F)
Pilons de poulet
200 - 1800 g
7 -63 oz
18 - 35
180 °C
(350 °F)
Oui
Bâtonnets de
poulet pané
3 - 12 pièces
(1 couche)
10 - 15
180 °C
(350 °F)
Ajouter de
l'huile à la
chapelure.
Prêts lorsqu'ils
sont dorés.
Ailes de poulet
Environ 100 g/
3 - 4 oz)
2 - 8 pièces
(1 couche)
14 - 18
180 °C
(350 °F)
Oui
Côtelettes de
viande sans os
Environ 150 g/5 oz
1 à 5 côtelettes 10 - 13
200 °C
(400 °F)
Hamburger
Environ 150 g/5 oz
(diamètre 10 cm/4")
1 - 4 galettes 10 - 15
200 °C
(400 °F)
Grosses saucisses
Environ
100 g/3 - 4 oz
(diamètre
4 cm/1 1/2")
1 - 6 pièces
(1 couche)
12 - 15
200 °C
(400 °F)
Saucisses nes
Environ
70 g/2 - 3 oz
(diamètre
2 cm/3/4")
1 - 7 pièces 9 - 12
200 °C
(400 °F)
Rôti de porc
500 - 1000 g
18 -35 oz
40 - 60
180 °C
(350 °F)
Laissez
reposer
pendant
5 minutes
avant de
découper.
Poisson entier
Environ
300 - 400 g/
11 - 14 oz
1 à 2 18 à 22
200 °C
(400 °F)
Coupez la
queue si elle
n'entre pas en
entier dans le
panier.
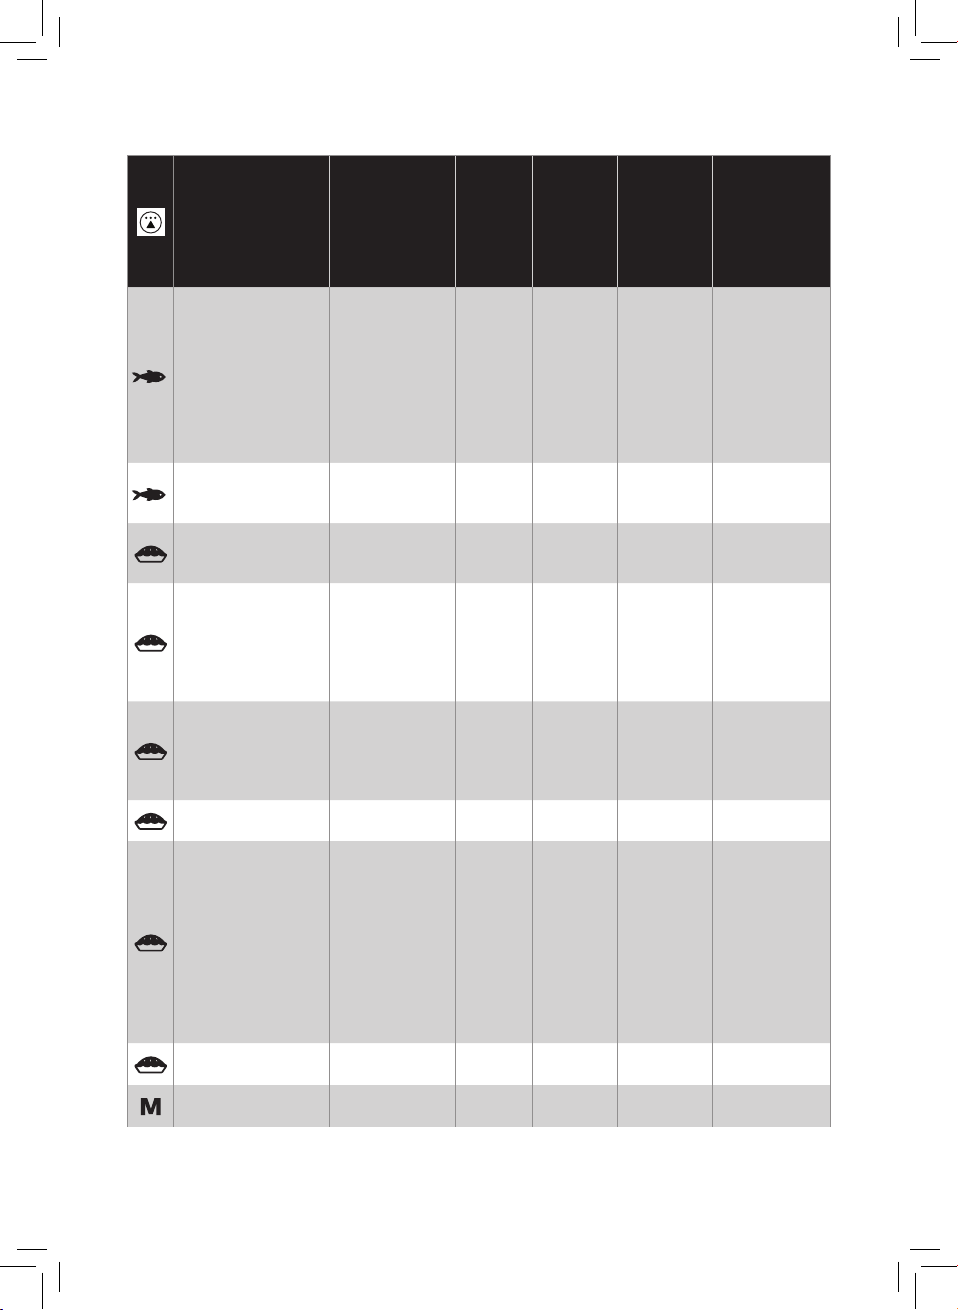
50 FRANÇAIS
Ingrédients
Quantité
(g/oz)
min. - max.
Temps
(min)
Tempé-
rature
(°C/°F)
Secouez,
tournez
ou mé-
langez à
mi-cuis-
son
Note
Filets de poisson
Environ 120 g/4 oz
1 à 3
(1 couche)
9 - 12
200 °C
(400 °F)
Placez la
peau face
vers le bas
et ajoutez-y
quelques
gouttes
d'huile an
d'éviter toute
adhérence.
Fruits de mer
Environ 25 - 30 g/
0,9 - 1.1 oz
200 - 1500 g
7 - 53 oz
10 à 25
200 °C
(400 °F)
Oui
Gâteau
500 g
18 oz
28
180 °C
(350 °F)
Utiliser un
moule à
gâteau.
Muns
Environ 50 g/2 oz
De 1 à 9 12 - 14
180 °C
(350 °F)
Utiliser un
moule à
muns en
silicone
résistant à la
chaleur.
Quiche (diamètre
21 cm/8 1/3")
1 15
180 °C
(350 °F)
Utiliser la
plaque de
cuisson ou un
plat allant au
four.
Pain grillé/petits
pains précuits
1 à 6 6 - 7
180 °C
(350 °F)
Pain frais 700 g / 25 oz 38
160 °C
(325 °F)
La forme doit
être aussi
plate que
possible an
d'éviter que le
pain touche
à l'élément
chauant
lorsqu'il
gone.
Petits pains frais
Environ 80 g/3 oz
1 - 6 pièces 18 - 20
160 °C
(325 °F)
Châtaignes
200 - 2000 g
7 - 70 oz
15 - 30
200 °C
(400 °F)
Oui
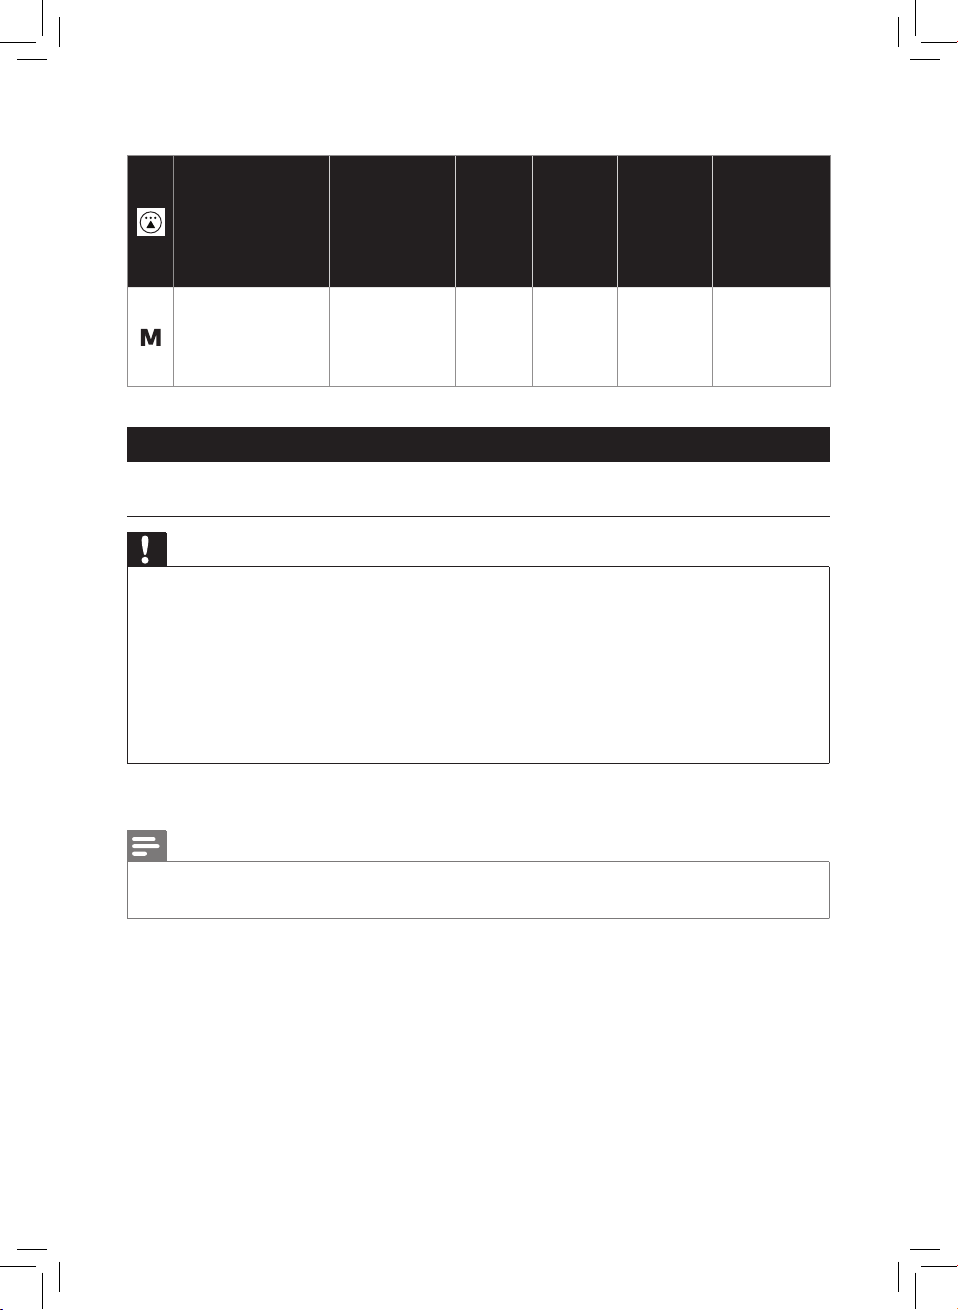
51FRANÇAIS
Ingrédients
Quantité
(g/oz)
min. - max.
Temps
(min)
Tempé-
rature
(°C/°F)
Secouez,
tournez
ou mé-
langez à
mi-cuis-
son
Note
Macédoine de
légumes (coupés
grossièrement)
300 - 800 g
11 - 28 oz
10 - 20
200 °C
(400 °F)
Oui
Réglez le
temps de
cuisson en
fonction au
goût.
Utilisation de la lampe
Cuisson à l'air
Avertissement
• Cette friteuse Airfryer fonctionne à l'air chaud. Ne remplissez pas la cuve
d'huile, de gras de friture, ni d'aucun autre liquide. (Fig. 8)
• Ne touchez pas les surfaces chaudes. Servez-vous des manches ou des
boutons. Manipulez la cuve chaude et le réducteur de gras avec des gants
isolants.
• Cet appareil est destiné à un usage domestique uniquement.
• Cet appareil peut dégager de la fumée lorsque vous l'utilisez pour la première
fois. Ce phénomène est normal.
• Le préchauage de l'appareil n'est pas nécessaire.
1 Placez l'appareil sur une surface stable, plane et résistante à la chaleur. Assurez-
vous que le tiroir peut être ouvert complètement.
Note
• Ne posez aucun objet sur le dessus ni sur les côtés de l'appareil. Cela risquerait
d'entraver la circulation de l'air et d'aecter les résultats de la friture.
2 Retirez le cordon d'alimentation du compartiment de rangement à l'arrière de
l'appareil. (Fig. 9)
3 Branchez la che dans la prise murale. (Fig. 10)
4 Ouvrez le tiroir en tirant sur le manche. (Fig. 11)
5 Mettez les aliments dans le panier. (Fig. 12)

52 FRANÇAIS
Note
• La friteuse Airfryer permet de préparer une grande variété d'aliments.
Consultez le tableau des aliments pour les quantités qui conviennent et les
durées de cuisson approximatives.
• Ne dépassez pas la quantité indiquée dans la section du tableau des aliments
et ne remplissez pas le panier au-delà de l'indication « MAX », car cela
risquerait d'aecter la qualité du résultat nal.
• Si vous souhaitez faire cuire plusieurs aliments en même temps, pensez à
bien vérier les durées et les températures de cuisson suggérées pour chacun
d'entre eux au préalable à leur cuisson simultanée.
6 Faites glisser le tiroir dans la friteuse Airfryer par le manche. (Fig. 13)
Avertissement
• N’utilisez jamais la cuve sans que le réducteur de gras et le panier ne soient
à l’intérieur. Si vous chauez l'appareil sans panier, utilisez des gants isolants
pour ouvrir le tiroir. Les bords et l'intérieur du tiroir deviennent très chauds.
• Ne touchez pas à la cuve, au réducteur de gras ou au panier pendant et pour
un certain temps après utilisation, car ils deviennent très chauds.
7 Appuyez sur le bouton marche/arrêt ( ) pour mettre l'appareil en marche.
(Fig. 14)
8 Pour changer le préréglage, tournez le cadran QuickControl au réglage désiré.
(Fig. 15)
» Pour conrmer le préréglage sélectionné, appuyez sur le
cadran QuickControl. L'indicateur de temps de cuisson clignote à l'écran.
(Fig. 16)
Note
• Une fois la cuisson démarrée, appuyer sur le bouton de préréglage si
vous voulez passer d'un mode de cuisson à un autre (voir page 54–
« Changement de préréglage pendant la cuisson »).
9 Pour changer le temps de la cuisson, tournez le cadran QuickControl au réglage
désiré. (Fig. 17)
» Pour conrmer le temps de cuisson sélectionné, appuyez sur le
cadran QuickControl. (Fig. 18)
Note
• Reportez-vous au tableau de cuisson des aliments pour les réglages de base
selon divers types d'aliments.
10 L'appareil commence à cuire une fois que le temps de cuisson a été conrmé.
Conseil
• Pour interrompre la cuisson, appuyez sur le cadran QuickControl. Pour
reprendre la cuisson, appuyez sur le cadran QuickControl.
53FRANÇAIS
Note
• Si vous ne dénissez pas le temps de cuisson requis dans les 30 minutes,
l'appareil s'éteint automatiquement pour des raisons de sécurité.
• Si l'option « - - » est sélectionnée à titre d'indication de temps, l'appareil passe
en mode réchaud.
• Certains aliments nécessitent d'être remués ou retournés en cours de cuisson
(voir le tableau des aliments). Pour mélanger les aliments, ouvrez le tiroir, retirez
le panier de la cuve et secouez-le au-dessus de l'évier (Fig. 19). Puis, remettez
la cuve avec le panier dans l'appareil et appuyez sur le cadran QuickControl
pour continuer la cuisson.
• Vous pouvez régler la minuterie sur la moitié du temps de cuisson an qu'un
signal sonore vous indique à quel moment remuer les aliments. Cependant,
vous devrez ensuite régler de nouveau la minuterie sur la moitié restante du
temps de cuisson.
11 Lorsque vous entendez le signal sonore de la minuterie, le temps de
préparation réglé s'est écoulé. (Fig. 20)
12 Ouvrez le tiroir en tirant sur le manche et vériez que les aliments sont cuits.
(Fig. 21)
Note
• Si les aliments ne sont pas prêts, remettez simplement le tiroir dans la friteuse
Airfryer et ajoutez quelques minutes supplémentaires à la minuterie.
13 Pour sortir de petits aliments, comme les frites, retirez le panier de la cuve par le
manche. (Fig. 22)
Avertissement
• Après la cuisson, la cuve, le réducteur de gras, le panier, l’intérieur de la
friteuse et les aliments sont chauds. Suivant le type d'aliments dans la
friteuse, de la vapeur peut s'échapper de la cuve.
14 Videz le panier dans un bol ou un plat. Retirez toujours le panier de la cuve
pour vider son contenu, car de l'huile chaude peut s'accumuler au fond de la
cuve pendant la cuisson. (Fig. 23)
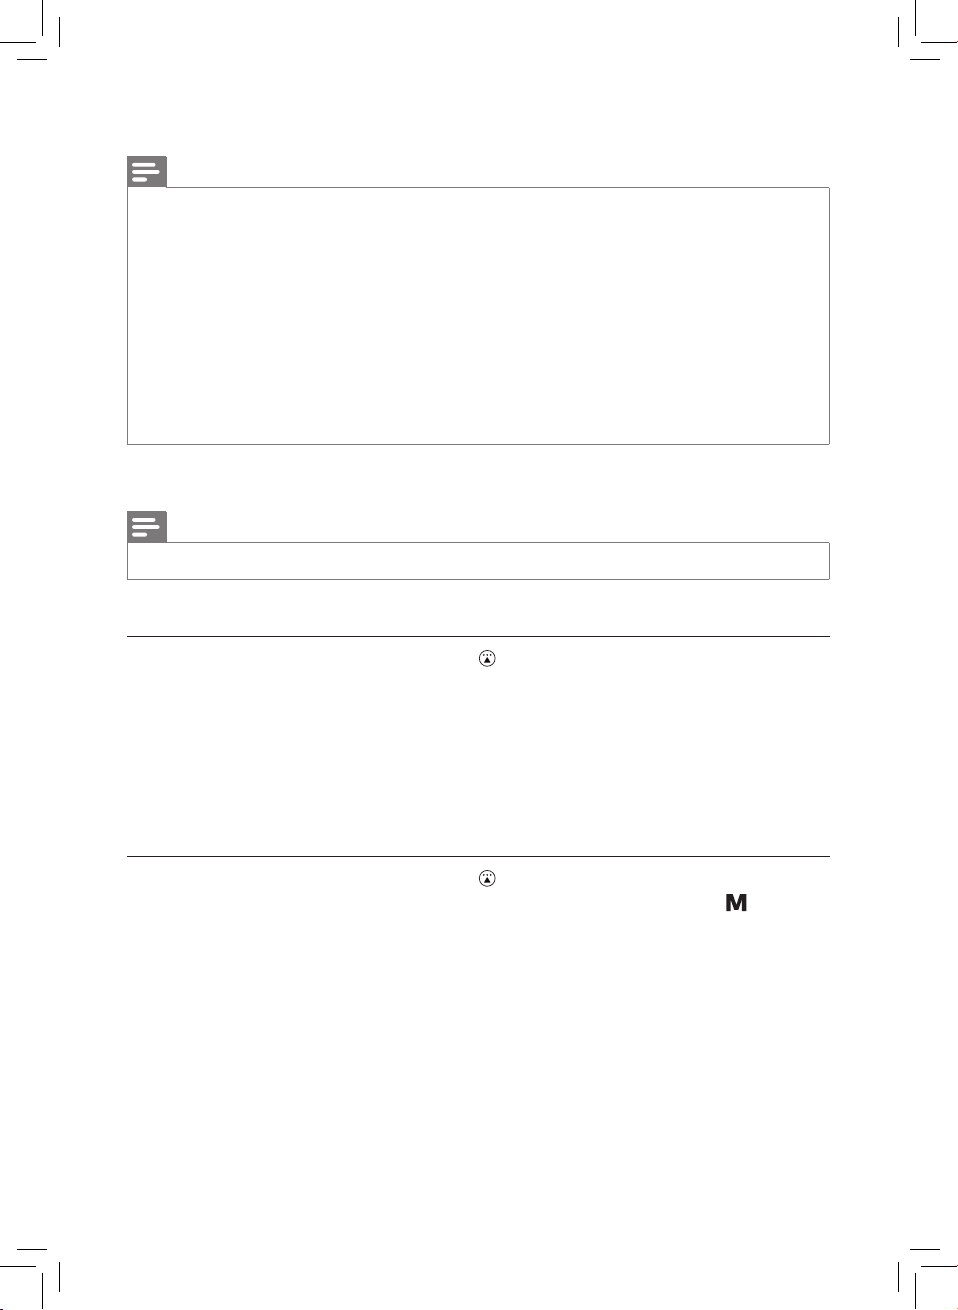
54 FRANÇAIS
Note
• Pour extraire les aliments de grande taille ou fragiles, utilisez des pinces ou
une pelle.
• L’excédent d’huile ou de gras provenant de la cuisson est recueilli au fond de la
cuve sous le réducteur de gras.
• Selon le type d'aliments cuits, vous voudrez peut-être verser avec précaution
l'excédent d'huile ou de gras de la cuve après chaque lot d'aliments ou
avant de secouer ou de replacer le panier dans la cuve. Placez le panier sur
une surface résistant à la chaleur. Portez des gants isolants, faites glisser la
cuve pour la sortir et placez-la sur une surface résistant à la chaleur. Retirez
avec précaution le réducteur de gras de la cuve à l’aide de pinces dotées
d’extrémités en caoutchouc. Versez l'excédent d'huile ou de gras. Réinsérez le
réducteur de gras dans la cuve, la cuve dans le tiroir et le panier dans la cuve.
Aussitôt que la cuisson d'un lot d'aliments est terminée, la friteuse est
instantanément prête à cuire un autre lot.
Note
• Répétez les étapes 1 à 14 pour faire cuire un autre lot.
Changer de préréglage pendant la cuisson
1 Appuyez sur le bouton de préréglage ( ). (Fig. 24)
2 Tournez le cadran QuickControl pour sélectionner un autre préréglage. (Fig. 25)
3 Pour conrmer le préréglage sélectionné, appuyez sur le cadran QuickControl.
L'indicateur de temps de cuisson clignote à l'écran. (Fig. 26)
4 Pour changer le temps de cuisson, tournez sur le cadran QuickControl. (Fig. 27)
» Pour conrmer le temps de cuisson sélectionné, appuyez sur le
cadran QuickControl. (Fig. 28)
Utilisation du mode manuel
1 Appuyez sur le bouton de préréglage ( ). (Fig. 24)
2 Tournez le cadran QuickControl pour sélectionner le mode manuel ( ). (Fig. 29)
3 Appuyez sur le cadran QuickControl pour sélectionner le mode manuel. (Fig. 30)
» La température par défaut est 350 °F/180 °C.
4 Pour changer la température, tournez le cadran QuickControl.
» Pour conrmer la température, appuyez sur le cadran QuickControl. (Fig. 31)
5 Lorsque la température est conrmée, l'indicateur de temps « - - » commence à
clignoter.
6 Pour changer le temps de cuisson, tournez sur le cadran QuickControl.
» Pour conrmer le temps de cuisson, appuyez sur le cadran QuickControl.
(Fig. 32)
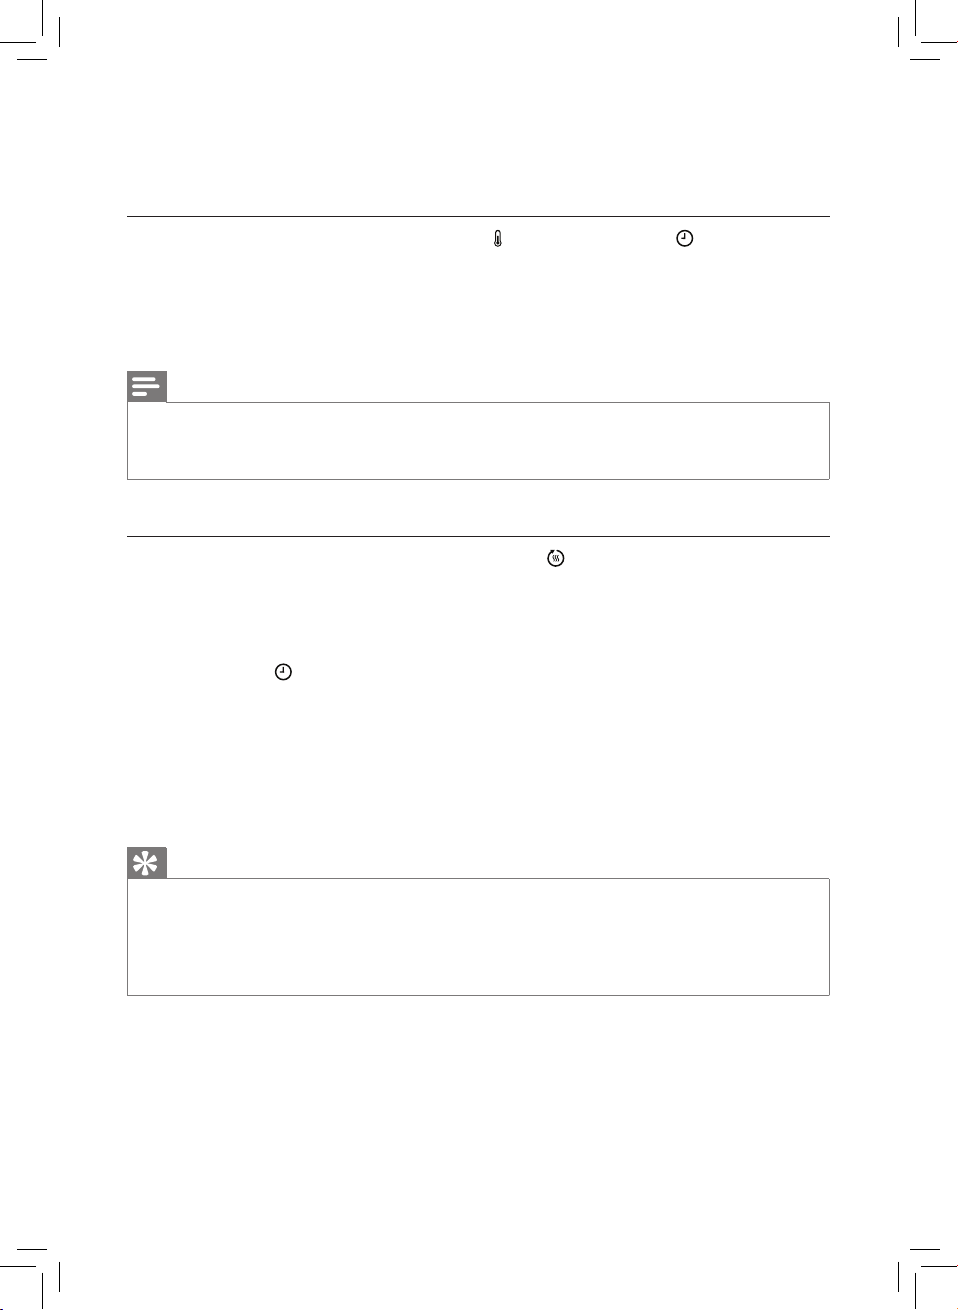
55FRANÇAIS
Modication de la température ou du temps de cuisson en tout
temps.
1 Appuyez sur le bouton de température ( ) ou de la minuterie ( ) (Fig. 33/34).
2 Pour changer la température ou le temps de cuisson, tournez le
cadran QuickControl.
» Pour conrmer la température ou le temps de cuisson, appuyez sur le
cadran QuickControl ou le bouton de température/minuterie de nouveau.
(Fig. 35/36)
Note
• Si vous n'appuyez pas sur le cadran QuickControl ou sur le bouton de
température/minuterie pour conrmer les modications, elles se conrment
automatiquement après 10 secondes.
Sélectionner le mode de maintien au chaud
1 Appuyez sur le bouton de maintien au chaud ( ) (vous pouvez activer le mode
de maintien au chaud en tout temps). (Fig. 37)
» Le bouton maintien au chaud s'allume et pulse.
» La minuterie de maintien au chaud est réglée à 30 minutes. Pour changer
le temps de maintien au chaud (1 à 30 min), appuyez sur le bouton de la
minuterie ( ), tournez le cadran QuickControl, puis appuyez dessus pour
conrmer le réglage (Fig. 38). La température du mode de maintien au
chaud n'est pas réglable.
2 Pour mettre en pause le mode maintien au chaud, appuyez sur le cadran
QuickControl. Pour reprendre le mode maintien au chaud, appuyez de nouveau
sur le cadran QuickControl.
3 Pour quitter le mode maintien au chaud, appuyez sur l'un des boutons
suivants : de préréglage, de température ou de marche/arrêt.
Conseil
• Si les aliments comme les frites perdent trop de leur texture croustillante
durant l'activation du mode de maintien au chaud, vous pouvez soit réduire la
durée de maintien au chaud en éteignant l'appareil plus tôt, soit réchauer les
aliments pendant 2 ou 3 minutes à une température de 180 °C (350 °F) pour
les rendre plus croustillants.
56 FRANÇAIS 56FRANÇAIS
Note
• Si vous activez le mode maintien au chaud pendant la cuisson (le bouton de
maintien au chaud s'allume et pulse), l'appareil gardera les aliments chauds
pendant 30 minutes, une fois le temps de cuisson écoulé.
• Lors de l'activation du mode de maintien au chaud, le ventilateur et l'élément
chauant à l'intérieur de l'appareil fonctionnent par moments.
• Le mode de maintien au chaud est conçu pour garder vos aliments chauds
immédiatement après leur cuisson dans la friteuse Airfryer. Il n'est pas conçu
pour réchauer les aliments.
Cuisson des frites maison
Pour cuire de savoureuses frites maison avec la friteuse Airfryer :
- Choisissez une variété de pommes de terre adaptée à la friture, par exemple
des pommes de terre fraîches Russet.
- Il est préférable de ne cuire les frites que par portions d'un maximum de
1000 g/35 oz pour obtenir un résultat homogène. Les grosses frites sont
généralement moins croustillantes que les frites plus nes.
- Secouez le panier 2 à 3 fois pendant la cuisson.
1 Épluchez les pommes de terre et coupez-les en bâtonnets (grosseur 8 x 8 mm
(5/16 x 5/16")).
2 Faites tremper les bâtonnets de pommes de terre dans un bol rempli d'eau
pendant au moins 30 minutes.
3 Videz le bol, puis séchez les bâtonnets avec de l'essuie-tout ou un linge à
vaisselle.
4 Versez une demi-cuillère à soupe d'huile de cuisson dans le bol, versez les
bâtonnets dans le bol et mélangez jusqu'à ce qu'ils soient enrobés d'huile.
5 Sortez les pommes de terre du bol avec les mains ou un ustensile ajouré, pour
que l'excès d'huile reste dans le bol.
Note
• N'inclinez pas le bol pour verser d'un coup les bâtonnets dans le panier, pour
éviter que l'excès d'huile ne coule dans la cuve.
6 Mettez les bâtonnets dans le panier.
7 Cuisez les bâtonnets de pommes de terre et secouez le panier à mi-cuisson.
Secouez le panier 2 à 3 fois si vous cuisez plus de 500 g/17,6 oz de frites.
Note
• Consultez le chapitre sur le tableau des aliments pour les quantités qui
conviennent et les temps de cuisson.
57FRANÇAIS
Nettoyage
Avertissement
• Laissez le panier, la cuve, le réducteur de gras et l’intérieur de l’appareil
refroidir complètement avant de les nettoyer.
• Retirez le réducteur de gras de la cuve à l’aide de pinces dont l’extrémité est
en caoutchouc. PAS à l’aide des doigts, car des résidus d’huile chaude et de
gras ont été recueillis sous le réducteur de gras.
• La cuve, le panier, le réducteur de gras et l’intérieur de l’appareil possèdent
un revêtement antiadhésif. N'utilisez pas d'ustensiles métalliques de cuisine
ni de matériaux de nettoyage abrasifs, car ils peuvent endommager le
revêtement antiadhésif.
Nettoyez l'appareil après chaque utilisation. Retirez l'huile et le gras du fond de la
cuve après chaque utilisation pour éviter les fumées.
1 Appuyez sur le bouton marche/arrêt ( ) de l'appareil pour l'éteindre, retirez la
che de la prise murale et laissez-le refroidir.
Conseil
• Retirez la cuve et le panier pour que la friteuse Airfryer refroidisse plus
rapidement.
2 Retirez le réducteur de gras de la cuve à l’aide de pinces dont l’extrémité est en
caoutchouc. Jetez les résidus de gras ou d'huile accumulés au fond de la cuve
pendant la cuisson.
3 Nettoyez la cuve, le panier et le réducteur de gras au lave-vaisselle. Vous
pouvez aussi les nettoyer à l'eau chaude avec du liquide vaisselle et une
éponge non abrasive (voir le « tableau de nettoyage »).
Conseil
• Si des résidus restent collés à la cuve, au réducteur de gras ou au panier,
vous pouvez les faire tremper dans de l’eau chaude avec un peu de liquide
vaisselle pendant 10 à 15 minutes. Le trempage déloge les résidus alimentaires
et en facilite le nettoyage. Assurez-vous d'utiliser un liquide vaisselle capable
de dissoudre l'huile et le gras. Si des taches de gras persistent sur la cuve, le
réducteur de gras ou le panier et que vous n’avez pu les faire disparaître avec
de l’eau chaude et du liquide vaisselle, utilisez un dégraissant liquide.
• Si nécessaire, ôtez les résidus collés à l'élément chauant à l'aide d'une brosse
à poils souples ou moyens. N'utilisez pas de brosse métallique en acier ni
de brosse à poils durs, car elles risquent d'endommager le revêtement de
l'élément chauant.
4 Essuyez l'extérieur de l'appareil à l'aide d'un chion humide. (Fig. 39)
Note
• Assurez-vous qu'aucune humidité ne reste sur le panneau de commande.
Essuyez le panneau de commande avec un linge après l'avoir nettoyé.
58 FRANÇAIS
5 Nettoyez l'élément chauant avec une brosse de nettoyage pour éliminer les
résidus de nourriture. (Fig. 40)
6 Nettoyez l'intérieur de l'appareil avec de l'eau chaude et une éponge non
abrasive. (Fig. 41)
Cette lampe ne contient aucune pièce pouvant être réparée par l'utilisateur. Pour
obtenir de l'aide aux États-Unis ou au Canada, composez le 1 866 309-8817.
Entreposage
1 Débranchez l'appareil et laissez-le refroidir.
2 Assurez-vous que toutes les pièces sont complètement propres et sèches avant
de ranger l'appareil.
3 Insérez le cordon d'alimentation dans le compartiment de rangement du
cordon.
Note
• Maintenez toujours la friteuse Airfryer à l'horizontale lorsque vous la portez.
Assurez-vous aussi de retenir le tiroir sur l'avant de l'appareil, car il risque
de glisser si la friteuse est penchée accidentellement vers l'avant. Ceci peut
endommager le tiroir.
• Assurez-vous toujours que les pièces amovibles de l'Airfryer (par exemple,
le fond en maille amovible, etc.) sont xées avant de déplacer ou de ranger
l'appareil.
Mise au rebut
Votre produit a été conçu et fabriqué avec des matériaux et des composants de
grande qualité qui peuvent être recyclés et réutilisés. Pour en savoir plus sur le
recyclage, veuillez communiquer avec les centres de gestion des déchets locaux ou
visiter le site www.recycle.philips.com.
Dépannage
Ce chapitre présente les problèmes les plus courants pouvant survenir avec
votre appareil. Si vous ne parvenez pas à résoudre le problème à l'aide des
renseignements ci-dessous, visitez www.philips.com/support ou composez le
1 866 309-8817 pour obtenir de l'aide (aux États-Unis ou au Canada seulement).
Problème Cause possible Solution
L'extérieur de cet
appareil devient
chaud en cours
d'utilisation.
La chaleur de
l'intérieur irradie vers
les parois extérieures.
Ce phénomène est normal. Les
manches et boutons demeurent
susamment froids pour que
vous puissiez les toucher durant
l'utilisation.

59FRANÇAIS
Problème Cause possible Solution
La cuve, le panier, le réducteur
de gras et l’intérieur de l’appareil
chauent toujours lors de la mise en
marche de l’appareil pour permettre
la cuisson des aliments. Ces pièces
sont toujours trop chaudes pour les
toucher.
Si vous laissez l'appareil allumé
durant une longue période, certaines
zones deviennent brûlantes. Ces
zones sont marquées sur l'appareil
avec l'icône suivante :
Tant que vous êtes conscient de la
présence des zones brûlantes et que
vous évitez de les toucher, l'appareil
est sans danger.
Mes frites maison
ne cuisent
pas comme je
l'espérais.
Vous n'avez pas utilisé
la bonne variété de
pommes de terre.
Pour obtenir les meilleurs résultats,
utilisez des pommes de terre fraîches
Russet. Pour conserver les pommes
de terre, ne les rangez pas dans une
zone froide, telle qu'un réfrigérateur.
Choisissez des pommes de terre dont
l'emballage indique qu'elles sont
adaptées à la friture.
La quantité d'aliments
dans le panier est trop
grande.
Suivez les directives de ce manuel
d'utilisation pour préparer des frites
maison (voyez le tableau des aliments
ou téléchargez l'application Airfryer
gratuite).
Il peut être nécessaire
de mélanger la
préparation à mi-
cuisson pour certains
types d'aliments.
Suivez les directives de ce manuel
d'utilisation pour préparer des frites
maison (voyez le tableau des aliments
ou téléchargez l'application Airfryer
gratuite).
La friteuse
Airfryer ne
s'allume pas.
L'appareil n'est pas
branché.
Lorsque vous allumez l'appareil, vous
entendez le bruit du ventilateur qui se
met en marche. Si vous ne l'entendez
pas, vériez d'abord que la che est
correctement branchée sur la prise
murale.
Plusieurs appareils
sont branchés sur la
même prise.
La friteuse AirFryer est dotée d’une
haute puissance en watts. Essayez
une autre prise et vériez les fusibles.

60 FRANÇAIS
Problème Cause possible Solution
Je vois quelques
zones qui se
décollent de
l'intérieur de mon
Airfryer.
Certaines petites
taches apparaissent
dans la cuve de
l'Airfryer à cause
de frottements
accidentels sur le
revêtement (par
exemple lors du
nettoyage avec un
outil agressif ou
pendant l'insertion et
le retrait du panier).
Pour éviter les dommages, descendez
correctement le panier dans la cuve.
Si vous insérez le panier de biais, ses
arêtes peuvent frotter sur la paroi de
la cuve et arracher de toutes petites
parties du revêtement. Si cela se
produit, sachez que ce n'est pas nocif
pour la santé, car tous les matériaux
utilisés sont de qualité alimentaire.
De la fumée
blanche
s'échappe de
l'appareil.
Vous cuisinez des
ingrédients gras et le
réducteur de gras n’est
pas dans la cuve.
Versez avec précaution l’excédent
d’huile ou de gras de la cuve, placez
le réducteur de gras dans la cuve,
puis poursuivez la cuisson. (Fig. 4)
La cuve contient des
résidus de graisse de
l'utilisation précédente.
La fumée blanche est produite par
des résidus gras qui s'échauent
dans la cuve. Nettoyez toujours la
cuve, le panier et le réducteur de
gras soigneusement après chaque
utilisation.
La chapelure ou
l'enrobage ne colle
pas correctement aux
aliments.
De la chapelure qui s'envole peut
causer une fumée blanche. Pressez
fermement la chapelure et l'enrobage
sur les aliments pour bien les coller.
La marinade, le
liquide et le jus de
viande provoquent
des éclaboussures
en tombant dans
les résidus de gras
produits.
Asséchez bien les aliments avant de
les placer dans le panier.
Mon écran
ache 5 tirets,
comme illustré
dans l'image ci-
dessous.
Le dispositif de
sécurité a été activé en
raison d'une surchaue
de l'appareil.
Débranchez l'appareil et laissez-le
refroidir pendant 1 minute avant de le
brancher à nouveau.