Loading ...
Loading ...
Loading ...
16 17
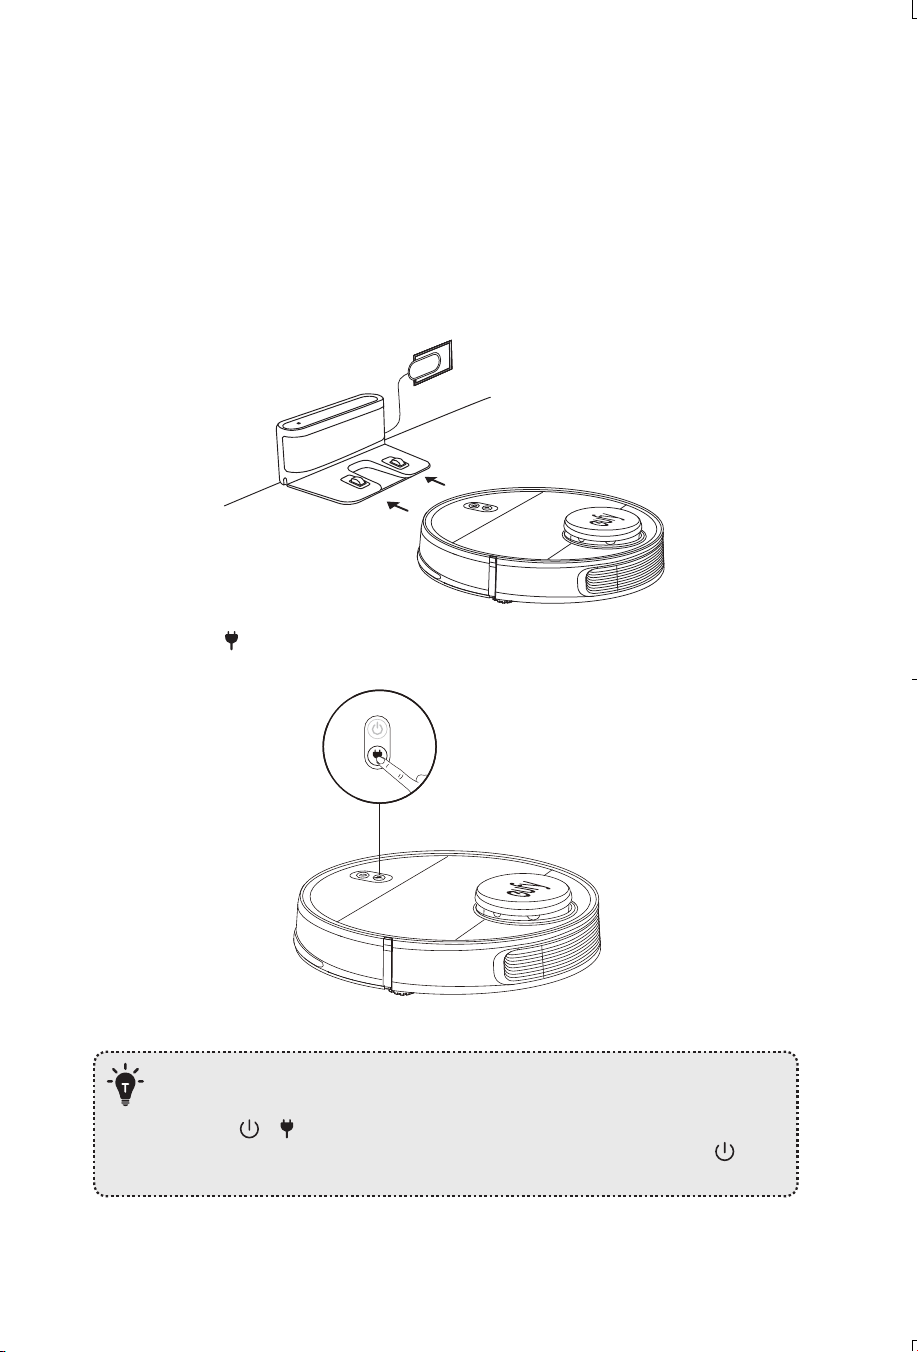
5. Insert the Charging Base into the waterproof pad to keep the floor dry. Make sure it is
firmly installed. If mopping is not needed, you can skip this step.
6. Connect the adapter to a wall outlet.
LED Indicator on
Charging Base
Status
Solid white
Charging Base connected to power source (When RoboVac is not
docked)
Off RoboVac properly connected to Charging Base
- Install the Charging Base in a location that RoboVac can easily access. It is
recommended to place the Charging Base against a wall, and on a hard-level
surface rather than on rugs or carpets.
- Always keep the Charging Base plugged in, otherwise RoboVac will not
automatically return to it.
- To ensure proper charging, do not frequently move the Charging Base. When
its location is changed, RoboVac may remap due to failure in relocalization
(see About Your RoboVac > Map Navigation and Management for details).
Charge Your RoboVac
• RoboVac has a pre-installed rechargeable battery that has to be fully charged before use.
• RoboVac will return to the Charging Base at the end of a cleaning cycle or when its
battery is running low.
Method 1: Attach RoboVac to the Charging Base by aligning its charging pins with the
charging pins on the base.
Method 2: Press on the main unit to send RoboVac to the Charging Base.
- To preserve the battery’s lifespan, recharge at least once every 6 months.
- To enter Reduced Power Standby mode when RoboVac is being charged, press
and hold
& simultaneously on RoboVac for 20 seconds until the Power
Status Lights turn off. Wi-Fi is disabled while this mode is active. Press to
exit Reduced Power Standby mode.
Loading ...
Loading ...
Loading ...