Loading ...
Loading ...
Loading ...
31
/3&RQYHUVLRQ,QVWUXFWLRQV
• With the installation of this conversion kit, the
cooktop should operate on LP gas at 10” of water
column pressure.
• The pressure regulator must be connected in series
with the manifold of the cooktop and must remain in
series with the supply line. For proper operation, the
maximum inlet pressure to the regulator must be no
more than 14” water column pressure for LP gas.
• When checking the regulator, the inlet pressure
must be at least 1” greater than the regulator output
setting. If the regulator is set for 10” of water column
pressure, the inlet pressure must be at least 11”.
,03257$17² Disconnect the cooktop and
the individual shut-off valve from the gas supply piping
system during any pressure testing of that system at test
pressures greater than 1/2 psig. Isolate the cooktop from
the gas supply piping system by closing the individual
manual shut-off valve to the cooktop during any pressure
testing of the gas supply piping system at test pressures
equal to or greater than 1/2 psig.
*$66833/<
BEFORE YOU BEGIN, TURN OFF THE GAS SUPPLY AT THE
SHUT-OFF VALVE. DISCONNECT THE ELECTRICAL SUPPLY
FROM THE COOKTOP.
78512))*$6$1'
(/(&75,&6833/<
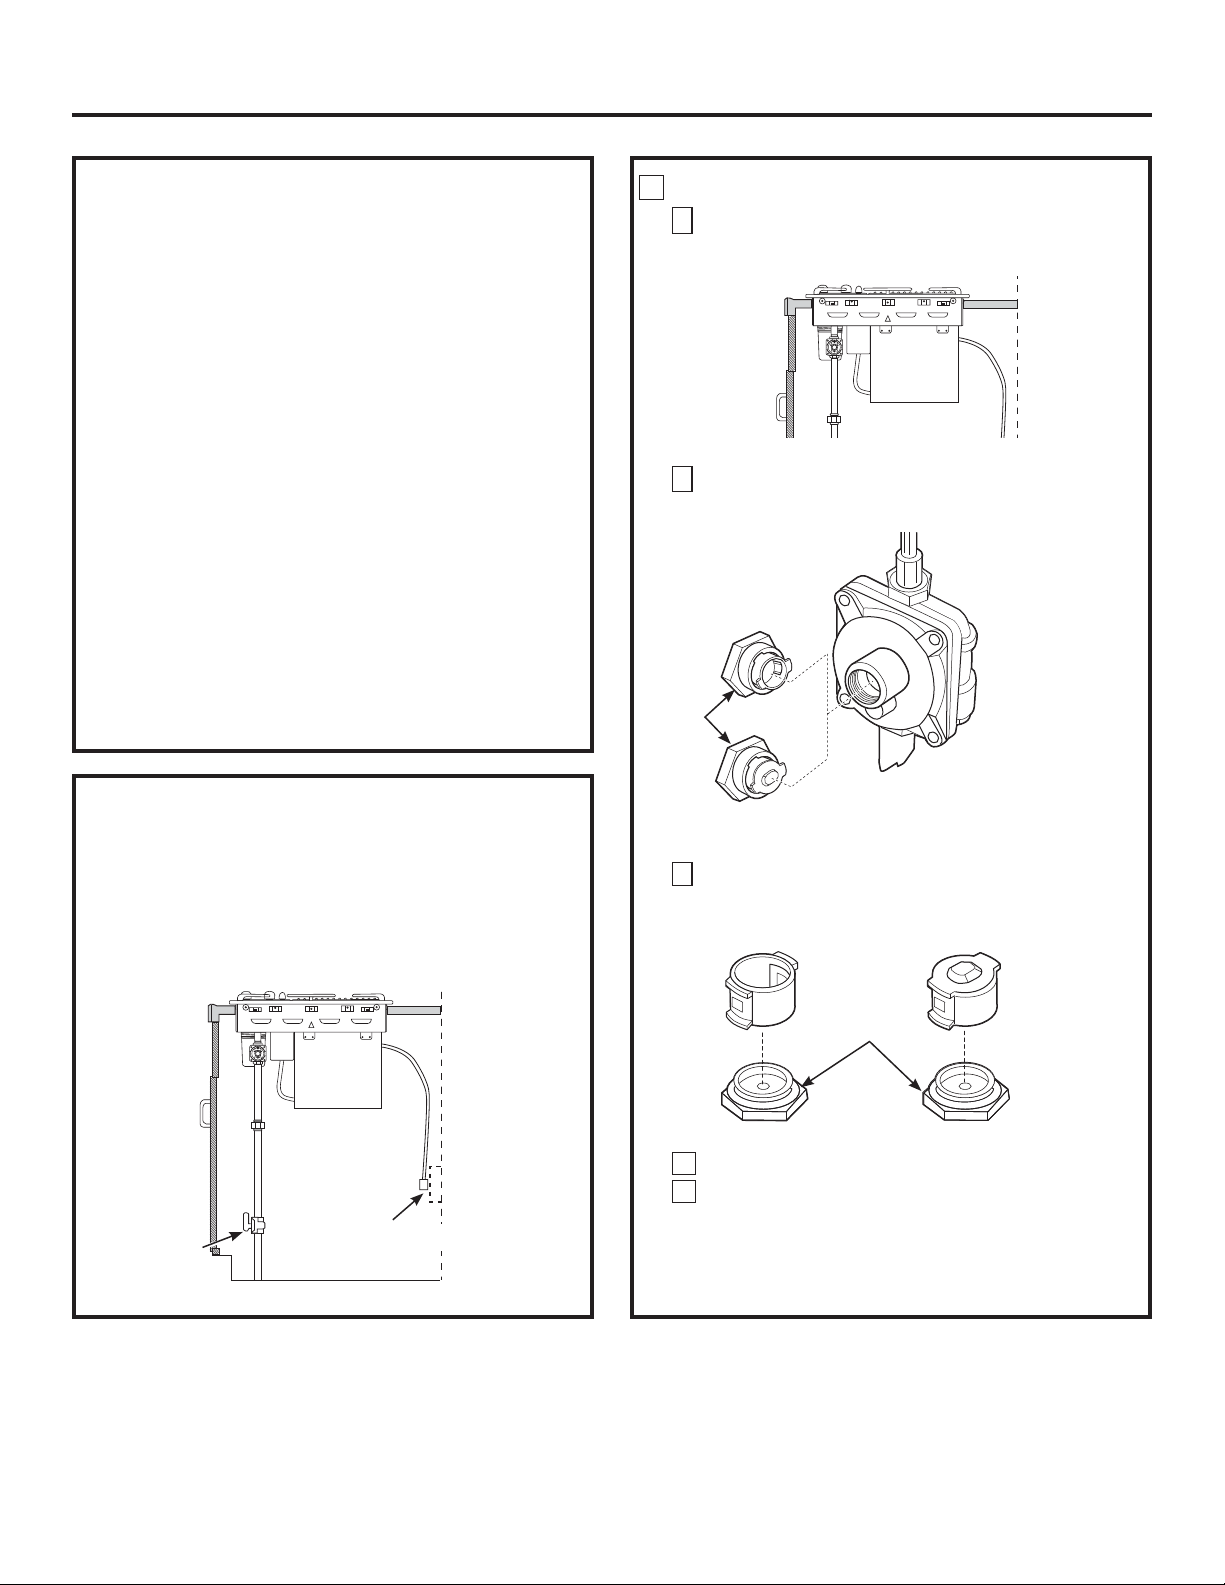
&219(577+(35(6685(5(*8/$725
A
Locate the pressure regulator under the front of the
cooktop.
1
B
Remove the nut from the pressure regulator with an
adjustable wrench.
C
Twist and remove the conversion plug from the inside
of the nut. Flip the conversion plug over; then insert,
twist and lock it back into place in the nut.
D
Reinstall the nut onto the regulator.
E
Apply the LP Conversion label next to the Rating
Plate.
Shut-off valve
Electrical supply
Nut
Natural gas
LP gas
Nut
Natural gas LP gas
Loading ...
Loading ...
Loading ...