Loading ...
Loading ...
Loading ...
10 English
Before you start
Before you start
Rotisserie spit * The rotisserie spit is used for grilling food such as chicken.
Use the rotisserie spit only in Single mode at level 3 where
the spit adapter is available. Unscrew the spit handle to
remove while grilling.
Rotisserie spit
and Shashlik *
Put the tray at rack position 1 to collect cooking juices, or
on the bottom of the oven for a large serving of meat. It is
recommended to use the spit accessories for meat under
1.5 kg.
1. Insert the spit into the meat. To help insert the spit, screw
the spit handle toward the blunt end.
2. Put parboiled potatoes and vegetables around the meat.
3. Put the cradle at the middle tray position with the “V”
shape to the front. Rest the spit onto the cradle with the
pointed end backward and gently push until the tip of
the spit enters the turning mechanism at the back of the
oven. The blunt end of the spit must rest on the “V” shape.
(The spit has two lugs which should be nearest to the
oven door so to stop the spit going forward, the lugs also
act as a grip for the handle.)
4. Unscrew the handle before cooking.
5. After cooking, screw the handle back to help remove the
spit from the cradle.
WARNING
Make sure that the rotisserie handle is seated properly.
Be careful when using the rotisserie. The forks and pins are
pointed and sharp, which can cause physical injury!
To prevent burns, use gloves to remove the rotisserie
because it is very hot.
Telescopic rails * Use the telescopic rail plate to insert the tray as follows:
1. Stretch the rail plate out from the oven.
2. Put the tray on the rail plate and slide the rail plate into
the oven.
3. Close the oven door.
NOTE
Availability of accessories with an asterisk (*) depends on the oven model.
Accessories
For rst time use, clean the accessories thoroughly with warm water, detergent
and a soft clean cloth.
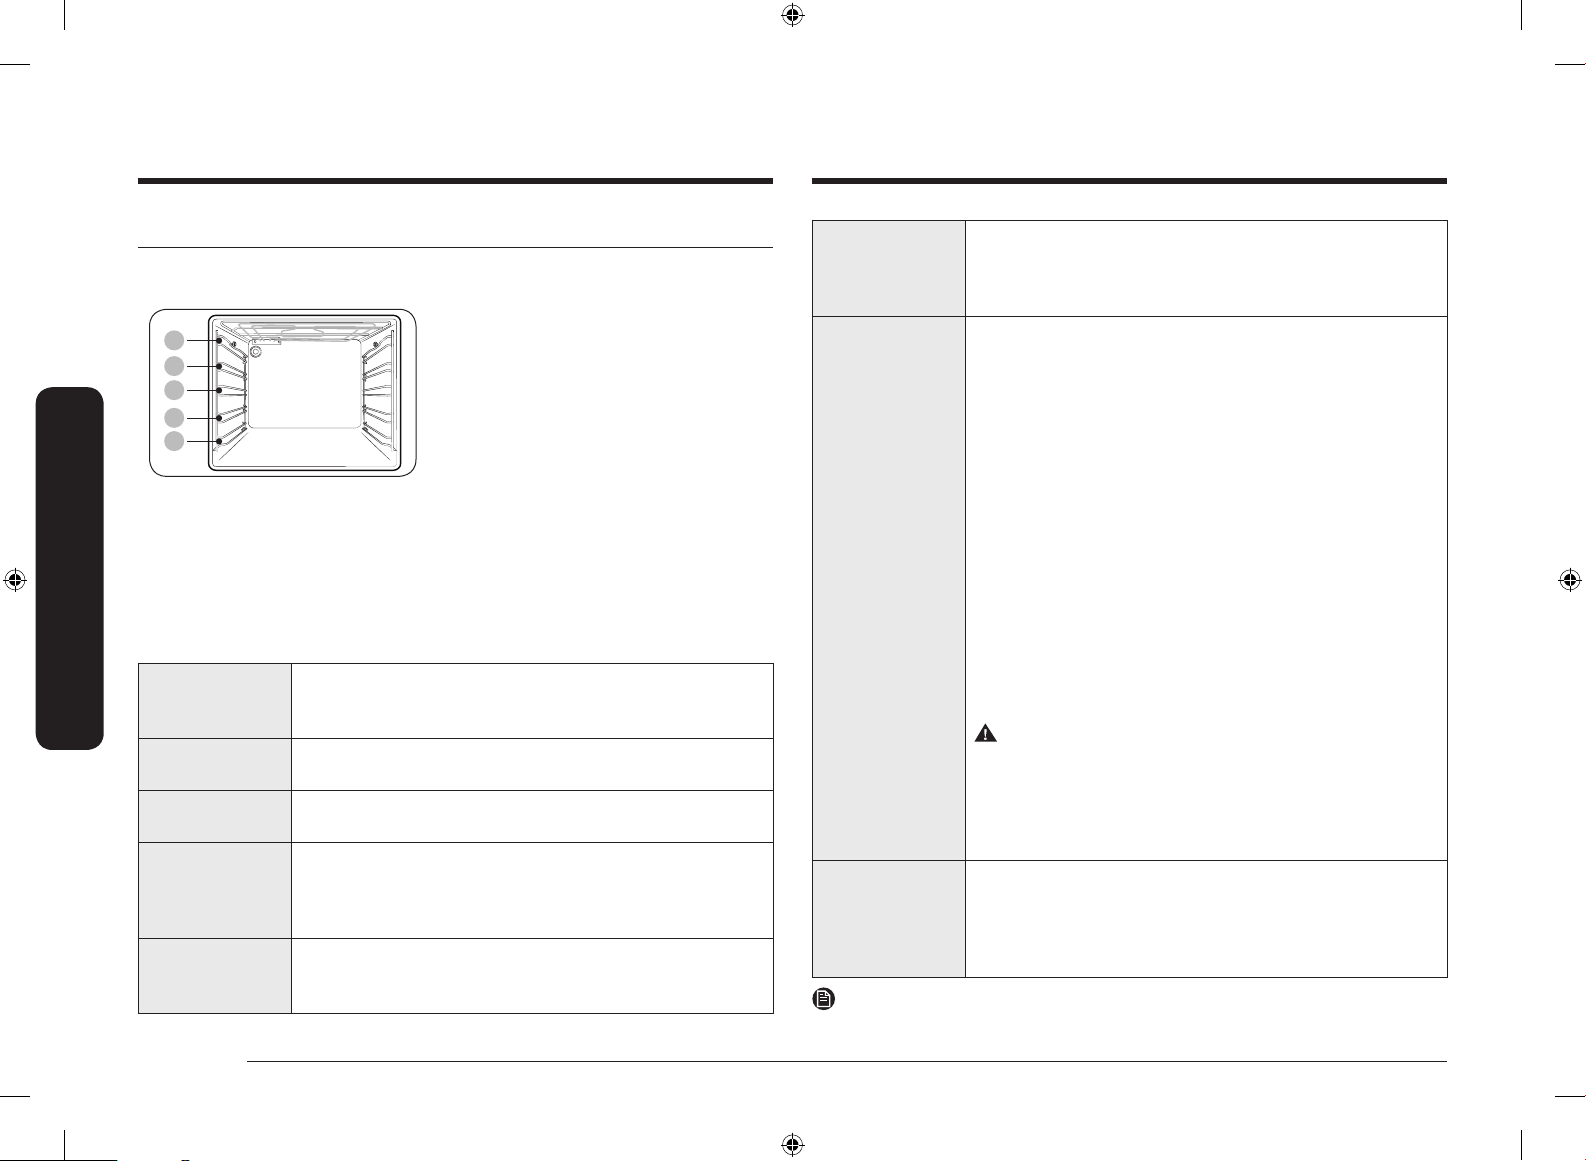
05
04
03
02
01
01 Level 1 02 Level 2
03 Level 3 04 Level 4
05 Level 5
• Insert the accessory to the correct position
inside of the oven.
• Allow at least a 1 cm space from the
accessory and the bottom of the oven, and
from any other accessory.
• Take caution in removing cookware and/or
accessories out of the oven. Hot meals or
accessories can cause burns.
• The accessories may be deformed while
they are gaining heat. Once they have
cooled down, they will recover their
original appearance and performance.
Basic use
For better cooking experience, familiarise yourself with how to use each accessory.
Wire rack The wire rack is designed for grilling and roasting. Insert the
wire rack into position with the protruding parts (stoppers
on both sides) towards the front
Wire rack insert * The wire rack insert is used with the tray, and prevents
liquid from dropping onto the bottom of the oven.
Baking tray * The baking tray (depth: 20 mm) is used to bake cakes,
cookies, and other pastries. Put the slanted side to the front.
Universal tray * The universal tray (depth : 30 mm) is used for cooking and
roasting. Use the wire-tray insert to prevent liquid from
dropping onto the bottom of the oven.
Put the slanted side to the front.
Extra-deep tray * The extra-deep tray (depth: 50 mm) is used for roasting with
or without the wire-tray insert. Put the slanted side to the
front.
NV70K2340RS_EU_DG68-00758A-04_EN.indd 10 2018-04-27 12:21:47
Loading ...
Loading ...
Loading ...