Loading ...
Loading ...
Loading ...
13
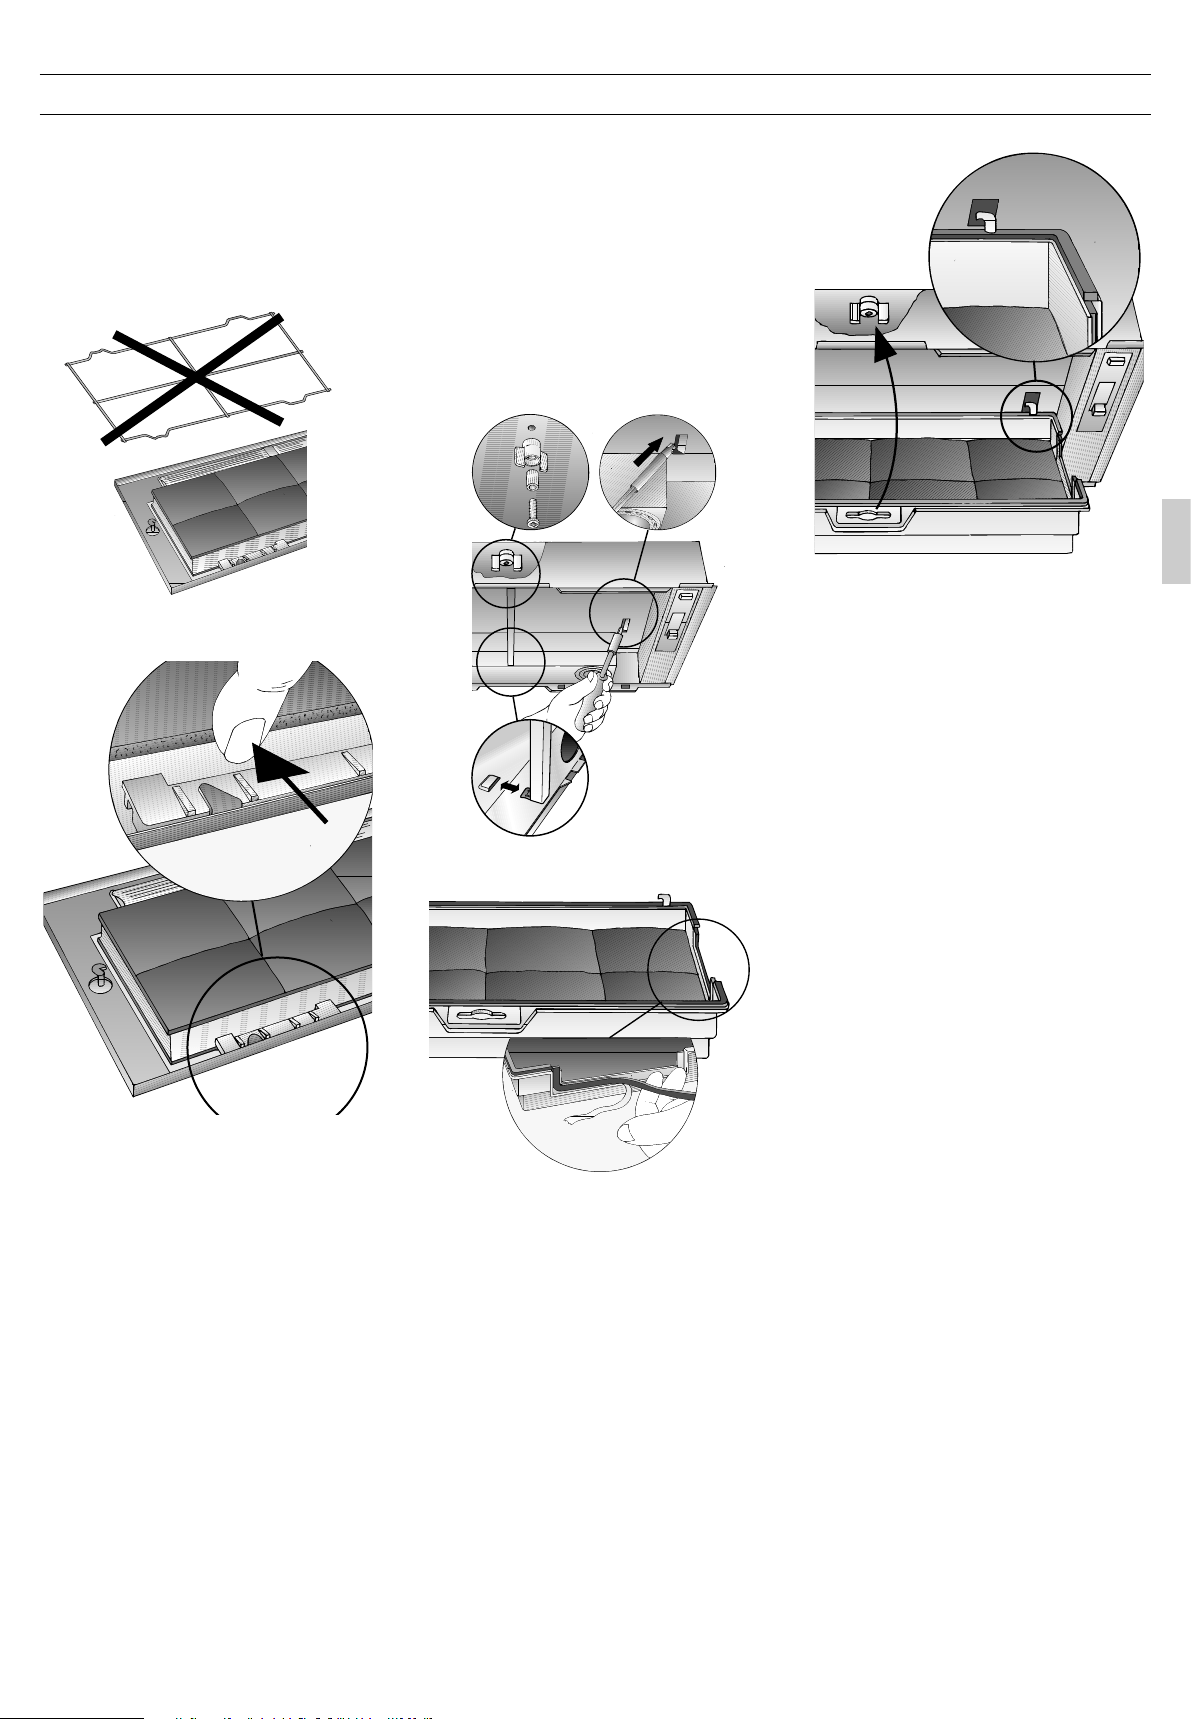
Removing and installing the activa-
ted carbon filter
Extractor hoods with afilter mat:
1. Remove the filter; see grease filter.
❑ The wiregrille is no longer required
when
an activatedcarbon filter is
installed.
2. Place the activated carbon filter on the
filter mat and clamp it in.
3. Install the filter frame.
❑ See grease filter.
Extractor hoods with two filter cartridges:
1.
Remove the filter cartridge.
❑ See grease filter.
2. Insert the screw through the wing nut
and the sleeve and screw in the middle
screw in the false bottom (required only
during the initial installation). Screw,
sleeve and wing nut areenclosed with
the activated carbon filter.
3. Using ascrewdriver,press in the two
lugs on the false bottom. If aspacer rail
has been installed, it must be removed.
4. Tape over the activatedcarbon filter with
the enclosed sealing strip.
5. Insert the activated carbon filter at the
rear,fold up and lock in the middle with the
wing nut. If the spacer rail has been remo-
ved, it must be re-installed.
Activated carbon filter
6. Re-insert the two filter cartridges.
Removing the activated carbon filter:
❑ The activated carbon filter is removed in
reverse sequence.
Changing the activated carbon filter:
If used normally (1 to 2hours daily), the
activated carbon filter should be changed
approx. once ayear.
Activated carbon filters can be purchased
from SPECIALIST OUTLETS (see optional
accessories on the last page).
Use original filters only. This will ensure
optimum performance.
Disposing of the old activated carbon
filter:
Activated carbon filters do not contain any
pollutants. They can be disposed of e.g. as
residual waste.
Loading ...
Loading ...
Loading ...