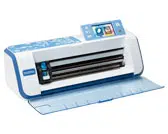
Allows you to control the unit and specify settings with the LCD panel and operating buttons. The angle of the operation panel can be adjusted.
2. Tool Tray
Stores accessories for easy access during use.
3. Carriage
Moves the installed holder for cutting or drawing.
4. Scanner Lever
Adjusted according to the operation being performed. For details, see “Preparing for Feeding the Mat” on page 9.
5. Grips
Grasped when moving the machine.
6. Feed Rollers
Should be adjusted on the right side when the optional roll feeder is used. For details, see “Adjusting the Position of the Feed Roller” on page 94.
7. Shaft
Drives a feed roller on each end to feed the mat.
8. Feeder Release Lever
Locks or releases the shaft when the optional roll feeder is used. For normal operations, set to the locked position. For details, see “Adjusting the Position of the Feed Roller” on page 94.
9. Tool Holder
Holds accessories upright for easy access during use.
10. Storage
Stores accessories.
11. Front Tray Cover
Protects the feed rollers, carriage and holder. Open the cover while the machine is operating.
12. Feed Slot
Feeds in the mat when it is loaded.
1. Holder
Installs in the carriage to cut or draw on craft paper or fabric. Use the holder designed specifically for cutting or drawing.
2. Holder Guide
The guide secures the holder.
3. Holder Lock Lever
Releases the holder when the lever is raised. Locks the holder when the lever is lowered.
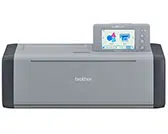
Unit Descriptions - Rear
1.USB Port (for a USB flash drive)
Allows a USB flash drive to be connected for saving and recalling data.
2. USB Port (for a computer)
Allows a USB cable to be connected for saving and recalling data. For Computers and Operating Systems, see “Connecting Your Machine to the Computer” on page 56.
3. Scanner Glass (inside of machine)
Can be maintained after the rear tray has been removed. For details, see “Cleaning the Scanner Glass” on page 91.
4. Slot
Allows a mat to be fed back and forth during an operation. Do not place any objects near the slot that would prevent the mat from being fed out.
5. Rear Tray
Supports the mat when it is fed out of the slot during operation. Be sure to pull out this tray before using the machine.
6. AC Power Jack
7. AC Power Cord
Unit Descriptions - Operation Panel
1.LCD Panel
Displays operation screens, preview images of patterns and error messages.
2. Power Button
Turns the machine on/off.
3. Power Indicator
Lights up when the machine is turned on, and flashes when the machine enters the sleep mode (powersaving mode) or the machine’s software is being updated.
4. Home Button
Displays the home screen (starting screen for operating this machine).
5. Feed Button
Feeds the loaded mat in to or out from the feed slot. Be sure to press this button to feed the mat when loading or unloading it.
6. Pause/Stop
Button Stops or pauses operation being performed by the machine.
Included Accessories
For details on the included accessories, refer to the “Included Accessories” insertion.
SCANNING FOR CUTTING
A printed image (paper/sticker), stamped paper or an original hand-drawn illustration can be scanned and its outline can be cut out or drawn. This is useful for scanning images for paper crafts, then cutting them out.
Tutorial 3 - Scanning and Cutting
In this tutorial, we will scan an illustration drawn on paper, then cut around it.
■ Preparation
1.Prepare the original.
When using the “Direct Cut” mode, use originals like those described below.
• Patterns that are clearly drawn, with no gradation, fading or blurriness
• Not using an extremely intricate design
2. Press to turn on the machine.
• For details, see “Turning On/Off the Machine” on page 8.
3. Install the cutting blade holder into the carriage of the machine.
• For details, see “Installing and Uninstalling the Holder” on page 24.
■ Scanning
Depending on the color of the illustration, it can be scanned in grayscale or color recognition mode.
1.Touch the “Scan” key in the home screen to select the scanning mode.
2. Select “Direct Cut” in the scanning mode selection screen.
3. In the selection screen for the cutting data destination, touch
4. Select the scanning mode according to the material to be scanned.
• First, test with grayscale recognition mode. If the desired cutting data is not created, test with color recognition mode
5. Attach the original that will be scanned to the mat.
6. While holding the mat level and lightly inserting it under the feed rollers on the left and right sides of the feed slot, press in the operation panel.
• For details, see “Loading the Mat” on page 26.
7. Touch the "Start" key to start scanning.
• When the scanner lever is raised, the following message appears.
Scanning with the lever raised may result in blurry scans.
■ Creating Cutting Data
The procedure for creating cutting data differs depending on the mode.
Grayscale recognition mode
1.Check the scanned image, and then touch the “OK” key.
2. In the image trim screen, use the touch pen to drag to trim the image to the size to be imported.
• When trimming is performed, the “OK” key changes to the “Preview” key.
If cutting lines are created, the outline of the scanned illustration will be black.
3. Touch the “Preview” key to confirm the trimmed area.
4. Touch the “OK” key in the mat layout screen.
• Touch the “Edit” key to fill patterns or make outlines thicker. For details, see “Using Drawing Functions to Fill Patterns/Make Outlines Thicker” on page 67. In addition, a pattern can be deleted, or multiple patterns can be selected. For details on selecting multiple patterns, see “Selecting Multiple Patterns” on page 38.
• Touch or to edit the imported cutting data. For details, see “Advanced Cutting Functions for “Direct Cut”” on page 73.
5. Select “Cut” in the preview screen.
6. Touch the "Start" key to start cutting.
• For details on unloading the mat after cutting, follow the procedure under “Unloading the Mat” on page 27.
Color recognition mode
1.In the image trim screen, use the touch pen to drag to trim the image to the size to be imported, and then touch the “OK” key.
2. Check the imported image in the image editing screen.
3. Touch the “OK” key
• Touch or to edit the imported cutting data. For details, see “Advanced Cutting Functions for “Direct Cut”” on page 73.
• Touch the “Edit” key to fill patterns or make outlines thicker. For details, see “Using Drawing Functions to Fill Patterns/Make Outlines Thicker” on page 67. In addition, a pattern can be deleted, or multiple patterns can be selected. For details on selecting multiple patterns, see “Selecting Multiple Patterns” on page 38.
4. Select “Cut” in the preview screen.
5. Touch the "Start" key to start cutting.
• For details on unloading the mat after cutting, follow the procedure under “Unloading the Mat” on page 27.
Advanced Cutting Functions for “Direct Cut”
■ Outline Distance
Use this function to cut while adding a margin around patterns. Specify the distance from the cutting line to the outline of the scanned image.
Available in the following screen
1.Touch
2. Touch or to change the setting.
■ Outlining and Framing
Any shape can be specified as the cutting line for the scanned image.
Available in the following screen
1. Touch
2. Select the shape of the cutting line
Outlining
Touch this key to create a cutting line that follows the outline of the scanned image.
2. Framing Touch the key for the desired frame to add it to the scanned image and create a cutting line that follows its shape.
• If there are multiple images, a frame can be specified for each image.
3. Previewing
Display a preview of the image together with the cutting line for the selected frame.
CARE AND MAINTENANCE
Cleaning
■ Cleaning the Mat
Cuttings and cut edges of patterns attached to the mat may reduce the mat’s adhesive strength and prevent correct operation. Periodically clean the mat. Using the included spatula, lightly scrape off any cuttings attached to the mat. Strongly rubbing the adhesive side of the mat may damage it.
Use tweezers (available either as optional accessories or commercially) to remove any fabric threads attached to the mat.
Clean the dotted marks on the mat and their surrounding area with a dry cloth.
■ Cleaning the Holder
If material cuttings, lint or dust accumulate in the holder, it may not operate correctly. Clean the holder after every use.
1.Twist off the holder cap to remove it.
2. Using a commercially available brush, clean off cuttings, lint and dust. Specifically clean off lint and dust around the blade. If lint and dust accumulate between the blade and holder, the blade may no longer rotate or the cutting quality may become poor. In addition, clean out any lint and dust that has accumulated in the cap.
3. Attach the holder cap to the holder. For details on attaching the holder cap, see “Installing” on page 88.
■ Cleaning Inside the Machine
If there are vertical lines or blank areas in the scanned image, lint or dust may have accumulated in the machine. The lint may also attach to the surface of the feed rollers, preventing a mat to be loaded or unloaded correctly. Use a soft brush to clean it.
1.Turn off the machine, unplug the power cord from the electrical outlet, and then disconnect the AC power cord from the AC power jack on the back of the machine.
2. Open the front tray cover
3. Remove the holder from the carriage.
4. Use a commercially available brush to clean around the feed slot and the carriage.
Cleaning the Scanner Glass
If there are unwanted vertical lines in the scanned image or if scanning cannot be done cleanly, the scanning area of the scanner may have become dirty. Clean the scanner glass inside the machine.
1. Turn off the machine, unplug the power cord from the electrical outlet, and then disconnect the AC power cord from the AC power jack on the back of the machine.
2. Store away the operation panel
3. Turn the machine upside down, and then pull out the rear tray
4. Pull the rear tray release lever (at the bottom of the machine), and then remove the cover. Pull out the rear tray to remove it together with the cover.
5. Dampen a soft lint-free cloth with water and firmly wring it out, and then wipe the scanner glass inside the machine.
6. Attach the cover to the machine.
• Push in the cover until it snaps into place.
7. Push in the rear tray.
8. After cleaning, perform a test scan.
Adjusting the Screen
If the screen does not respond correctly when you touch a key (the machine does not perform the operation or performs a different operation), follow the steps below to make the proper adjustments
1.Holding your finger on the LCD screen, turn the main power to off and back to on. Keep your finger on the LCD screen, until Brother logo disappears.
The touch panel adjustment screen is displayed.
2. Using the included touch pen (stylus), lightly touch the center of each +, in order from 1 to 5. If an error occur when touching +, start again from number 1.
After completing the touch panel adjustment, the message “SUCCESS” appears on the screen.
3. Turn the main power to off, then turn it back to on.
Adjusting the Scanning/Cutting Position
In “Direct Cut” mode, the cutting position can be automatically adjusted if it has shifted. For details on the “Direct Cut” mode, see “SCANNING FOR CUTTING (Direct Cut)” on page 69.
■ Materials
Paper
Thick paper
Color: White
Size: A4 size (210 mm × 297 mm) or
Letter size (216 mm × 279 mm)
Thickness: 0.2 to 0.3 mm (recommended)
Mat
Mat suitable for the material (See page 14.)
Cutting blade
Auto Blade Holder (black)
1.Insert the holder into the carriage.
• For details, follow the procedures under “Installing and Uninstalling the Holder” on page 24.
2. Attach the paper to the mat.
• Align the upper-left corner of the paper with the upper-left corner of the mat.
• For details on attaching the paper, follow the procedure under “Attaching the Material (Paper)” on page 16.
3. Touch the “Scanning/Cutting Position Adjustment” button in the settings screen.
The following message appears.
• Touch the “OK” key.
4. Pressto feed in the mat.
• For details, see “Loading the Mat” on page 26.
5. After making sure that the scanner lever (on the left side of the machine) is lowered to “1”, touch the “Start” key to start cutting.
See “Cutting” on page 26.
Position adjustment cuts are cut, and then the cuts are scanned.
• Using the intersecting cuts on the left and right sides, the scanning position is automatically adjusted.
6. The adjustment results screen appears.
• If the center of the cut aligns with the center of the red circle, the position is properly adjusted. Touch the “Yes” key, and then continue with step 7.
• If the center of the cut does not align with the center of the red circle, the position is improperly adjusted. Touch the “No” key, replace the paper attached to the mat, and then repeat steps 4 through 6 to readjust the position.
7. When the following message appears, touch the “OK” key.
The adjustment is finished.
• To return the settings to their defaults, touch the “Reset” key in the screen shown below.
8. Use “Direct Cut” mode to check the adjustment results.
• For details on the “Direct Cut” mode, see “SCANNING FOR CUTTING (Direct Cut)” on page 69.
Adjusting the Position of the Feed Roller
For normal operations (when the optional roll feeder is not used), it is not necessary to adjust the position of the feed roller. If the feed roller is inadvertently moved, follow the procedure below to return it to its original position.
For details on using the roll feeder, refer to the manual included with it.
1.Pull the feeder release lever toward you to release the shaft.
2. Rotate the feed roller lock dial toward the back to unlock the feed roller, and then move the feed roller to the mark.
3. Rotate the feed roller lock dial toward you to lock the feed roller, and then push the feeder release lever to the position.
TROUBLESHOOTING
Please pay attention to all applicable safety warnings when referring to the sections cited below.
If the machine stops operating correctly, check the following possible problems before requesting service.
You can solve most problems by yourself. If you need additional help, the Brother Solutions Center offers the latest FAQs and troubleshooting tips.
If the problem persists, contact the retailer who sold you this machine or the nearest authorized service center. For wireless network troubleshooting, refer to “Wireless Network Setup Guide”.
Power Supply
Symptom
Possible Causes (or Results)
Solutions
Reference
The machine cannot be turned on.
The AC power cord is not correctly connected to the machine.
Check that the power cord is connected to the electrical outlet.
page 8
Mat
Symptom
Possible Causes (or Results)
Solutions
Reference
The mat cannot be inserted.
When the mat was inserted, it was not placed under the feed rollers.
Insert the mat so that it is placed under the feed rollers on the left and right sides of the feed slot.
page 26
The mat was not loaded using the “Feed” button.
Lightly insert the mat into the feed slot, and then press the “Feed” button.
page 26
The feed roller is not positioned correctly.
Adjust the position of the feed roller.
page 94
The shaft is released.
Lock the shaft.
page 94
The mat cannot be recognized
The dotted marks on the part of the mat that is inserted are dirty.
Clean the dotted marks on the mat and their surrounding area.
page 89
The dotted marks on the part of the mat that is inserted are hidden by material or tape that was attached.
Attach the material or tape while keeping it within the adhesive area of the mat.
page 16
The mat was inserted so that the side with the material attached is facing down.
Insert the mat so that the side with the material attached is facing up.
page 26
The mat was inserted in the wrong direction.
Insert the mat in the correct direction.
page 26
The scanner glass is dirty.
Clean the scanner glass inside the machine.
page 91
A mat designed specifically for this machine is not used.
Replace the mat with one designed specifically for this machine.
—
The mat is fed in at an angle.
The mat was inserted into the feed slot at an angle.
Press the “Feed” button to feed out the mat, and then re-insert it straight in.
page 26 page 27
The corners of the mat are deformed (bent).
Replace the mat with a new one.
page 87
The rear tray is not pulled out.
Pull out the rear tray.
page 7
page 9
The feed roller is not positioned correctly.
Adjust the position of the feed roller.
page 94
The material to be cut/ drawn or original to be scanned cannot be attached to the mat.
The material extends from the adhesive area of the mat.
Attach the material while keeping it within the adhesive area of the mat.
page 16
The mat’s adhesive strength has decreased.
Replace the mat with a new one.
page 87
The mat cannot be fed out.
The material to be cut/drawn or original to be scanned is jammed in the feeding mechanism in the machine.
Press the “Feed” button while the mat is being inserted to feed it out. If the mat does not feed out, turn off the machine, and then carefully pull out the mat.
page 27
When the mat is inserted, the attached material peels off.
The mat is not level due to the weight of the material.
With your hands, hold the mat level when inserting it.
page 26
The mat’s adhesive strength has decreased.
Replace the mat with a new one.
page 87
Paper/Fabric Jam
Symptom
Possible Causes (or Results)
Solutions
Reference
The mat cannot be fed.
There is an obstruction around the slot at the back of the machine.
Maintain space around the slot at the back of the machine so that the mat can be fed out.
page 7
The surface where the machine is installed is uneven.
Place the machine on a flat, even surface.
—
The mat or the material catches on a feed roller when the mat is being inserted.
The mat’s adhesive strength has decreased, or the material is not secured.
Press the “Feed” button to feed out the mat, and then replace the mat with a new one.
page 27 page 87
The material extends from the adhesive area of the mat.
Press the “Feed” button to feed out the mat, and then attach the material while keeping it within the adhesive area of the mat.
page 16 page 27
The thickness of the material exceeds the maximum limit.
Press the “Feed” button to feed out the mat, raise the scanner lever, and then correctly insert the mat.
page 7
page 9
page 27
Press the “Feed” button to feed out the mat, and then change the material to a thin one.
—
The mat or the material catches on a feed roller during cutting/drawing/ scanning.
- The mat’s adhesive strength has decreased, or the material is not secured.
- The material extends from the adhesive area of the mat.
- The rear tray is not pulled out.
Press the “Pause/Stop” button to stop the operation. Follow the instructions on the screen, and press the “Feed” button to feed out the mat.
If the mat does not feed out, turn off the machine, remove the holder, and then manually feed out the mat.
After feeding out the mat, replace it with a new one or attach the material while keeping it within the adhesive area of the mat. Pull out the rear tray, and then insert the mat.
page 7
page 9
page 16
page 27
page 87
The mat is fed in at an angle and is not fed during cutting/drawing/ scanning.
The material to be cut/ drawn or original to be scanned peels off during cutting/drawing/ scanning.
Cutting
Symptom
Possible Causes (or Results)
Solutions
Reference
The material being cut catches on the tip of the cutting blade.
Dust or lint has accumulated in the holder.
Clean the holder.
page 89
The blade is worn.
Replace the blade with a new one.
page 87
The material being cut is incompatible with this machine.
Replace the material with one compatible with this machine.
page 14
The machine stopped while an operation is being performed.
For safety, the machine stops operating if the panel is touched while cutting.
Follow the instructions in the message that appears in the screen. Touch the “OK” key to move the carriage to its initial position. Load the mat and perform the operation again.
—
Not all of the material to be cut is cut. Some areas remain uncut.
A blade appropriate for the material being cut is not used.
Use a blade appropriate for the material being cut.
page 23
If cutting is not possible even though the cutting pressure is set higher than necessary, the blade may be chipped.
Replace the blade with a new one.
page 87
The mat’s adhesive strength has decreased, or the material is not secured.
Replace the mat with a new one.
page 87
The blade is worn.
Replace the blade with a new one.
page 87
The material is incompatible with this machine.
Replace the material with one compatible with this machine.
page 14
The cutting pressure (“Cut Pressure”) is incorrect.
Adjust the setting for “Cut Pressure” in the settings screen.
page 10 page 27
Dust or lint has accumulated in the holder.
Clean the holder.
page 89
The spacing between arranged patterns is too small.
Rearrange the patterns to slightly separate them.
Set the number to “3” or higher in the “Pattern Interval” setting, and then rearrange the patterns or perform the auto layout function.
page 10 page 49
The material or tape extends from the adhesive area of the mat.
Attach the material or tape while keeping it within the adhesive area of the mat.
page 16
Fabric was cut without using a sheet for fabric cutting.
Attach a high tack adhesive fabric support sheet to a mat or affix an iron-on fabric appliqué contact sheet to a fabric before cutting it.
page 17 page 20
A fabric is not firmly attached to a mat that has a high tack adhesive fabric support sheet on its adhesive side.
Firmly attach the fabric to the mat pressing the handle of the included spatula across the surface of the fabric.
page 20
An iron-on fabric appliqué contact sheet is not firmly attached to a fabric.
Iron the entire contact sheet to affix it firmly to the wrong side of the fabric.
page 17
There are deep cuts completely through the mat
The cutting pressure (“Cut Pressure”) is incorrect.
Adjust the setting for “Cut Pressure” in the settings screen.
page 10 page 27
After using a mat with deep cut marks which completely went through the mat, the machine's surface where the blade points down (1) has cut marks.
Contact the retailer who sold you this machine or the nearest authorized service center.
—
Drawing
Symptom
Possible Causes (or Results)
Solutions
Reference
The drawn line is thicker (thinner) than intended.
The drawing speed (“Draw Speed”) or drawing pressure (“Draw Pressure”) is incorrect.
Adjust the settings for “Draw Speed” and “Draw Pressure” in the settings screen. To draw thicker lines, increase the drawing pressure. To draw thinner lines, decrease the drawing pressure. To draw thicker lines, reduce the drawing speed. To draw thinner lines, increase the drawing speed.
After adjusting the settings, perform a test/trial drawing operation.
page 10 page 62
The machine stopped while an operation is being performed.
For safety, the machine stops operating if the panel is touched while drawing.
Follow the instructions in the message that appears in the screen. Touch the “OK” key to move the carriage to its initial position. Load the mat and perform the operation again.
—
Scanning
Symptom
Possible Causes (or Results)
Solutions
Reference
Unwanted images are scanned.
The scanning area is incorrectly specified.
In “Scan to USB” mode, specify the paper size with the “Scan Size” setting.
page 83
In “Direct Cut” or “Scan to Cut Data” mode, trim the image in the editing screen after scanning.
page 71
page 77
Scanning cannot be done cleanly (there are lines in the scanned image).
The scanner glass is dirty.
Clean the scanner glass inside the machine.
page 91
The original to be scanned is dirty or scratched.
In “Direct Cut” or “Scan to Cut Data” mode, remove thin lines or dirt in the image editing screen.
page 81
The lines printed on the mat are scanned.
The original is transparent so the lines printed on the mat are being scanned.
In “Direct Cut” or “Scan to Cut Data” mode, remove the lines in the image editing screen.
page 81
The scanned image is red.
When the optional scanning mat is used, scanning is performed without peeling off the blue tape.
Peel off the blue tape from the optional scanning mat before scanning.
—
The scan image is out of focus
The scanner lever is not correctly positioned for the thickness of the material
Set the scanner lever position to "1".
page 9
ERROR MESSAGES
The following table lists some of the messages that may appear while the machine is operating as well as their corresponding solutions.
Perform the necessary operation according to the instructions in the message or the solution described here. If the problem persists, contact the retailer who sold you this machine or the nearest authorized service center
Error Messages
Causes / Solutions
A malfunction occurred.
Turn the machine off, then on again.
Turn the machine off, then on again.
Cannot operate when there are too many patterns.
The message appears under the following conditions:
- In “Direct Cut” mode, more than the maximum number of patterns have been detected for the cutting pattern.
- In “Scan to Cut Data” mode, more than the maximum number of patterns are being saved as cutting data.
Reduce the number of patterns being used.
* Depending on the machine model, the maximum number of patterns will differ. Check the “Maximum Pattern Number” under “Machine Information” of the settings screen.
- There are too many cutting lines to be created after large number of small patterns are scanned.
- There are too many light tone patterns to be converted to two-tone (black and white) patterns while the image detection level is being adjusted.
Scan images again after reducing the number of patterns arranged in the original.
Cannot operate when there is no pattern.
There is no scanned image or lines for scanning. Recheck the image to be scanned, and adjust the scanning area, image detection level and “Ignore Object Size” settings.
In addition, change the image drawn on the original to one more easily scanned.
Cannot read the data.
Get the PIN code again and register to the machine.
- This message appears when you try to transfer data with a machine different than the one registered with CanvasWorkspace.
- The registration of your machine has been canceled from CanvasWorkspace. Register the machine to be used again.
Cannot save the data.
Get the PIN code again and register to the machine.
Includes a special pattern that cannot be saved to external memory.
Save the pattern in the machine’s memory.
Depending on the pattern, it may not be possible to save it to external memory (USB flash drive or CanvasWorkspace).
Initialization of the blade position failed. Turn the machine off.
Turn the machine off, then on again.
Initialization of the head failed. Turn the machine off.
No more patterns can be added to this combination.
More than the maximum number of patterns are being combined. Reduce the number of patterns.
* Depending on the machine model, the maximum number of patterns will differ. Check the “Maximum Pattern Number” under “Machine Information” of the settings screen.
No pattern in the effective area.
There is no pattern(s) to be cut out or drawn within the cutting area.
To cut out or draw a pattern outside of the area, increase the setting for “Cut Area”, or move the pattern(s) into the area specified with “Cut Area” (page 10).
Not enough available memory to save the data.
Delete a file from the machine’s memory or USB flash drive.
Not enough space on the mat.
Check pattern size, space on the mat, Cut Area (setting) or Pattern Interval (setting).
Perform one of the following to arrange the patterns.
- Delete a pattern already arranged in the mat layout screen.
- Resize a pattern in the arrangement.
- Enlarge the setting for “Cut Area” (page 10).
- Reduce the spacing between arranged patterns using the “Pattern Interval” setting.
Not enough space on the mat.
Max: 10 (example: calculated number)
Since there are too many patterns, they cannot be arranged.
Reduce the number of patterns to the maximum shown on the screen.
OK to retrieve and resume previous memory?
To use data from the previous operation, touch the “OK” key. (page 12)
Pattern cannot be grouped. Invalid pair was selected.
The message appears when you are unifying patterns. Patterns with seam allowances and no seam allowances are selected as pairs. Select patterns, all of which have either seam allowances or no seam allowances.
Patterns cannot be welded.
There are some patterns which cannot accept or no overlaps.
The message appears when you are welding patterns.
- The patterns do not overlap. Rearrange them so the selected patterns overlap. Unifying the pattern, instead, can be an alternative editing method depending on your project.
- A pattern that has a seam allowance is selected. Deactivate the seam allowance setting and weld the patterns.
- An open shape is selected as a pattern. Only closed shapes can be welded. Unifying the pattern, instead, can be an alternative editing method depending on your project.
Replace the mat with 12 × 24 inch mat.
The 12" × 12" mat was loaded although 24-inch data was created. Load the 12" × 24" mat
Scanning error occurred.
Turn the machine off.
Turn the machine off, then on again, and then try performing the operation again.
Since the shape was larger than the mat, it was reduced in size when imported.
If the pattern in the imported SVG file is larger than the mat, the pattern will be reduced to fit the size of the mat. If necessary, in the software used to create the SVG file, edit the pattern to fit the size of the mat.
Some shapes could not be converted.
The imported SVG data contains data that cannot be converted, such as images or text. All other data was read as cutting line data.
The data cannot be deleted.
The USB flash drive being used may not be usable with this machine. If removing the USB flash drive and performing the operation again causes the message to appear again, replace the USB flash drive. For information about USB flash drive compatible with this machine, visit our website
The data cannot be read.
The data cannot be saved.
The data could not be imported.
There are too many patterns.
The message appears when an SVG file contains more than the maximum number of patterns. In the software used to create the SVG file, reduce the number of patterns.
* Depending on the machine model, the maximum number of patterns will differ. Check the “Maximum Pattern Number” under “Machine Information” of the settings screen.
The data is too complicated to be imported.
SVG files containing a complicated pattern cannot be imported. In the software used to create the SVG file, simplify the pattern.
The mat cannot be recognized.
The mat will unload.
A mat that cannot be recognized has been inserted. If a mat designed specifically for this machine is not being used, use the specially designed mat.
Clean the dotted marks at the edge of the mat and their surrounding area. If the mat is still not recognized, replace the mat with a new one.
There are no patterns that can be detected.
The imported SVG data contains data that cannot be converted, such as images or text.
There are some patterns which cannot add seam allowance.
The seam allowance settings cannot be specified for complex pattern shapes. Select a pattern with a simple shape.
Expanding the seam allowance to 2 mm or more may help
There are some patterns which cannot set cutting distance from the outline.
The cutting distance cannot be specified for complex pattern shapes. Select a pattern with a simple shape.
This data is too complicated and cannot be converted.
Complex patterns cannot be welded or filled.
Reduce the number of patterns arranged or change the patterns to ones with simple designs.
This mat cannot be used.
The mat is one that cannot be used with the function being performed. Replace the mat.
(For example, the scanning mat was loaded while trying to cut.)
Cooling Down
The machine has stopped cutting/drawing to cool down the hot part inside the machine.
Leave it for a while then follow the instruction on the screen to restart.
If this message appears often, contact the retailer who sold you this machine or the nearest authorized service center.


 to turn on the machine.


 in the operation panel.
 to trim the image to the size to be imported.


 or
or  to edit the imported cutting data. For details, see “Advanced Cutting Functions for “Direct Cut”” on page 73.


 or
or  to change the setting.


 to feed in the mat.


 mark.
mark. position.