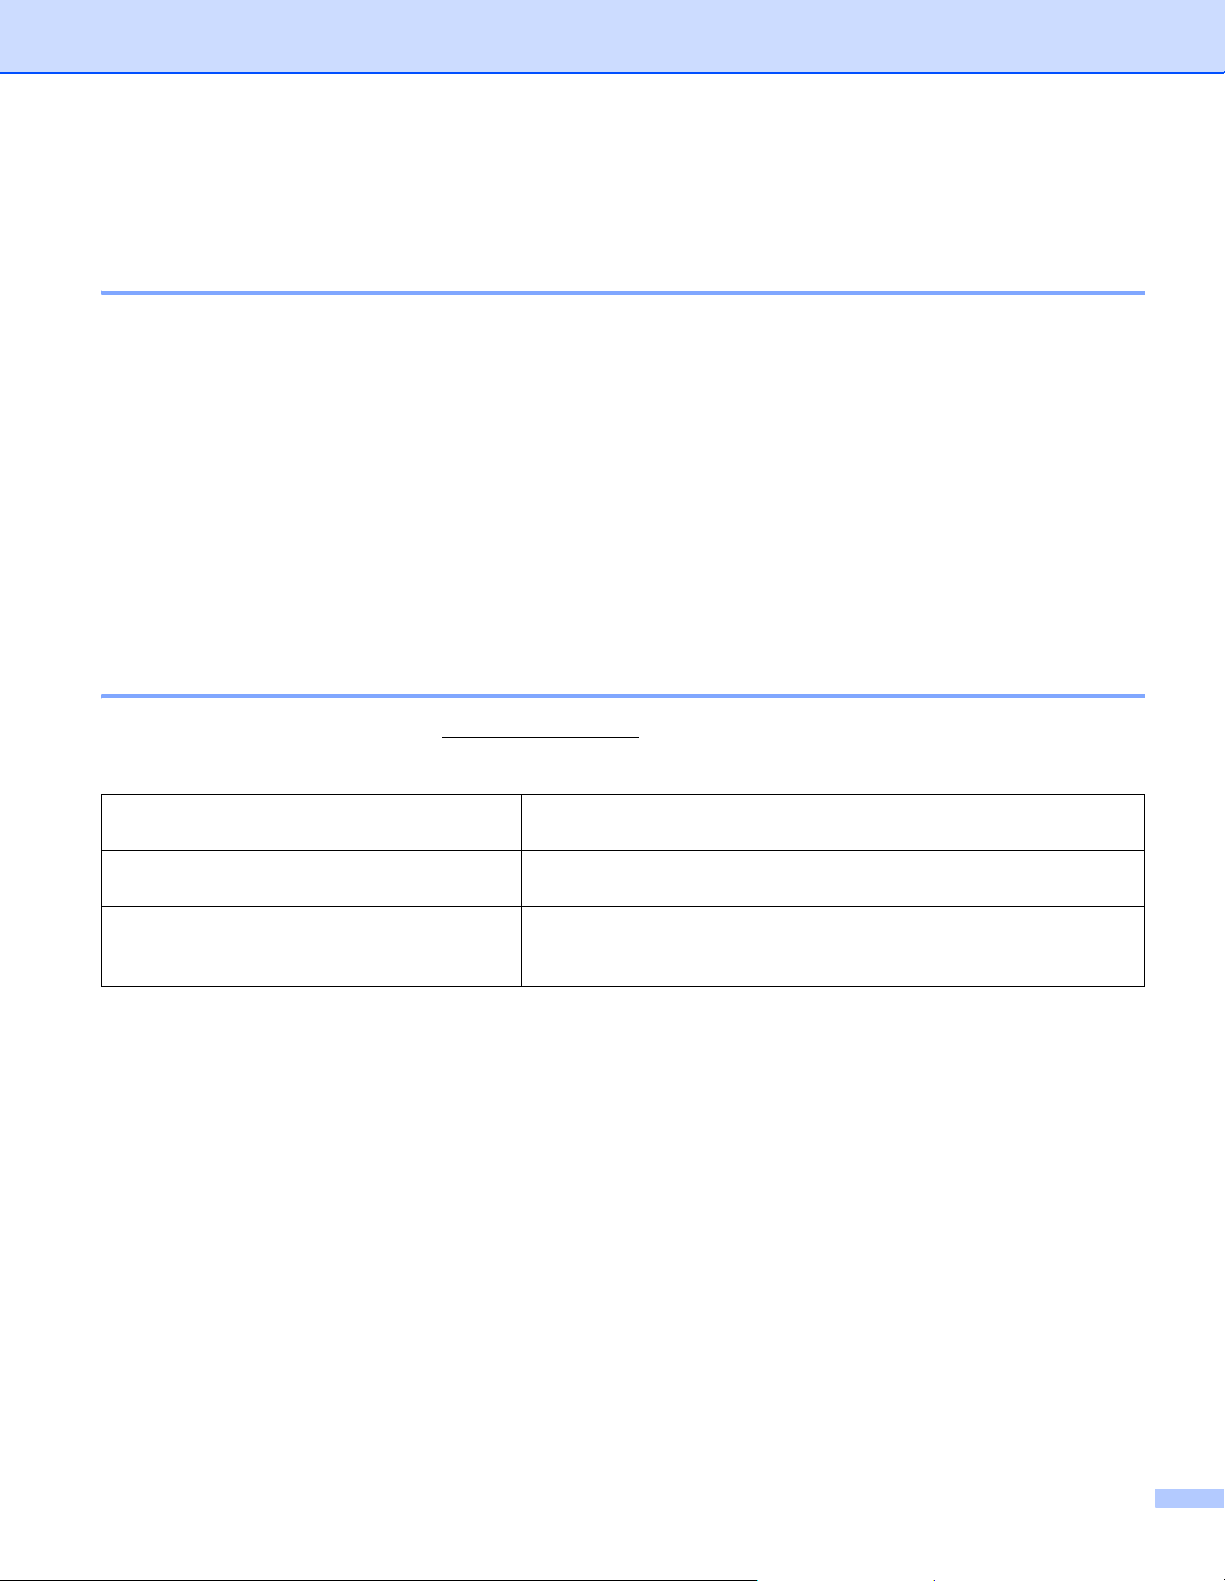
QL-600
Read the Quick Setup Guide, including all Precautions, for the correct
setup procedure. After reading this guide, keep it in a safe place for quick
reference.
Version 01
ENG
User’s Guide
i
Introduction
Important Notice
The contents of this document and the specifications of this product are subject to change without notice.
Brother reserves the right to make changes without notice in the specifications and materials contained
herein and shall not be responsible for any damages (including consequential) caused by reliance on the
materials presented, including but not limited to typographical and other errors relating to the publications.
Screen images in this document may differ depending on your computer's operating system, your product
model, and software version.
Before using the Label Printer, make sure you read all the documents included with the Label Printer for
information about safety and operation.
The Label Printer shown in the illustrations may be different from your Label Printer.
The available supplies may vary depending on the country.
Available Manuals
Visit the Brother support website at support.brother.com and click Manuals on your model page to download
the latest manuals.
1
Printed manual in the box
2
PDF manual on the Brother support website
Product Safety Guide This guide provides safety information; read it before you use the
Label Printer. This information is included in the Quick Setup Guide.
Quick Setup Guide
1
This guide provides safety information and basic information about
using the Label Printer along with troubleshooting tips.
User's Guide
2
This guide provides additional information about the Label Printer
settings and operations, troubleshooting tips, and maintenance
instructions.
ii
Symbols Used in This Guide
The following symbols are used throughout this guide:
IMPORTANT NOTE
This product is approved for use in the country of purchase only. Do not use this product outside the
country of purchase as it may violate the wireless telecommunication and power regulations of that
country.
Not all models are available in all countries.
WARNING
Indicates a potentially hazardous situation which, if the product is handled without
following the warnings and instructions, could result in death or serious injuries.
CAUTION
Indicates a potentially hazardous situation which, if not avoided, may result in minor
or moderate injuries.
IMPORTANT
Indicates information or directions that should be followed. Ignoring them may result
in damage or failed operations.
Note
Indicates notes that provide information or directions that can help you better
understand and use the product more efficiently.
iii
General Precautions
DK Roll (DK Label and DK Tape)
Use only genuine Brother accessories and supplies (with , marks). DO NOT use any
unauthorized accessories or supplies.
If the label is attached to a wet, dirty, or oily surface, it may peel off easily. Before applying the label,
clean the surface to which the label will be applied.
DK Rolls use thermal paper or film that can fade in color or peel off surfaces if exposed to ultraviolet light,
wind, or rain.
DO NOT expose the DK Rolls to direct sunlight, high temperatures, high humidity, or dust. Store in a
cool, dark place. Use the DK Rolls soon after opening the package.
Scratching the printed surface of the label with your finger nails or metal objects, or touching the printed
surface with damp or wet hands can cause the color to change or fade.
DO NOT apply labels to any persons, animals, or plants. In addition, never apply labels to public or
private property without permission.
As the end of the DK Roll is designed to not adhere to the label spool, the last label may not be cut
correctly. If this happens, remove the remaining labels, insert a new DK Roll, and reprint the last label.
Note: To account for this, the number of DK Labels included on each DK Roll may be more than indicated
on the package.
When a label is removed after being applied to a surface, a portion of the label may remain applied.
Prior to using CD/DVD labels, be sure to follow the instructions in your CD/DVD player’s instruction guide
regarding applying CD/DVD labels.
DO NOT use CD/DVD labels in a slot loading CD/DVD player.
DO NOT peel off the CD/DVD label once it is applied to the CD/DVD, a thin surface layer may come off,
resulting in damage to the disc.
DO NOT apply CD/DVD labels to CDs/DVDs designed for use with inkjet printers. Labels peel off these
discs easily and using discs with peeling labels can result in loss or damage of data.
When applying CD/DVD labels, use the applicator included with the CD/DVD label rolls. Failure to do so
could cause damage to the CD/DVD player.
Users shall take full responsibility for applying CD/DVD labels. Brother accepts no responsibility for any
loss or damage of data caused by the inappropriate use of CD/DVD labels.
Be careful not to drop the DK Roll.
DK Rolls use thermal paper and thermal film. Both the label and print will fade with sunlight and heat.
DO NOT use DK Rolls for any outdoor use that requires durability.
Depending on the area, material, and environmental conditions, the label may unpeel or become
irremovable, or the color of the label may change or be transferred to other objects. Before applying the
label, check the environmental conditions and the material. Test the label by affixing a small piece of it
to an inconspicuous area of the intended surface.
If print results are not as expected, use the adjustment options in the printer driver or the Printer Setting
Tool.

iv
Table of Contents
Section I Basic Operations
1 Set Up the Label Printer 2
Parts Description .......................................................................................................................................2
Front ....................................................................................................................................................2
Rear.....................................................................................................................................................3
Connect the AC Power Cord .....................................................................................................................4
Load the DK Roll........................................................................................................................................5
Turn Power On/Off.....................................................................................................................................7
2 Print Using a Computer (P-touch Editor) 8
Install Printer Driver and Software on a Computer ....................................................................................8
Connect the Label Printer to a Computer ..................................................................................................8
Print from a Computer ...............................................................................................................................9
Available Applications..........................................................................................................................9
Create and Print Labels from Your Computer .....................................................................................9
Attach Labels.....................................................................................................................................10
Install the Printer Driver and Software on a Computer not connected to the Internet .......................11
3 Change the Label Printer Settings 12
Printer Setting Tool for Windows .............................................................................................................12
Before Using the Printer Setting Tool ................................................................................................12
Use the Printer Setting Tool for Windows................................................................................................13
Device Settings for Windows ...................................................................................................................15
Settings Dialog Box ...........................................................................................................................15
Menu Bar ...........................................................................................................................................17
Basic Tab...........................................................................................................................................18
Apply Setting Changes to Multiple Label Printers .............................................................................18
Printer Setting Tool for Mac .....................................................................................................................19
Before Using the Printer Setting Tool ................................................................................................19
Use the Printer Setting Tool for Mac........................................................................................................19
Settings Dialog Box ...........................................................................................................................20
Basic Tab...........................................................................................................................................21
Apply Setting Changes to Multiple Label Printers .............................................................................21
Section II Application
4 How to Use P-touch Editor 23
For Windows............................................................................................................................................23
Starting P-touch Editor ......................................................................................................................23
Printing with P-touch Editor ...............................................................................................................25
For Mac....................................................................................................................................................27
Start P-touch Editor ...........................................................................................................................27
Operation modes ...............................................................................................................................28

v
5 How to Use the P-touch Address Book (Windows only) 29
Start the P-touch Address Book ........................................................................................................29
Create a New Contact .......................................................................................................................32
6 How to Use P-touch Library (Windows only) 34
Start P-touch Library................................................................................................................................34
Open and Edit Templates ........................................................................................................................36
Print Templates........................................................................................................................................37
Search for Templates ..............................................................................................................................38
7 How to Update P-touch Software 40
Update P-touch Editor and P-touch Address Book (Windows only)........................................................40
Update the Firmware ...............................................................................................................................42
For Windows......................................................................................................................................42
For Mac .............................................................................................................................................44
Section III Appendix
8 Reset the Label Printer 47
Reset Device Settings to the Factory Settings Using the Label Printer Buttons......................................47
Reset Device Settings Using the Printer Setting Tool .............................................................................47
9 Maintenance 48
Clean the Exterior of the Unit...................................................................................................................48
Clean the Label Output Slot.....................................................................................................................48
Self-Cleaning Print Head .........................................................................................................................48
10 Troubleshooting 49
Overview..................................................................................................................................................49
Driver Installation Problems (for Windows)..............................................................................................49
LED Indications........................................................................................................................................50
Printing Problems ..............................................................................................................................52
Software Version ...............................................................................................................................55
11 Product Specifications 56
Label Printer Specifications .....................................................................................................................56
Operating Environment............................................................................................................................56
12 Print Directly from Various Windows Software 57
Setting the Printer Driver .........................................................................................................................57
Basic Tab...........................................................................................................................................58
Advanced Tab ...................................................................................................................................58
Other Tab ..........................................................................................................................................59
Printing from other Windows software...............................................................................................60

2
1
1
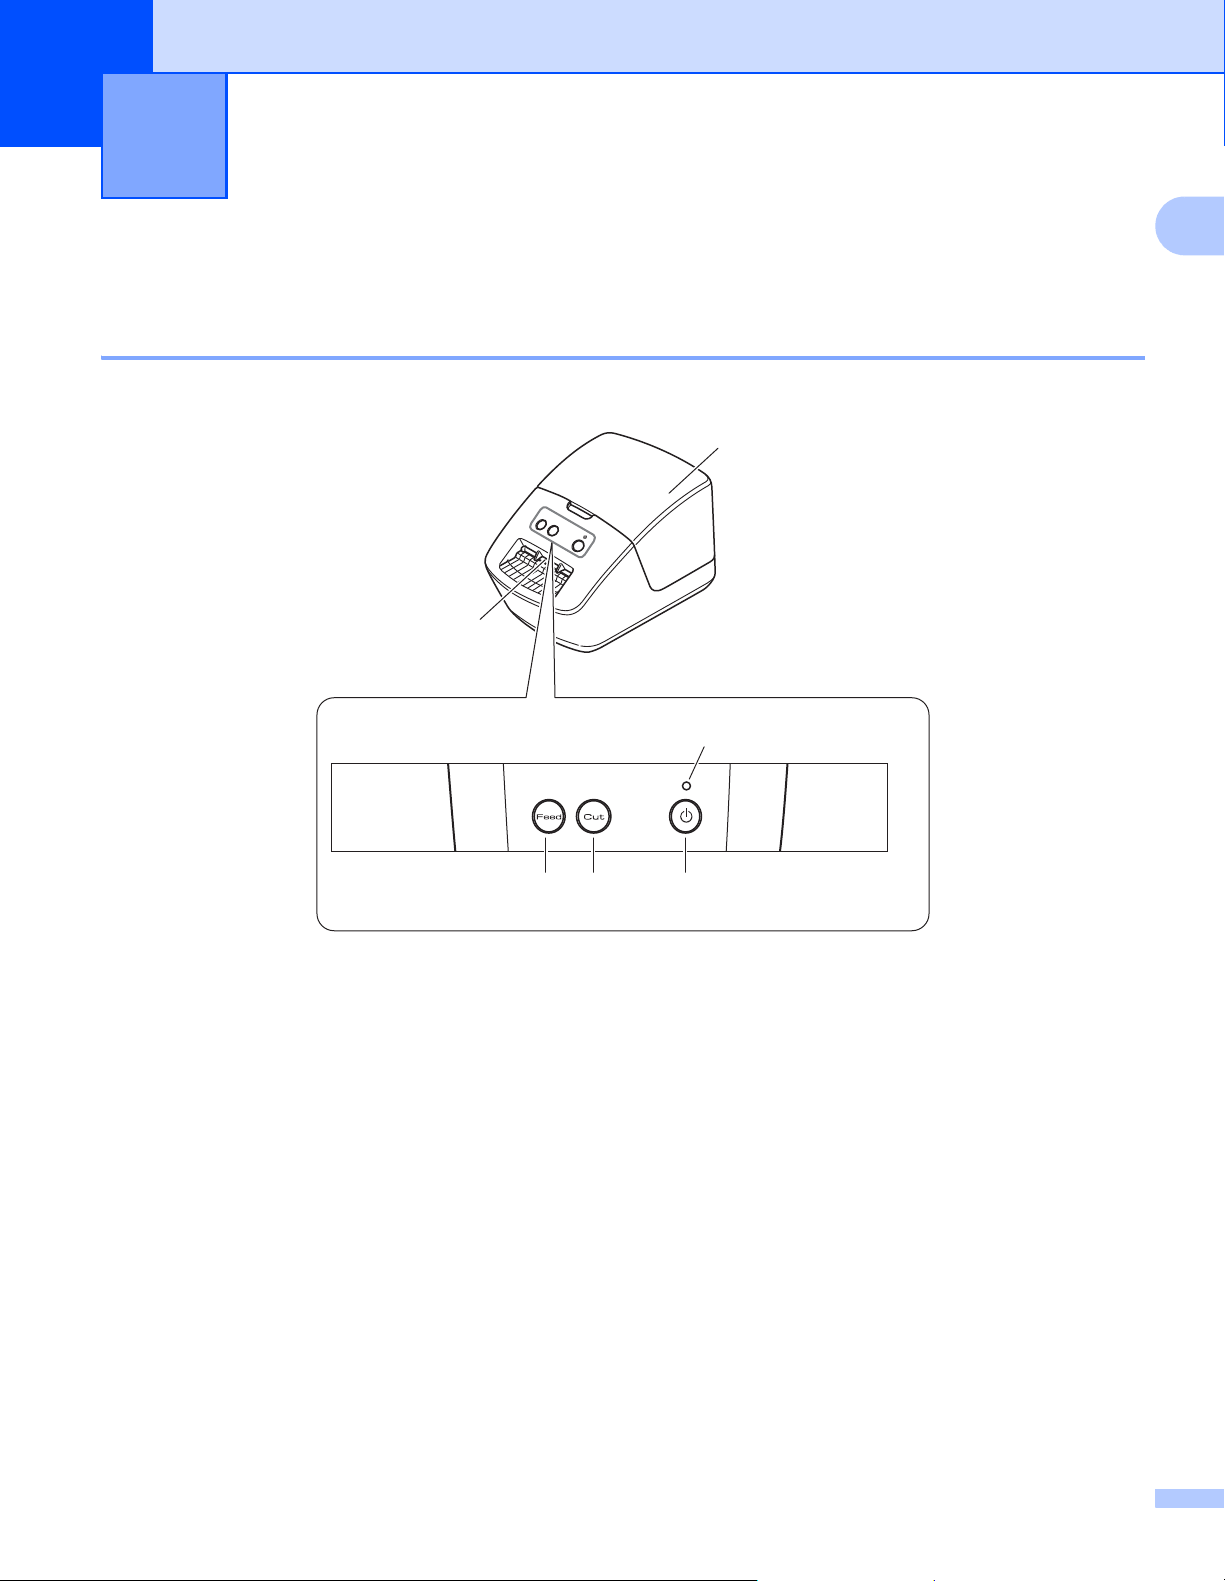
Parts Description 1
Front 1
Set Up the Label Printer 1
1 Feed Button
2 Cut Button
3 Power Button
4 Status LED
5 DK Roll Compartment Cover
6 Label Output Slot
2
4
31
5
6
Control Panel Buttons
Set Up the Label Printer
3
1
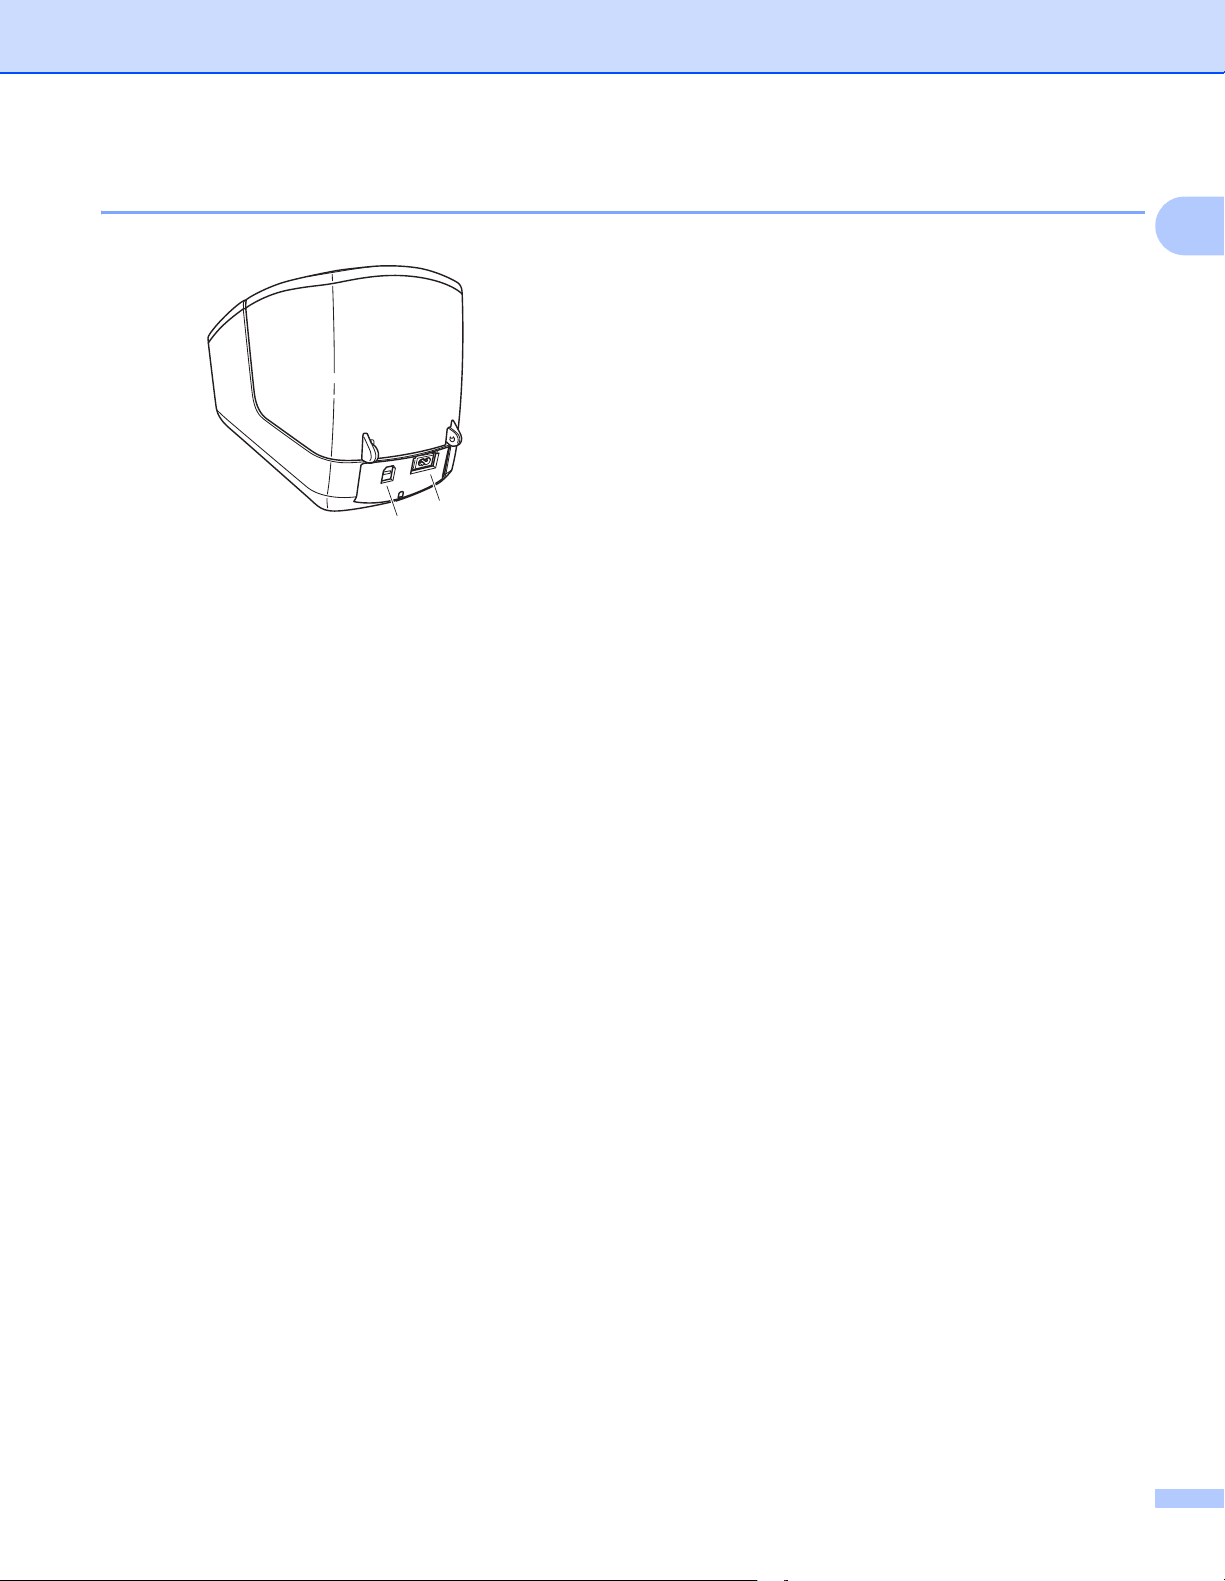
Rear 1
1 USB Port
2 AC Power Port
1
2
Set Up the Label Printer
4
1
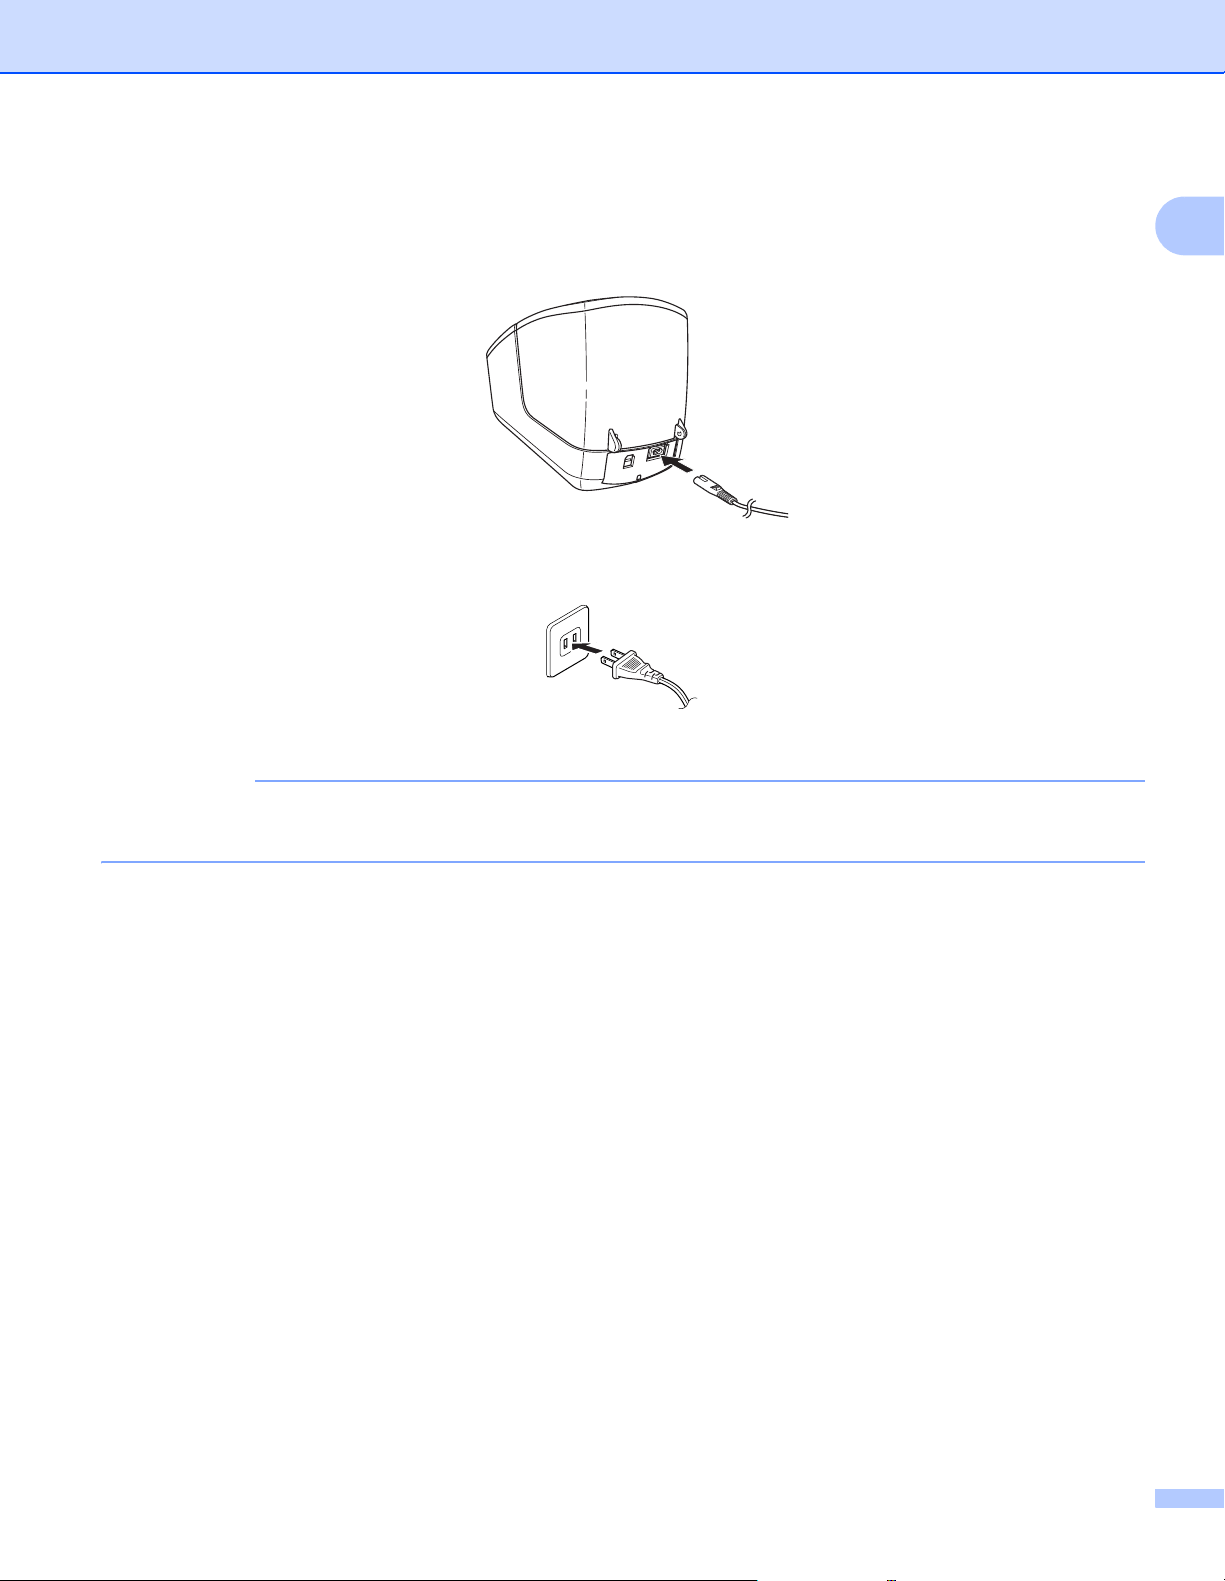
Connect the AC Power Cord 1
a Connect the AC Power Cord to the Label Printer.
b Plug the AC Power Cord into an AC power outlet.
IMPORTANT
Do not use your Label Printer in areas where the power source voltage is different from the Label Printer's
specified voltage. For more information, see Product Specifications on page 56.
Set Up the Label Printer
5
1
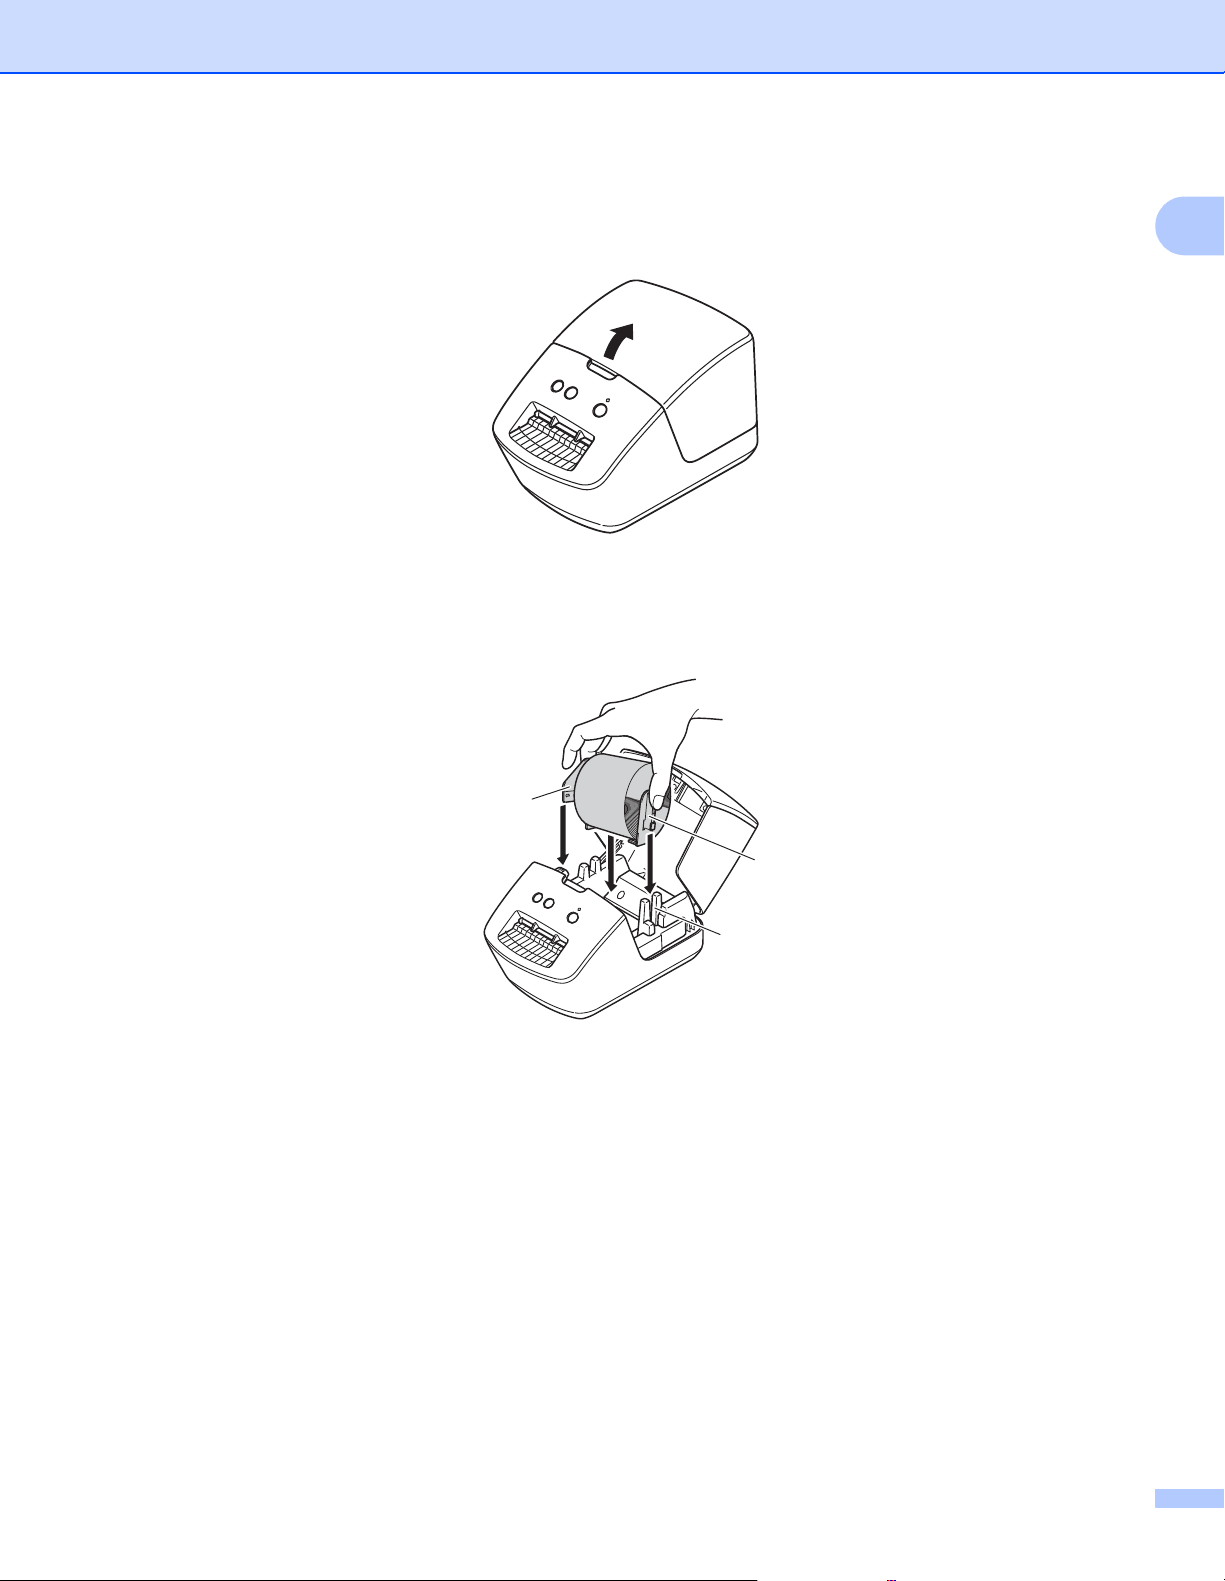
Load the DK Roll 1
a Hold the Label Printer by the front, and firmly lift the DK Roll Compartment Cover to open it.
b Place the DK Roll into the Roll Spool Guide (1).
• Make sure that the Roll Spool Arm (2) is inserted firmly in the Roll Spool Guide.
• Make sure the Stabilizer (3) slides into the notch in the Label Printer.
1
2
3
Set Up the Label Printer
6
1
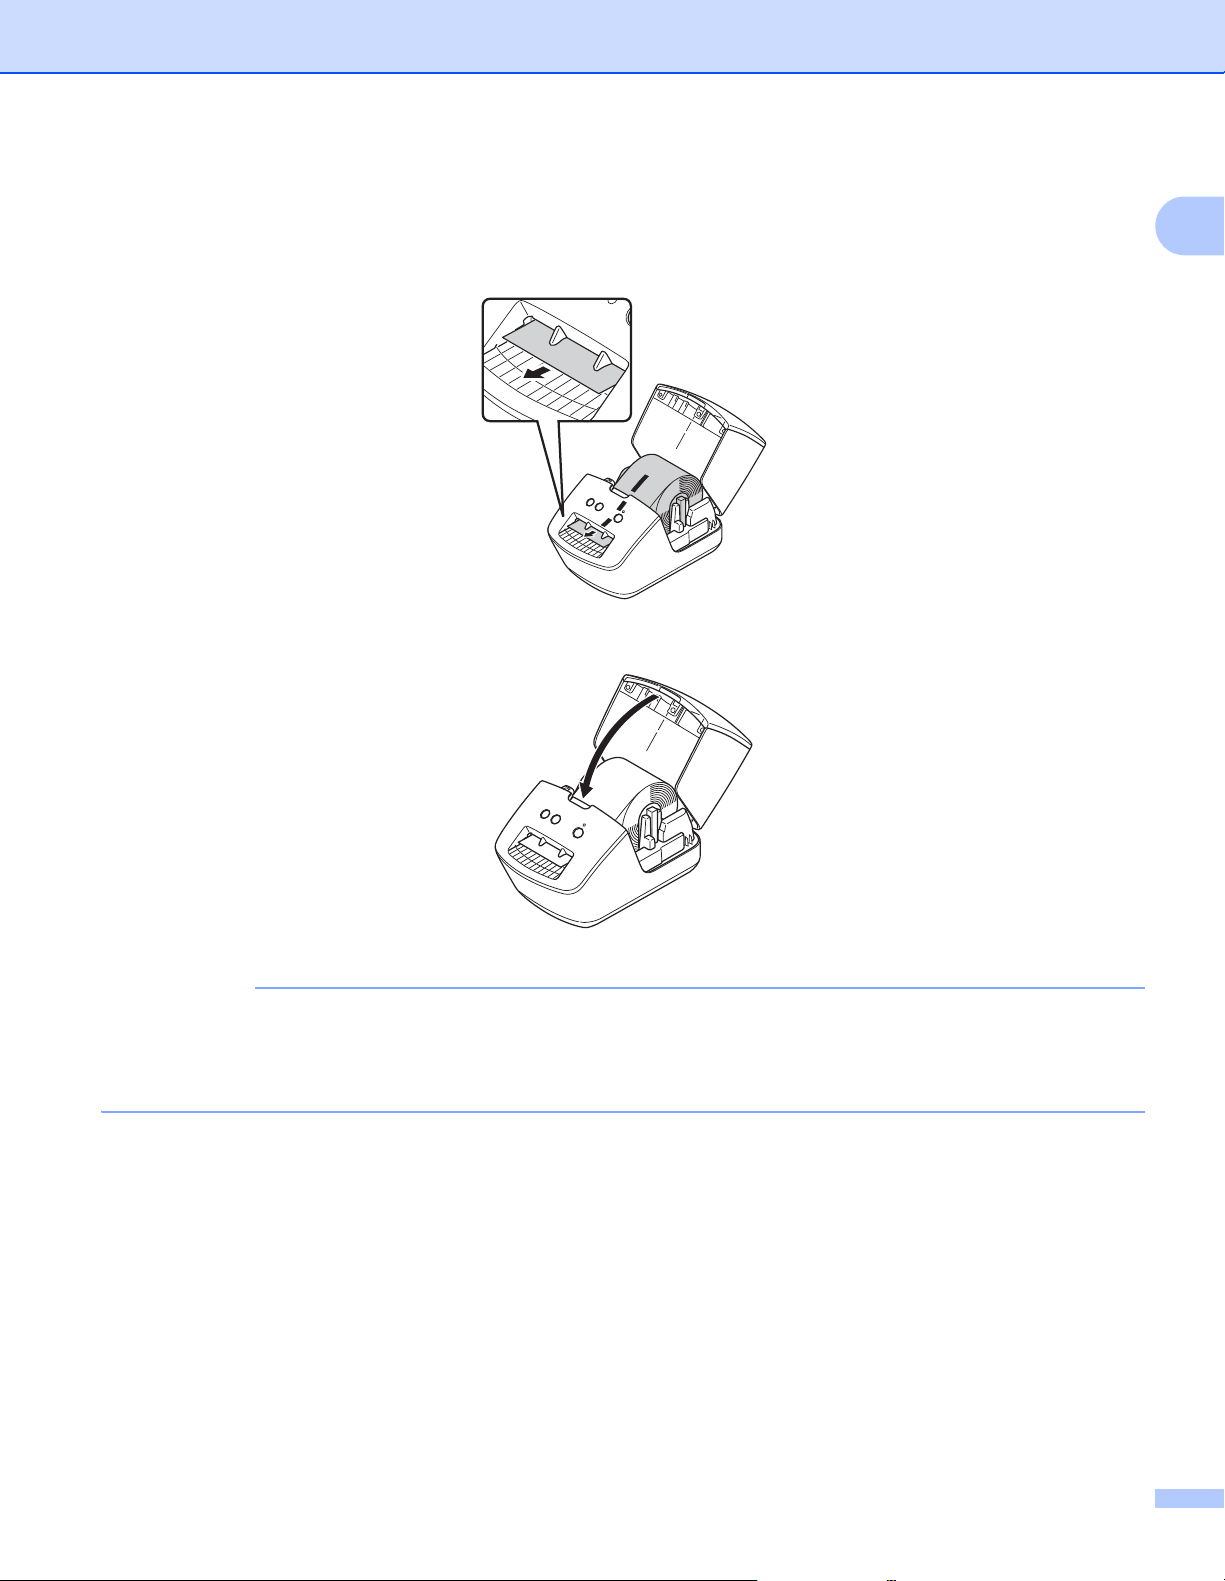
c Thread the DK Roll through the Label Printer.
• Align the edge of the DK Roll with the upright edge of the Label Output Slot.
• Check that the DK Roll is threaded straight so that the labels are not skewed.
• Push the first label through the Label Output Slot until the end comes out of the slot as shown.
d Close the DK Roll Compartment Cover.
IMPORTANT
• Do not leave any printed labels in the Label Printer. Doing so will cause the labels to jam.
• When not in use, remove any DK Rolls from inside the Label Printer and close the DK Roll Compartment
Cover to prevent dust and debris from accumulating in the Label Printer.

Set Up the Label Printer
7
1
Turn Power On/Off 1
On: Press the (Power Button) to turn the Label Printer On. The Status LED turns green.
IMPORTANT
• If you are using a DK Die-cut label, the end of the label is aligned automatically after you press the
(Power Button).
• If a different label is set, press the Feed Button to align the end of the label.
Off: Press and hold the (Power Button) to turn the Label Printer Off.
8
2
2
Install Printer Driver and Software on a Computer 2
To print from your Windows computer or Mac, install the printer driver, P-touch Editor, and other applications
to your computer.
Software for Windows:
Printer Driver, P-touch Editor, P-touch Address Book, P-touch Update Software, and Printer Setting Tool
Software for Mac:
Printer Driver, P-touch Editor, P-touch Update Software, and Printer Setting Tool
Note
If the computer is not connected to the Internet, see the Install the Printer Driver and Software on a
Computer not connected to the Internet on page 11.
a Visit our website (install.brother) and download the Software Installer for the latest software and
manuals.
b Double-click the downloaded EXE file (for Windows) or DMG file (for Mac), and follow the on-screen
instructions to proceed with the installation.
c Close the dialog box when the installation is complete.
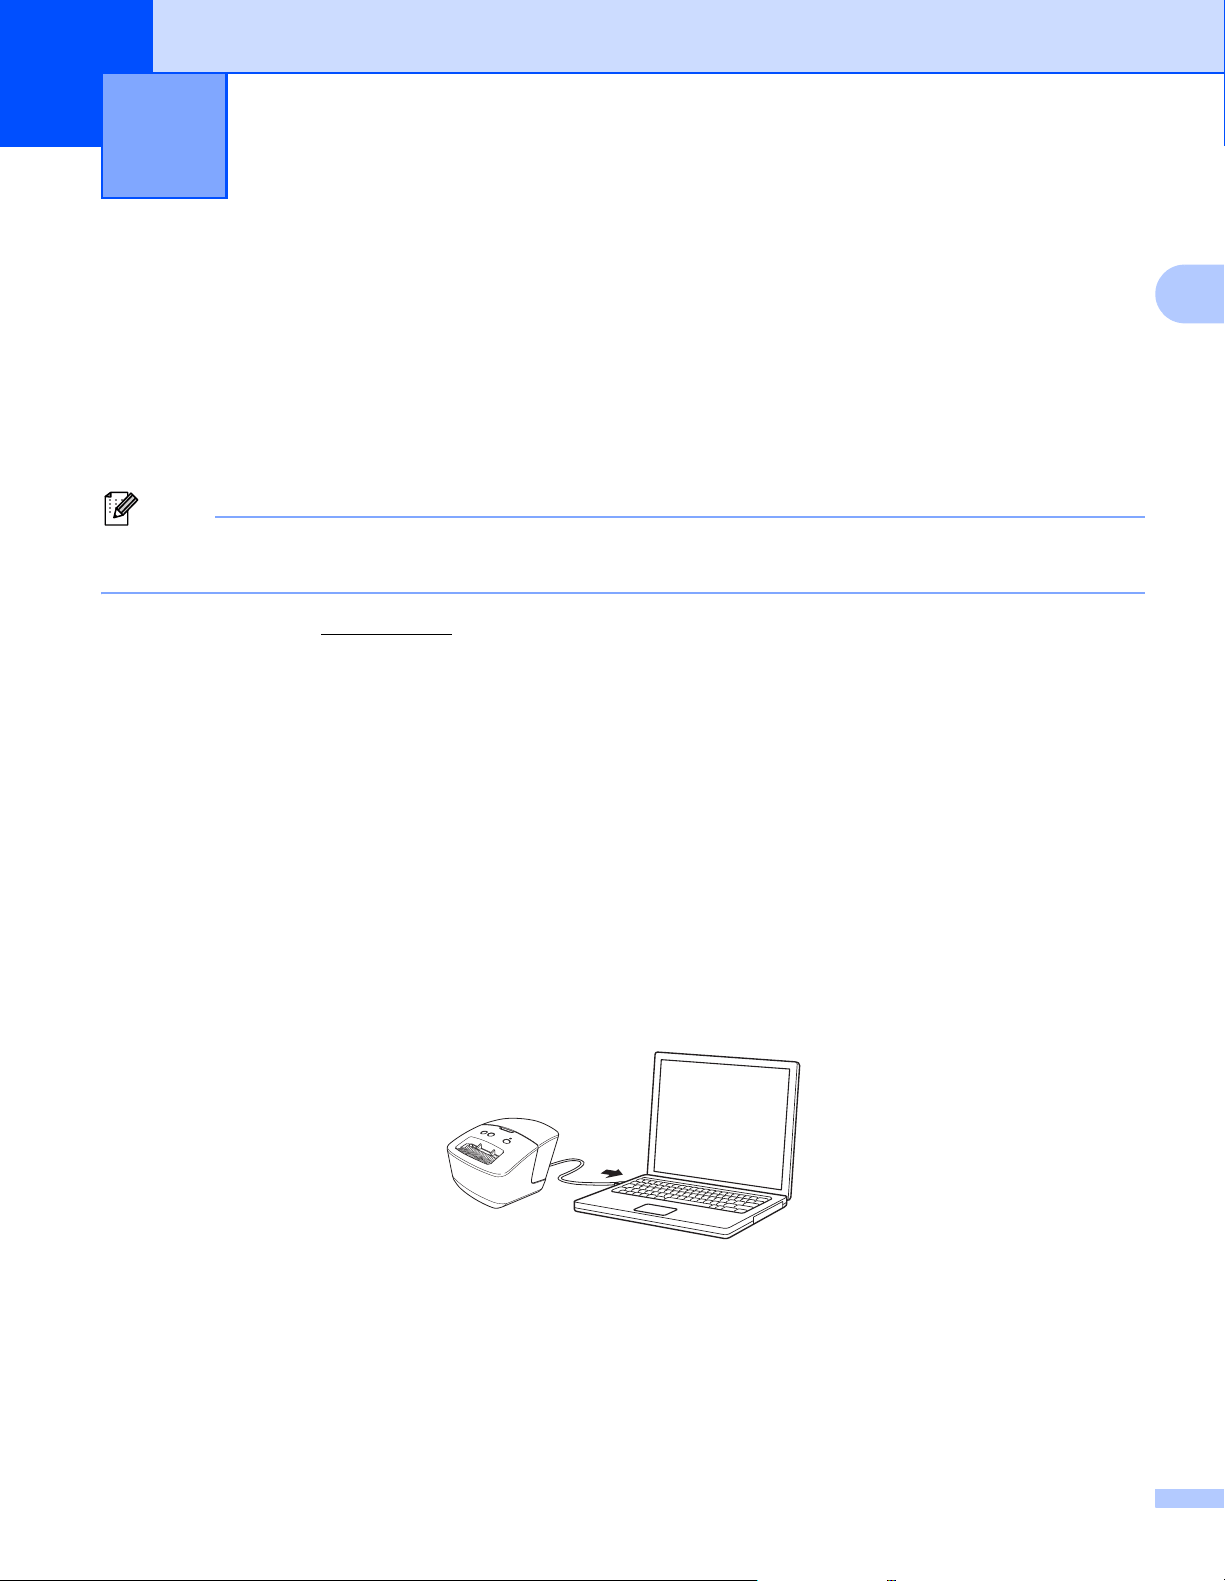
Connect the Label Printer to a Computer 2
You can connect the Label Printer to a Windows computer or Mac using a USB Cable.
a Make sure the Label Printer is turned Off before connecting the USB Cable.
b Connect the USB Cable to the USB Port on the back of the Label Printer, and then to your computer's
USB Port.
c Turn the Label Printer On.
Print Using a Computer (P-touch Editor) 2
Print Using a Computer (P-touch Editor)
9
2
Print from a Computer 2
Available Applications 2
To use the Label Printer effectively, a number of applications and functions are available.
You must install the printer driver to use these applications.
If you haven't already, visit our website (install.brother
) and download the installer for the applications and
printer driver.
Create and Print Labels from Your Computer 2
There are various methods for printing with this Label Printer.
The following describes the procedure for printing from a computer using P-touch Editor or P-touch Address
Book.
a Start P-touch Editor or P-touch Address Book, and then open the document you want to print.
b Create a label design.
c Check the cutting options in the Printer Driver (see Cutting Options on page 10).
d Select File > Print or click the Print icon.
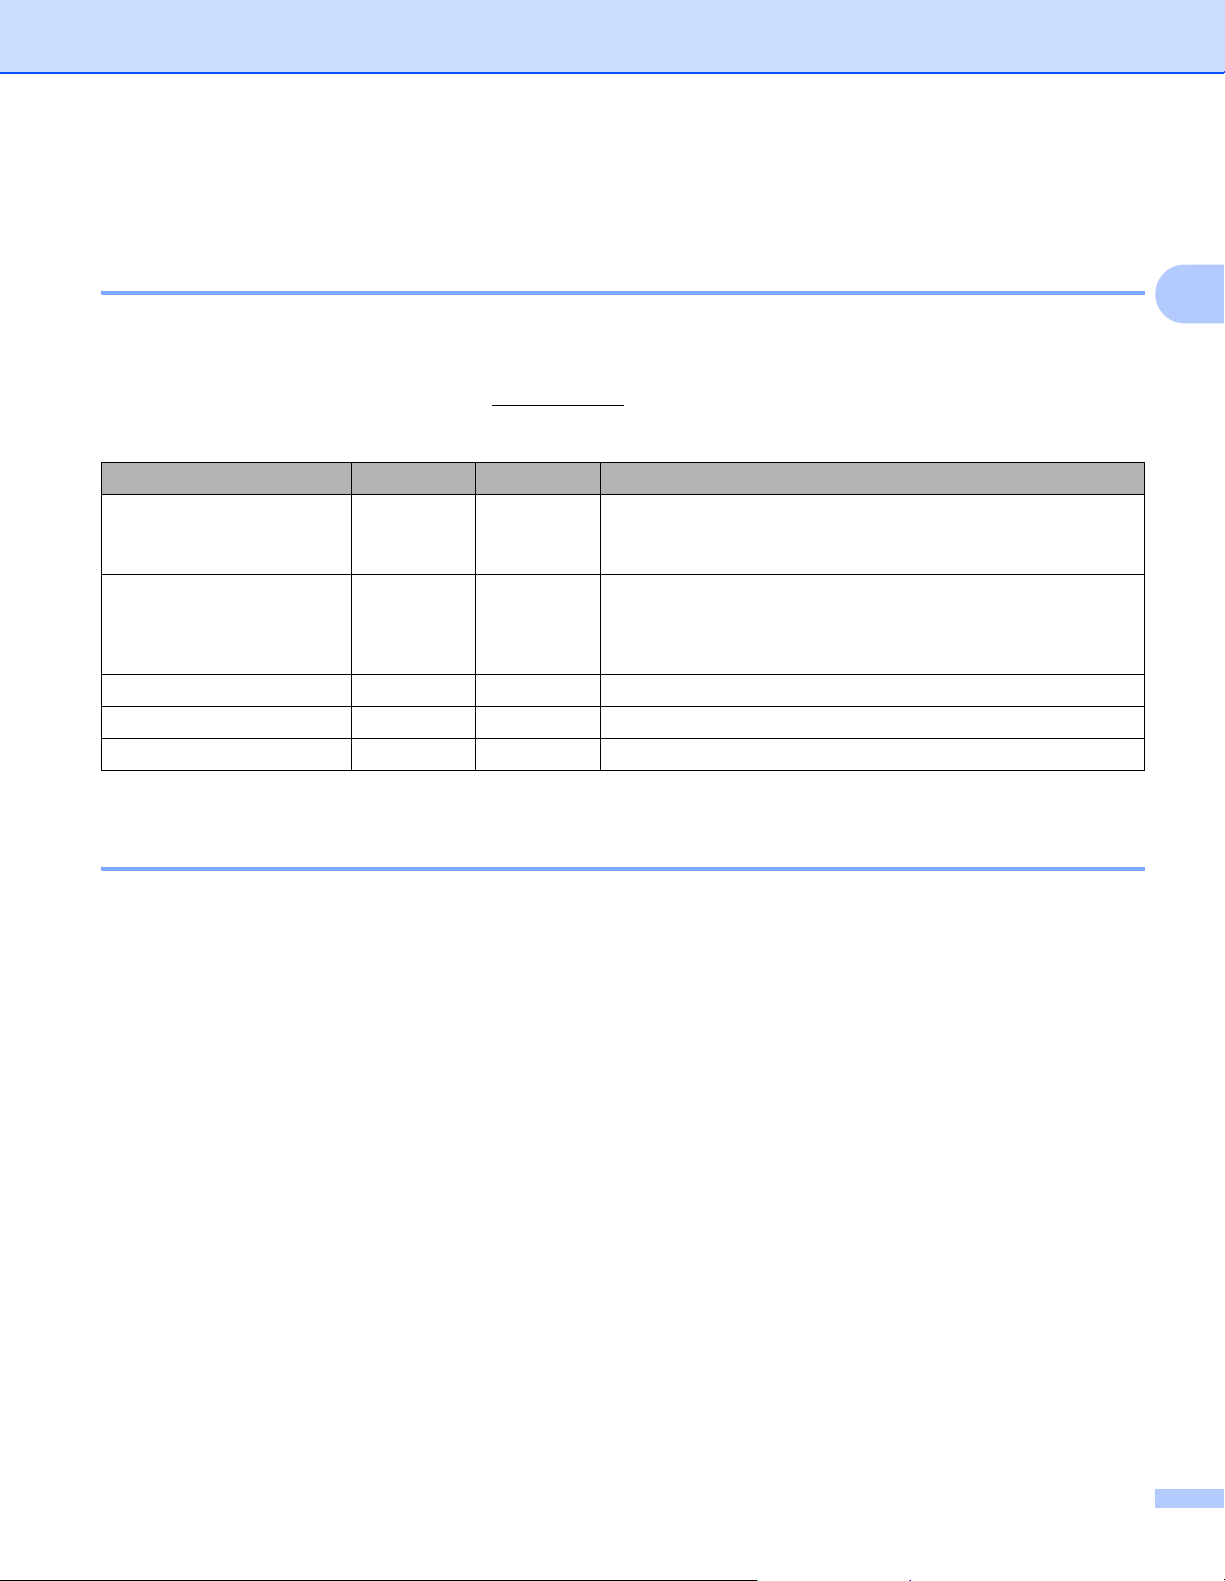
Application Windows Mac Features
P-touch Editor rr
Designs and prints custom labels with built-in drawing tools,
text using different fonts and styles, imported graphic
images, and barcodes.
P-touch Library r
Manages and prints P-touch Editor templates.
You can use P-touch Library to print templates.
This application is installed with P-touch Editor.
P-touch Update Software rrUpdates software to the latest version.
P-touch Address Book r Prints address labels using an address database.
Printer Setting Tool rrSpecifies the Label Printer's device settings from a computer.
Print Using a Computer (P-touch Editor)
10
2
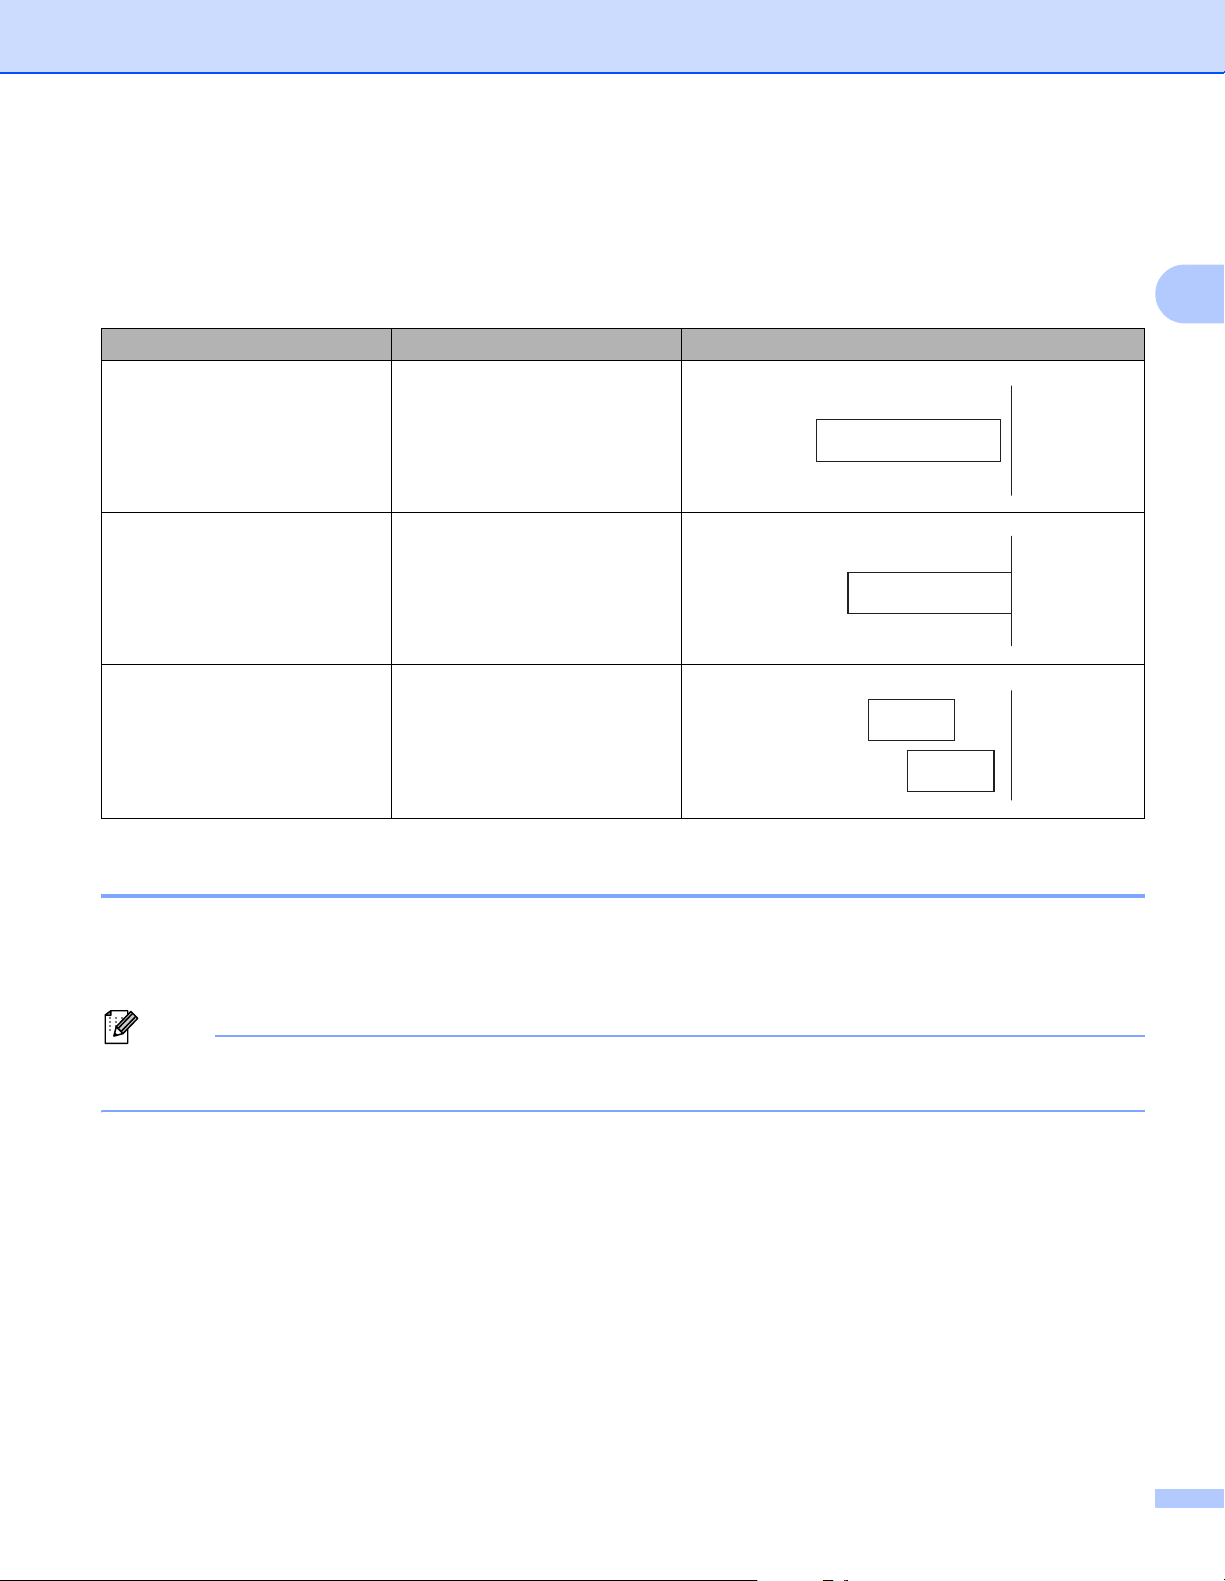
Cutting Options 2
Cutting Options allow you to specify how the label is cut when it is printed. In the Printer Driver, select Auto
Cut and Cut at End, based on how you want the label to print and cut, as illustrated in the table.
Attach Labels 2
a Peel the backing from the label.
b Position the label, and then press firmly from top to bottom with your finger to attach the label.
Note
Labels may be difficult to attach to surfaces that are wet, dirty, or uneven. The labels may peel off easily
from these surfaces.
Label Cut Option Table
Auto Cut Cut at End Label Exiting the Label Printer
No Yes
No No
Yes Yes or No
ABCABC
ABCABC
ABC
ABC

Print Using a Computer (P-touch Editor)
11
2
Install the Printer Driver and Software on a Computer not connected to the
Internet 2
a On a computer connected to the Internet, visit support.brother.com, and go to your model's Downloads
page.
b Select the computer's operating system of the computer not connected to the Internet.
c Download the files you need.
IMPORTANT
You must download at least the Printer Driver and P-touch Editor to the computer to use the Label Printer.
Windows
• Do not use the Software/Document Installer as it needs an active Internet connection.
• Download each type of software individually, for example: the Printer Driver or P-touch Editor.
Mac
Download the Full Software Package.
d Copy the downloaded EXE file (for Windows) or DMG file (for Mac) from the Downloads folder onto
removable media (for example, a USB flash drive or CD-ROM).
e Copy the downloaded files from the removable media onto the computer not connected to the Internet.
f Double-click the downloaded files, and follow the on-screen instructions to proceed with the installation.
g Close the dialog box when the installation is complete.
12
3
3
Printer Setting Tool for Windows 3
Use the Printer Setting Tool, installed on a Windows computer, to specify the Label Printer's device and
P-touch Template settings.
Note
Install the Printer Setting Tool using the Software/Documentation Installer. For more information,
see Install Printer Driver and Software on a Computer on page 8.
Before Using the Printer Setting Tool 3
Make sure the AC Power Cord is connected to the Label Printer and to an AC power outlet.
Make sure the printer driver has been installed correctly and that you can print.
Connect the Label Printer to a computer with a USB Cable.
Change the Label Printer Settings 3
Change the Label Printer Settings
13
3
Use the Printer Setting Tool for Windows 3
a Connect the Label Printer you want to configure to the computer.
b Start the Printer Setting Tool.
For Windows 10:
Click Start > Brother > Printer Setting Tool.
For Windows 8 / Windows 8.1:
On the Apps screen, click the Printer Setting Tool.
For Windows 7:
Click Start > All Programs > Brother > Labels & Mobile Printer > Printer Setting Tool.
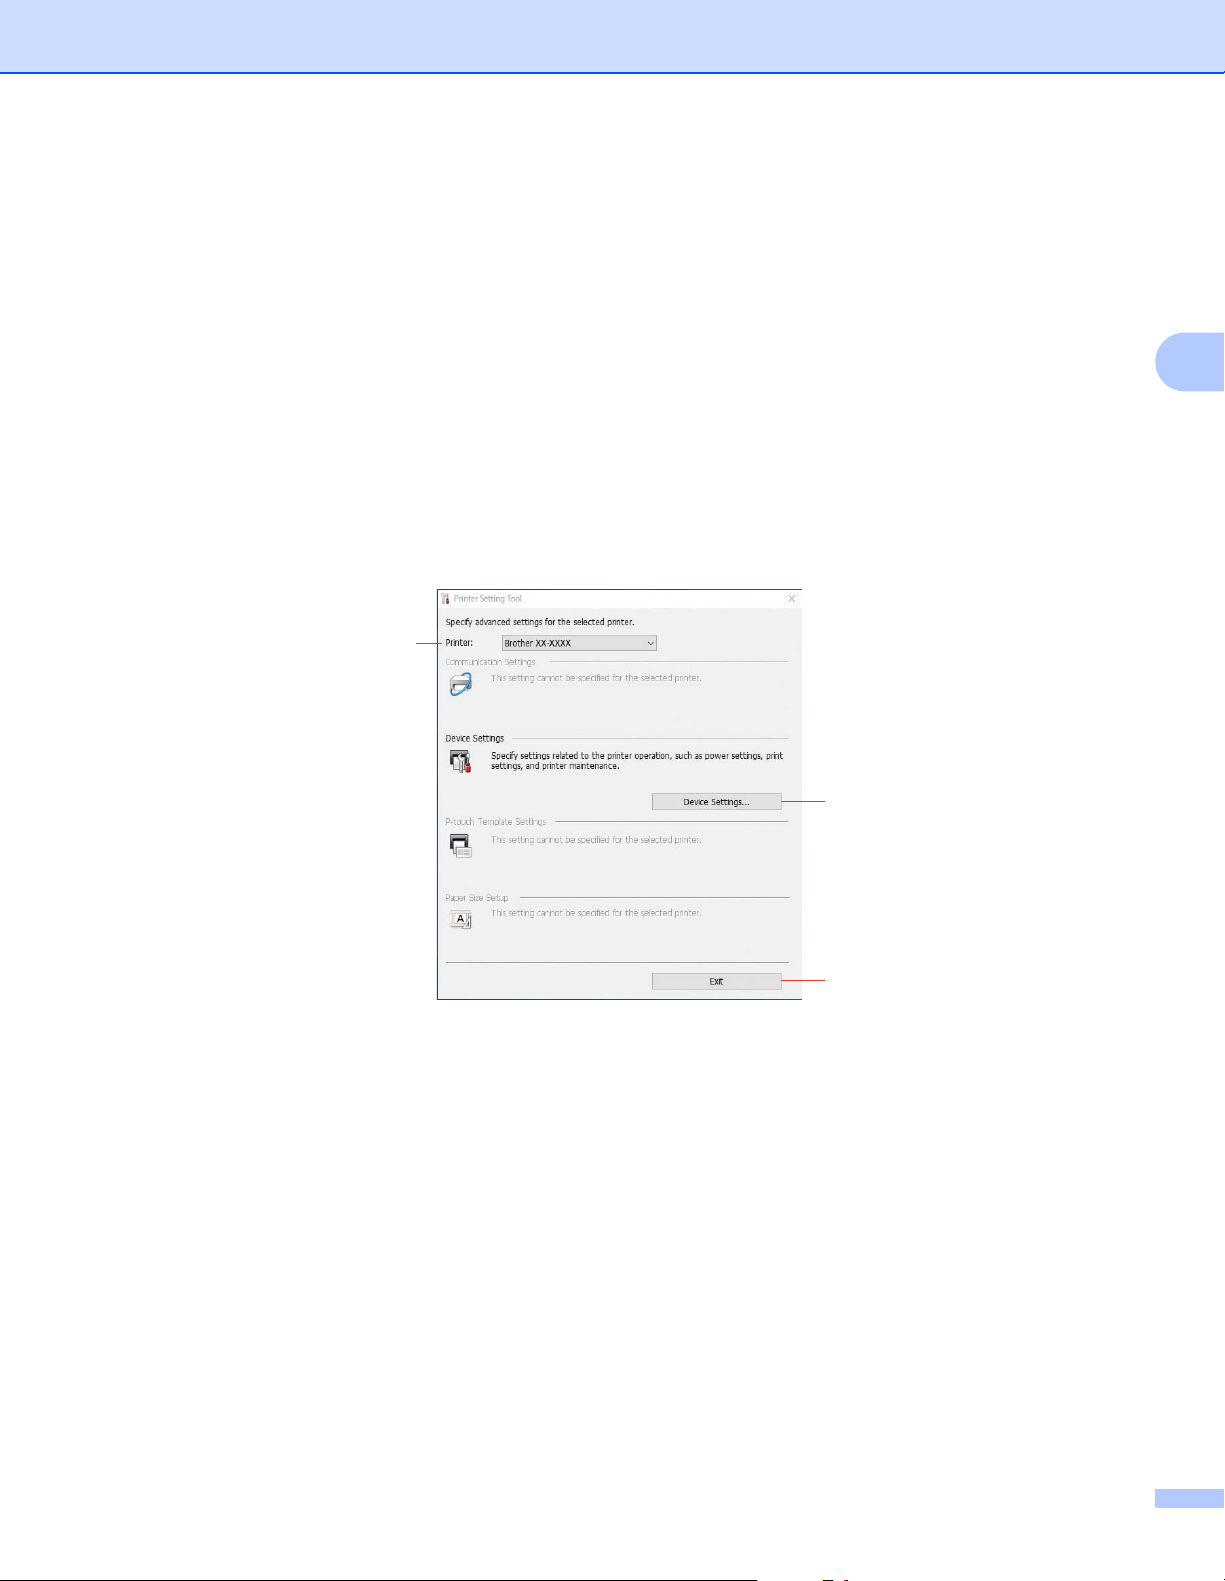
The main window appears.
1 Printer
Lists the connected Label Printers.
2 Device Settings
Specifies device settings, such as power settings and printer settings.
3Exit
Closes the window.
c Check that the Label Printer you want to configure appears next to Printer. If a different Label Printer
appears, select the Label Printer you want from the drop-down list.
d Click Device Settings to select the settings you want to change, and then specify or change the settings
in the dialog box. For more information on the settings dialog boxes, see Device Settings for Windows
on page 15. Click Apply when finished.
1
2
3

Change the Label Printer Settings
14
3
e Click Exit.
IMPORTANT
Use the Printer Setting Tool to configure the Label Printer only when the Label Printer is idle. The Label
Printer may malfunction if you try to configure it while it is processing or printing a print job.
Change the Label Printer Settings
15
3
Device Settings for Windows 3
Use Device Settings in the Printer Setting Tool to specify or change printer settings when connecting the
Label Printer and computer with a USB Cable. Not only can you change the device settings for one Label
Printer, but you can also apply the same settings to multiple Label Printers.
When printing from a computer application, various printing settings can be specified from the printer driver;
however, by using Device Settings in the Printer Setting Tool, more advanced settings can be specified.
When you open Device Settings, the Label Printer's current settings are retrieved and displayed. If the
current settings cannot be retrieved, the previous settings are displayed. If the current settings cannot be
retrieved and previous settings were not specified, the Label Printer's factory settings appear.
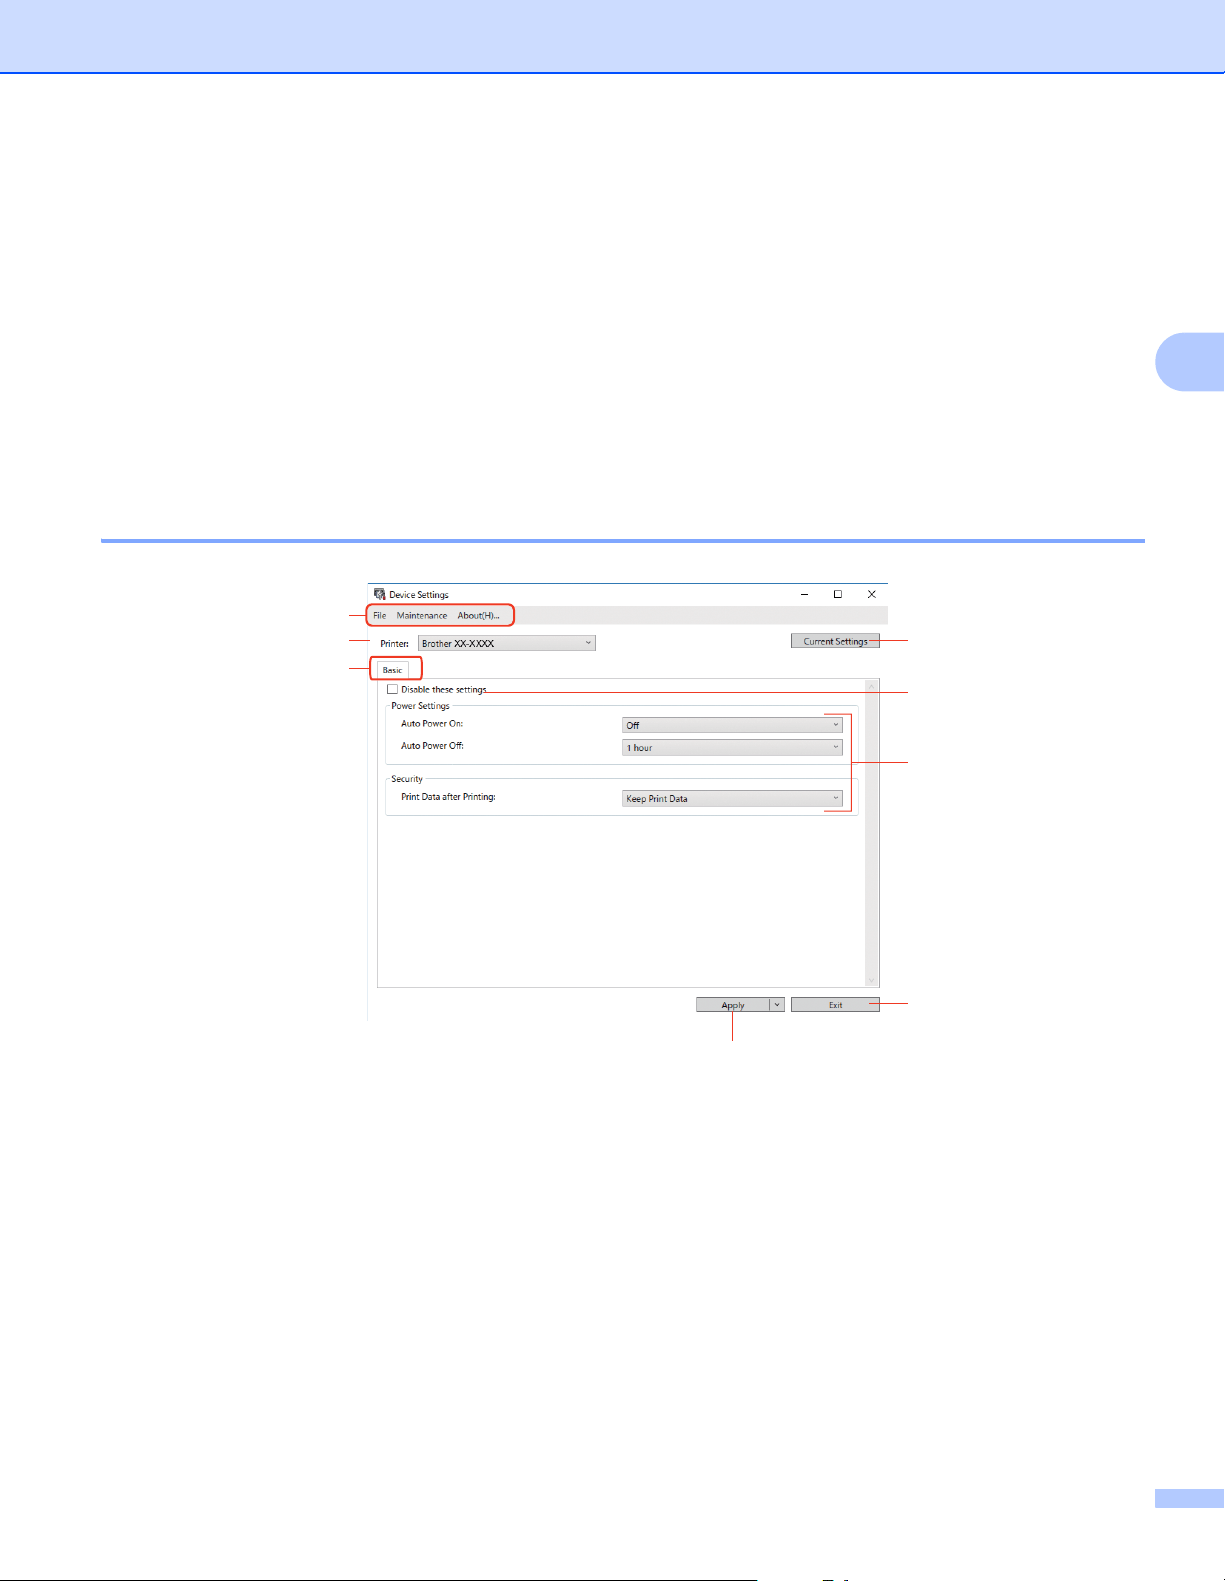
Settings Dialog Box 3
1 Menu Bar
Commands are categorized under each menu by function (File, Maintenance, and About).
2Printer
Specifies the Label Printer you want to configure.
1
2
3
4
5
6
7
8

Change the Label Printer Settings
16
3
3 Settings Tabs
Contains settings that may be specified or changed.
Note
If appears on a tab, the settings in that tab cannot be changed. In addition, the settings in the tab will
not be applied to the Label Printer even if you click Apply. The settings in the tab will not be saved or
exported when you use the Save in Command File or Export commands.
4 Current Settings
Retrieves the settings from the currently-connected Label Printer and displays them in the dialog box.
Settings will also be retrieved for parameters on tabs with .
5 Disable these settings
When this check box is selected, appears on the tab, and the settings can no longer be specified or
changed.
Settings in a tab where appears will not be applied to the Label Printer even if Apply is clicked.
In addition, the settings in the tab will not be saved or exported when you use the Export command.
6 Parameters
Displays the current settings.
7Exit
Exits Device Settings and returns to the Printer Setting Tool's main window.
8Apply
Applies the settings to the Label Printer.
To display the current settings, select Check Setting from the drop-down list.

Change the Label Printer Settings
17
3
Menu Bar 3
File
• Apply Settings to the Printer
Applies the settings to the Label Printer.
• Check Setting
Displays the current settings.
• Import
Imports an exported file.
• Export
Saves the current settings in a file.
Maintenance
• Reset to Factory Defaults (For Administrators)
Resets the device settings in the Basic tab to the factory settings.
• Option Settings
If the Do not display an error message if the current settings cannot be retrieved at startup check
box is selected, a message will not appear on your screen the next time you turn on the Label Printer.

Change the Label Printer Settings
18
3
Basic Tab 3
•Auto Power On
Specifies whether the Label Printer turns on automatically when the AC Power Cord is plugged into an AC
power outlet.
•Auto Power Off
Specifies the period of time that passes before the Label Printer turns off automatically.
• Print Data after Printing
Specifies whether or not print data is erased after printing.
Apply Setting Changes to Multiple Label Printers 3
a After applying the settings to the first Label Printer, disconnect it from your computer, and then connect
the second Label Printer.
b Select the newly connected Label Printer from the Printer drop-down list.
c Click Apply. The same settings that were applied to the first Label Printer are applied to the second
Label Printer.
d Repeat steps a – c for all Label Printers whose settings you want to change.
Note
To save the current settings in a file, click File > Export.
The same settings can be applied to another Label Printer by clicking File > Import, and then selecting
the exported settings file. For more information, see Device Settings for Windows on page 15.
Change the Label Printer Settings
19
3
Printer Setting Tool for Mac 3
Using the Printer Setting Tool, you can specify the Label Printer's communication settings and device settings
from a Mac. Not only can you change the device settings for one Label Printer, but you can also apply the
same settings to multiple Label Printers.
Note
The Printer Setting Tool can be installed using the Software/Documentation installer. For more information,
see Install Printer Driver and Software on a Computer on page 8.
Before Using the Printer Setting Tool 3
Make sure the AC Power Cord is connected to the Label Printer and to an AC power outlet.
Make sure the printer driver has been installed correctly and you can print.
Connect the Label Printer to a computer with a USB Cable.
Use the Printer Setting Tool for Mac 3
a Connect the Label Printer you want to configure to the computer.
b Click Macintosh HD > Applications > Brother > Printer Setting Tool > Printer Setting Tool.app.
The Printer Setting Tool window appears.
c Check that the Label Printer you want to configure appears next to Printer. If a different Label Printer
appears, select the Label Printer you want from the pop-up list.
d Select any of the Settings tabs, and then specify or change the settings you want.
e Click Apply Settings to the Printer to apply the settings to the Label Printer.
f Click Exit.
IMPORTANT
Use the Printer Setting Tool to configure the Label Printer only when the Label Printer is idle. The Label
Printer may malfunction if you try to configure it while it is processing or printing a print job.
Change the Label Printer Settings
20
3
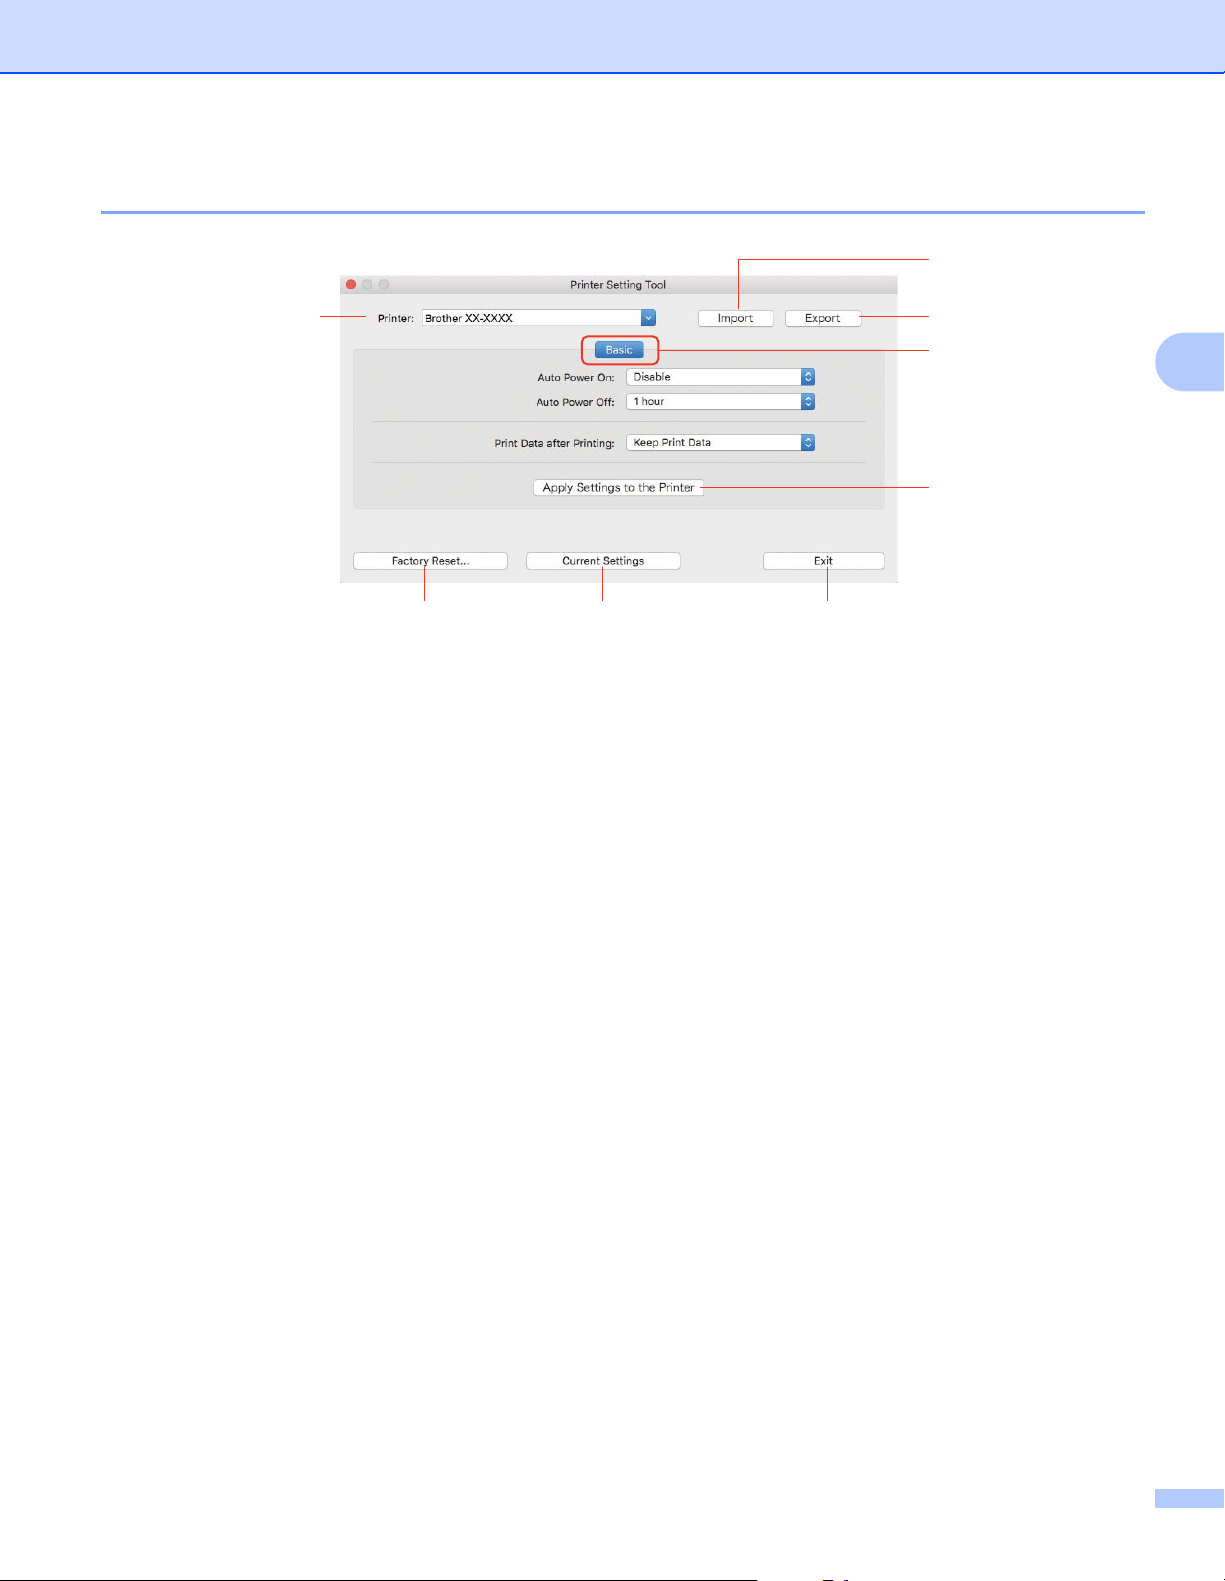
Settings Dialog Box 3
1Printer
Lists the connected Label Printers.
2 Import
Imports settings from a file.
3 Export
Saves the current settings in a file.
4 Settings Tabs
Contain settings that you can specify or change.
5 Apply Settings to the Printer
Applies the settings to the Label Printer.
6 Factory Reset
Resets the device settings in the Basic tab to the factory settings.
7 Current Settings
Retrieves the settings from the currently-connected Label Printer and displays them in the dialog box.
8Exit
Exits the Printer Setting Tool.
1
2
3
4
5
67 8

Change the Label Printer Settings
21
3
Basic Tab 3
•Auto Power On
Specifies whether the Label Printer turns on automatically when the AC Power Cord is plugged into an
AC power outlet.
•Auto Power Off
Specifies the period of time that passes before the Label Printer turns off automatically.
• Print Data after Printing
Specifies whether or not print data is erased after printing.
Apply Setting Changes to Multiple Label Printers 3
a After applying settings to the first Label Printer, disconnect it from the computer, and then connect the
second Label Printer to the computer.
b Select the newly connected Label Printer from the Printer drop-down list.
c Click Apply Settings to the Printer.
The same settings that were applied to the first Label Printer are applied to the second Label Printer.
d Repeat steps a – c for all Label Printers whose settings you want to change.
Note
To save the current settings in a file, click Export.
The same settings can be applied to another Label Printer by clicking Import, then selecting the exported
settings file. For more information, see Settings Dialog Box on page 20.

23
4
4
To use your Label Printer with your computer, install P-touch Editor and the printer driver.
For the latest drivers and software, visit support.brother.com
and go to your model's Downloads page.
For Windows 4
Starting P-touch Editor 4
a Start the P-touch Editor .
For Windows 10:
Click Start > P-touch Editor 5.2 under Brother P-touch, or double-click the P-touch Editor 5.2 icon
on the desktop.
For Windows 8 / Windows 8.1:
Click P-touch Editor 5.2 on the Apps screen or double-click the P-touch Editor 5.2 icon on the
desktop.
For Windows 7:
Click Start > All Programs > Brother P-touch > P-touch Editor 5.2, or double-click the P-touch
Editor 5.2 shortcut icon on the desktop.
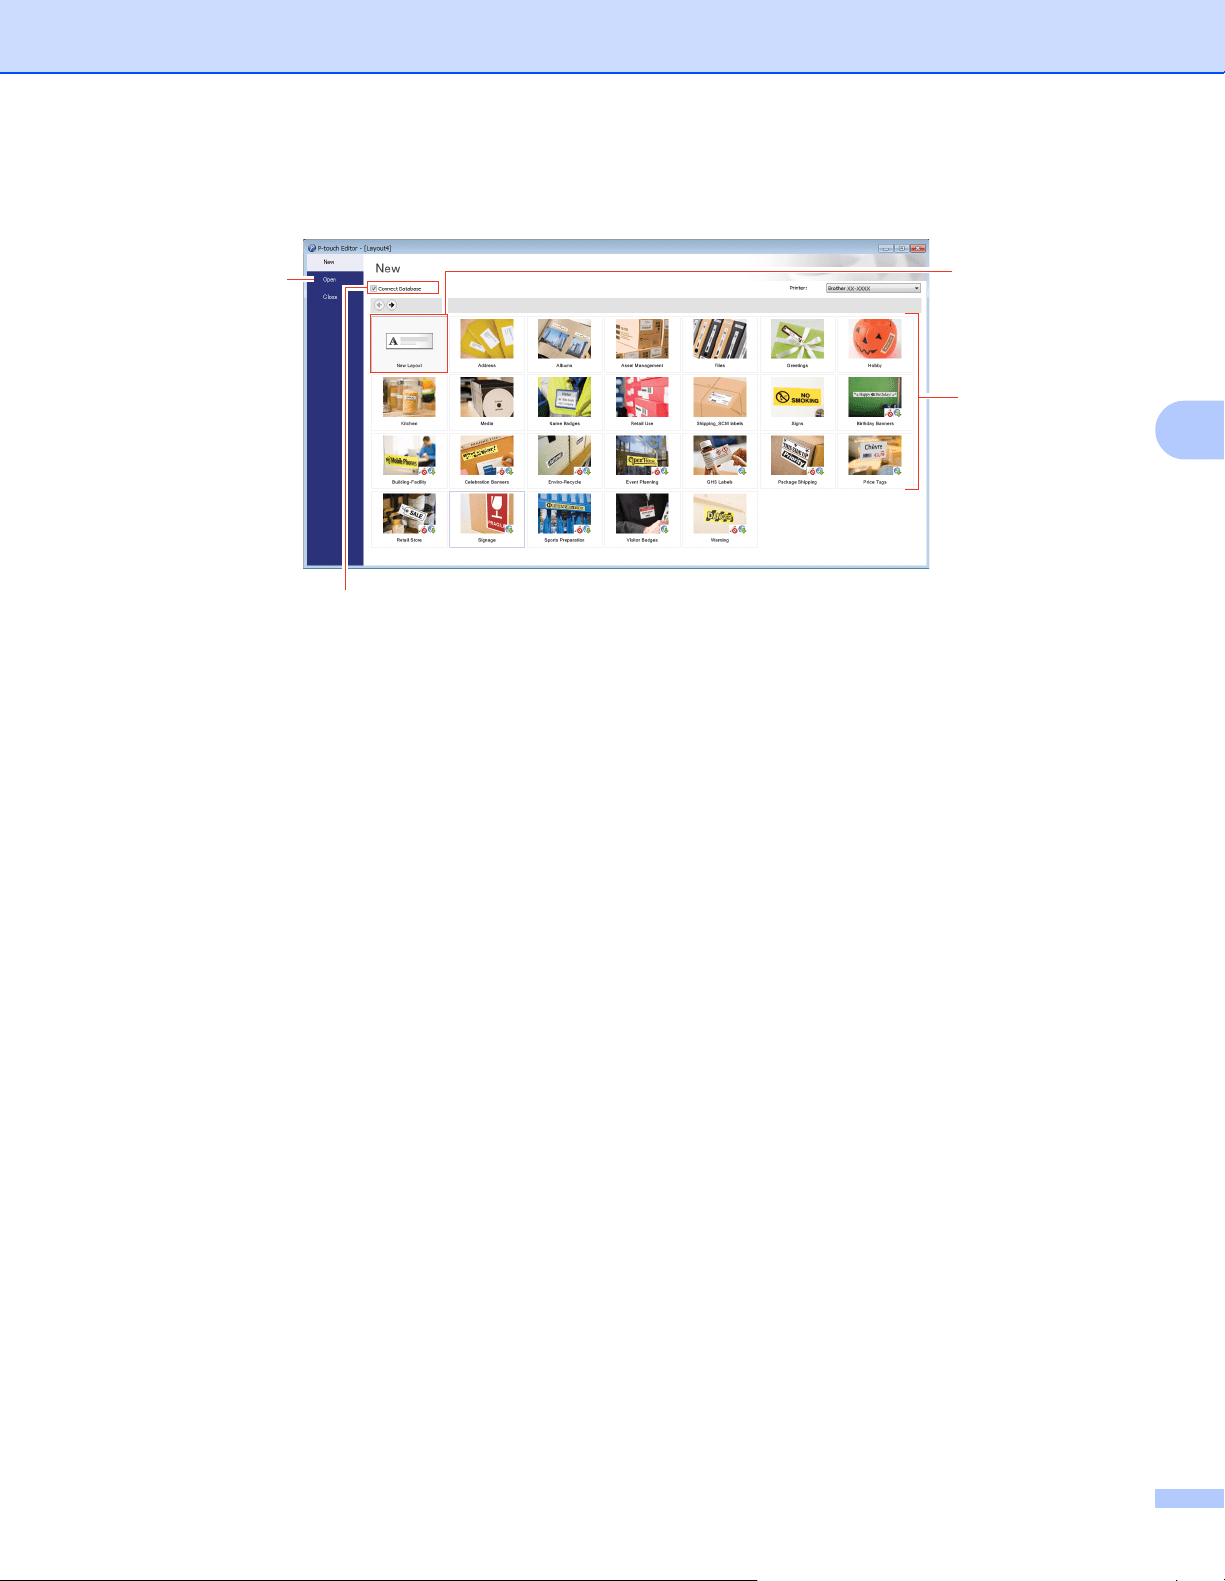
b When P-touch Editor starts, select whether you want to create a new layout or open an existing layout.
Note
To change how P-touch Editor functions when it starts, click Tools > Options in the P-touch Editor menu
bar to display the Options dialog box. On the left side, select the General heading, and then the setting
you want in the Operations list box under Startup Settings. The factory setting is Display New View.
How to Use P-touch Editor 4
How to Use P-touch Editor
24
4
c Select one of the options displayed.
1 To create a new layout, double-click New Layout, or click New Layout and then click →.
2 To create a new layout using a preset layout, double-click a category button, or select a category
button and then click →.
3 To connect a preset layout to a database, select the check box next to Connect Database.
4 To open an existing layout, click Open.
2
1
3
4
How to Use P-touch Editor
25
4
Printing with P-touch Editor 4
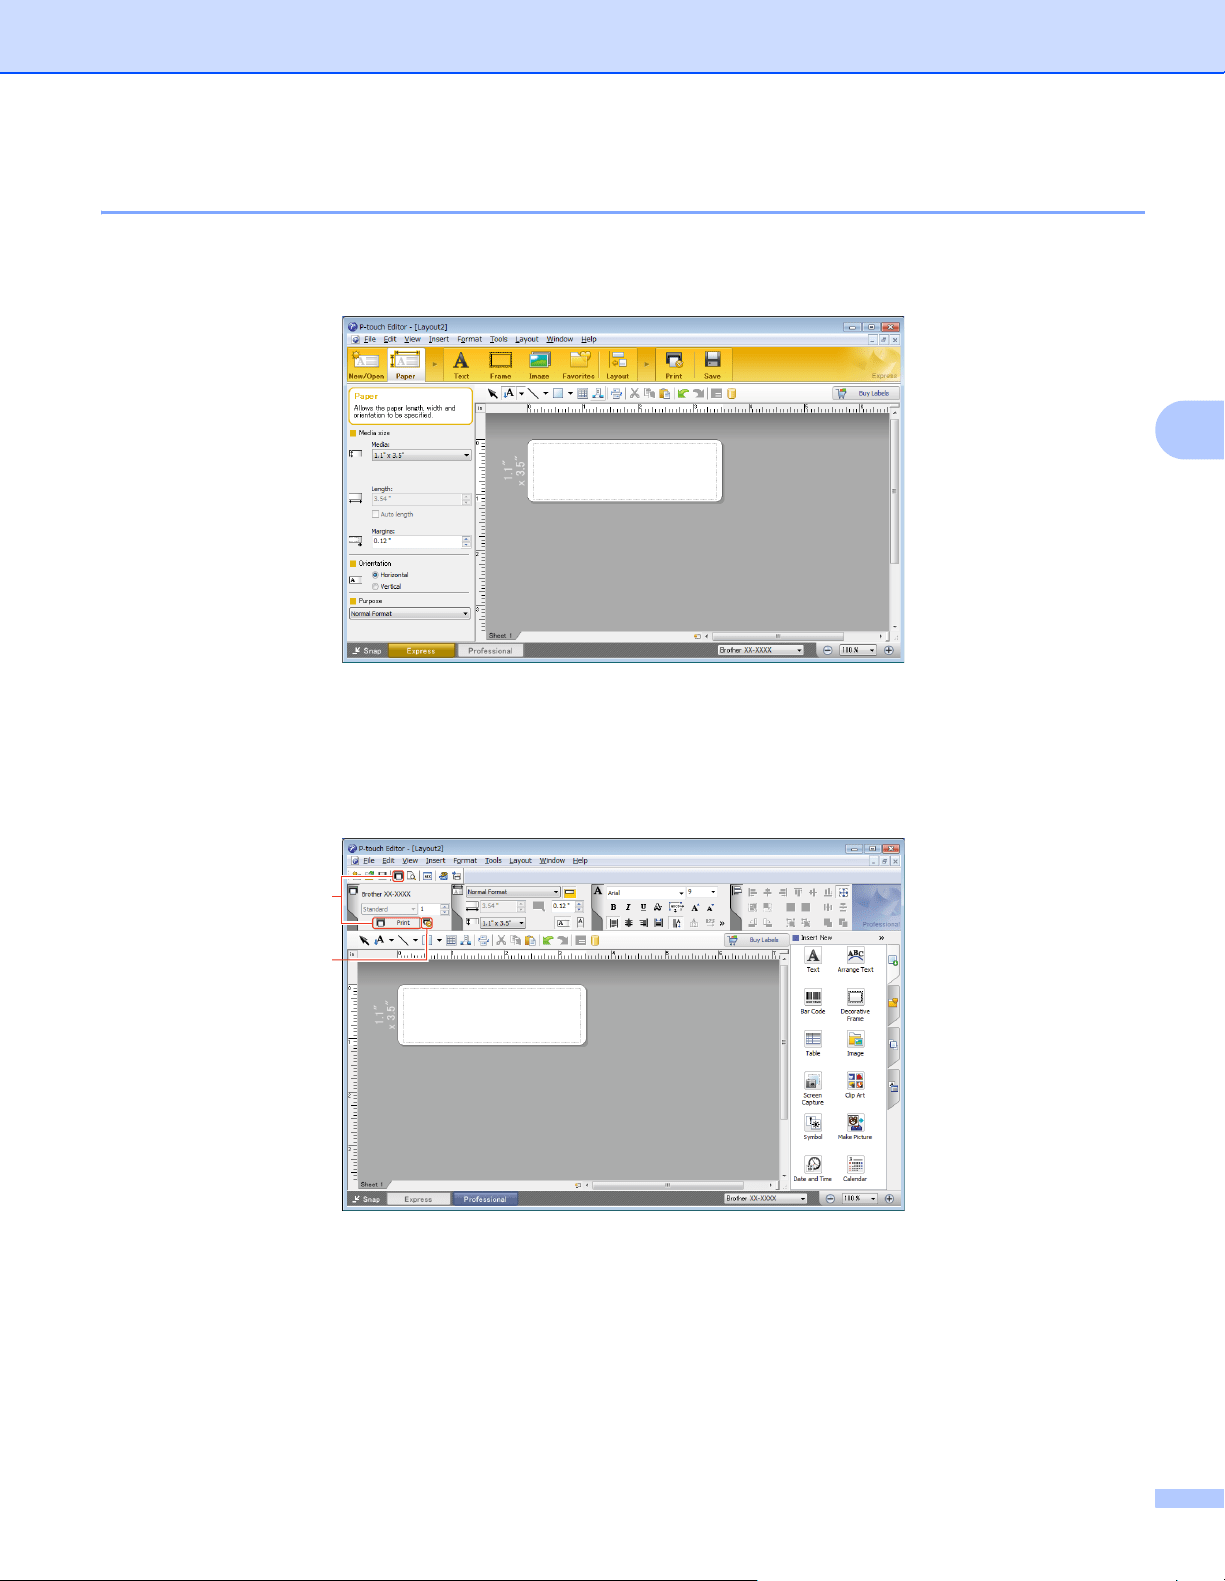
Express mode
This mode allows you to quickly create layouts that include text and images.
Configure the print settings in the Print screen before printing.
To print, click File > Print from the menu bar or click the Print icon.
Professional mode
This mode allows you to create layouts using a wide-range of advanced tools and options.
Configure the print settings in the Print screen before printing.
To print, click File > Print from the menu bar or click the Print icon (A).
Click the Print icon (B) to start printing without changing the printing settings.
B
A
How to Use P-touch Editor
26
4
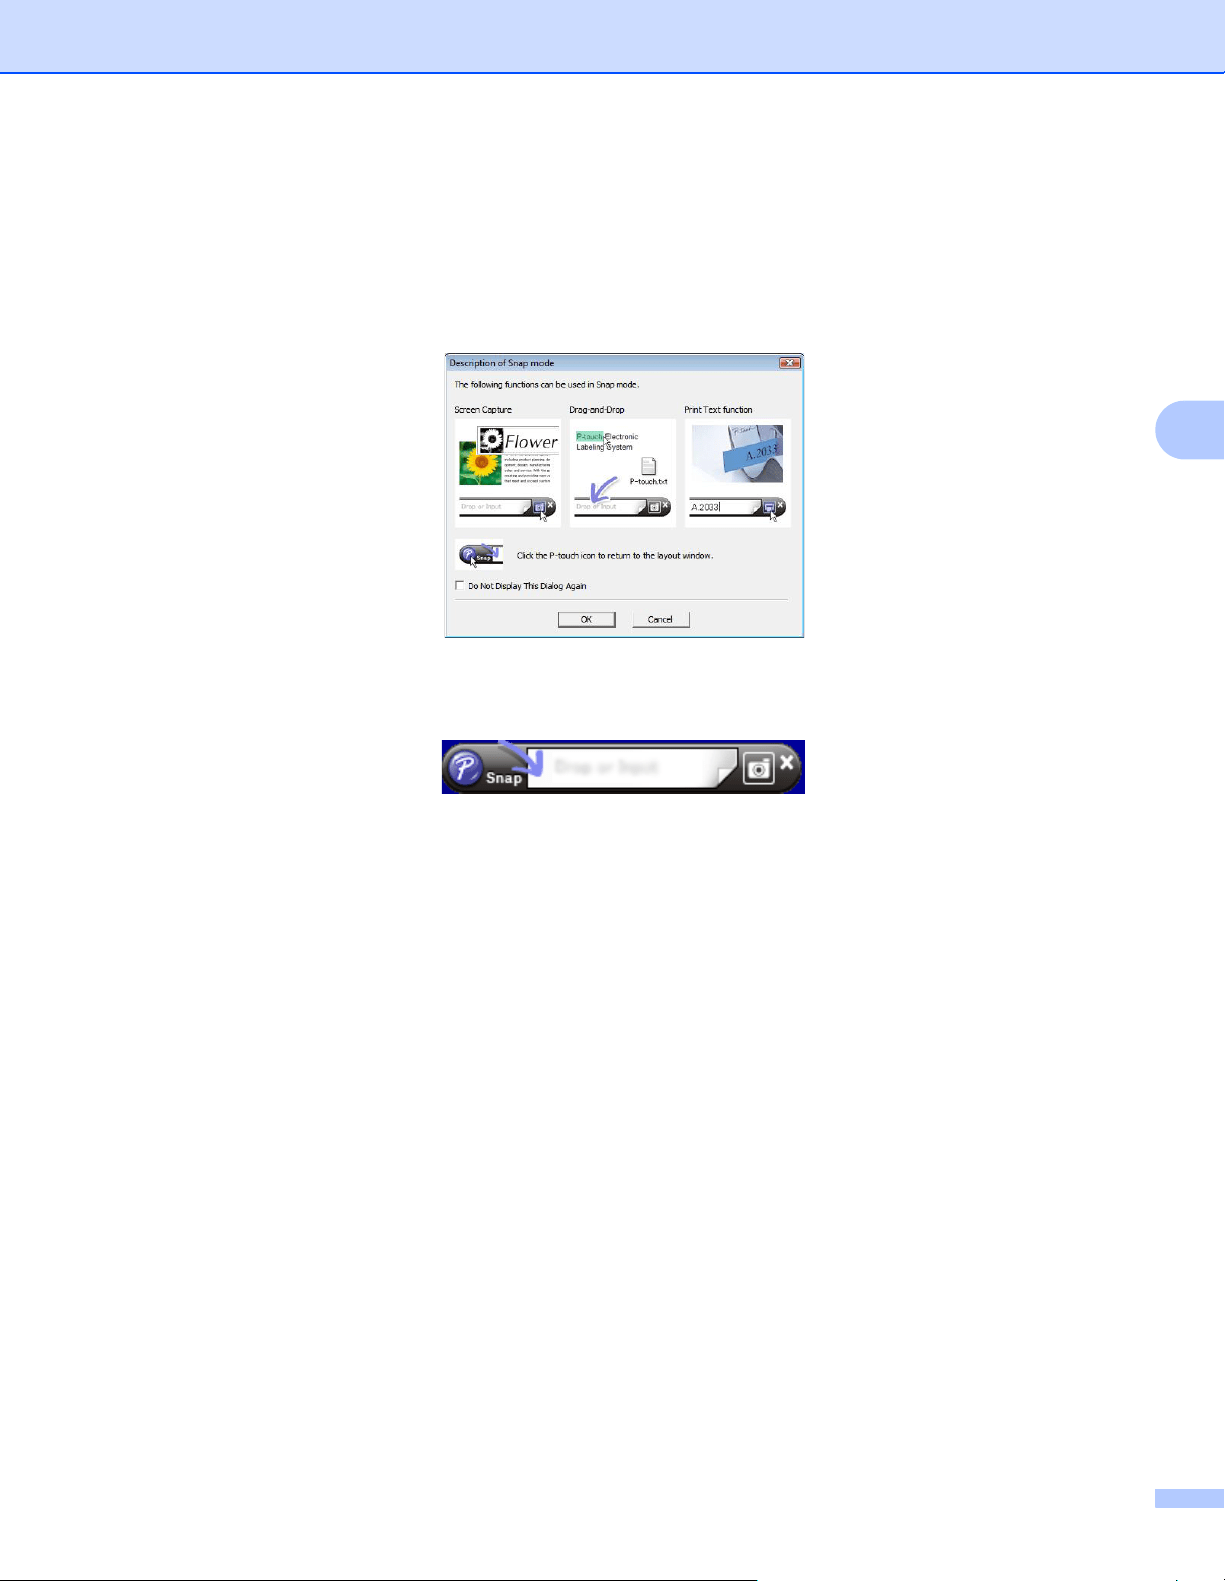
Snap mode
This mode allows you to capture all or a portion of your computer screen display, print it as an image,
and save it for future use.
a Click the Snap mode selection button.
The Description of Snap mode dialog box appears.
b Click OK.
The Snap mode palette appears.
How to Use P-touch Editor
27
4
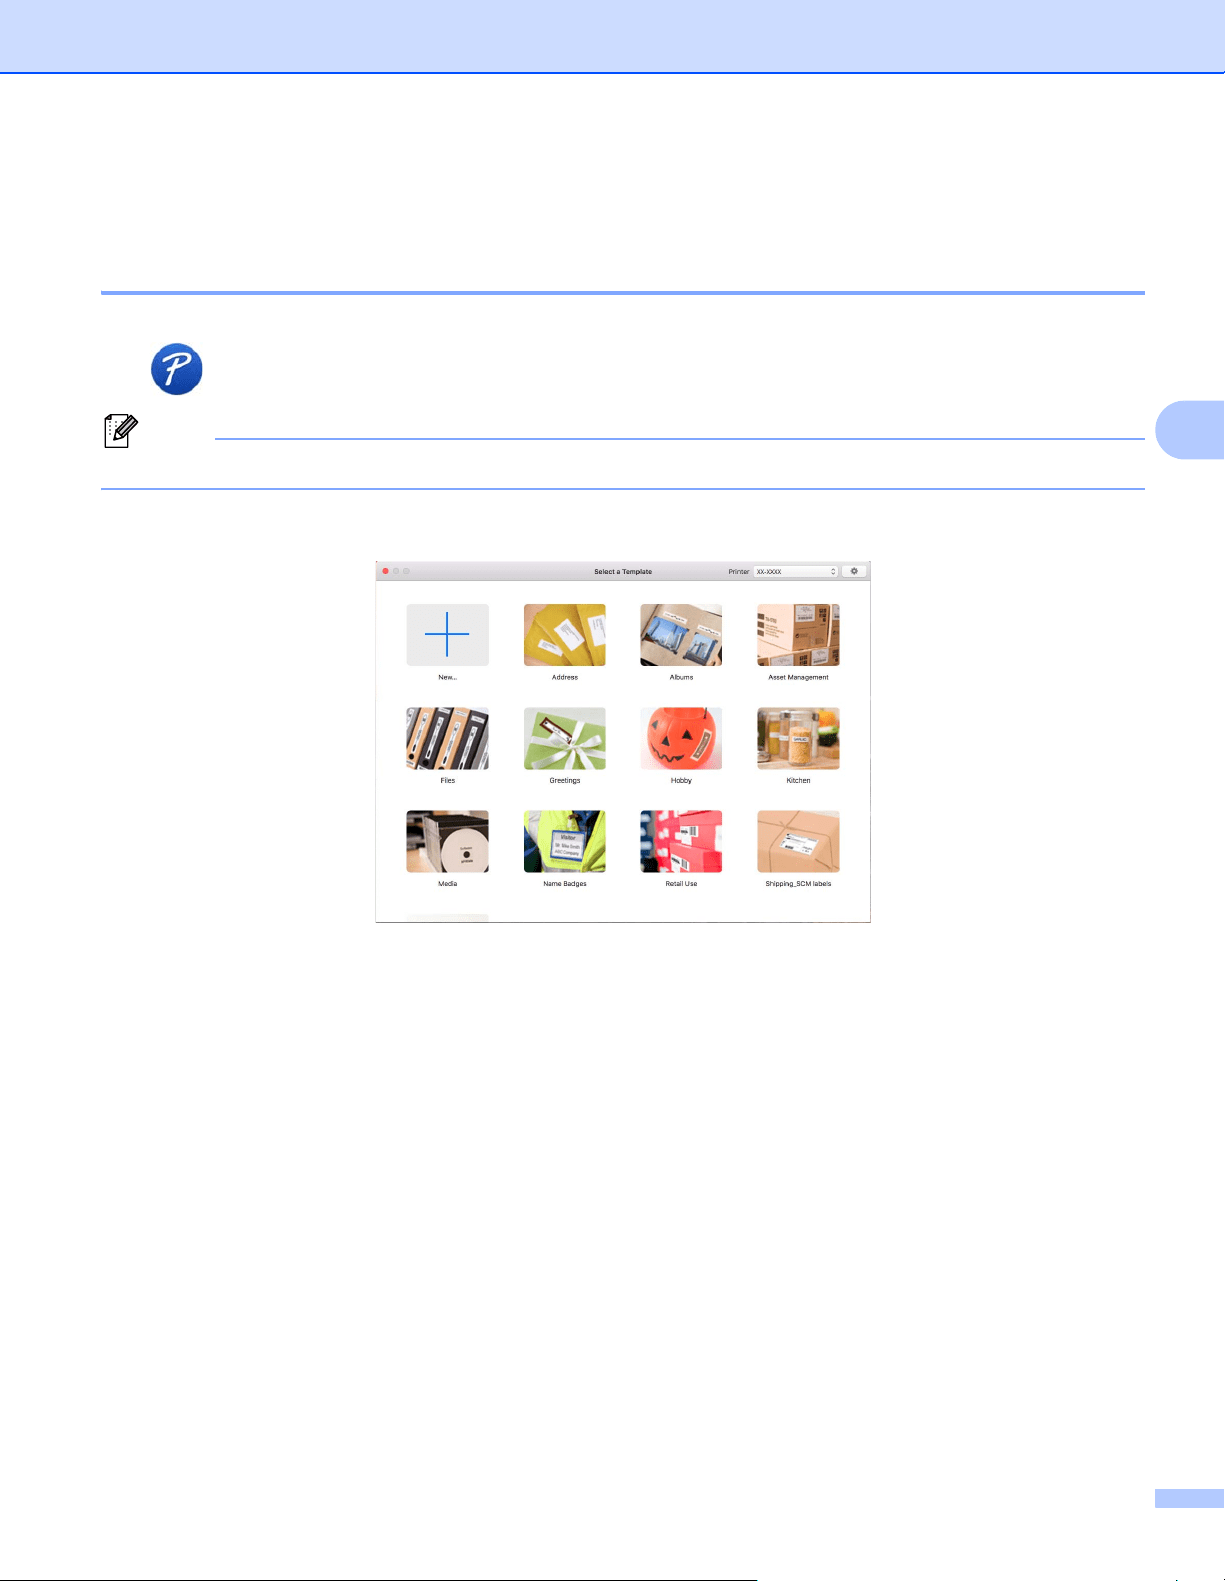
For Mac 4
Start P-touch Editor 4
Double-click Macintosh HD > Applications, and then double-click the P-touch Editor application
icon.
Note
When using a Mac, you cannot transfer label data created using P-touch Editor to the Label Printer.
When P-touch Editor starts, select whether you want to create a new layout or open an existing layout.
How to Use P-touch Editor
28
4
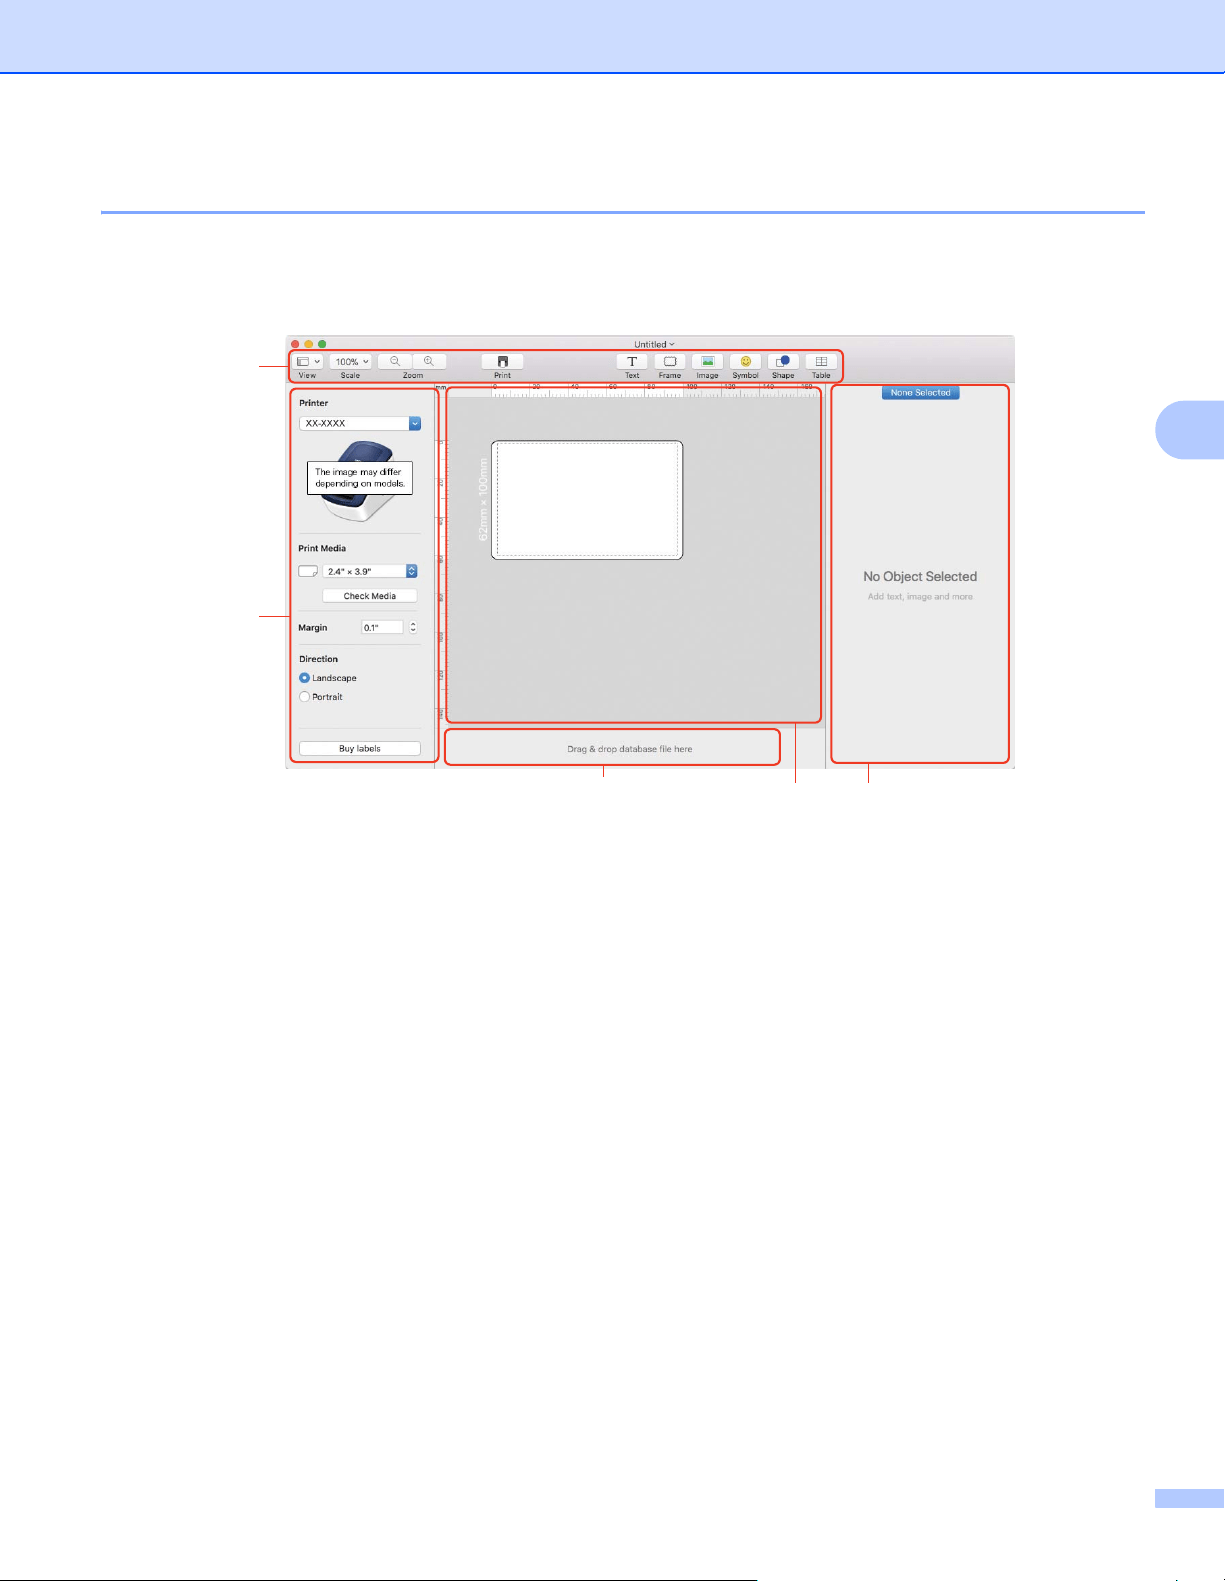
Operation modes 4
Standard mode
This mode allows you to create labels that contain text and images.
1 Toolbar
2 Label Inspector
3 Database Connection Area
4 Object Inspector
5 Layout Window
1
2
3
45

29
5
5
This section describes how to efficiently create labels from contacts using the P-touch Address Book.
The screens may differ depending on your operating system.
(P-touch Address Book is not supported in some languages.)
Start the P-touch Address Book 5
a Start the P-touch Address Book .
For Windows 10:
Click Start > P-touch Address Book 1.3 under Brother P-touch, or double-click the P-touch
Address Book 1.3 icon on the desktop.
For Windows 8 / Windows 8.1:
Click P-touch Address Book 1.3 on the Apps screen or double-click the P-touch Address Book 1.3
icon on the desktop.
For Windows 7:
Click Start > All Programs > Brother P-touch > P-touch Address Book 1.3, or double-click the
P-touch Address Book 1.3 shortcut icon on the desktop.
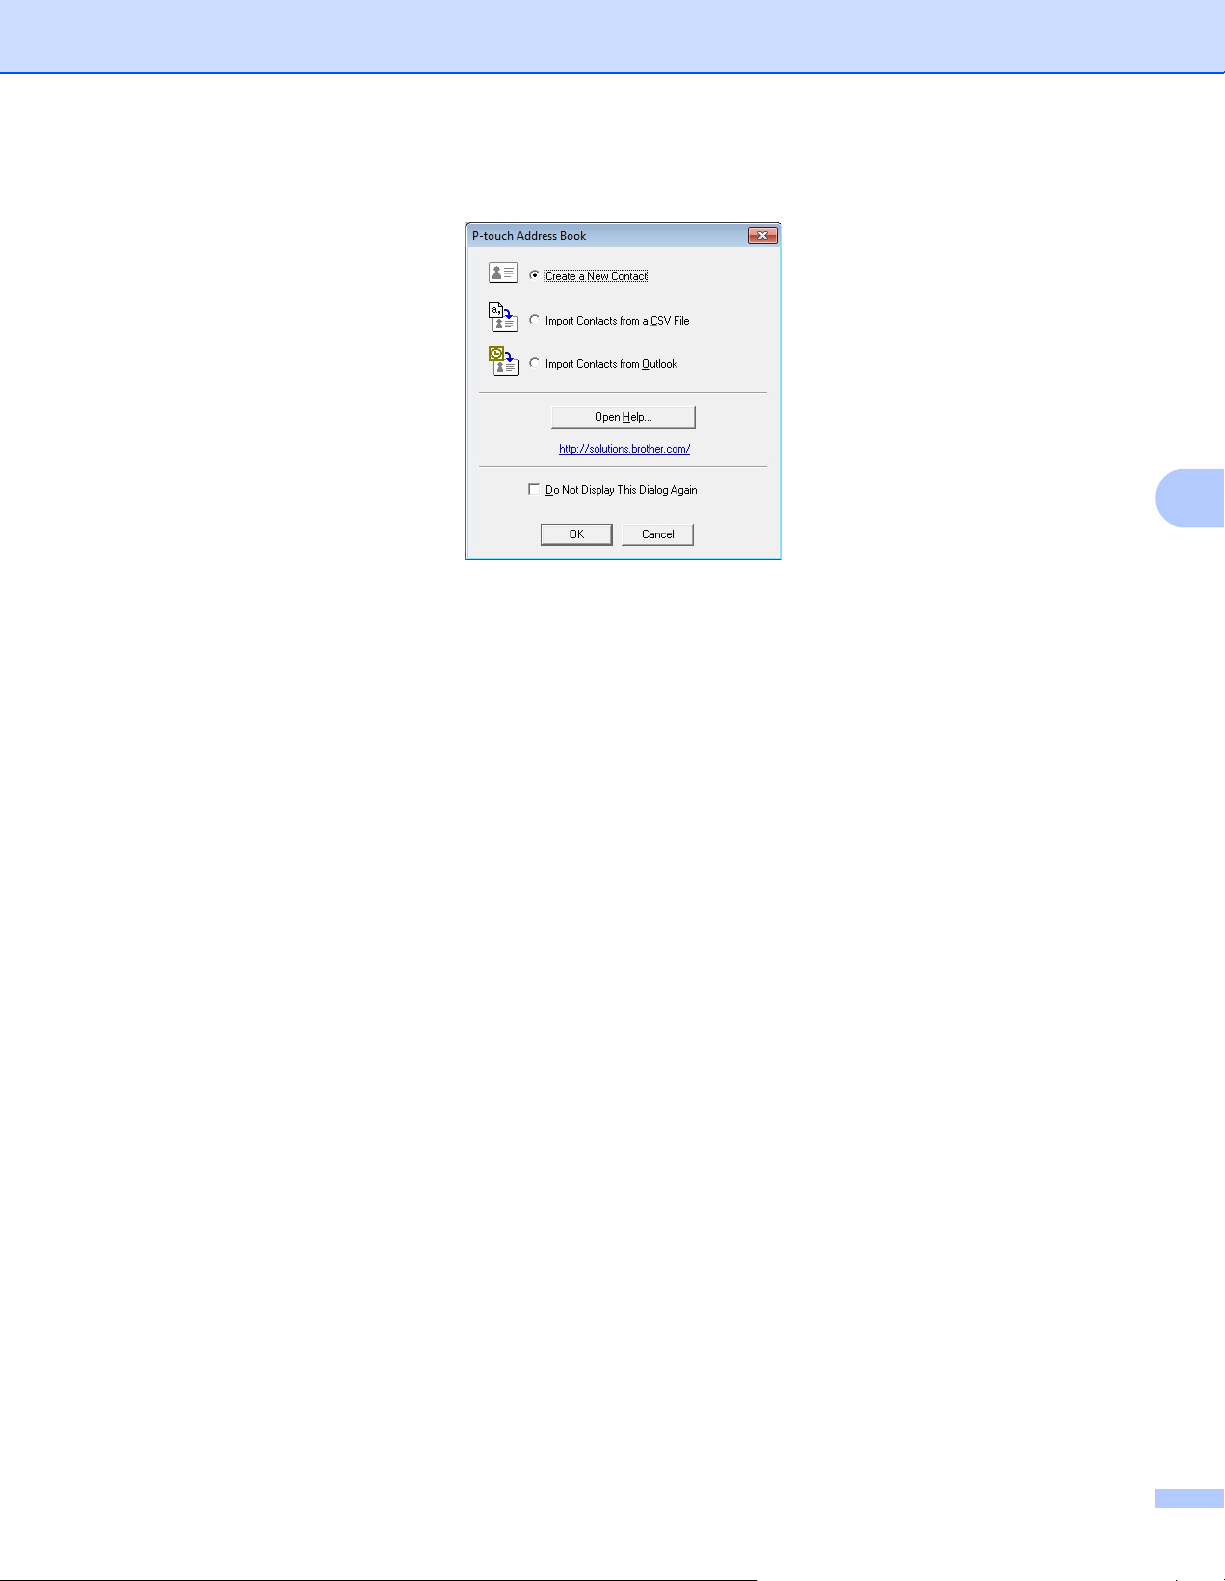
b When the P-touch Address Book is launched, the Startup dialog box appears, which allows you to create
new contacts, or import Outlook contacts and CSV formatted data.
How to Use the P-touch Address Book
(Windows only)
5
How to Use the P-touch Address Book (Windows only)
30
5
c In the Startup dialog box, specify the P-touch Address Book operation you want to perform and click OK.
Select Create a New Contact to view a New Contact dialog box.
Select Import Contacts from a CSV File or Import Contacts from Outlook to import contacts in
other formats.
Click Open Help... to open the P-touch Address Book Help files.
The P-touch Address Book Help offers detailed information on available features and explains how
to use the P-touch Address Book.
How to Use the P-touch Address Book (Windows only)
31
5
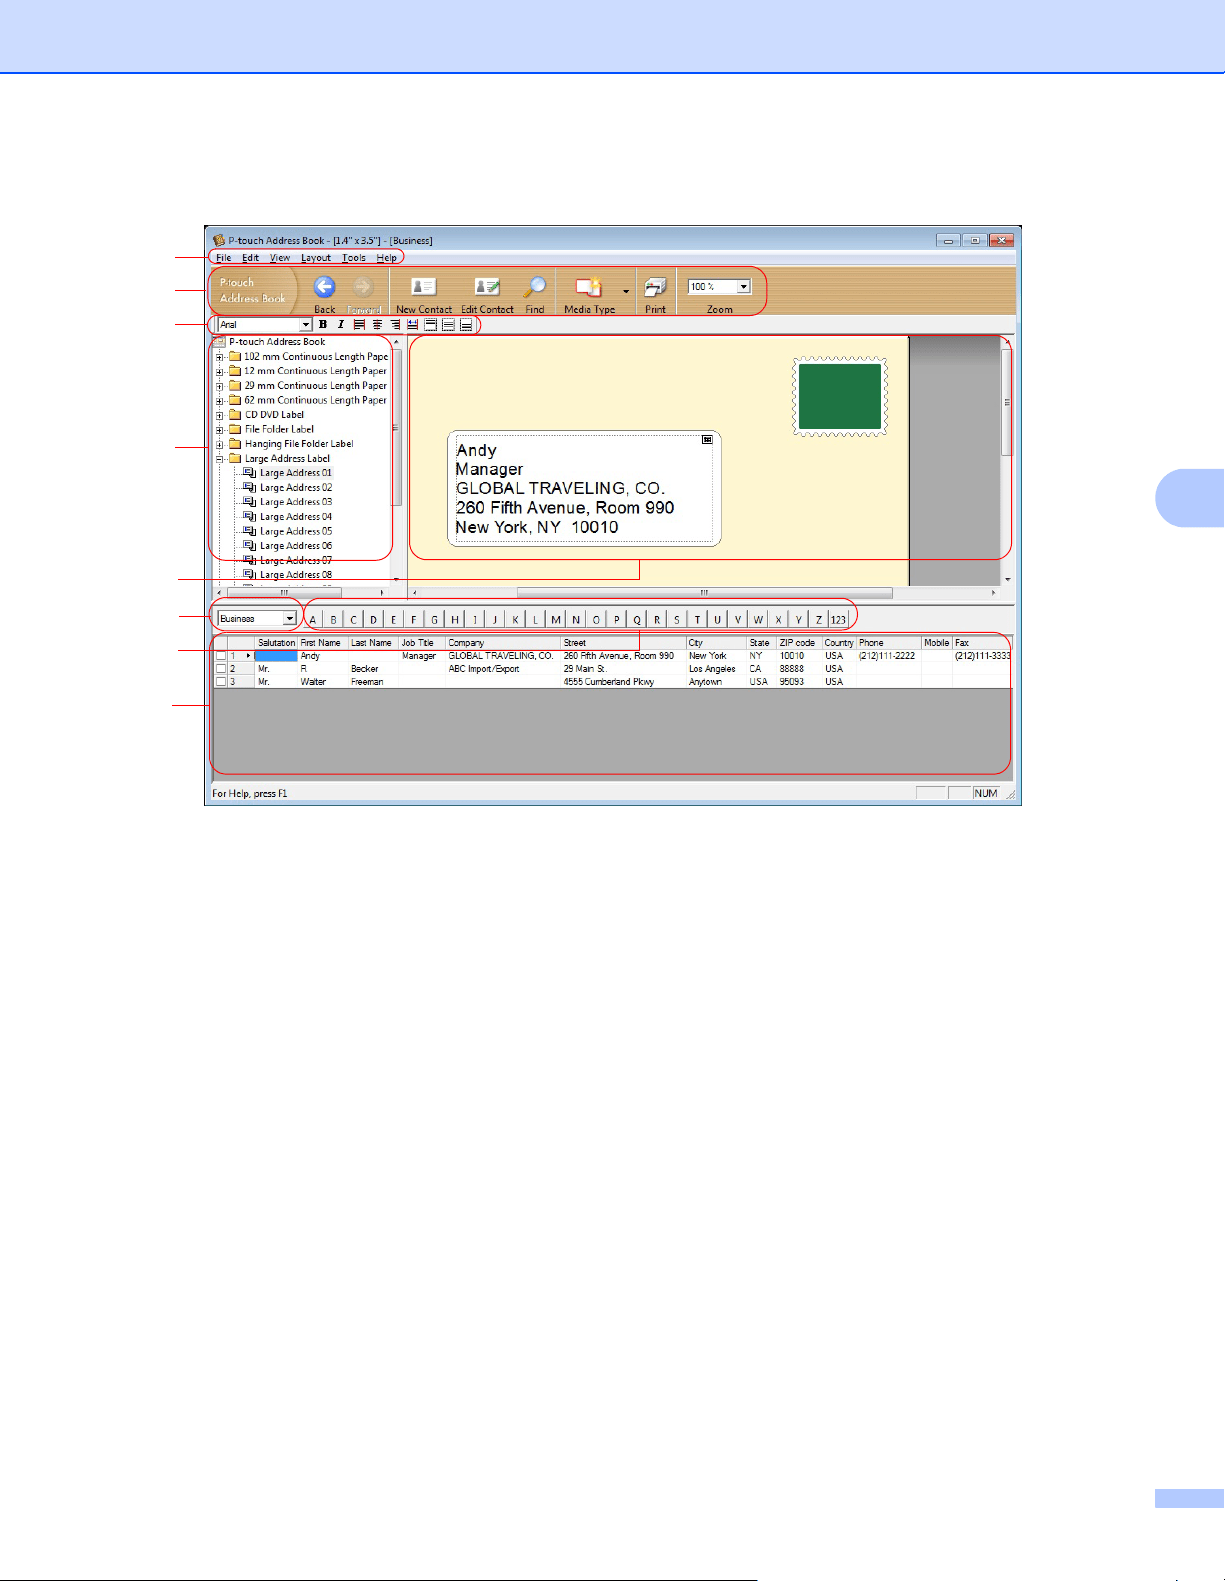
Layout Window
1 Menu Bar
Commands are categorized under each menu (File, Edit, View, Layout, and Tools) according to their
functions.
2 Standard Toolbar
Provides a group of frequently used commands (such as New Contact, Edit Contact, Find, or Print).
3 Text Toolbar
Used to adjust text attributes such as font size and alignment for text formatting.
4 Layout Style Selection View
Displays layout styles stored in the folder.
5 Layout Work Area
Used to display or edit the layout selected in the Layout Style Selection view (4).
6 Contact List Combo Box
Displays the contact list that is currently specified. You can choose from Personal, Business, Other1,
Other2, and Other3.
7 Index Tab
You can search within the field in Record View. Click Tools > Sort to open the Sort dialog box,
and specify the field you want using Key1.
8 Record View
Displays the contact data in each field. The data can also be edited (added, deleted, or modified).
1
2
3
4
6
8
5
7
How to Use the P-touch Address Book (Windows only)
32
5
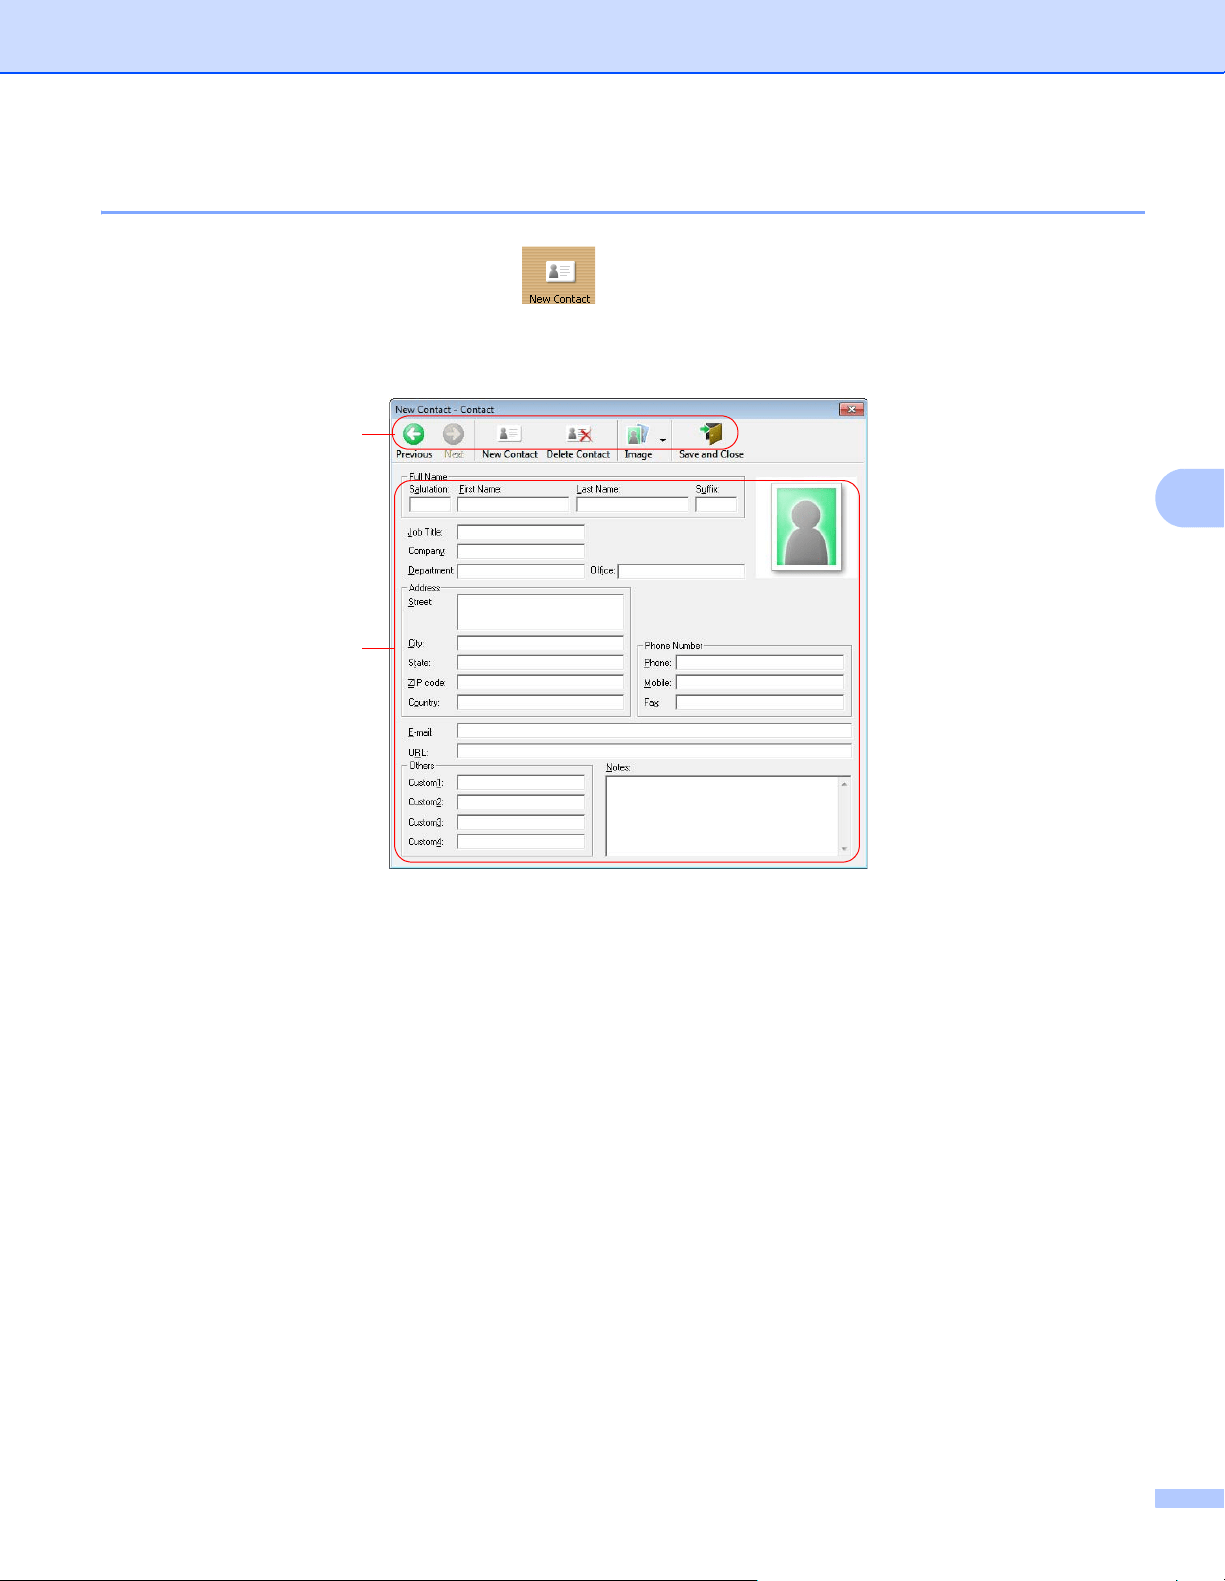
Create a New Contact 5
a Click File > New Contact, or click the (New Contact) button.
The New Contact dialog box appears.
b Enter the new contact information.
1
2
How to Use the P-touch Address Book (Windows only)
33
5
1 New Contact Form Toolbar
2 Contact Form
Used to enter each item, such as name, address, phone number, company information, and email
address for the new contact.
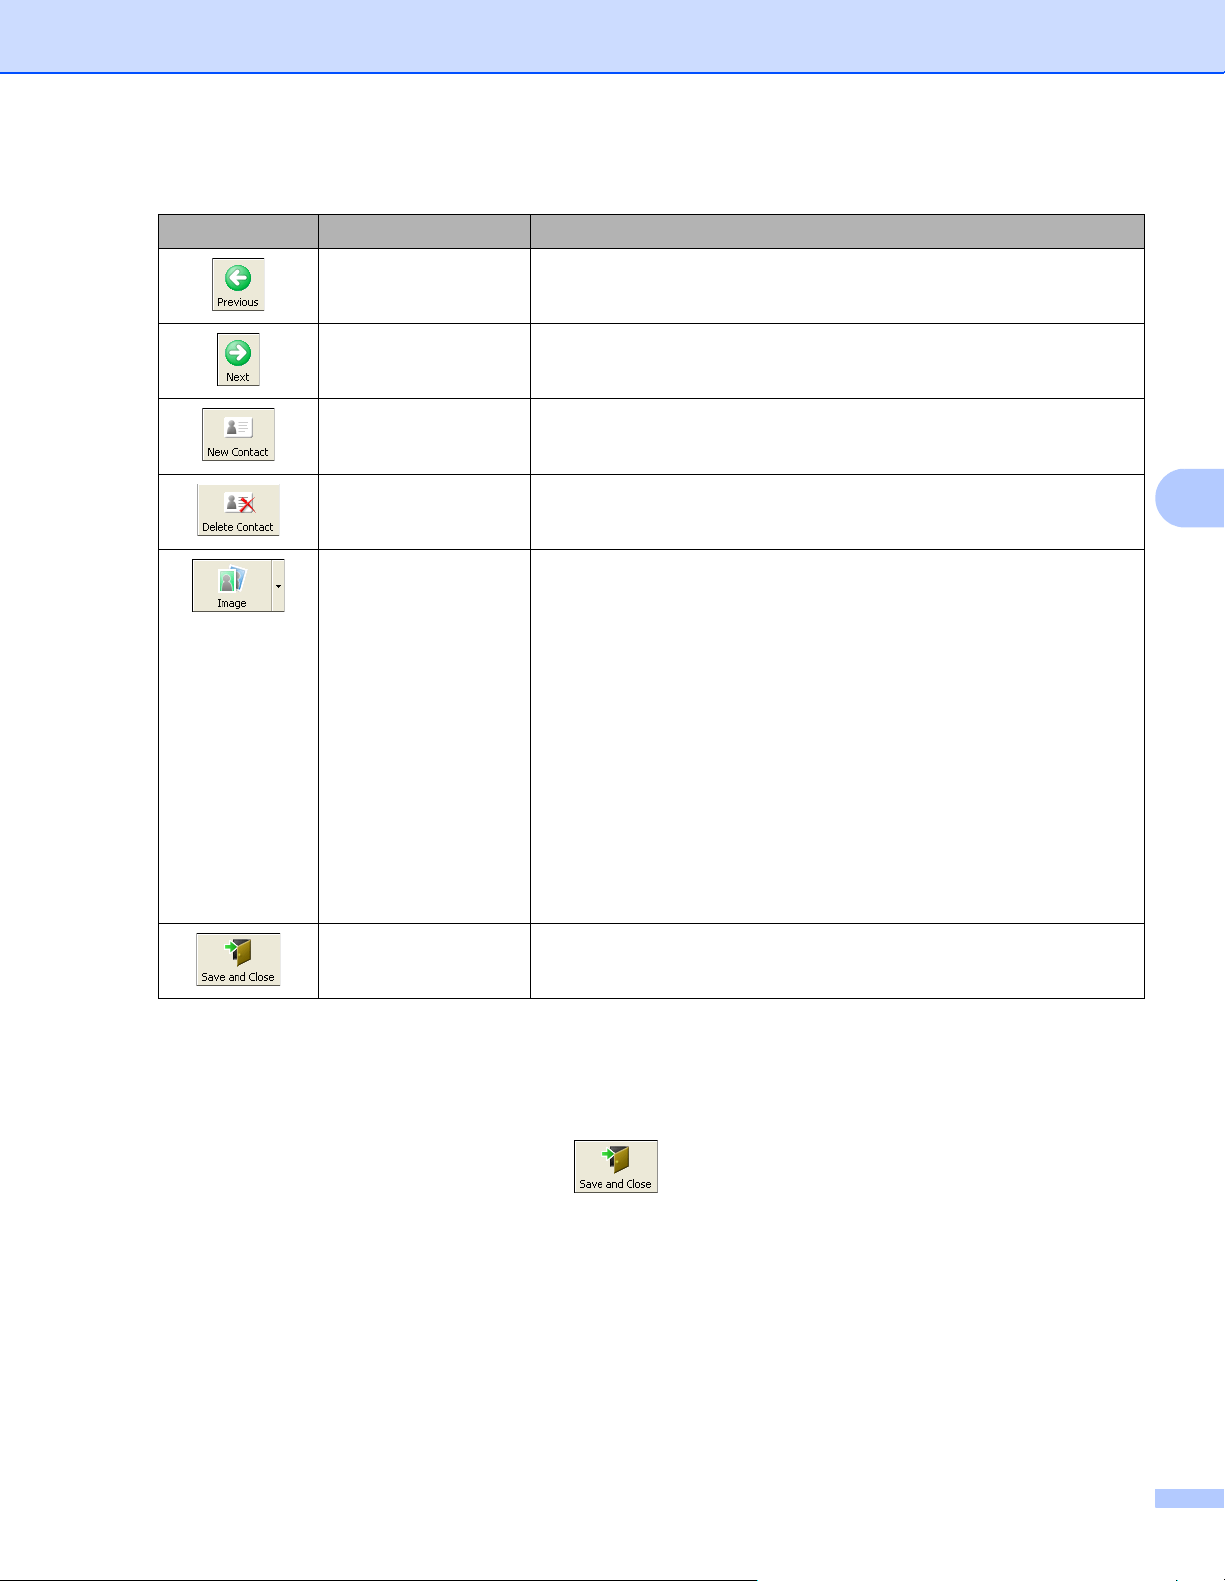
c When you finish entering the data, click the (Save and Close) button.
Icon Button Name Function
Previous Displays the previous contact.
Next Displays the next contact.
New Contact Displays the form window for a new contact.
Delete Contact Deletes the contact that is currently selected.
Image Allows you to insert an image for a contact from a file or a
camera currently connected to the computer.
The following file types are supported:
• Bitmap (*.bmp, *.dib)
• JPEG file (*.jpg, *.jpeg)
• TIFF file (uncompressed) (*.tif)
• GIF file (*.gif)
• Icon (*.ico)
• Windows Meta File (*.wmf, *.emf) (Image adjustment is not
allowed.)
• PNG file (*.png)
Save and Close Saves the contact and closes the New Contact dialog box.
34
6
6
This program allows you to manage and print P-touch Editor templates.
Start P-touch Library 6
For Windows 10:
Click Start > P-touch Library 2.3 under Brother P-touch.
For Windows 8 / Windows 8.1:
On the Apps screen, click P-touch Library 2.3.
For Windows 7:
Click Start > All Programs > Brother P-touch > P-touch Tools > P-touch Library 2.3.
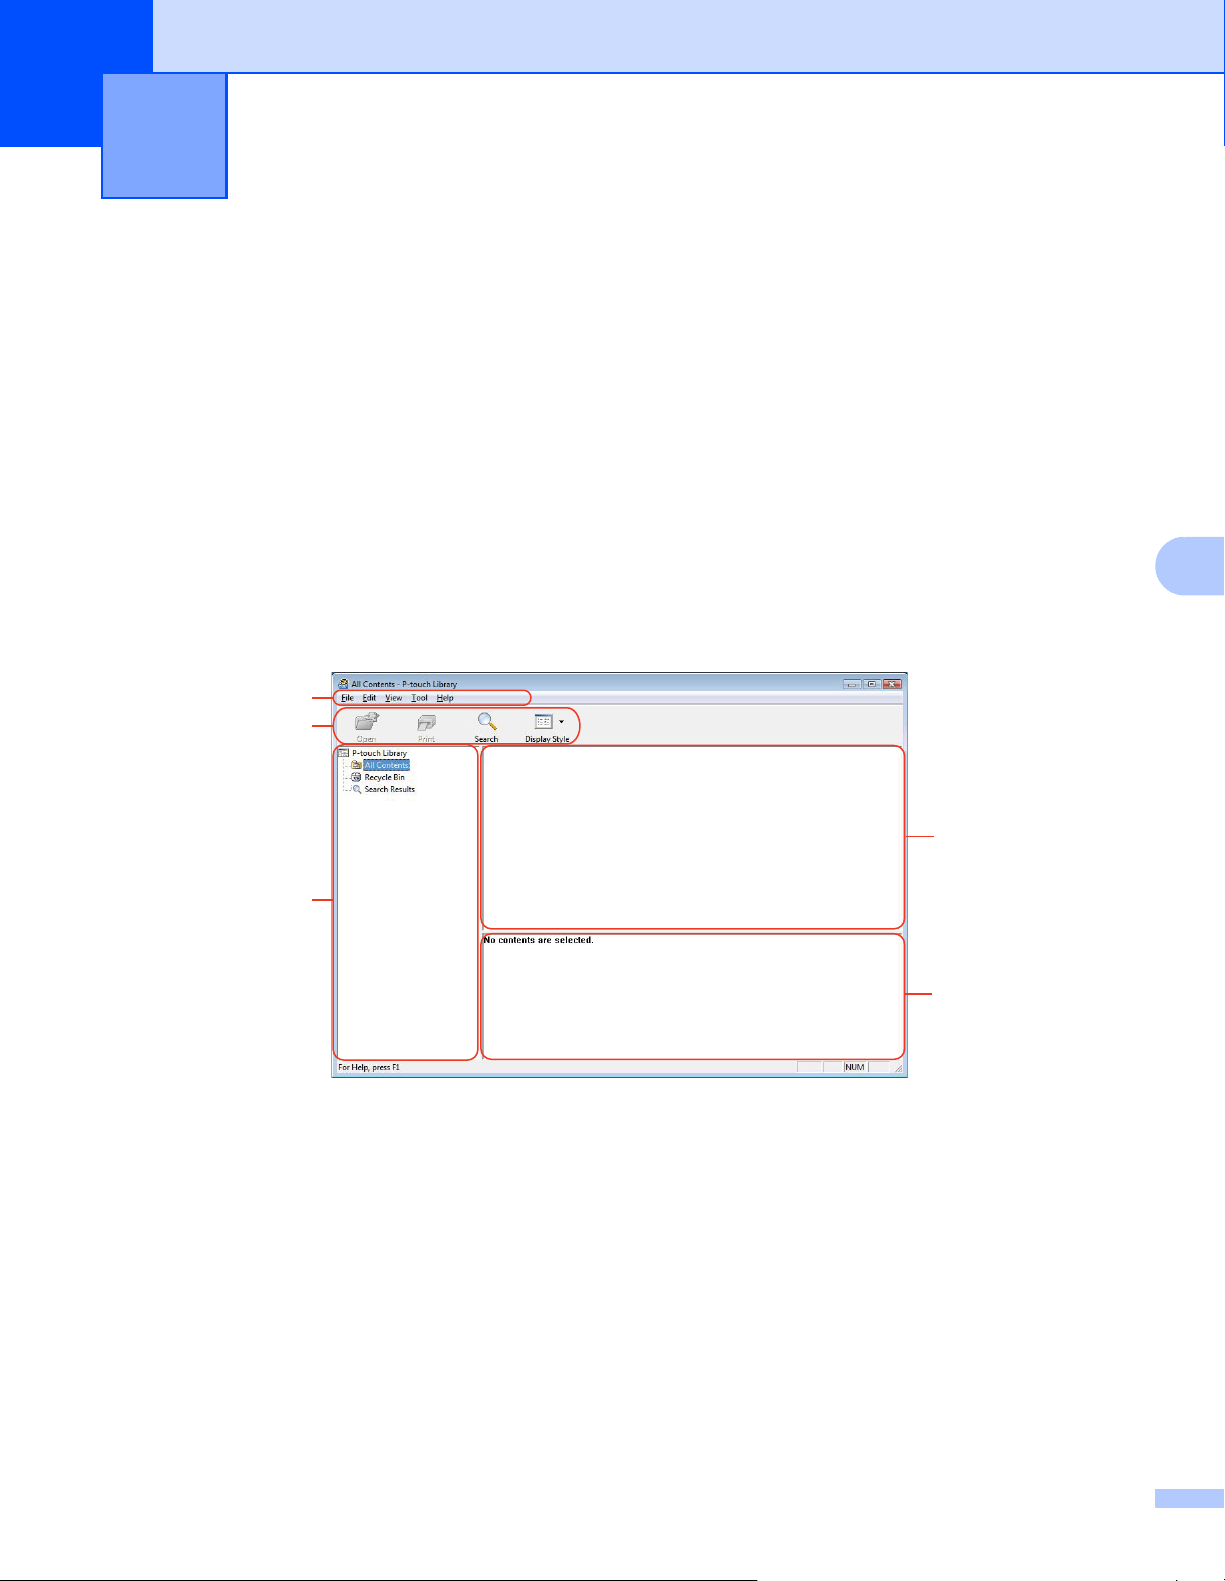
Main window
6
1 Menu Bar
Provides access to all available commands, which are grouped under each menu title (File, Edit, View,
Tool, and Help) according to their functions.
2 Toolbar
Provides access to frequently-used commands.
3 Folder List
Displays a list of folders. When you select a folder, the templates in the selected folder appear in the
templates list.
4 Templates List
Displays a list of the templates in the selected folder.
How to Use P-touch Library
(Windows only)
6
2
3
1
4
5
How to Use P-touch Library (Windows only)
35
6
5Preview
Displays a preview of the templates selected in the templates list.
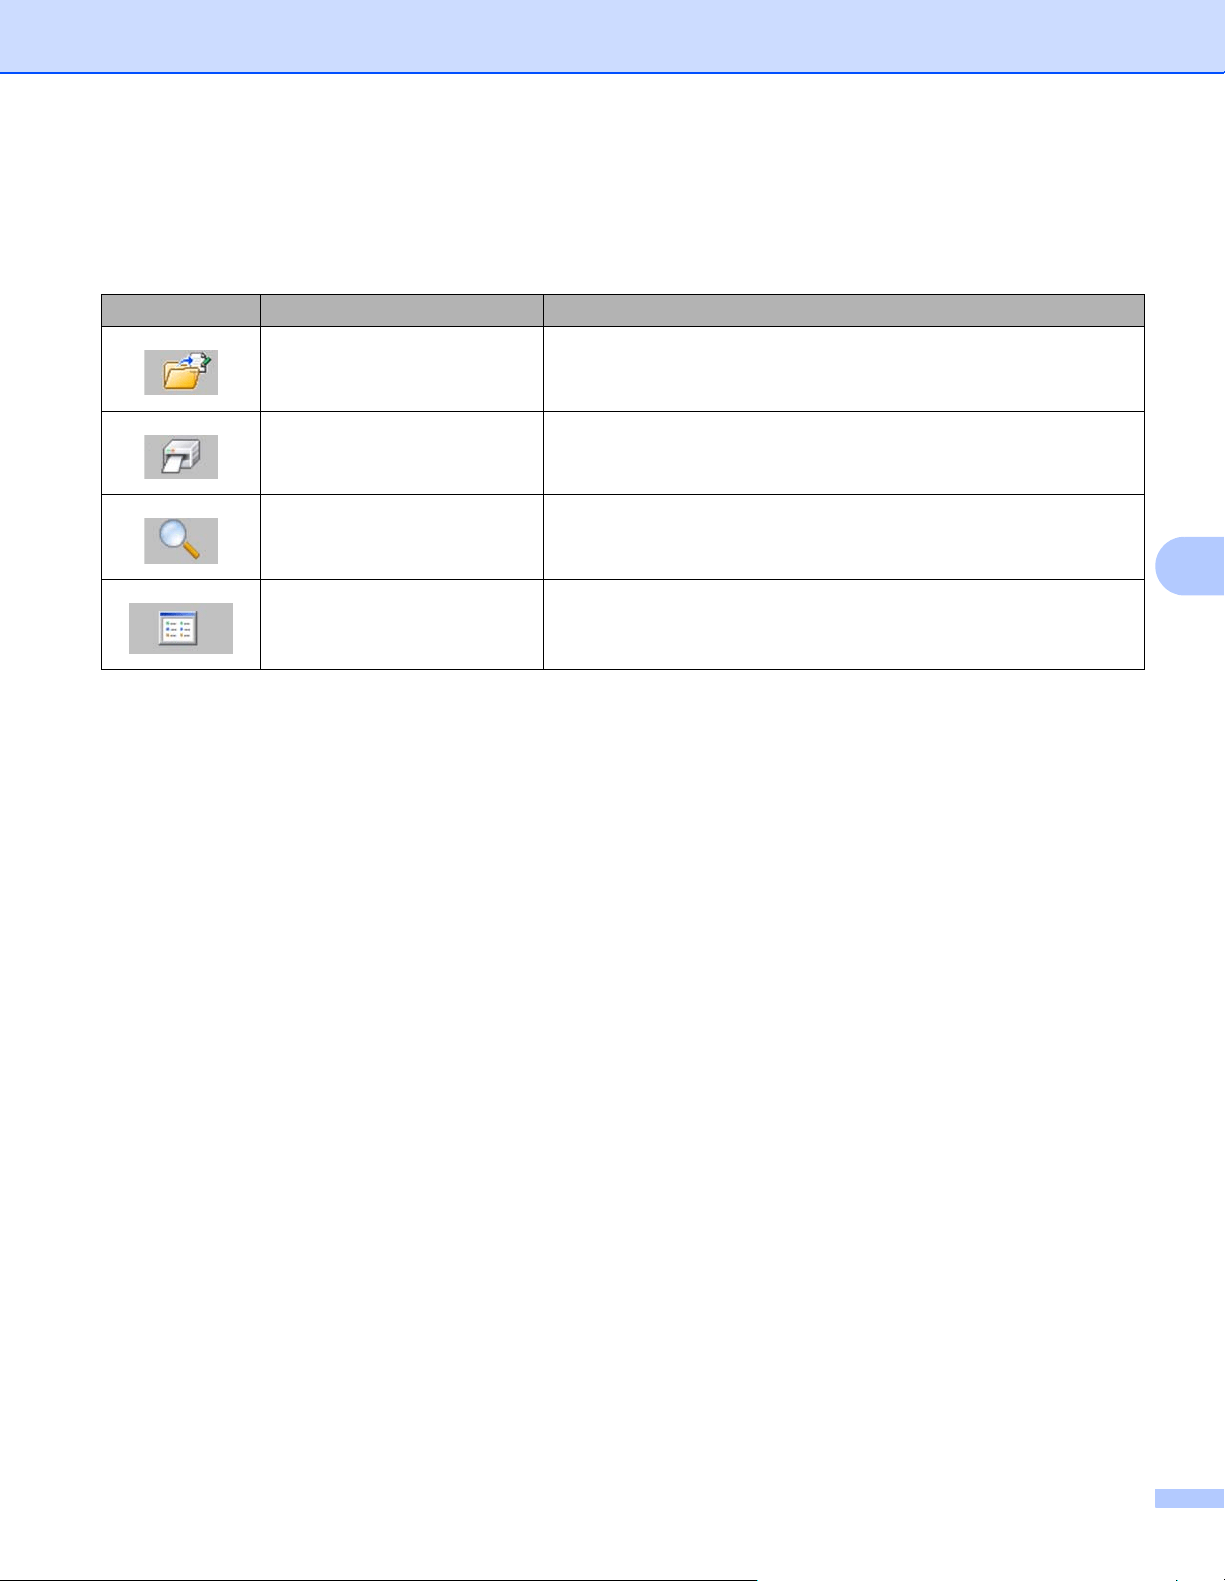
Toolbar Icons
Icon Button name Function
Open Opens the selected template.
Print Prints the selected template with the Label Printer.
Search Allows you to search for templates registered to P-touch Library.
Display Style Changes the file display style.

How to Use P-touch Library (Windows only)
36
6
Open and Edit Templates 6
Select the template you want to open or edit, and then click Open.
The program associated with the template launches, allowing you to edit the template.

How to Use P-touch Library (Windows only)
37
6
Print Templates 6
Select the template you want to print and then click Print.
The connected Label Printer prints the template.
How to Use P-touch Library (Windows only)
38
6
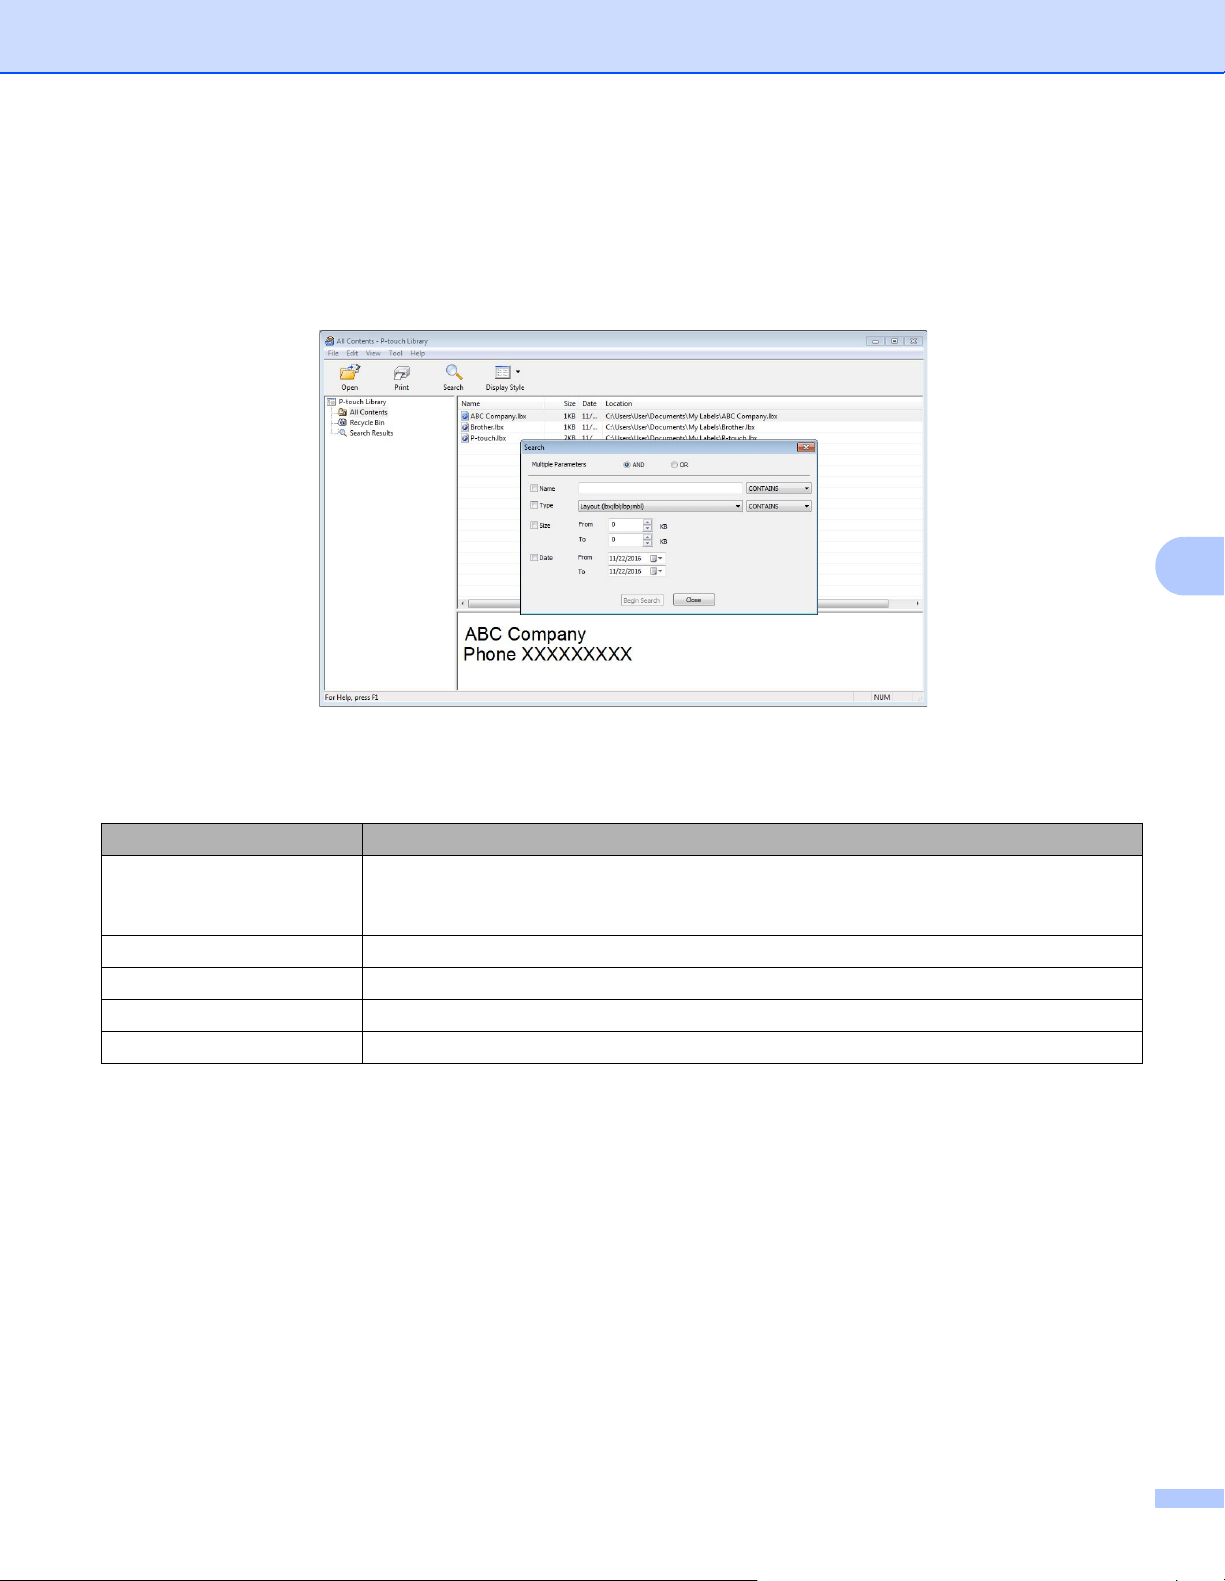
Search for Templates 6
You can search for templates registered in the P-touch Library.
a Click Search.
b Specify the search criteria.
The following search criteria are available:
c Click Begin Search.
Settings Details
Multiple Parameters Determines how the program searches when multiple criteria are specified. If you select
AND, the program searches for files that satisfy all of the criteria.
If you select OR, the program searches for files that satisfy any of the criteria.
Name Search for a template by specifying the file name.
Type Search for a template by specifying the file type.
Size Search for a template by specifying the file size.
Date Search for a template by specifying the file date.

How to Use P-touch Library (Windows only)
39
6
d Close the Search dialog box.
To confirm the search results, click Search Results in the folder view.
Note
You can register templates to P-touch Library by dragging and dropping them into the All Contents folder
or to the folder list. You can also configure P-touch Editor to register templates to P-touch Library
automatically, using the following procedure:
1 In the P-touch Editor menu, select Tools > Options.
2 In the Options dialog box, click General > Registration Settings.
3 Select the timing for registering templates created with P-touch Editor, and then click OK.

40
7
7
The software can be upgraded to the latest available version using the P-touch Update Software.
Note
• The actual software and the contents of this manual may differ.
• Do not turn off the power when transferring data or updating firmware.
Update P-touch Editor and P-touch Address Book
(Windows only) 7
IMPORTANT
Before updating P-touch Editor and P-touch Address Book, install the printer driver.
a Start the P-touch Update Software.
For Windows 10:
Click Start > Brother P-touch > P-touch Update Software, or double-click P-touch Update
Software on the desktop.
For Windows 8 / Windows 8.1:
Click P-touch Update Software on the Apps screen or double-click P-touch Update Software on
the desktop.
For Windows 7:
Double-click the P-touch Update Software icon.
Note
The following method can also be used to start P-touch Update Software:
Click Start > All Programs > Brother P-touch > P-touch Update Software.
How to Update P-touch Software 7

How to Update P-touch Software
41
7
b Click the Computer software update icon.
c Select the Printer and Language, select the check boxes next to P-touch Editor and P-touch Address
Book, and then click Install.
d A message appears when the installation has finished.
How to Update P-touch Software
42
7
Update the Firmware 7
IMPORTANT
• Before updating the firmware, you must install the printer driver.
• Do not turn off the power when transferring data or updating firmware.
• If another application is running, exit the application.
For Windows 7
a Turn on the Label Printer and connect the USB Cable.
b Start the P-touch Update Software.
For Windows 7:
Double-click the P-touch Update Software icon.
Note
The following method can also be used to start P-touch Update Software:
Click Start > All Programs > Brother P-touch > P-touch Update Software.
For Windows 8 / Windows 8.1:
Click P-touch Update Software on the Apps screen or double-click P-touch Update Software on
the desktop.
For Windows 10:
Click Start > Brother P-touch > P-touch Update Software, or double-click P-touch Update
Software on the desktop.
How to Update P-touch Software
43
7
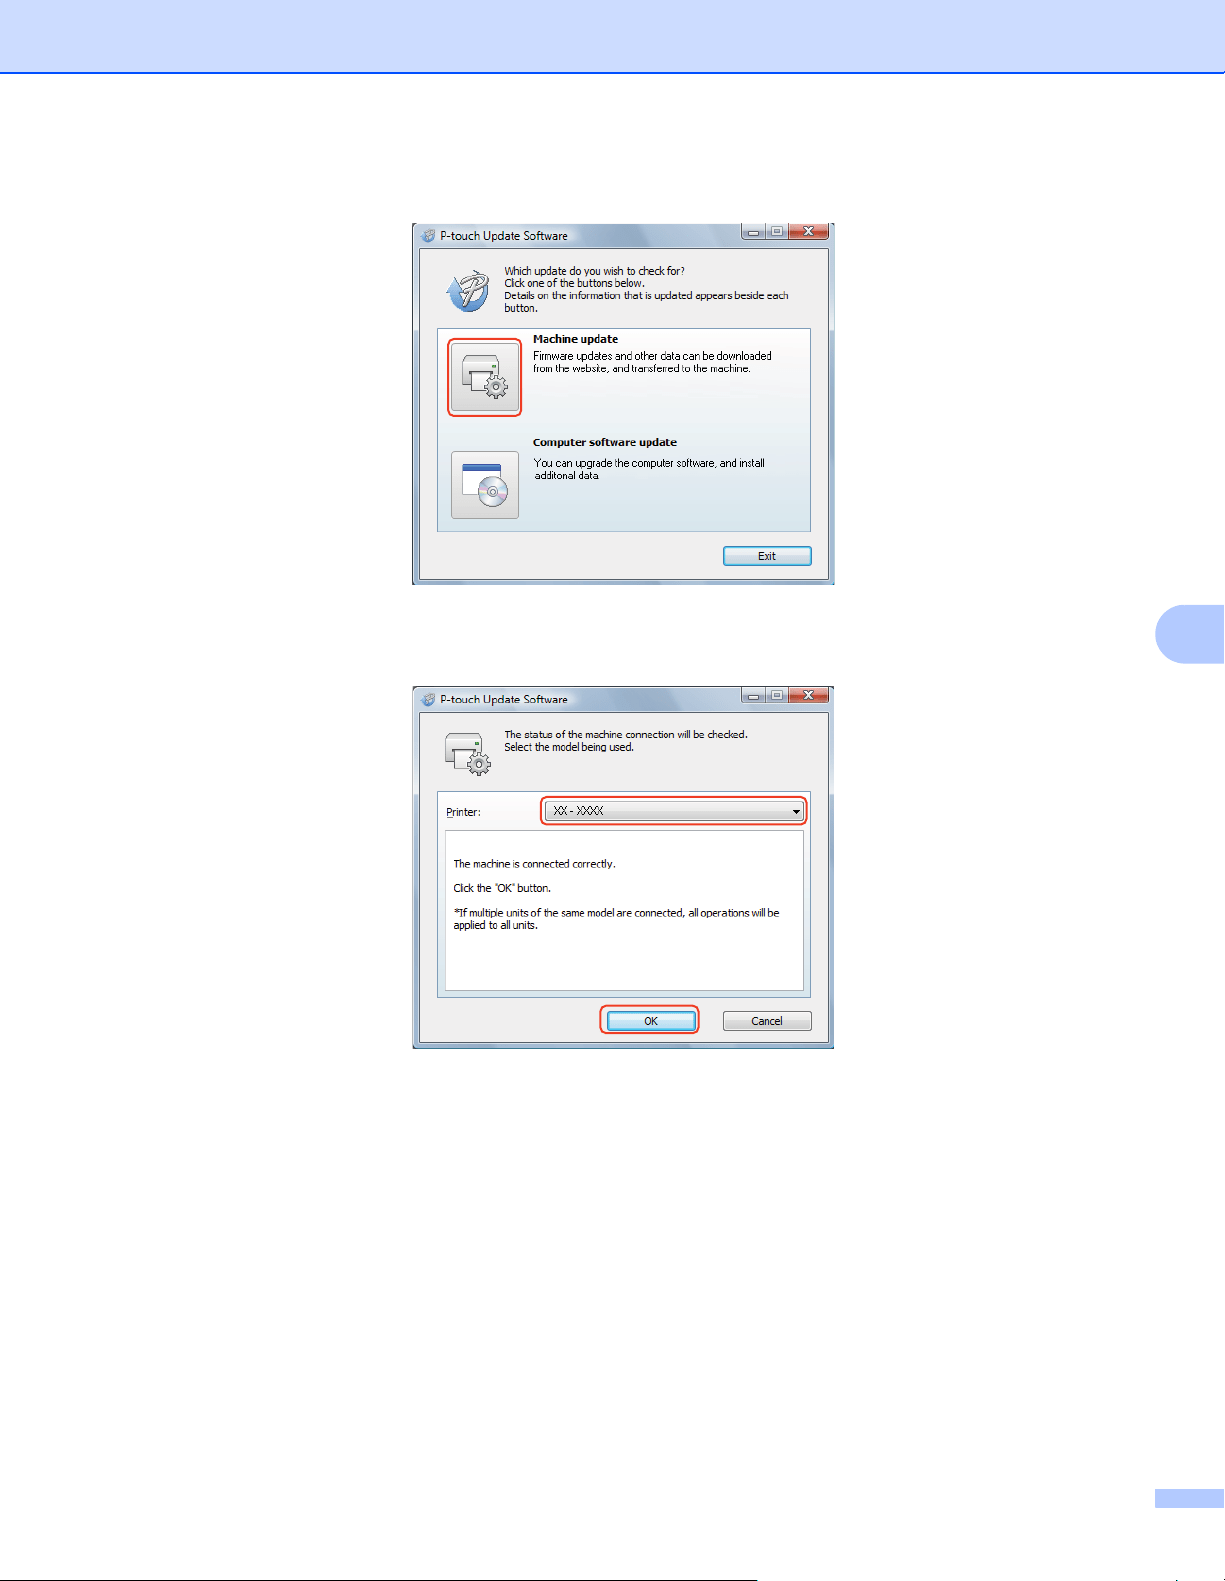
c Click the Machine update icon.
d Select the Printer, make sure that The machine is connected correctly. message appears, and then
click OK.
How to Update P-touch Software
44
7
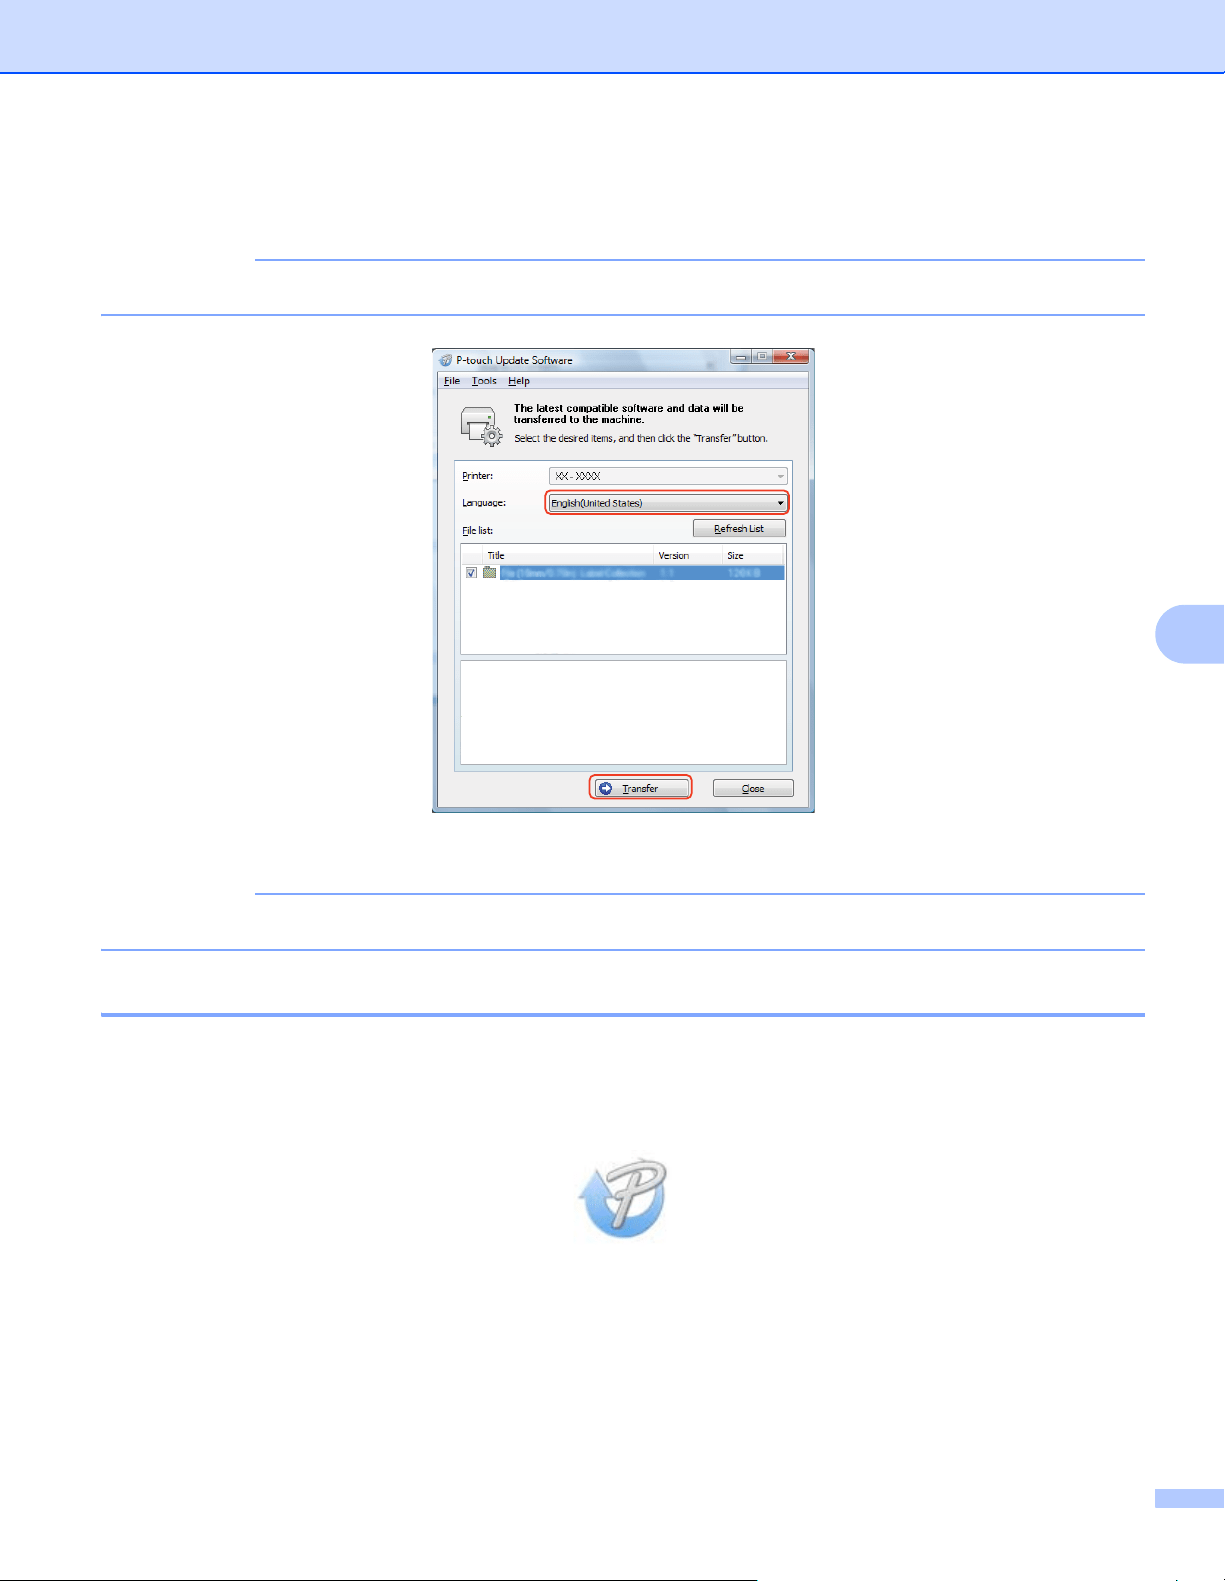
e Select the Language, select the check box next to the firmware you want to update to, and then click
Transfer.
IMPORTANT
Do not turn off the Label Printer or disconnect the cable during data transfer.
f Check the content to be updated, and then click Start to begin the update.
IMPORTANT
Do not turn off the Label Printer or disconnect the cable during the update process.
For Mac 7
a Turn on the Label Printer and connect the USB Cable.
b Double-click Macintosh HD > Applications > P-touch Update Software, and then double-click the
P-touch Update Software application icon.
How to Update P-touch Software
45
7
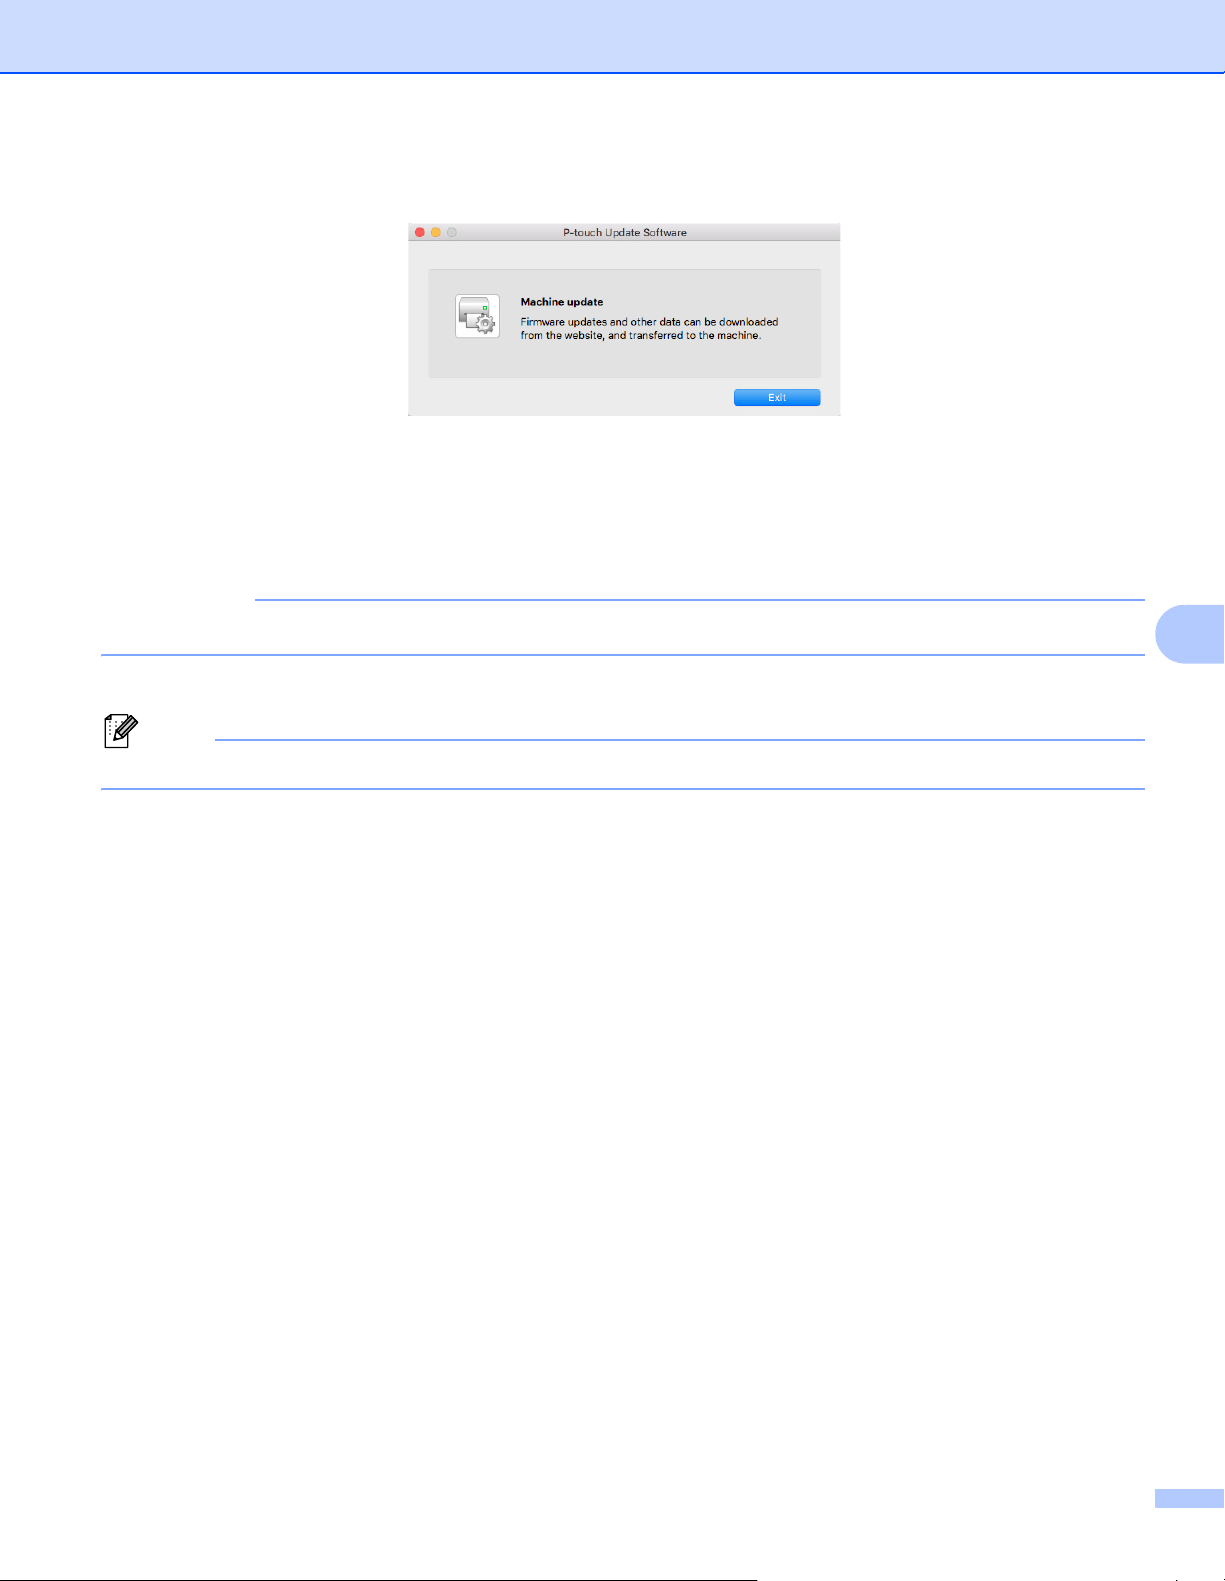
c Click the Machine update icon.
d Select the Printer, make sure that The machine is connected correctly. message appears, and then
click OK.
e Select the Language, select the check box next to the firmware you want to update to, and then click
Transfer.
IMPORTANT
Do not turn off the Label Printer or disconnect the cable during data transfer.
f Check the content you want to update, and then click Start to begin the update.
Note
Do not turn off the Label Printer during the update process.


47
8
8
Reset your printer's device settings if the Label Printer is not operating correctly.
Reset Device Settings to the Factory Settings Using the Label
Printer Buttons 8
To reset the Label Printer, do the following:
a Turn off the Label Printer.
b Press and hold the (Power Button) and Cut Button for about two seconds. The Status LED lights in
orange.
c Continue holding down the (Power Button), and press the Cut Button six times.
d Release the (Power Button). The Status LED flashes orange. Then, the Status LED lights in green.
Reset Device Settings Using the Printer Setting Tool 8
You can also use the Printer Setting Tool from your computer to reset device settings to the factory settings.
For more information, see Factory Reset on page 20.
Reset the Label Printer 8
48
9
9
We recommend cleaning your Label Printer on a regular basis to maintain its performance.
Note
Always disconnect the AC Power Cord before cleaning the Label Printer.
Clean the Exterior of the Unit 9
Wipe any dust and marks from the main unit using a soft, dry cloth.
Use a cloth slightly damp ened with water on stubborn marks.
Note
Do not use paint thinner, benzene, alcohol, or any other organic solvent.
These may deform or damage the Label Printer case.
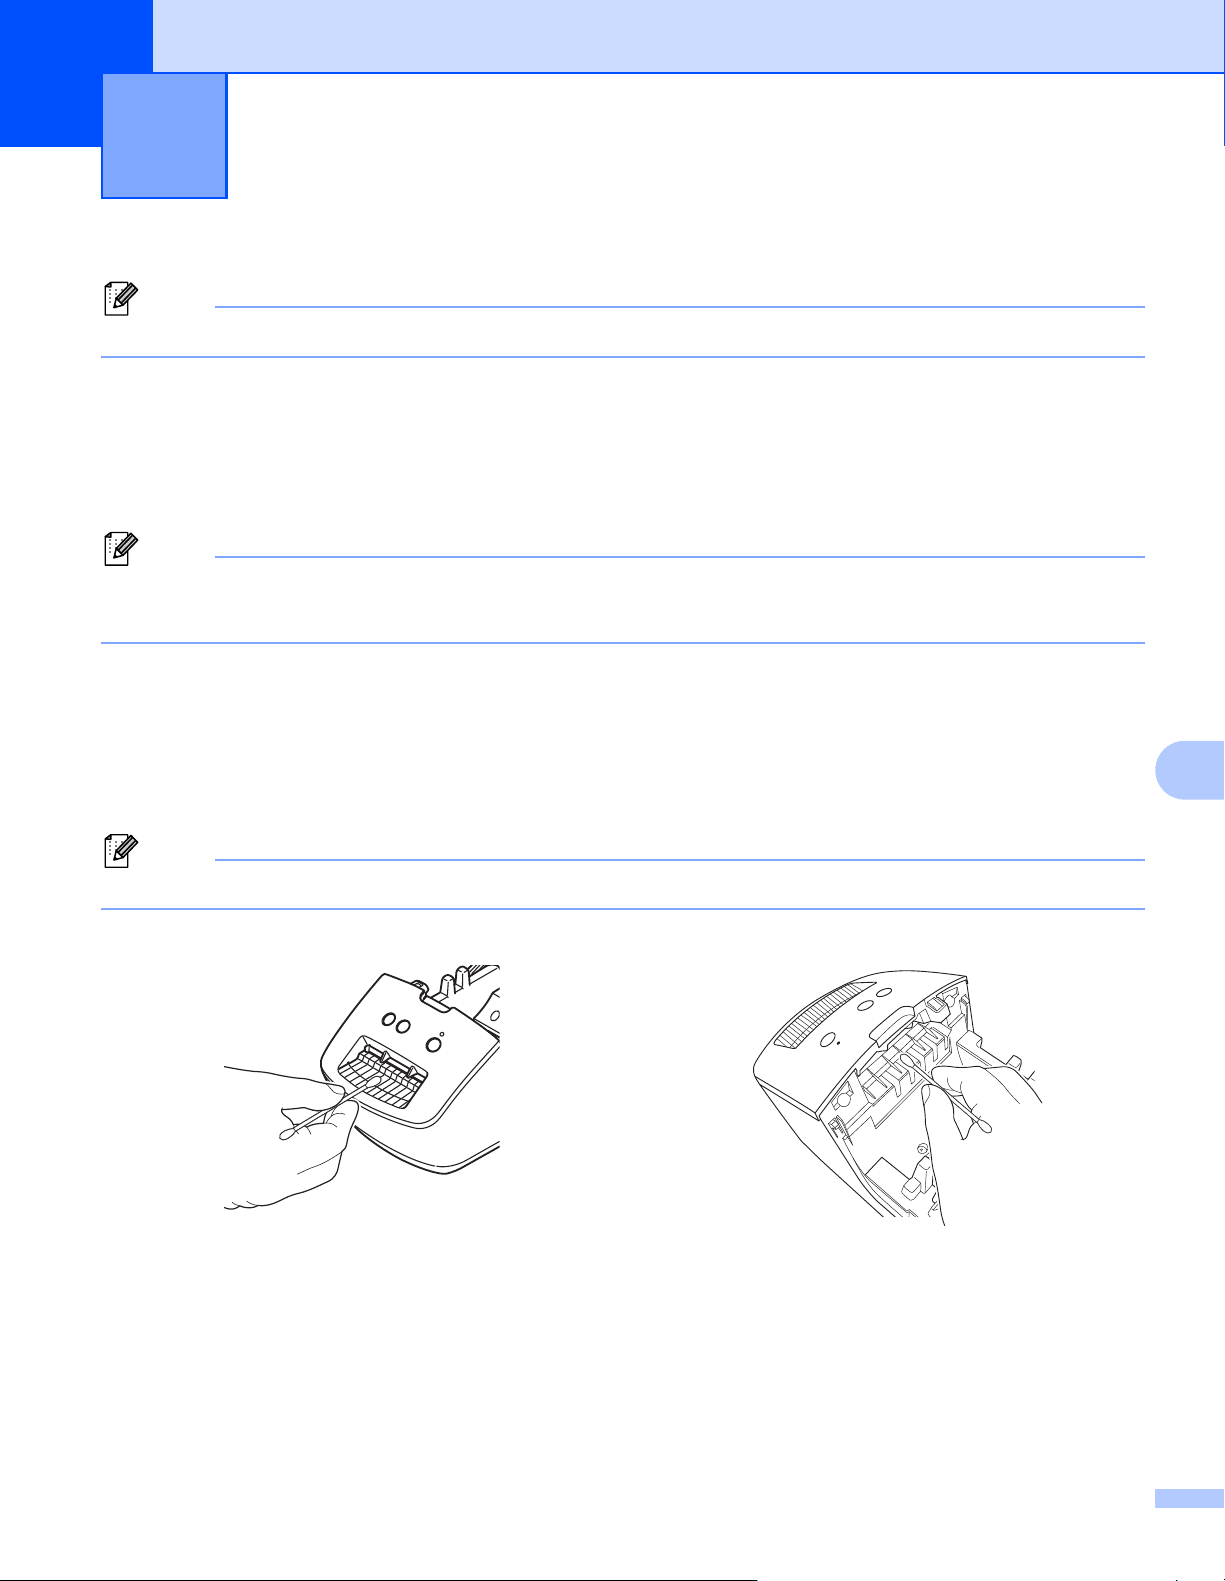
Clean the Label Output Slot 9
If a label causes the Label Printer to jam due to adhesive residue attached to the Label Output Slot,
disconnect the AC Power Cord from the Label Printer and clean the area with a cloth or cotton swab dipped
in isopropyl alcohol or ethanol.
Note
Use isopropyl alcohol or ethanol according to the manufacturer's safety guidelines, as applicable.
Self-Cleaning Print Head 9
The DK Roll (thermal recording paper type) used with the Label Printer is designed to clean the Print Head
automatically. When the DK Roll passes the Print Head during printing and label feeding, the Print Head is
cleaned.
Maintenance 9
49
10
10
Overview 10
This chapter explains how to resolve typical problems you may encounter when using the Label Printer. If you
have any problems with the Label Printer, first make sure you have performed the following tasks correctly:
Connect the Label Printer to an AC power outlet. For more information, see Connect the AC Power Cord
on page 4.
Remove all protective packaging from the Label Printer.
Install and select the correct printer driver. For more information, see Install Printer Driver and Software
on a Computer on page 8.
Connect the Label Printer to a computer. For more information, see Connect the Label Printer to a
Computer on page 8.
Close the DK Roll Compartment Cover completely.
Insert a DK Roll correctly. For more information, see Load the DK Roll on page 5.
If you still have problems, read the troubleshooting tips in this chapter for help. If, after reading this chapter,
you are unable to resolve your problem, visit support.brother.com
.
Driver Installation Problems (for Windows) 10
Troubleshooting 10
Problem Solution
The "Device driver software was not
successfully installed." message
appears on the computer.
• Although such Windows messages may continue to appear during the
installation, you can still install the driver correctly using the installer.
• Before you run the installer, make sure that the Label Printer is on and that
it is connected to your computer with a USB cable.
• If the printer driver is not successfully installed, go to
I cannot install the
printer driver even if I follow the correct procedure.
on page 49.
• I cannot install the printer driver
even if I follow the correct
procedure.
• I cannot see my Label Printer
listed in P-touch Editor even
though I have installed the printer
driver.
If you cannot use your printer even though you have installed the printer driver:
1. Download the Printer Driver Uninstaller from support.brother.com
.
2. Use the Printer Driver Uninstaller to remove the printer information.
3. Run the installer again and follow the on-screen instructions to proceed with
the installation.
Troubleshooting
50
10
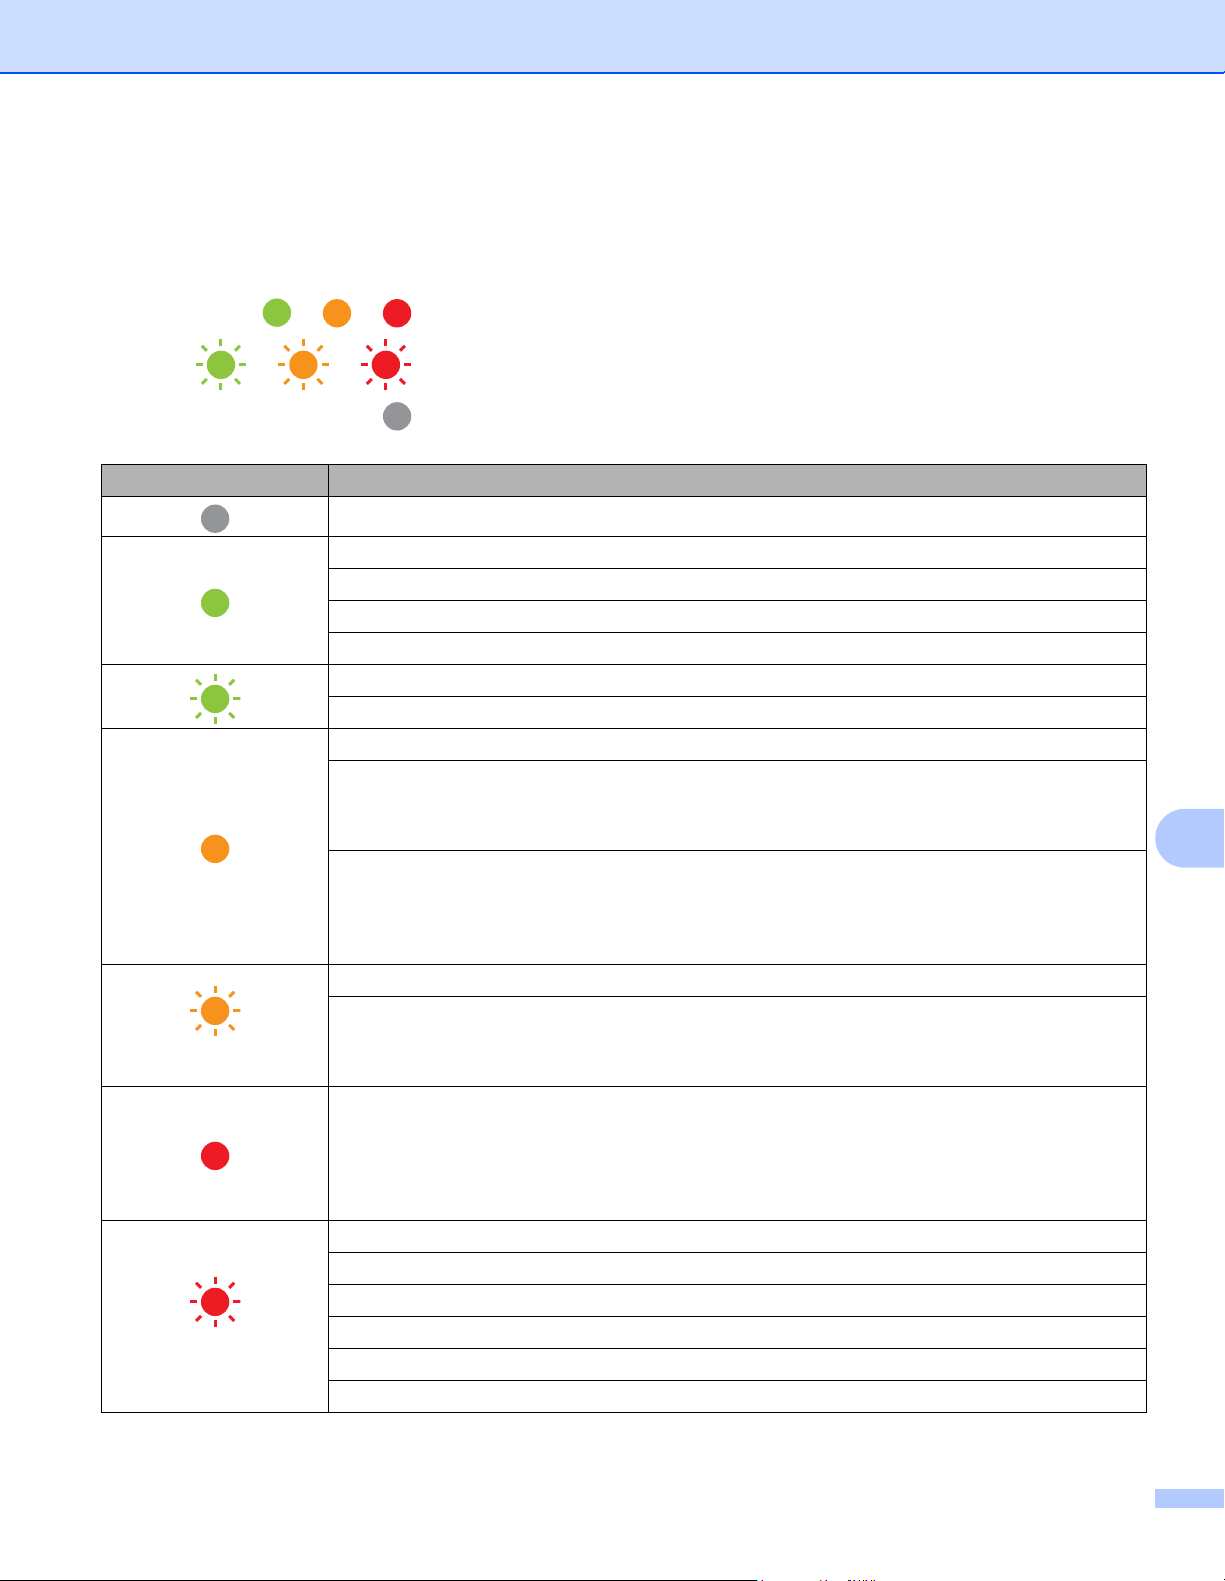
LED Indications 10
The LED Indicators light and flash to indicate the Label Printer's status.
or or
LED Indicator is lit in the color shown
or or
LED Indicator is flashing in the color shown
LED Indicator is off
Status LED Condition
Power is Off
Idle mode
Feeding mode
Printing mode
Cutting mode
Receiving data
Cancelling the print job
The DK Roll Compartment Cover is open. Close the DK Roll Compartment Cover correctly.
The Label Printer is in Reset mode.
For more information, see Reset Device Settings to the Factory Settings Using the Label
Printer Buttons on page 47.
If the Status LED lights in orange for 0.5 second after printing, the Label Printer is erasing
all print data.
For more information, see Use the Printer Setting Tool for Windows on page 13 or Printer
Setting Tool for Mac on page 19.
(once for 0.5 seconds)
The Label Printer is in Cooling mode.
The printer settings are being reset.
For more information, see Reset Device Settings to the Factory Settings Using the Label
Printer Buttons on page 47.
The Label Printer is in Boot mode.
Try updating the firmware.
For more information, see Update the Firmware on page 42.
If the Label Printer is still in Boot mode, contact Brother Customer Service.
(every two seconds)
Roll end error
No media error
Wrong media error
Feed error
Cover open error
Transferred data error
Troubleshooting
51
10
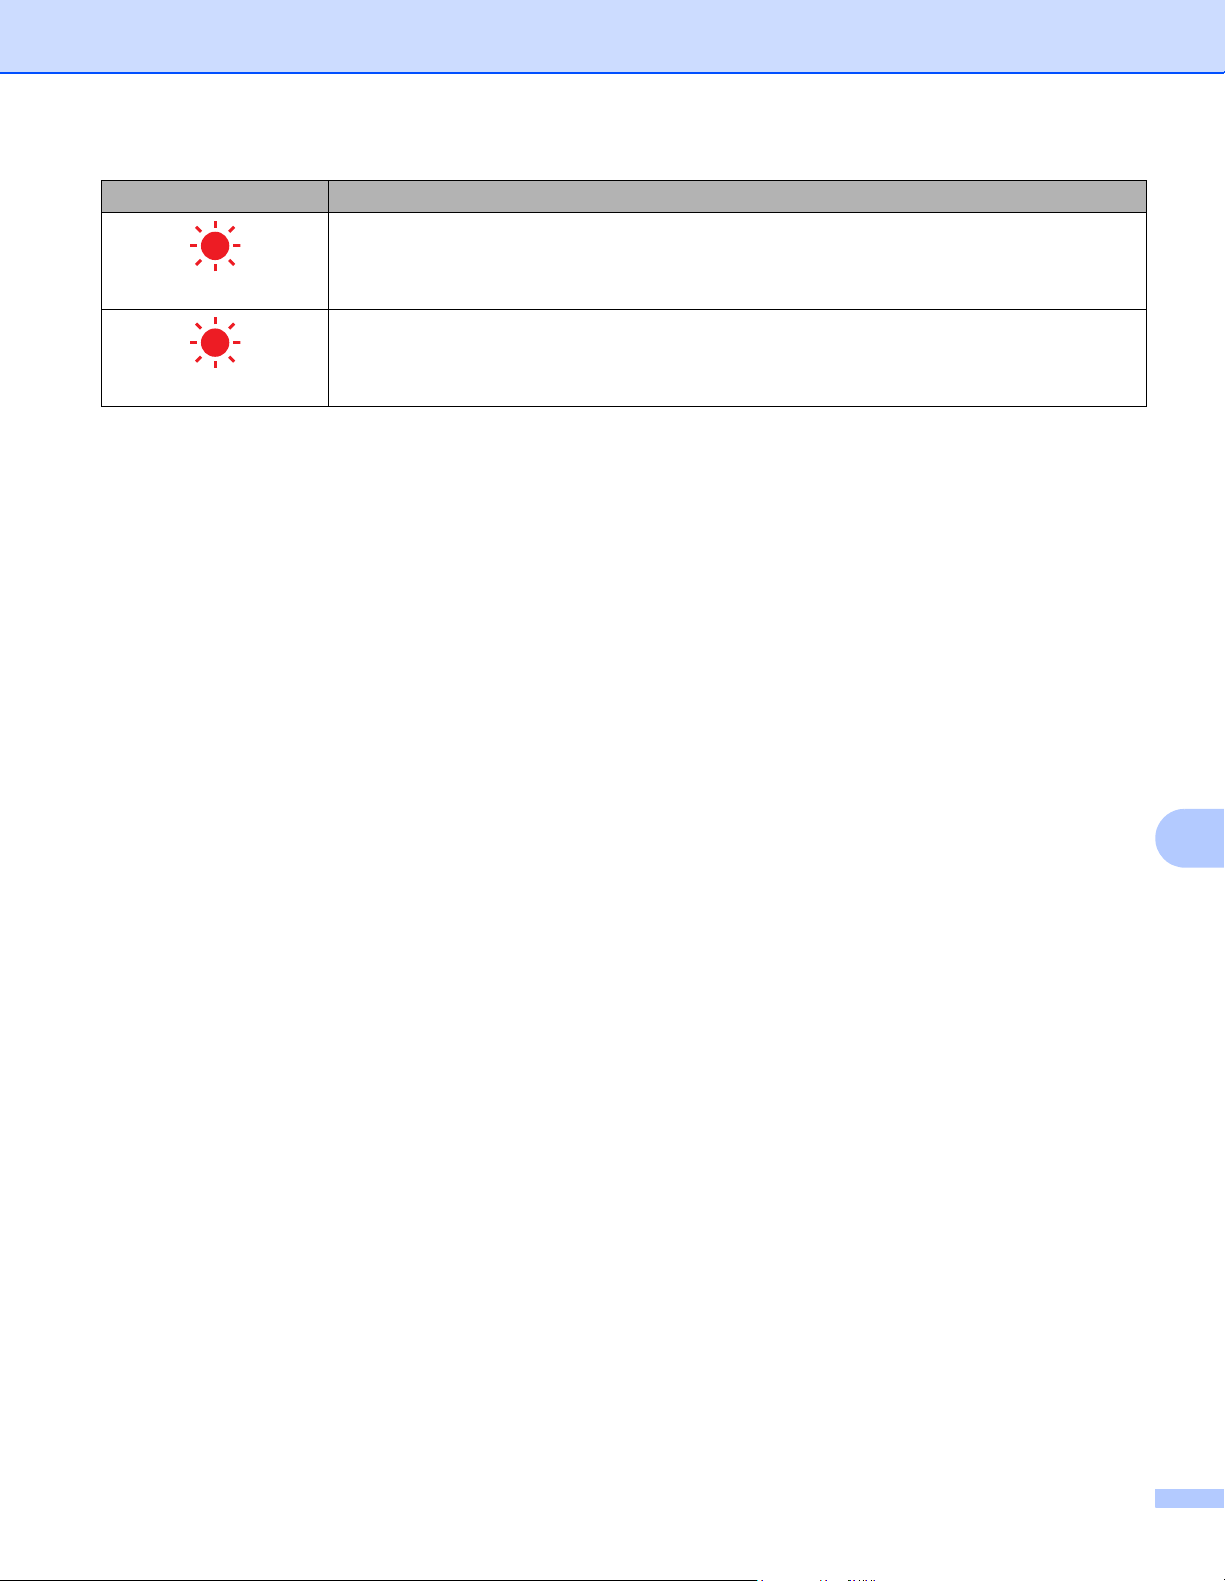
(twice for 2 seconds)
Cutter error
(flashes rapidly)
System error
Contact Brother Customer Service.
Status LED Condition
Troubleshooting
52
10
Printing Problems 10
Problem Solution
The Status LED is not lit. Check that the AC Power Cord is inserted. If it is inserted correctly, try plugging
it into another AC power outlet.
The Label Printer does not print, or a
printing error is received.
• Check that the cable is connected securely.
• Remove the DK Roll and reinstall it.
• Check that there is enough roll remaining.
• Make sure that the DK Roll Compartment Cover is closed.
• Turn Off the Label Printer and then turn it On again. If there is still a problem,
contact your Brother Customer Service.
• If the Label Printer is connected via a USB Port, try connecting it directly to
the computer. If not, try connecting it to different USB Port.
The printed label contains streaks or
poor quality characters, or the label is
not fed correctly.
Is the Print Head or roller dirty?
While the Print Head generally remains clean under normal use, lint or dirt from
the roller may become stuck on the Print Head.
If this occurs, clean the roller.
For more information, see Self-Cleaning Print Head on page 48.
A data transmission error appears on
the computer.
• Is the correct port chosen?
Check that the correct port is selected from the "Print to the following port"
list in the Printer Properties dialog box.
• Is the Label Printer in cooling mode (the Status LED is flashing in orange)?
Wait until the Status LED stops flashing and then try printing again.
Labels are jammed in the cutter. Contact Brother Customer Service.
The label is not ejected correctly after
printing.
• Check that the Label Output Slot is not blocked.
• Check that the DK Roll is set correctly by removing the DK Roll and
reinstalling it.
• Ensure that the DK Roll Compartment Cover is closed correctly.
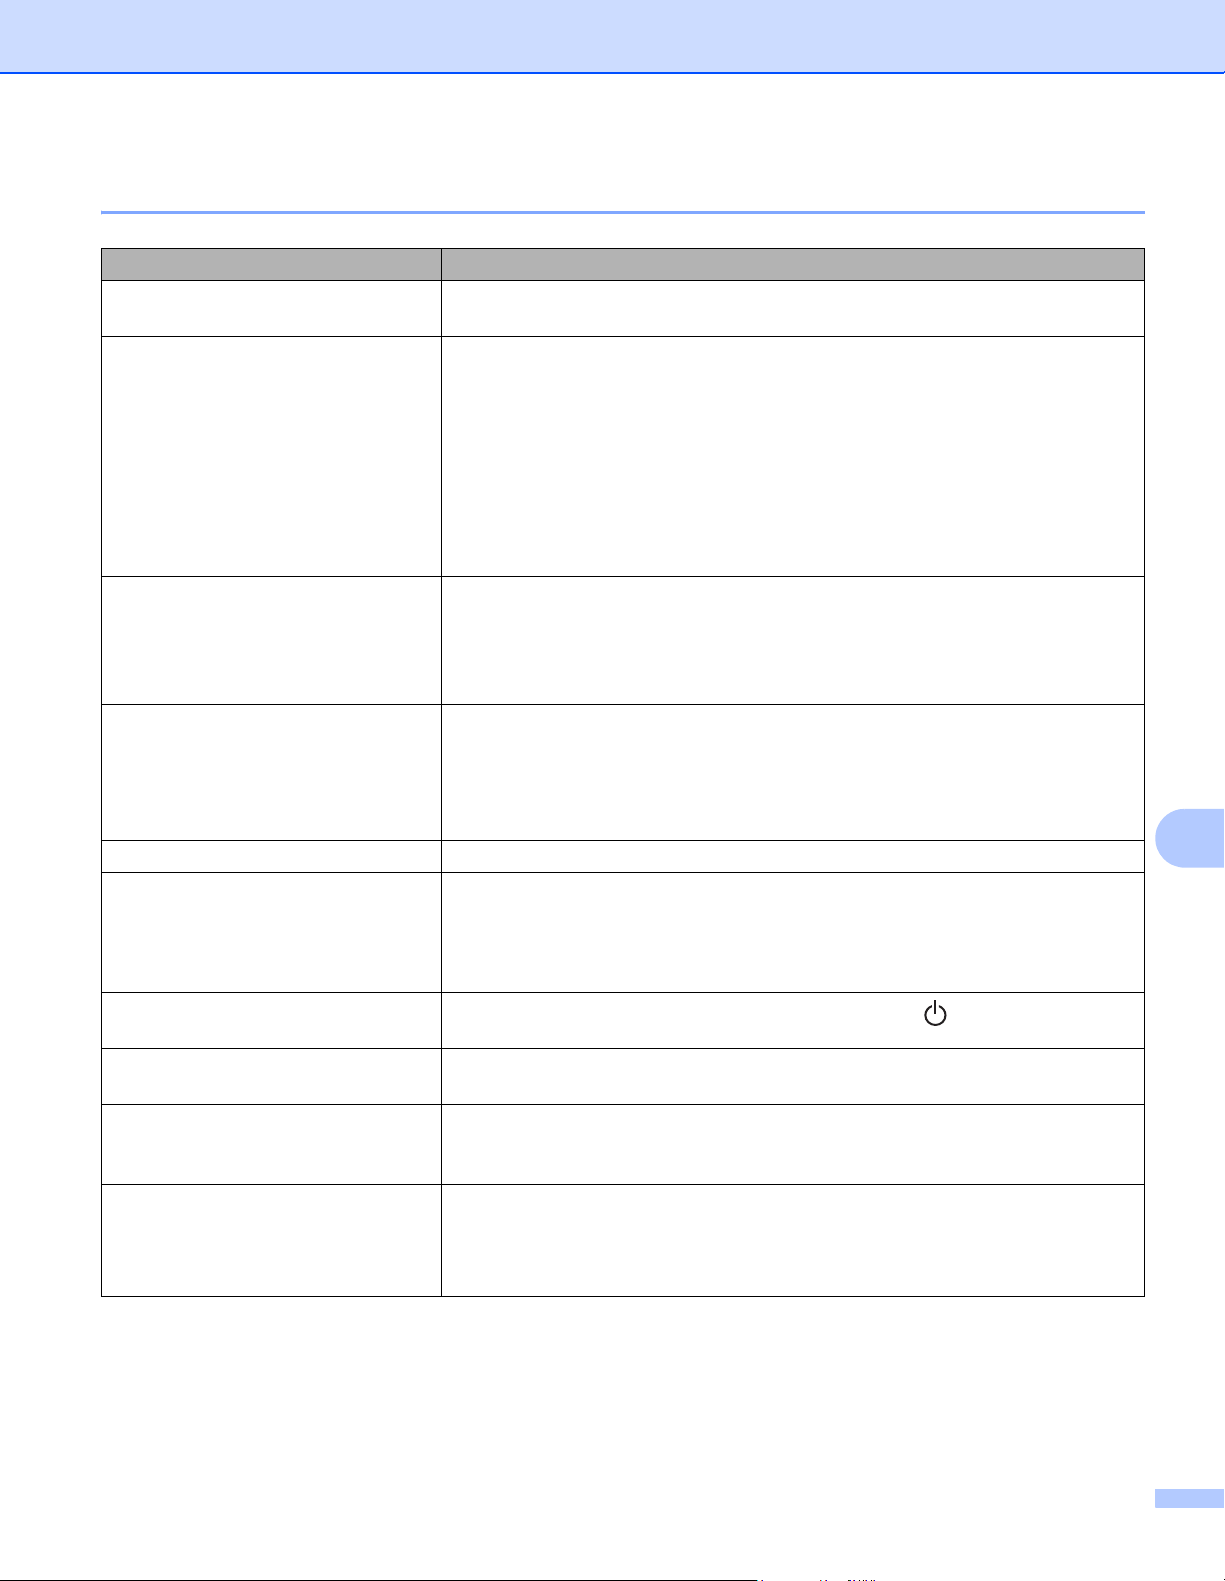
I want to cancel the current printing
job.
Make sure that the Label Printer is On, and press the (Power Button).
The print quality is poor. Is there dirt or lint on the roller preventing it from rolling freely?
For more information, see Self-Cleaning Print Head on page 48.
After replacing the DK Roll while the
Add-In feature was activated, the
layout style was not updated.
Close P-touch Editor to exit the Add-In, and then reactivate the Add-In.
The P-touch Add-In icon is not
displayed in Microsoft Word.
• Is Microsoft Word started up from Microsoft Outlook?
• Is Microsoft Word chosen as the default editor for Microsoft Outlook?
Due to program limitations, the Microsoft Word Add-In does not work with
Microsoft Outlook. Close Microsoft Outlook, and restart Microsoft Word.
Troubleshooting
53
10
Label Printer is in cooling mode The Print Head is too hot.
The Label Printer stops and resumes printing only after the Print Head has
cooled down. The head may become too hot if you are printing a large number
of labels.
When the Print Head becomes too hot, it may produce imaging outside the print
area. To avoid or delay overheating, make sure the Label Printer has adequate
ventilation and is not located in an enclosed space.
If the Label Printer must cool down because it overheated due to the type of
DK Roll you are using or the contents of the label, printing may take longer than
usual.
Note
This condition may occur more often when the Label Printer is used at high
altitude (more than 10,000 ft (3,048 m)) due to a lower air density available
to cool the Label Printer.
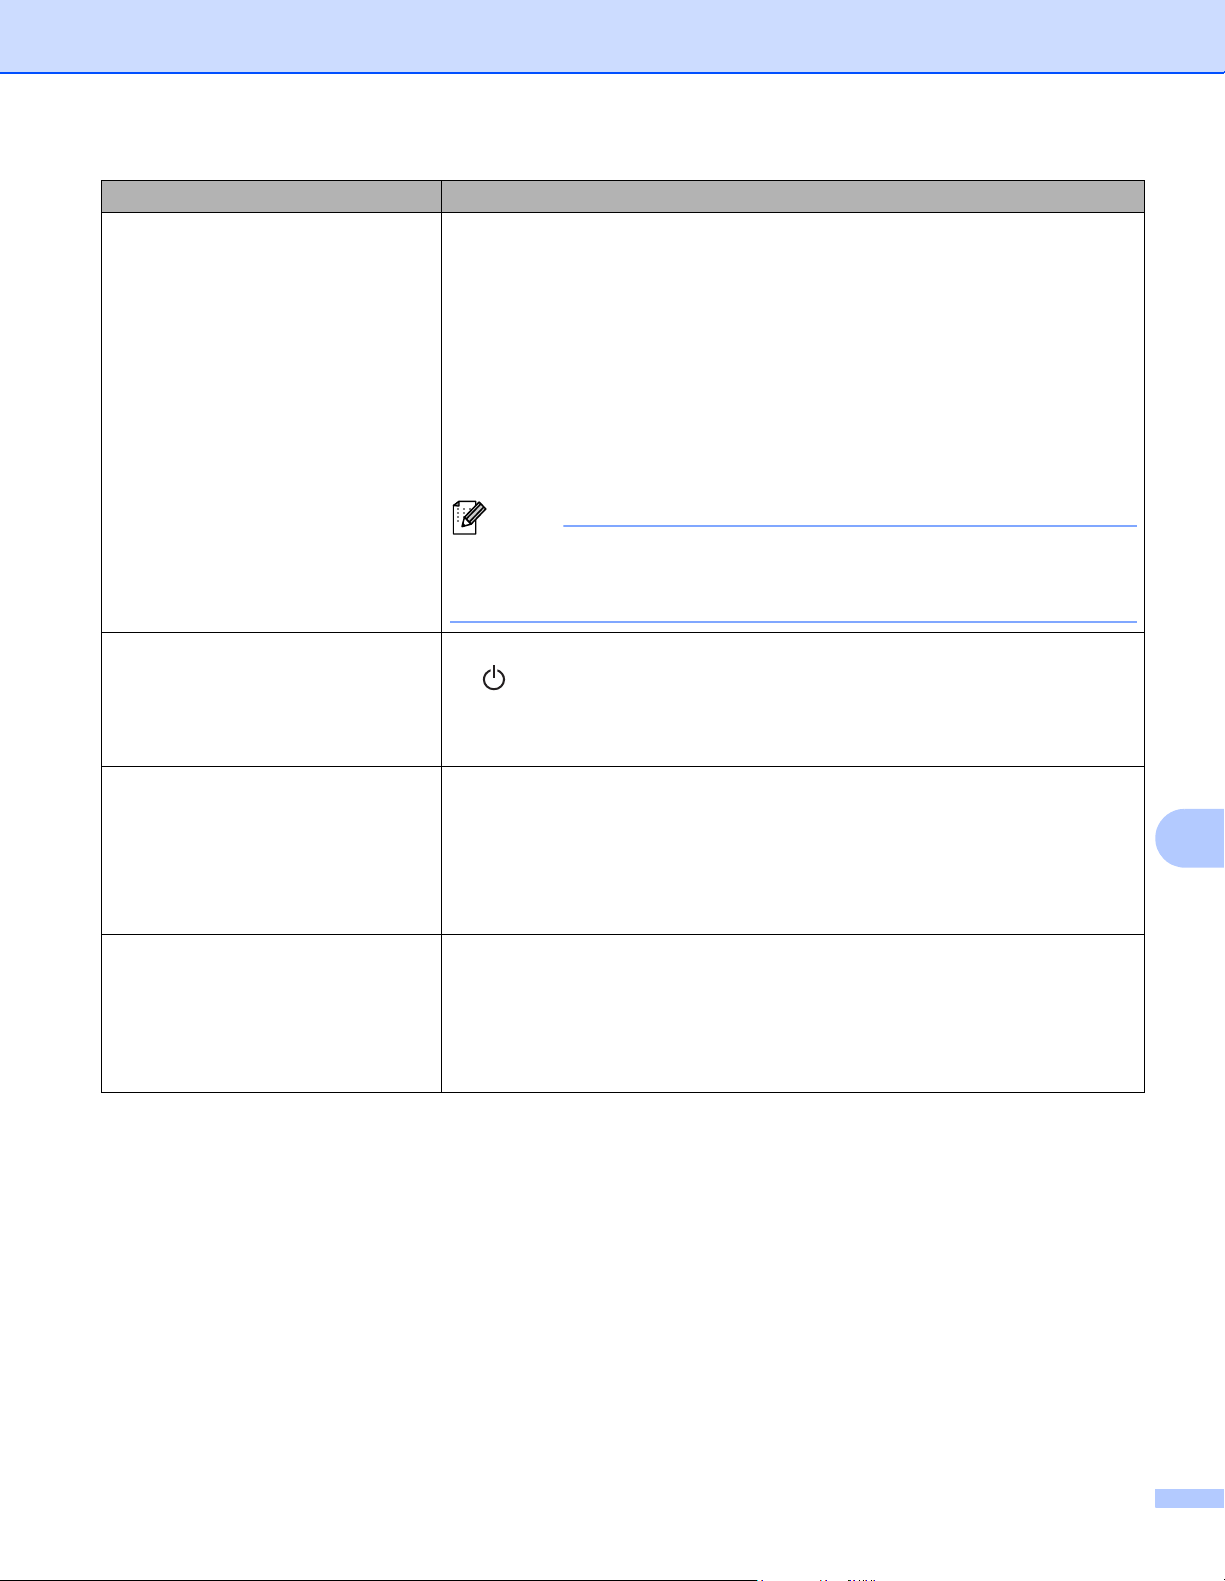
Cutter error If a cutter error occurs, keep the DK Roll Compartment Cover closed and press
the (Power Button). The cutter moves back to the normal position and the
Label Printer turns off automatically.
After the Label Printer is turned Off, check the label outlet and remove any
jammed labels.
Unable to reset an error To reset an error:
1. Open the DK Roll Compartment Cover, and then close it.
2. If the error is not reset, press the Cut Button.
3. If the error is not reset, turn off the Label Printer, and then turn it on again.
4. If the error is not reset, contact Brother Customer Service.
I want to reset the Label Printer. You can reset the Label Printer using the Printer Setting Tool from a computer.
For more information, see Change the Label Printer Settings on page 12.
You can reset the Label Printer using the Printer buttons.
For more information, see Reset Device Settings to the Factory Settings Using
the Label Printer Buttons on page 47.
Problem Solution
Troubleshooting
54
10
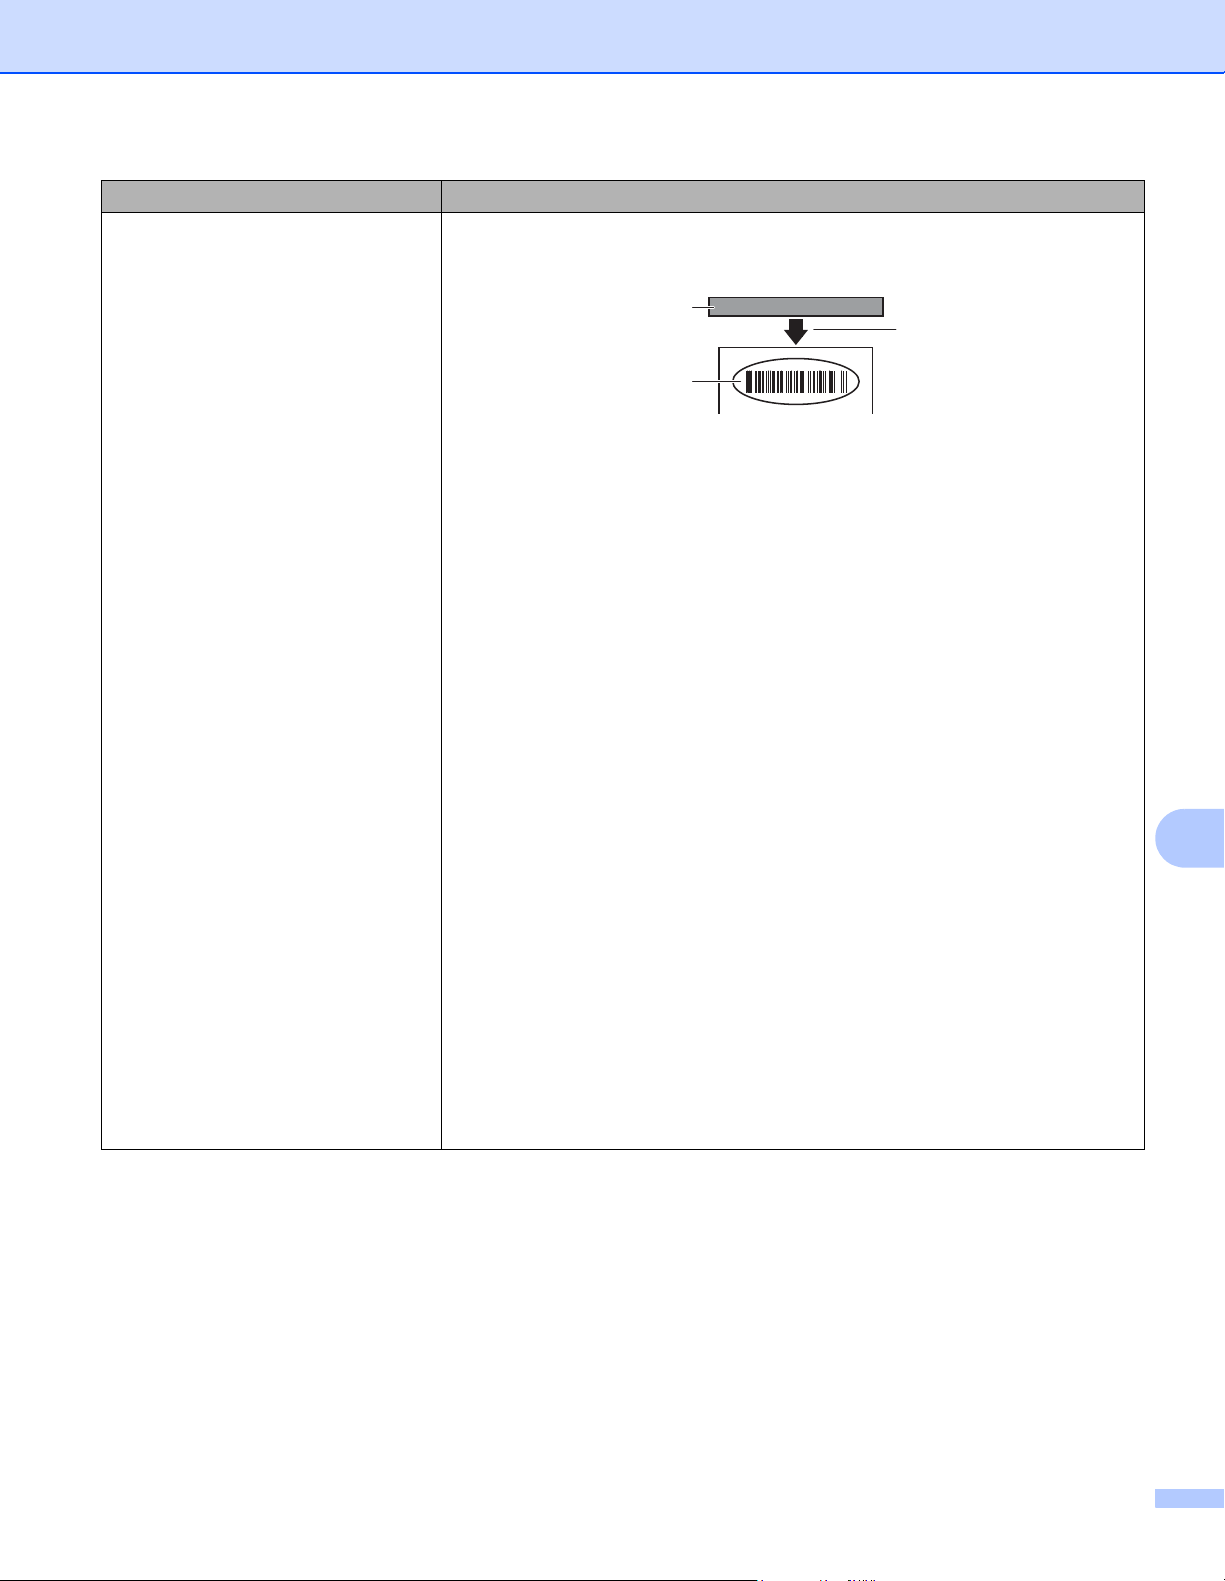
Printed barcodes cannot be read. Print labels so that barcodes are aligned with the Print Head as shown
below:
1 Print Head
2 Barcodes
3 Printing orientation
Barcodes may not be read if they are reduced or enlarged.
Try using another scanner.
We recommend printing barcodes with Print Quality options set to Give
priority to print quality.
For Windows 10:
To display the Quality options, open the printer properties by clicking Start >
Settings > Devices > Printers & scanners > Devices and Printers,
right-clicking the Label Printer you want to set up, and then clicking Printing
preferences.
For Windows 8 / Windows 8.1:
To display the Quality options, open the printer properties by clicking Control
Panel in the Apps screen > Hardware and Sound > Devices and Printers,
right-clicking the Label Printer you want to set up, and then clicking Printing
preferences.
For Windows 7:
To display the Quality options, open the printer properties by clicking Start >
Devices and Printers, right-clicking the Label Printer you want to set up, and
then clicking Printing preferences.
For Mac:
To change the Print Quality options, open the Print dialog box and select Basic
from the print options pop-up menu.
Problem Solution
1
2
3
Troubleshooting
55
10
Software Version 10
Problem Solution
I do not know the Label Printer's
firmware version.
To check for the latest firmware:
1. Turn your Label Printer on.
2. Press and hold the Cut Button for several seconds to print the report.
We recommend you use a 2.4" (62 mm) DK Roll.
I want to confirm whether I am using
the latest version of the software.
Use the P-touch Update Software function to confirm whether you have the
latest version.
For more information on how to use P-touch Update Software, see How to
Update P-touch Software on page 40.
56
11
11
Label Printer Specifications 11
Operating Environment 11
Product Specifications 11
Items Specifications
LED Indicators Status LED (green, orange, red)
Print
Print Method Direct thermal printing
Print Speed Max. 2.8" (71 mm)/sec, Max. 44 labels/min. (Standard
Address Labels) (When connected to the computer and
using P-touch Editor)
Print Head 300 dpi / 720 dots
Max. printing width 2.3" (59 mm)
Max. printing length 39.37" (1 m)
Min. printing length 0.5" (12.7 mm)
Cutter Durable Automatic Cutter
Buttons Power, Feed, and Cut
Interface USB
Power supply 120 V AC, 60 Hz, 1.7 A
Dimensions 5.0" (128 mm) × 8.7" (221 mm) × 6.0" (153 mm)
Weight Approx. 2.5 lb (1.1 kg) (Without DK Rolls)
Items Specifications
Temperature Between 50 °F (10 °C) and 95 °F (35 °C)
Humidity Between 20% to 80% (without condensation)
The maximum wet bulb temperature: 80.6 °F (27 °C)

57
12
12
This Label Printer can print directly from various Windows software after you install the printer driver.
IMPORTANT
Make sure the software is compatible with the label size you are using. Otherwise, you may not be able to
print the labels.
Setting the Printer Driver 12
The printer names in the following screens may differ from your printer’s name.
The screens may differ depending on your operating system.
a Open the Devices and Printers window.
For Windows 10:
1 Click, right-click, or tap and hold Start on the desktop.
2Click Windows System > Control Panel > Hardware and Sound > Devices and Printers.
For Windows 8 / Windows 8.1:
1 Move your mouse to the upper or lower right corner of your desktop until the menu bar appears.
Note
If the Start screen is on your computer screen, click the desktop tile first.
2Click Settings > Control Panel > Hardware and Sound > Devices and Printers.
For Windows 7:
Click the Start > Devices and Printers.
Note
For details, see Windows Help.
b Select "Brother QL-XXX" (where "XXX" is your printer name), and right click and select Select printing
preferences. The Brother QL-XXX printing preferences dialog box appears.
c Select the printer settings you want. Set the paper size, number of copies, quality, and cut option.
d Click OK.
Print Directly from Various Windows
Software
12
Print Directly from Various Windows Software
58
12
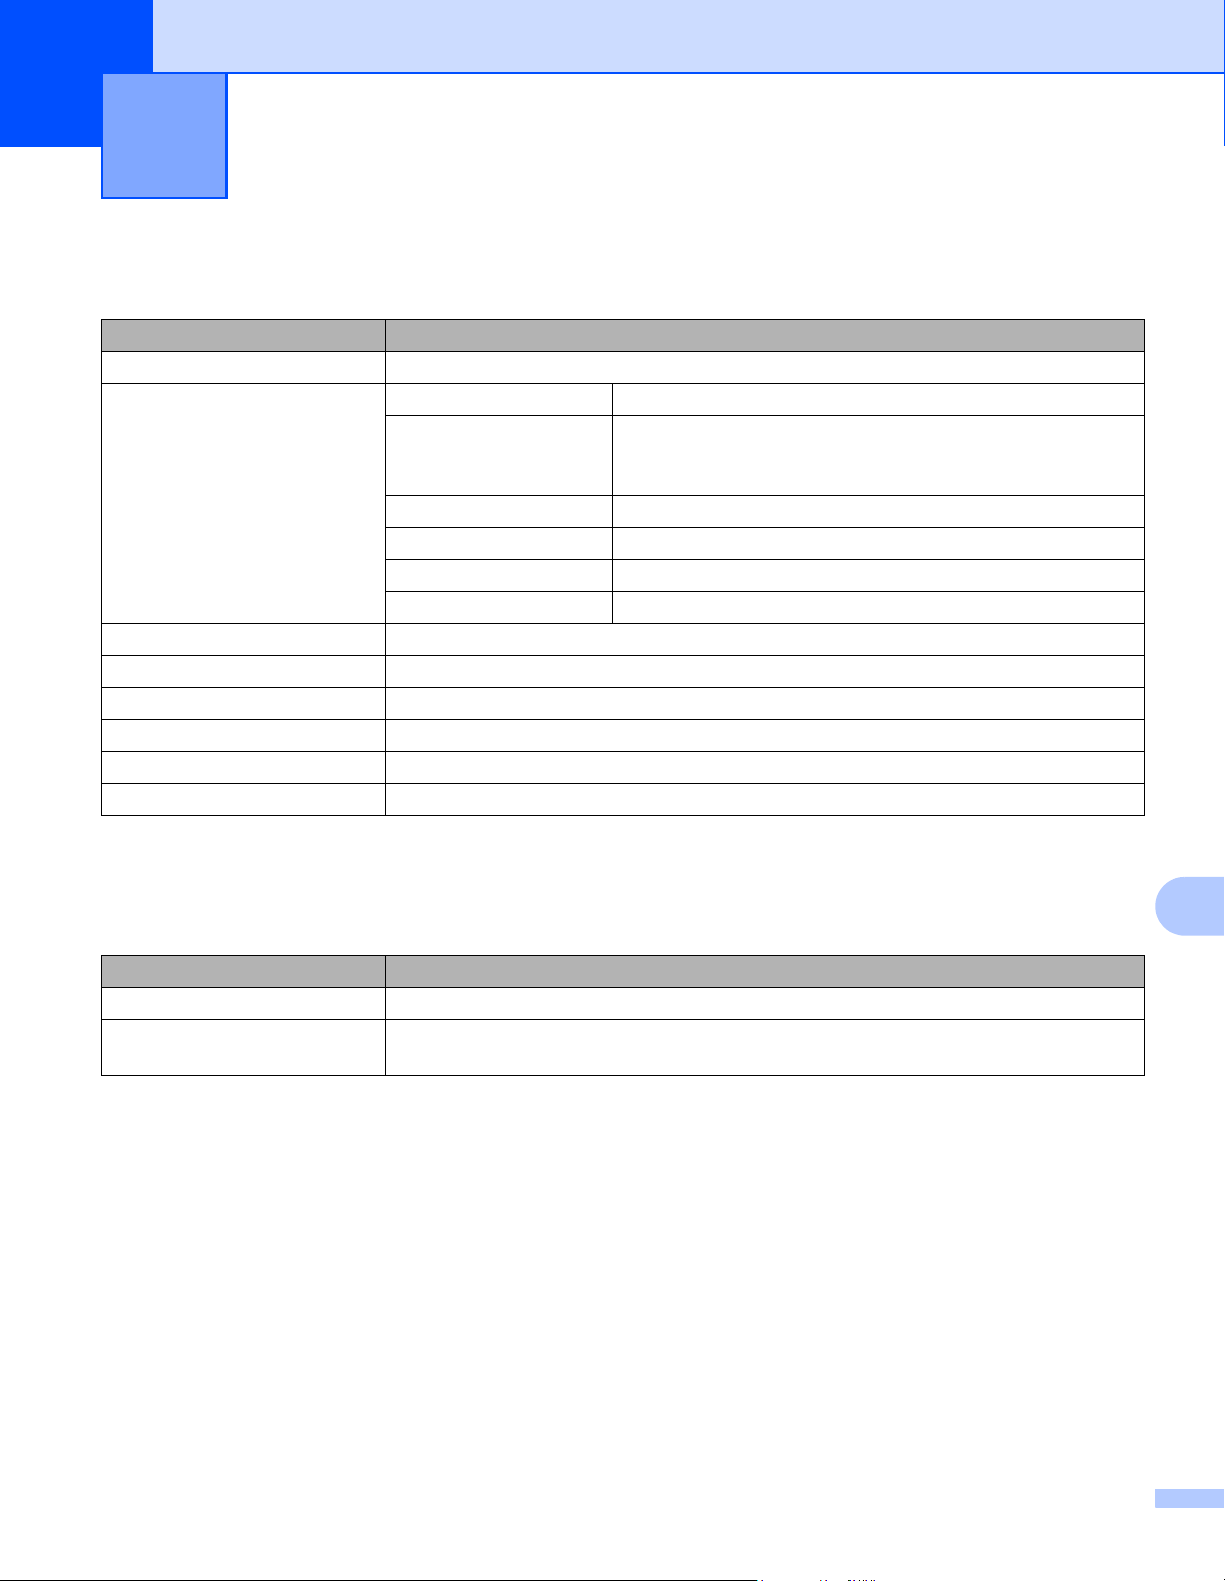
Basic Tab 12
Specify the paper size, number of copies, quality, and cut option.
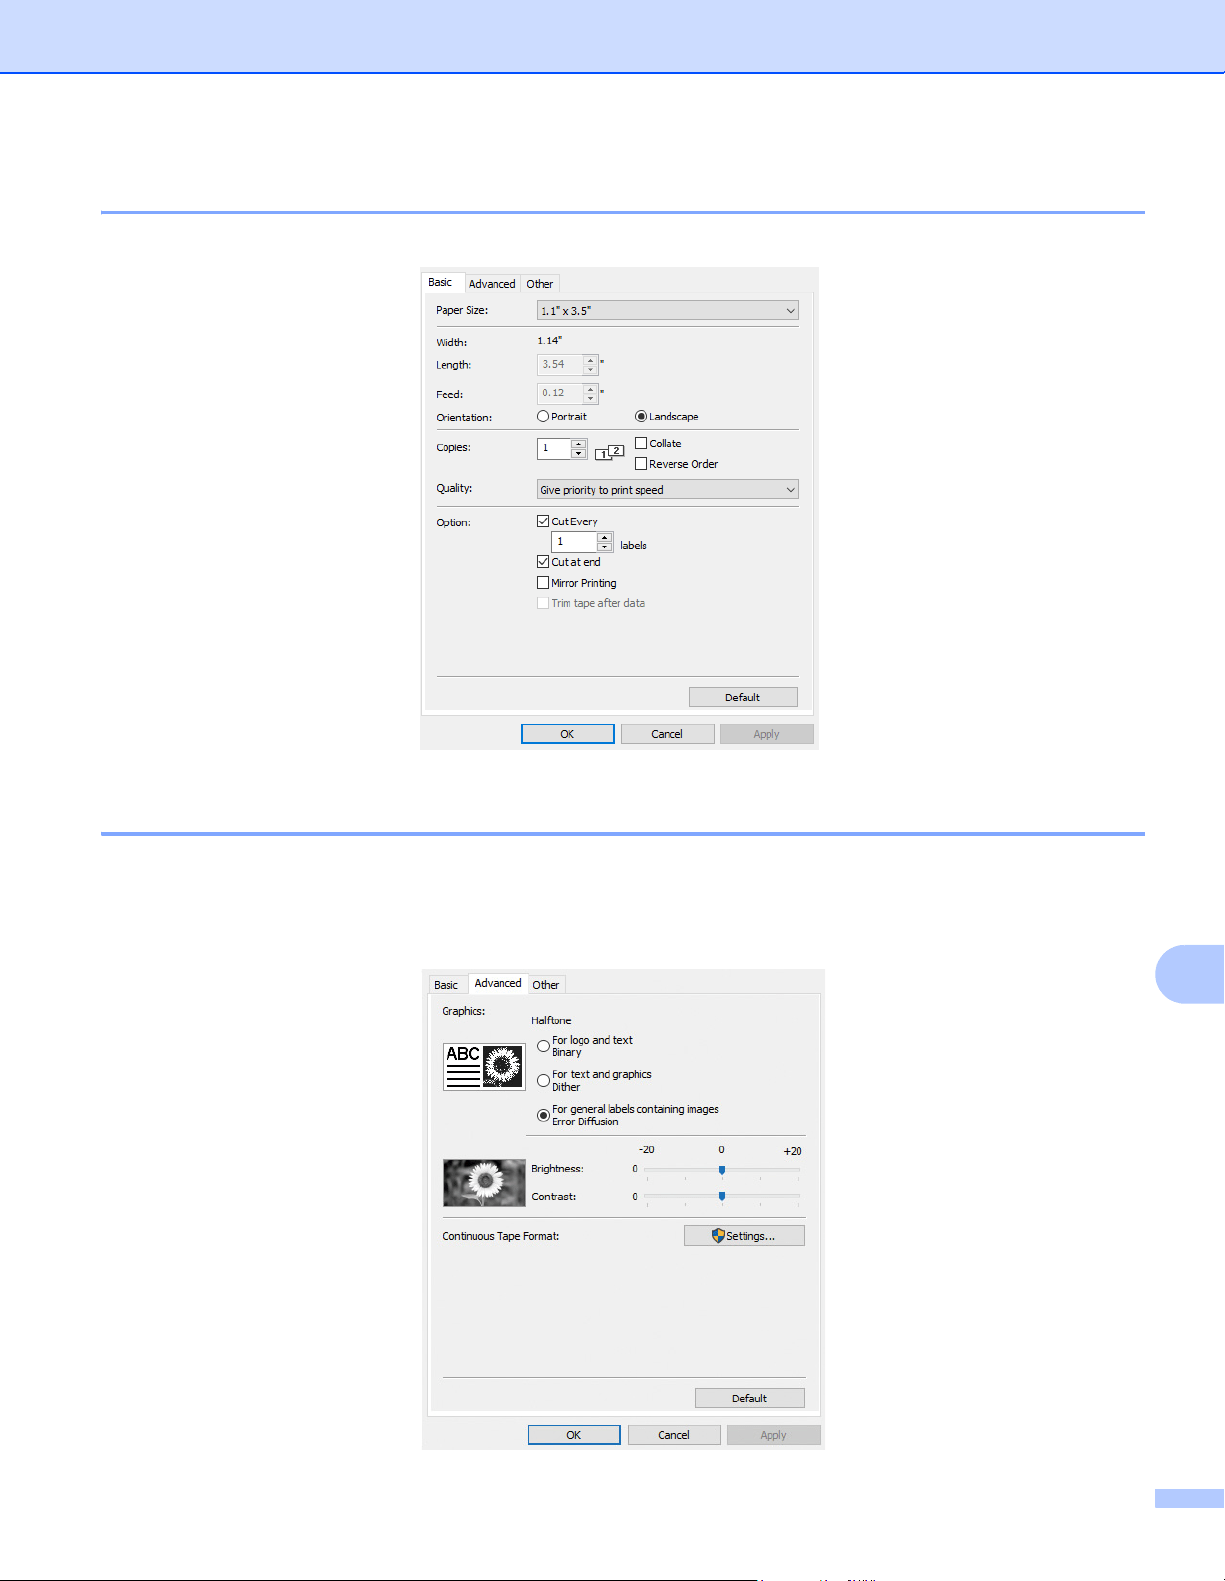
Advanced Tab 12
Specify graphic options such as Halftone, Brightness, Contrast, and Continuous Tape Format.
You can modify or create a new Label Format from the Continuous Tape Format dialog box, which
appears when you click Settings...
Print Directly from Various Windows Software
59
12
Set the format name (Name) and size (Width, Length, and Feed), and click Default.
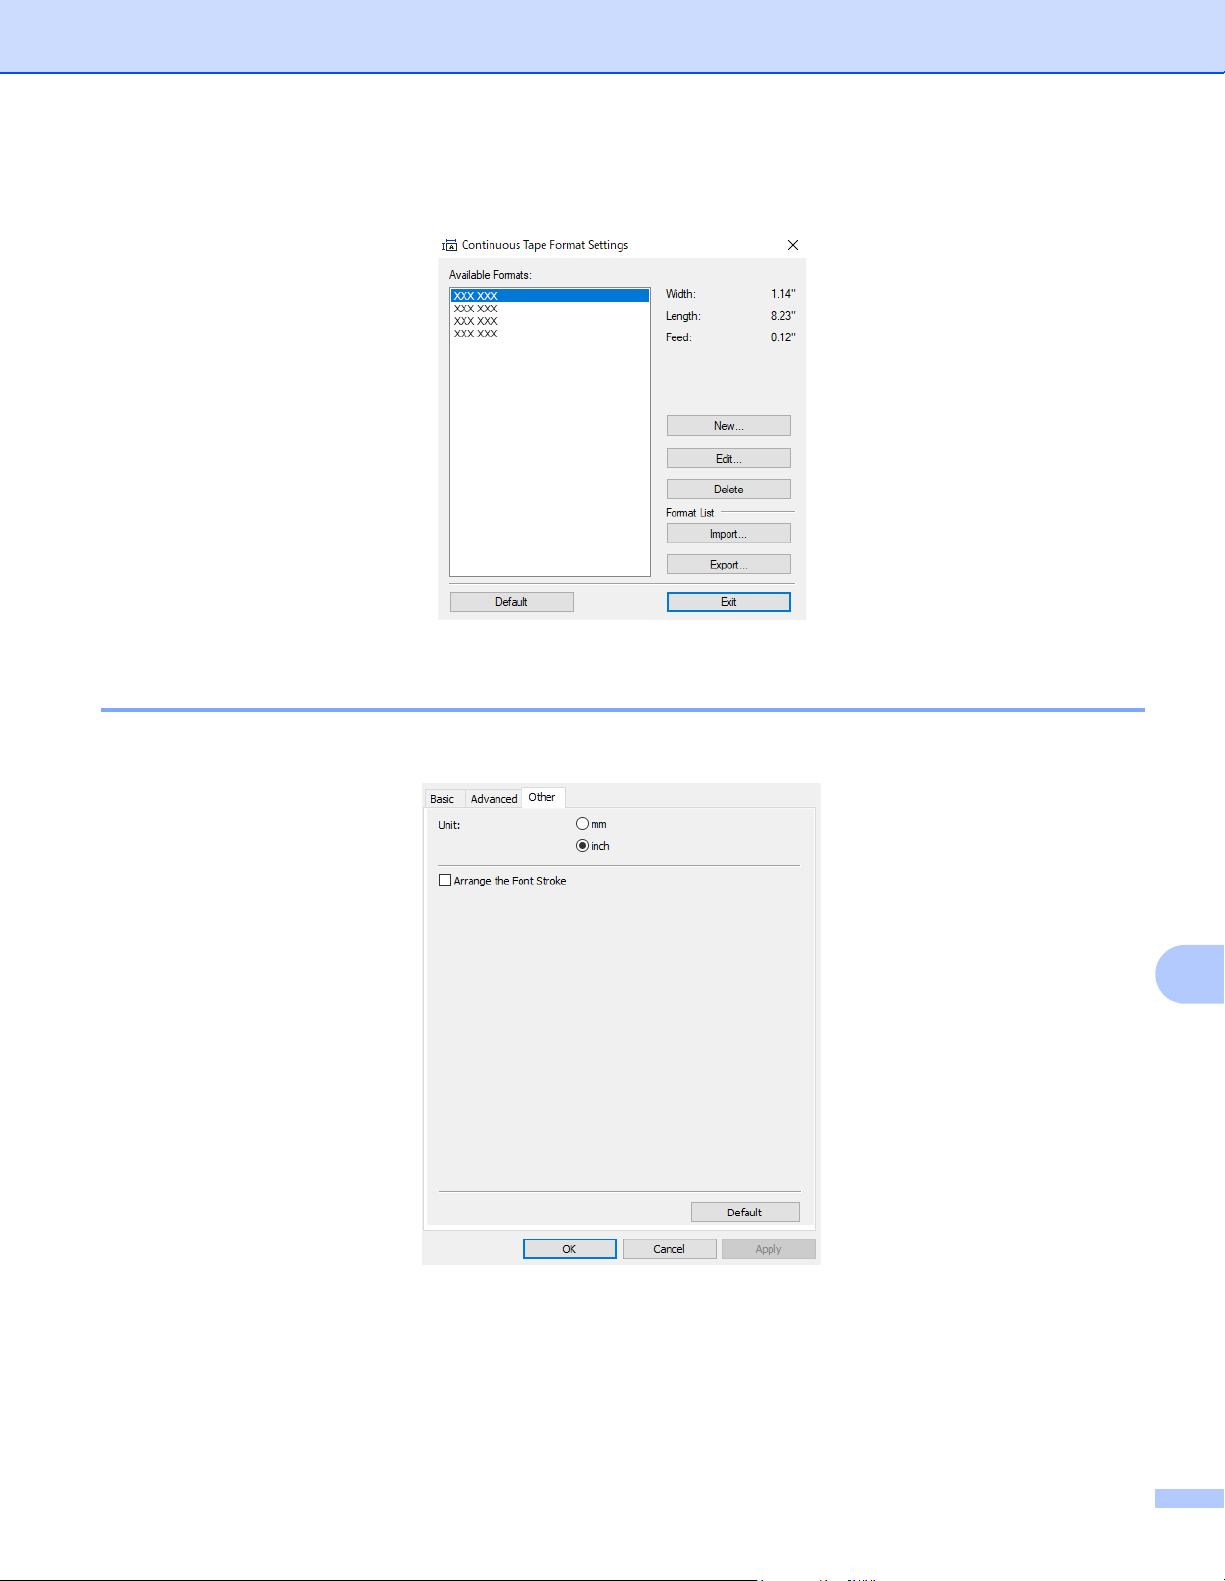
Other Tab 12
Specify the measurement unit (inches/mm).

Print Directly from Various Windows Software
60
12
Printing from other Windows software 12
Operation may differ depending on the software you are using.
a Select "Brother QL-XXX" (where "XXX" is your printer name) in the printer setting of the application.
b Adjust the paper size setting to the size of DK Roll set in your printer.