Loading ...
Loading ...
Loading ...
43INSTALLATION
• If a powerpoint is fitted it must be accessible with the
appliance installed, as the plug must be accessible
after installation.
• This appliance must be mounted on a flat surface for
the full width and depth of the product.
• To avoid overheating, the appliance must not
be installed in a recess or cupboard behind a
decorative door.
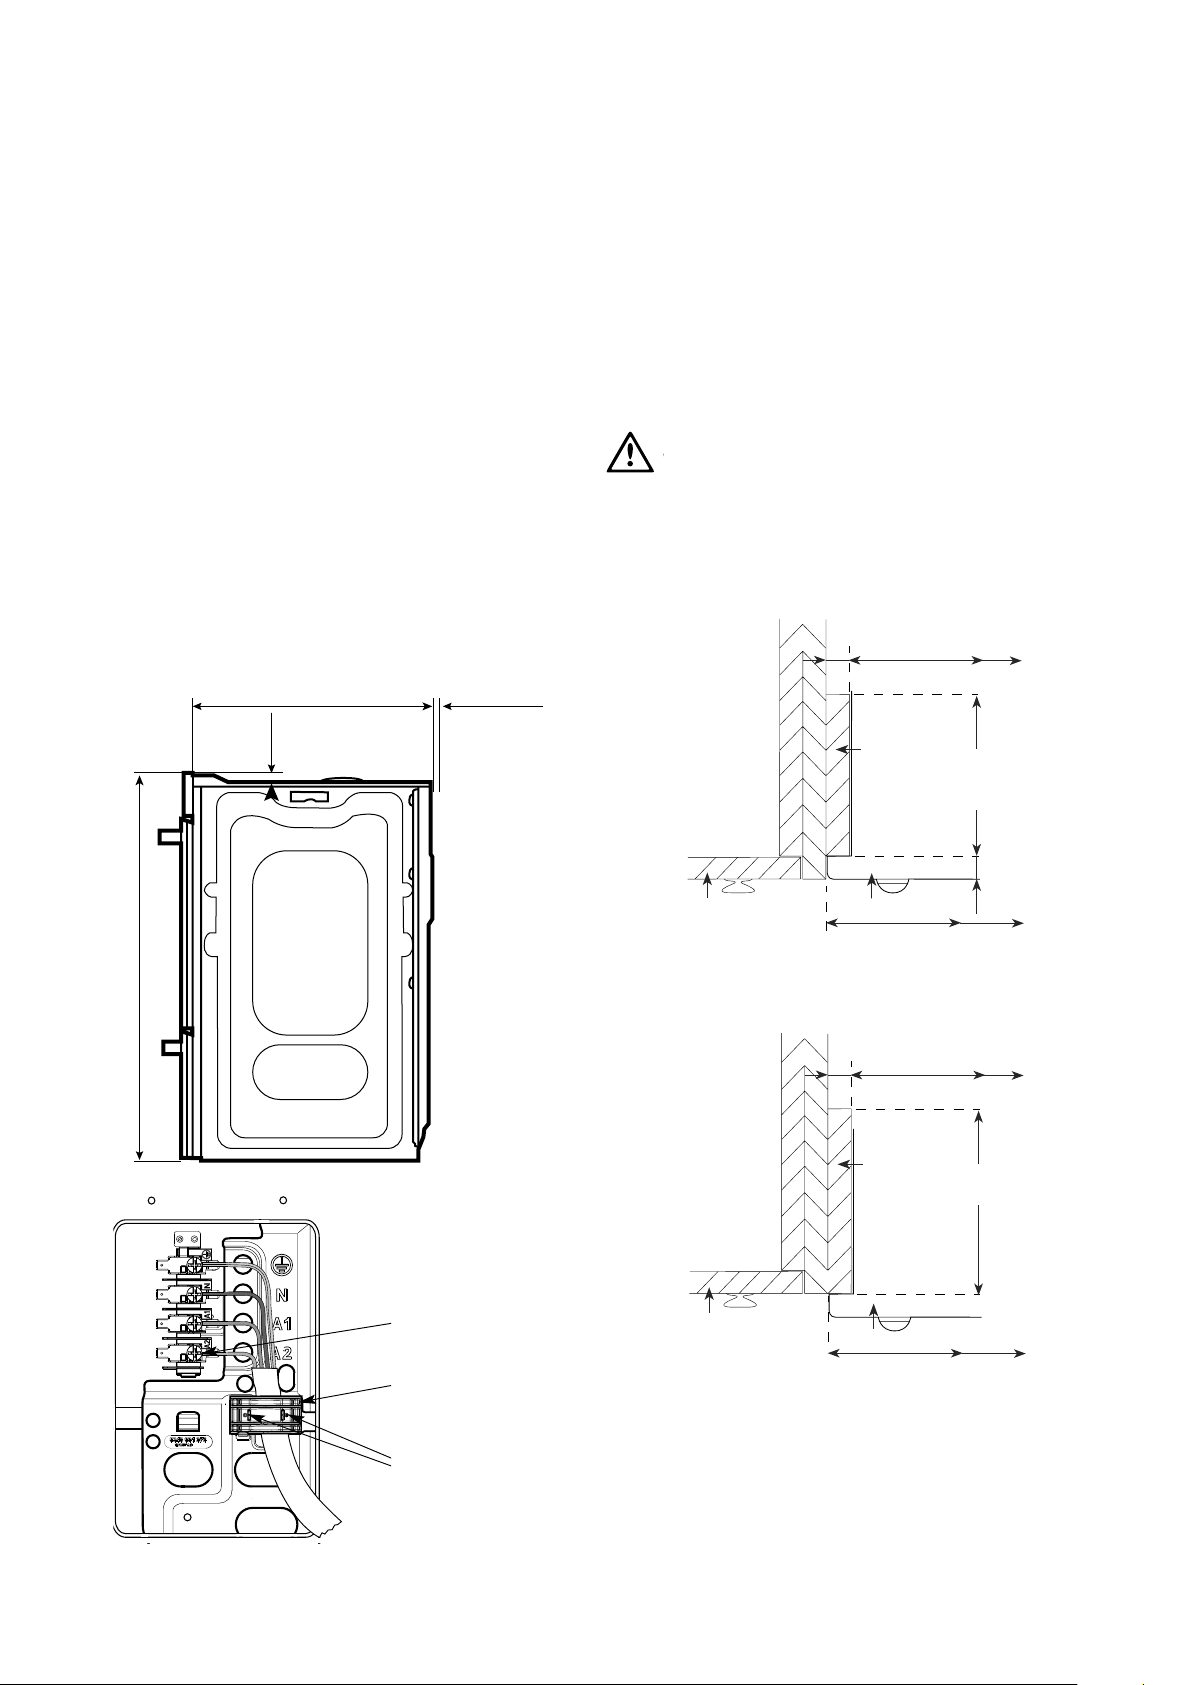
Hard wiring detail
1. Remove terminal cover plate from rear panel
of appliance.
2. Fit wires through hole in cover plate and make
connections to terminals.
3. Engage wires into plastic clip. Secure plastic clip with
two long silver screws (supplied in separate bag).
4. Replace cover plate onto rear panel.
553mm
15mm
A
8mm min
clearance
Second active wire only
required (optional) for
multi-phase products
Plastic clips
Plastic clip
securing points
Cabinet construction for your appliance
For the best integration within a kitchen, install the
appliance in a standard 600mm wide cupboard that gives
a flush fit with the surrounding cupboard fronts as shown
in Fig. A. A recess of 20 mm is ideal.
With the exception of pyrolytic ovens, the appliance can
also be installed using a proud fit to the surrounding
cupboard as shown in Fig. B.
WARNING
CAUTION
For all Pyrolytic clean oven models, the oven must be
installed as a flush fit to the surrounding cupboards and
the “Infill panel” MUST not exceed 100mm in length. This
ensures a 16mm gap is maintained between the cabinet
and oven side to prevent the cupboard overheating.
Fig. A
Flush Fit
16mm
568mm
600mm
20mm
Infill
panel
Cupboard
door
Oven
100mm max
for Pyro oven
Fig. B
Proud Fit
16mm
568mm
600mm
Infill
panel
Cupboard
door
Oven
100mm max
for Pyro oven
Loading ...
Loading ...
Loading ...