Loading ...
Loading ...
Loading ...
49-60807 Rev. 3
INSTALLING THE ICEMAKER (Continued)
Installation Instructions
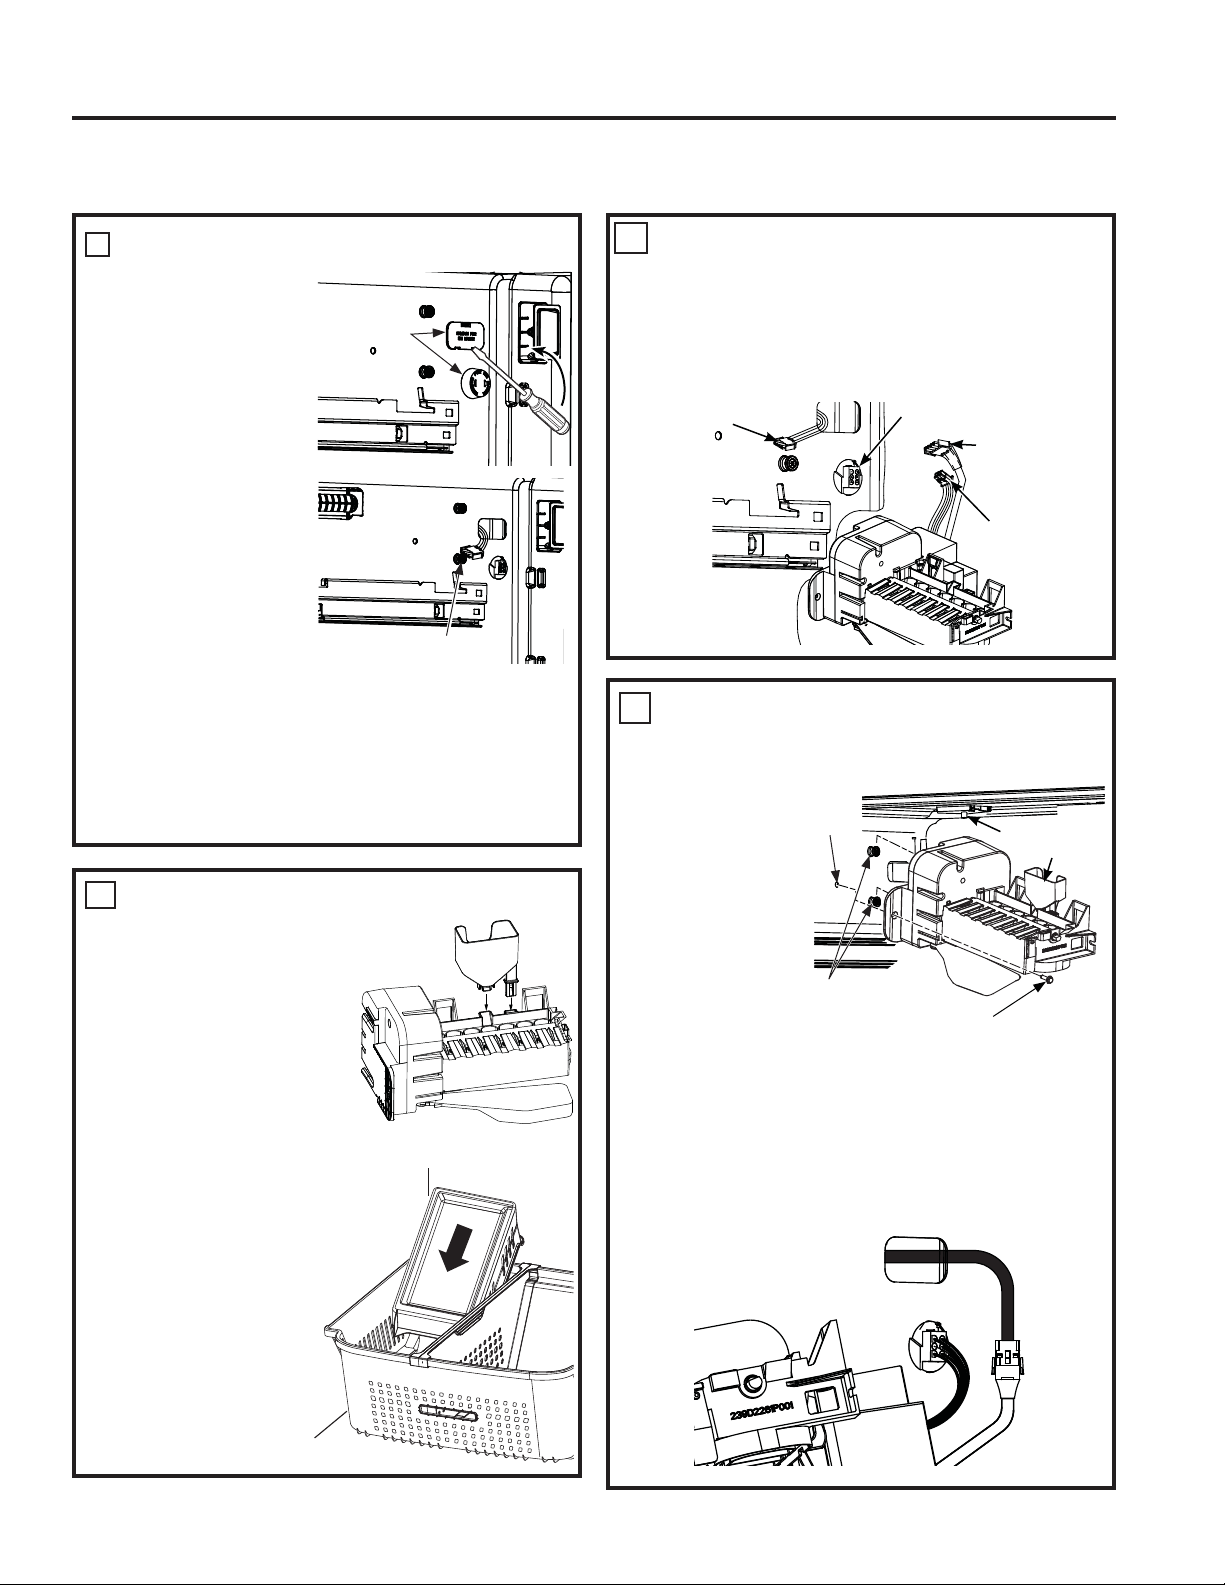
REMOVE THE OUTLET COVER(S)
Ŷ ,QVLGHWKHIUHH]HU
remove the outlet
FRYHUVZLWKD
small flat-blade
screwdriver.
For round cover
LISUHVHQW,QVHUW
the screwdriver
into one of the
smaller outermost
slots and push in
firmly to release
the round cover.
For rectangular
cover: insert the
screwdriver into
the slot at the top
RIWKHFRYHU/LIWWKHVFUHZGULYHUXSWRUHOHDVH
the snap and pull the cover out away from
liner. (This part is disposable and may break
ZKHQUHPRYHG
Ŷ 5HPRve the icemaker power cord plug from
the pocket in the side wall.
INSTALL THE ICEMAKER FILL
CUP
Ŷ 5HPRYHWKHLFHPDNHU
from the kit, install the
icemaker fill cup that
came with your kit
into the icemaker as
shown.
For New Install
Ŷ &KRRVHWKH
appropriate size
ice bucket from
the kit. Place the
ice bucket in the
left side of the
freezer basket,
upside down, with
taller end toward
the rear of the
basket.
10
Outlet
covers
,FHPDNHUSRZHUFRUG
INSTALLATION INSTRUCTIONS
PLUG IN THE ICEMAKER
Ŷ Place icemaker and fill cup on top of lower
EDVNHWFRQWHQWVRULFHEXFNHWIRUVXSSRUW
ZLWKWKHZLUHDQGFRQQHFWRUVIDFLQJXS,QVWDOO
the six pin connector first and then the four
pin connector.
MOUNT THE ICEMAKER
Ŷ /LIWWKHLFHPDNHUXSDQGURWDWHWRDOLJQWKH
slots on the side of the icemaker with the
mounting pins
in the freezer
ZDOO6OLGHWKH
icemaker back
so the fill tube
on the top
wall fits inside
the fill cup
opening.
Ŷ 0DNHVXUH
- The connector plugs are still firmly in the
sockets.
- The fill tube extends into the fill cup opening
at the back of the icemaker.
- The icemaker is level.
Ŷ &KHFNWKHZLULQJWRPDNHVXUHWKHLFHPDNHU
is plugged in correctly.
11
12
3LQ&RQQHFWRU
3LQ&RQQHFWRU
3LQ&RQQHFWRU
3LQ&RQQHFWRU
Fill Tube
0RXQWLQJ3LQV
0RXQWLQJ6FUHZ
6FUHZ
Hole
)LOO&XS
Loading ...
Loading ...
Loading ...