Loading ...
Loading ...
Loading ...
49-60807 Rev. 3 11
INSTALLATION INSTRUCTIONS
Installation Instructions
INSTALLING THE ICEMAKER (Continued)
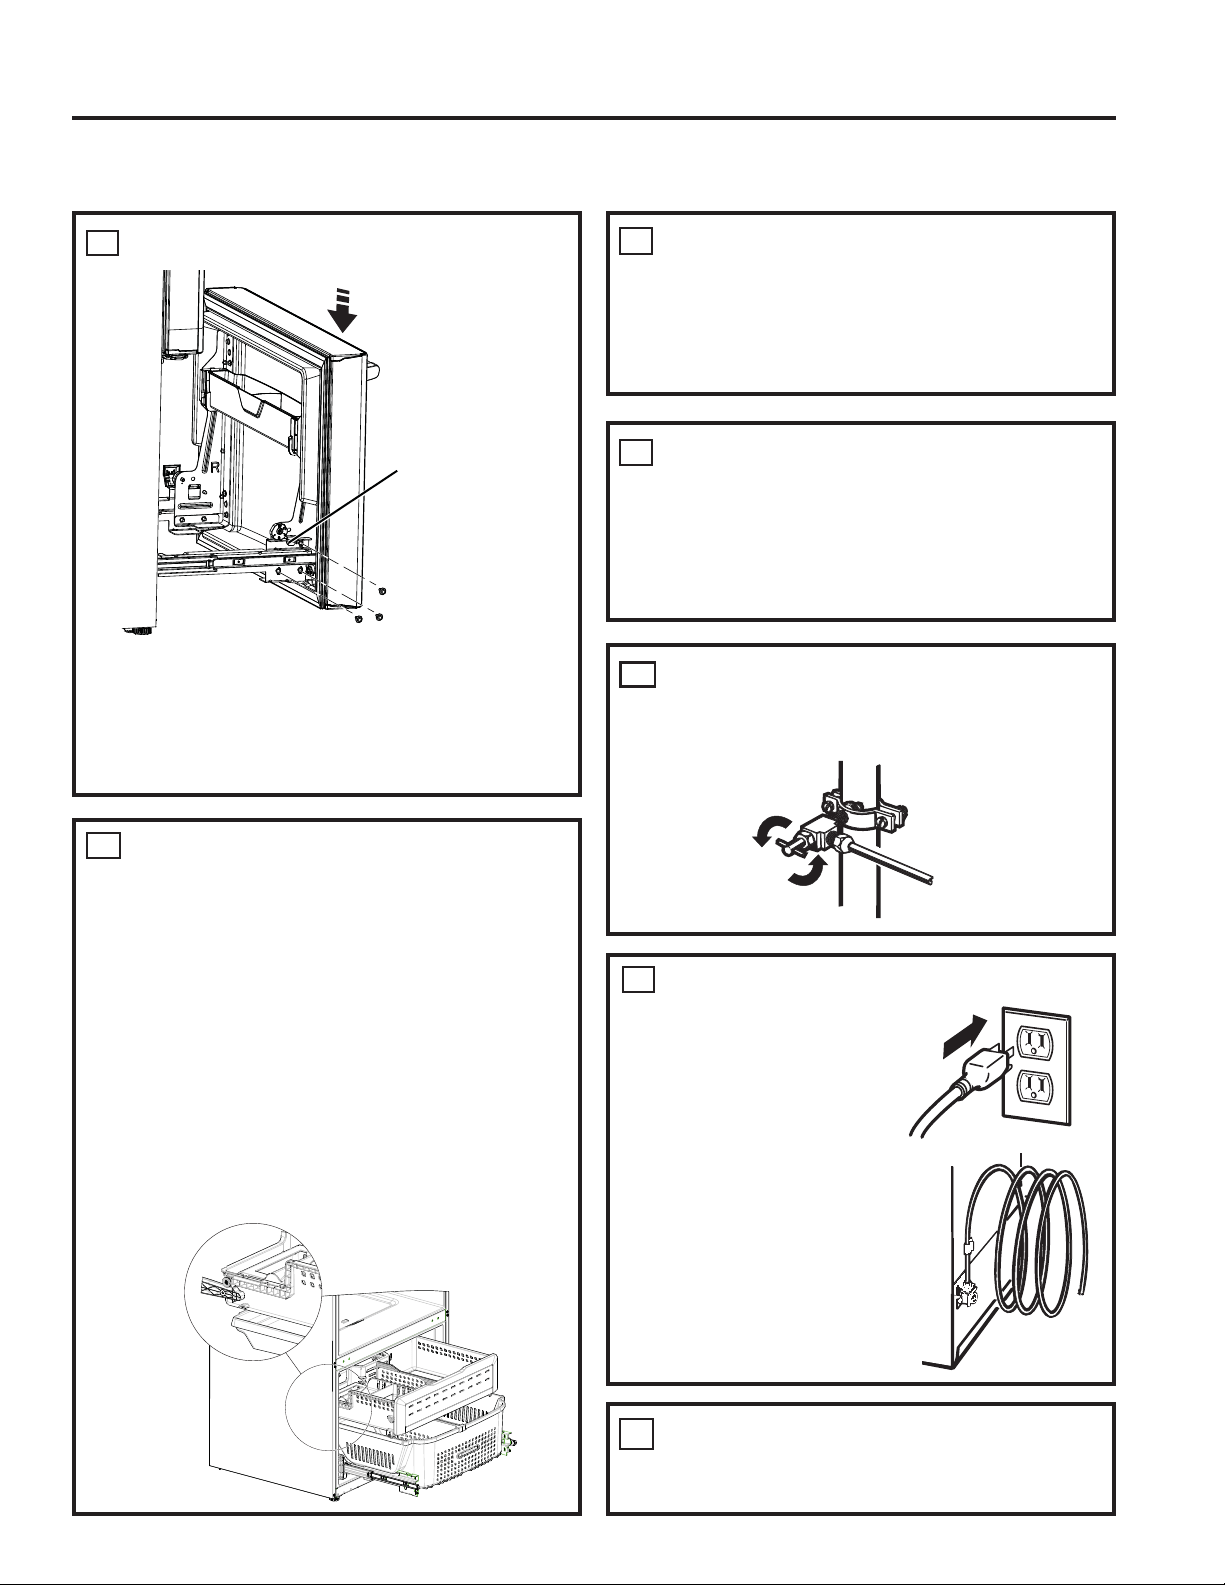
REPLACE FREEZER DOOR (Cont.)
Ŷ For adjusting freezer door gaps, follow the
LQVWUXFWLRQVLQWKH2ZQHU¶V0DQXDO
Ŷ 5HSODFHIUHH]HUEDVNHWRQWRWKHVOLGH
brackets and make sure the freezer door
operates and closes freely.
RE-INSTALL FREEZER DRAWER
Ŷ 5HLQVWDOOIUHH]HUGUDZHUE\SODFLQJWKH
rear drawer wheels onto the top of the track
mounted to the side of the freezer walls. The
front wheels on the freezer drawer should be
on top of the bottom basket sides. Place the
ice bucket in the drawer and push the drawer
into the freezer with the front of the bucket
VHHSDJHWRWKHIURQWRIWKHEDVNHW
Ŷ 0DNHVXUH
- The ice bucket does not hit the icemaker
arm and the freezer drawer retracts
completely into the freezer compartment.
- The fill tube extends into the fill cup opening
at the back of the icemaker.
16
17
Align and insert tab
on Freezer Door
Bracket with slot
RQ)UHH]HU6OLGH
Bracket.
NOTE: Place one
side in first and then
align the other side.
ATTACH WARRANTY LABEL
Ŷ A label is provided with this kit to record the
date of installation for warranty purposes.
Apply it to the inside of the refrigerator under
existing model/serial number label on the side
wall of the fresh food compartment.
KEEP THIS MANUAL
The warranty for the icemaker is printed in this
PDQXDO.HHSWKLVPDQXDOZLWK\RXU5HIULJHUDWRU
2ZQHU¶V0DQXDO
The icemaker installation inside the freezer is
now complete.
TURN THE WATER ON AT THE
SHUTOFF VALVE
Tighten any connections that leak.
18
20
PLUG IN THE REFRIGERATOR
Plug in the refrigerator.
Arrange the coil of tubing
so that it does not vibrate
against the back of the
refrigerator or against the
wall. Push the refrigerator
back to the wall.
START THE ICEMAKER
6HWWKHLFHPDNHUWR216HHSDJH
22
21
Loading ...
Loading ...
Loading ...