Loading ...
Loading ...
Loading ...
10 49-60807 Rev. 3
Installation Instructions
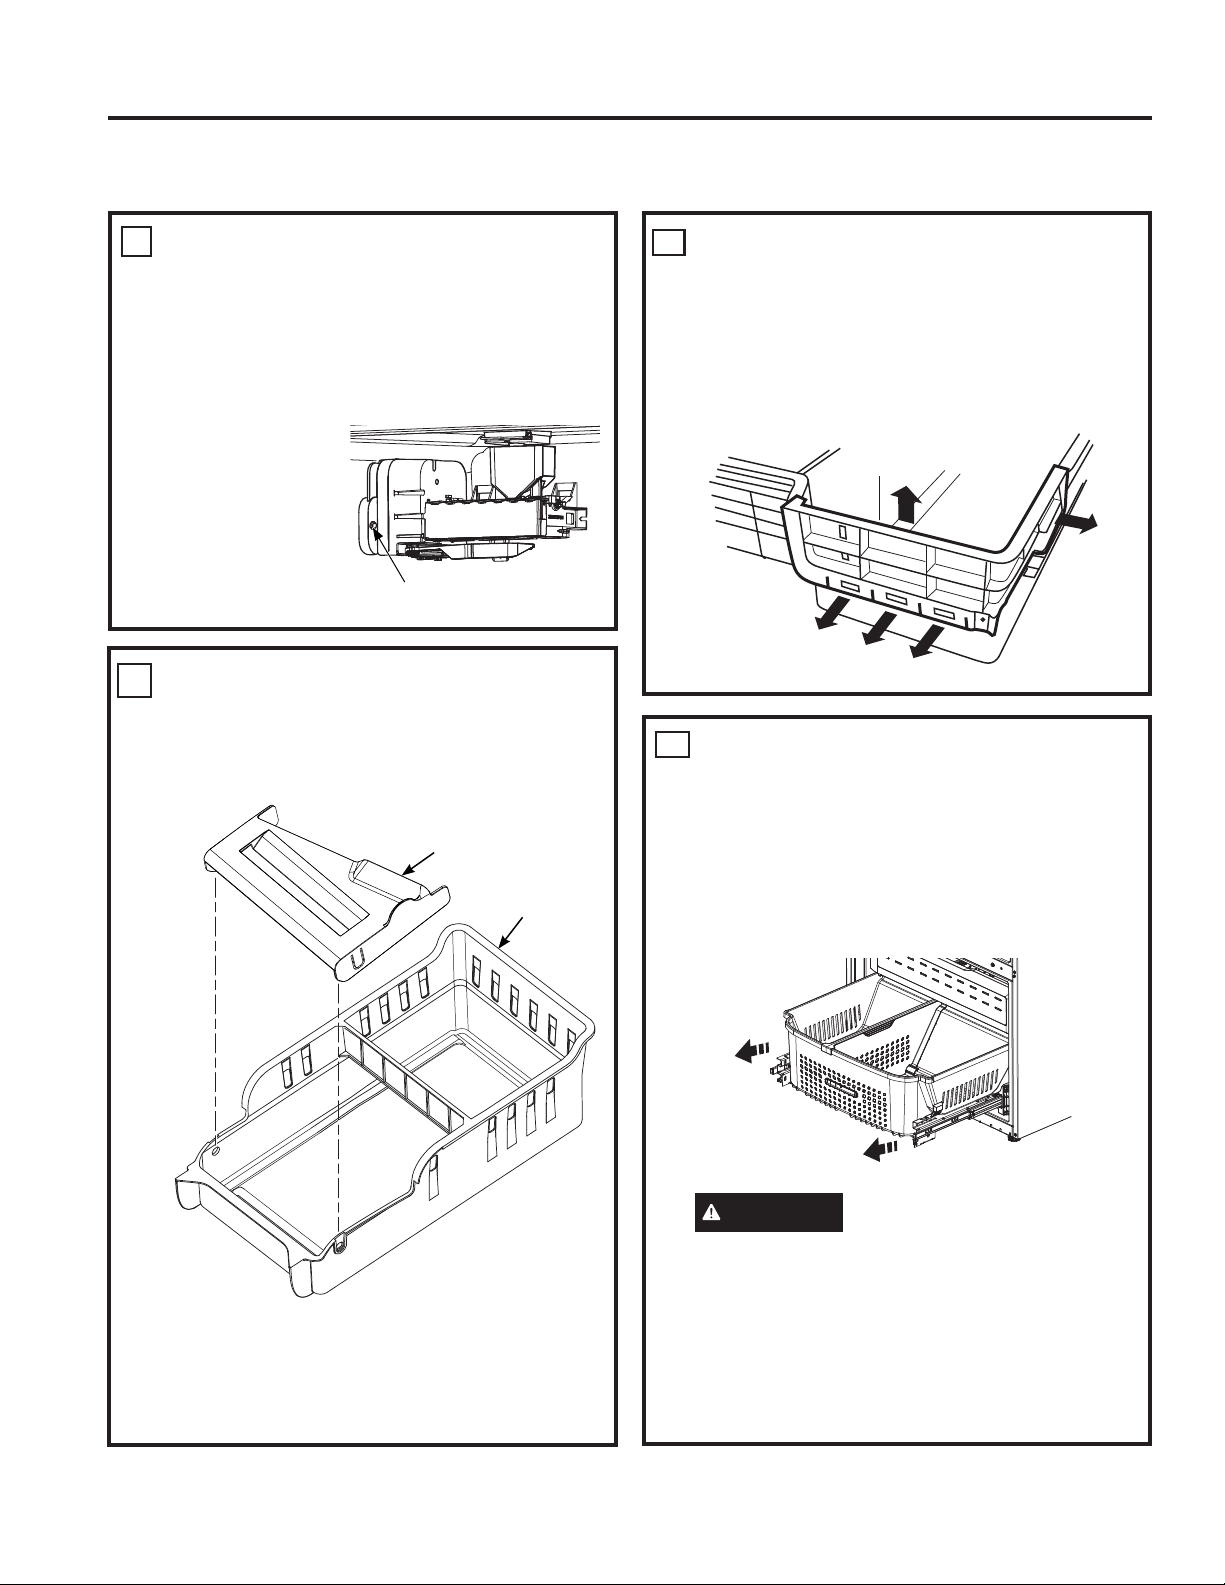
INSTALLING THE ICEMAKER (Continued)
CHECK INSTALLATION
Ŷ Push the icemaker back toward the rear of
the cabinet so the mounting screw hole in the
icemaker flange aligns with the mounting hole
in the freezer side wall, making sure wires are
not hanging outside of wire housing.
Ŷ ,QVWDOOVHOIWDSSLQJKH[KHDGVFUHZIURPWKH
kit into the hole in
the flange of the
icemaker.
REMOVE THE ICE BUCKET
Ŷ 5HPRYHWKHLFHEXFNHWIURPWKHEDVNHW
Ŷ For non-counter depth modles: ,QVWDOOWKHLFH
bucket cover onto the ice bucket by snapping
pins into holes at the back of the ice bucket.
NOTE:.LWFRPHVZLWKWZRLFHEXFNHWV&RXQWHU
GHSWKPRGHOVZLOOXVHVPDOOHUEXFNHW8VHH[WUD
bucket (in models with “Y” in model number such
DV*<(IRUDGGLWLRQDOLFHVWRUDJHRULWFDQEH
recycled.
13
14
,FH%XFNHW
&RYHU
,FH%XFNHW
)URQW
Hex Head
0RXQWLQJ6FUHZ
INSTALLATION INSTRUCTIONS
REMOVE FREEZER DRAWER
CORNER
Ŷ 5HPRYHWKHGUDZHUFRUQHUSLHFHE\SXOOLQJ
out and up on three tabs while pushing down
on the back of the drawer. Then pull out the
side flange while pulling up on the corner
piece to complete the removal.
REPLACE FREEZER DOOR
Ŷ Pull the lower basket and slide mechanism to
full extension using both hands.
Ŷ 5HPRYHWKHEDVNHWUHVWLQJRQWKHVOLGHV
,IWKHEDVNHWLVIXOORIIUR]HQJRRGVOLIWWKH
basket and set to the rear of the freezer
compartment until after the freezer door is
located on slides.
CAUTION
Lifting Hazard
)UHH]HUGRRULVKHDY\8VHERWKKDQGVWR
secure the door before lifting.
Ŷ /LIWWKHIUHH]HUGRRUDQGDOLJQWKHWDEVRQWKH
GRRUEUDFNHWVLGHVZLWKWKHVTXDUHKROHVLQ
slide mechanisms.
Ŷ 5HSODFHWKHDWWDFKPHQWVFUHZVDQGWRUTXH
the screws to 65 in-lb.
15
16
Loading ...
Loading ...
Loading ...