Loading ...
Loading ...
Loading ...
14 49-60807 Rev. 3
INSTALLING THE WATER LINE (Continued)
Installation Instructions
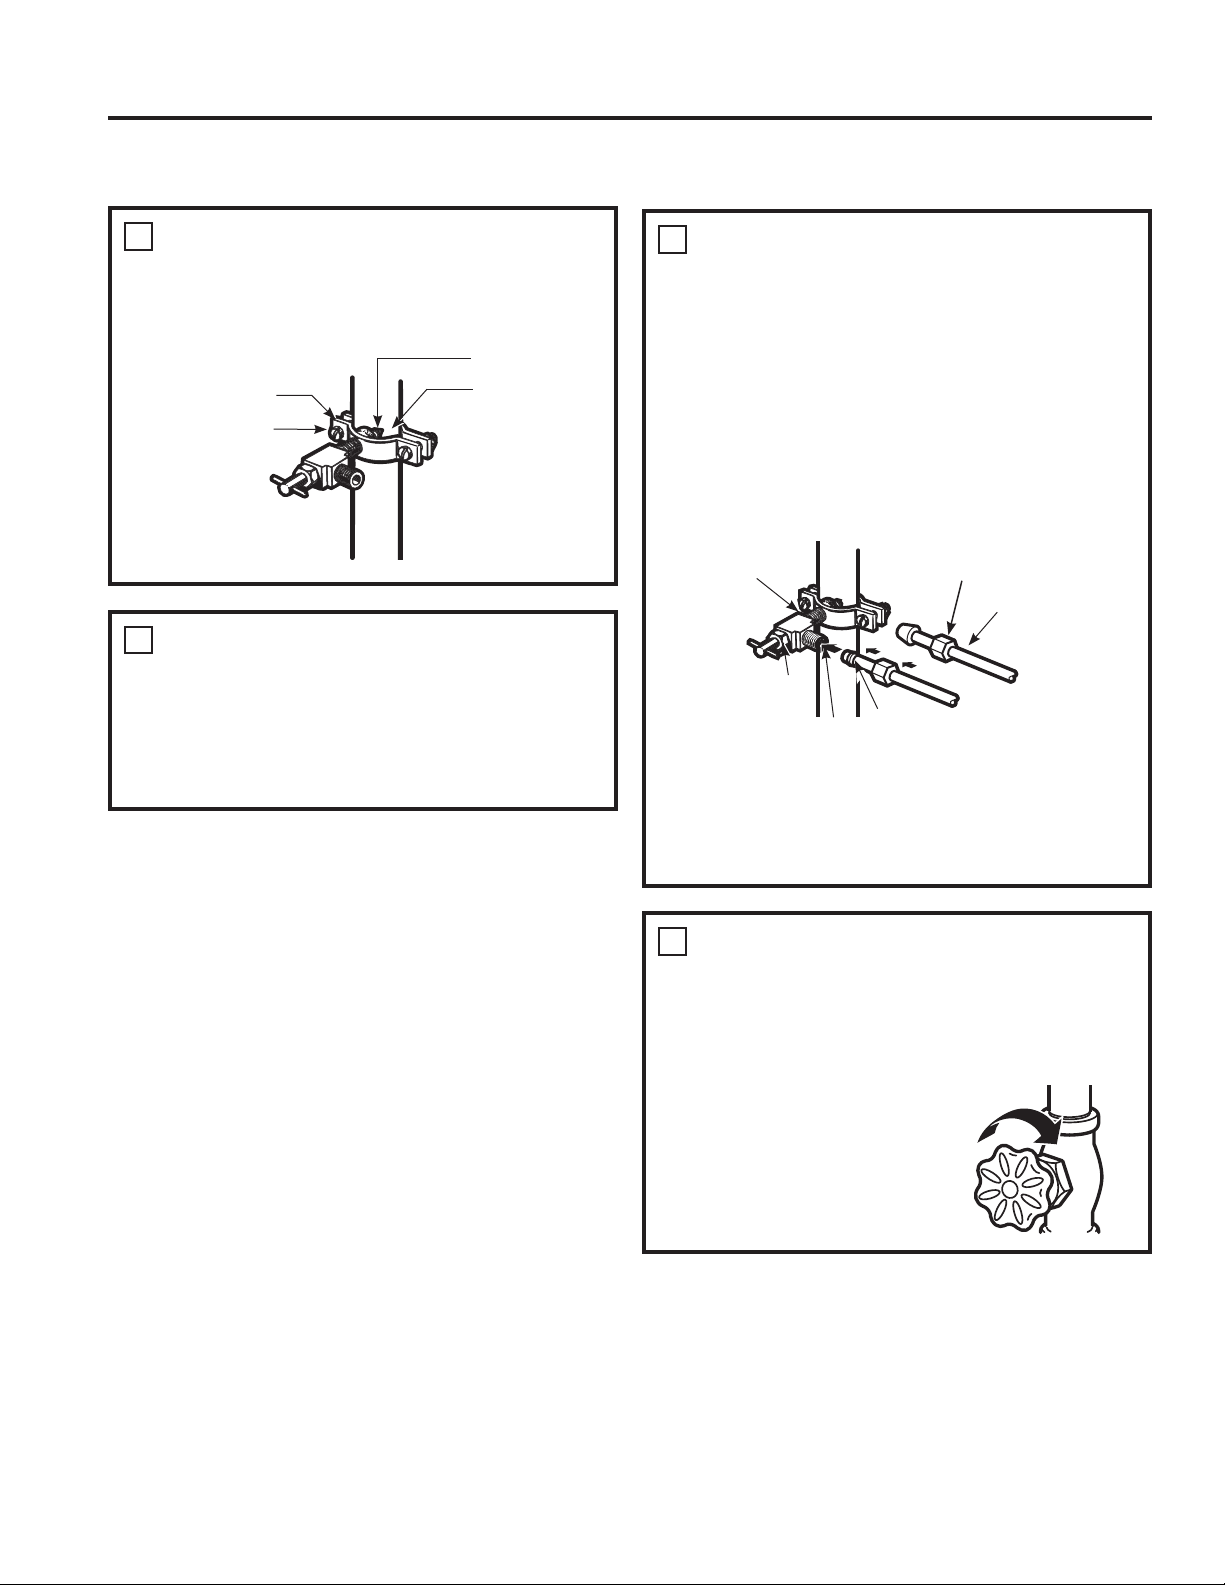
5
TIGHTEN THE PIPE CLAMP
Tighten the clamp screws until the sealing
washer begins to swell.
NOTE: Do not overtighten or you may crush
the tubing.
8
FLUSH OUT THE TUBING
Turn the main water supply on and flush out the
tubing until the water is clear.
6KXWWKHZDWHURIIDWWKHZDWHUYDOYHDIWHUDERXW
RQHTXDUWOLWHURIZDWHUKDVEHHQIOXVKHG
through the tubing.
6
ROUTE THE TUBING
5RXWHWKHWXELQJEHWZHHQWKHFROGZDWHUOLQHDQG
the refrigerator.
5RXWHWKHWXELQJWKURXJKDKROHGULOOHGLQWKHZDOO
or floor (behind the refrigerator or adjacent base
FDELQHWDVFORVHWRWKHZDOODVSRVVLEOH
7
CONNECT TUBING VALVE
3ODFHWKHFRPSUHVVLRQQXWDQGIHUUXOHVOHHYH
for copper tubing onto the end of the tubing
and connect it to the shutoff valve.
0DNHVXUHWKHWXELQJLVIXOO\LQVHUWHGLQWR
the valve. Tighten the compression nut securely.
)RUSODVWLFWXELQJIURPD6PDUW&RQQHFW
5HIULJHUDWRU7XELQJNLWLQVHUWWKHPROGHGHQG
of the tubing into the shutoff valve and tighten
compression nut until it is hand tight, then
tighten one additional turn with a wrench. Over
tightening may cause leaks.
NOTE: &RPPRQZHDOWKRI0DVVDFKXVHWWV
3OXPELQJ&RGHV&05VKDOOEHDGKHUHGWR
6DGGOHYDOYHVDUHLOOHJDODQGXVHLVQRWSHUPLWWHG
LQ0DVVDFKXVHWWV&RQVXOWZLWK\RXUOLFHQVHG
plumber.
Washer
,QOHW(QG
3LSH&ODPS
&ODPS
6FUHZ
INSTALLATION INSTRUCTIONS
6DGGOH7\SH
6KXWRႇ9DOYH
&RPSUHVVLRQ1XW
Packing Nut
2XWOHW9DOYH
)HUUXOHVOHHYH
6PDUW&RQQHFW
Tubing
Loading ...
Loading ...
Loading ...