Loading ...
Loading ...
Loading ...
Page |
11
Activating/Deactivating
The appliance will activate the ice-maker as soon
as it is plugged in and powered on. The LED
indicator light above the ICE button will be
illuminated.
NOTE: The ice-maker will temporarily disengage
when the lower drawer is opened, and re-engage
when closed.
To deactivate the ice-maker, press the ICE
button. The key-press will sound, and the LED
indicator light above the ICE button will turn off.
To reactivate, press the ICE button again. The
key-press will sound, and the LED indicator light
will reactivate.
NOTE:
If the ice maker is being used for the first
time, after a long
period of disuse, or after a filter
replacement, DO NOT use the ice produced during
the first 2 complete batches (full buckets). Throw
the ice-cube batches away and clean the ice bucket.
Make sure that the ice bucket and lower drawer
partition are correctly placed when returning the ice-
bucket into the drawer
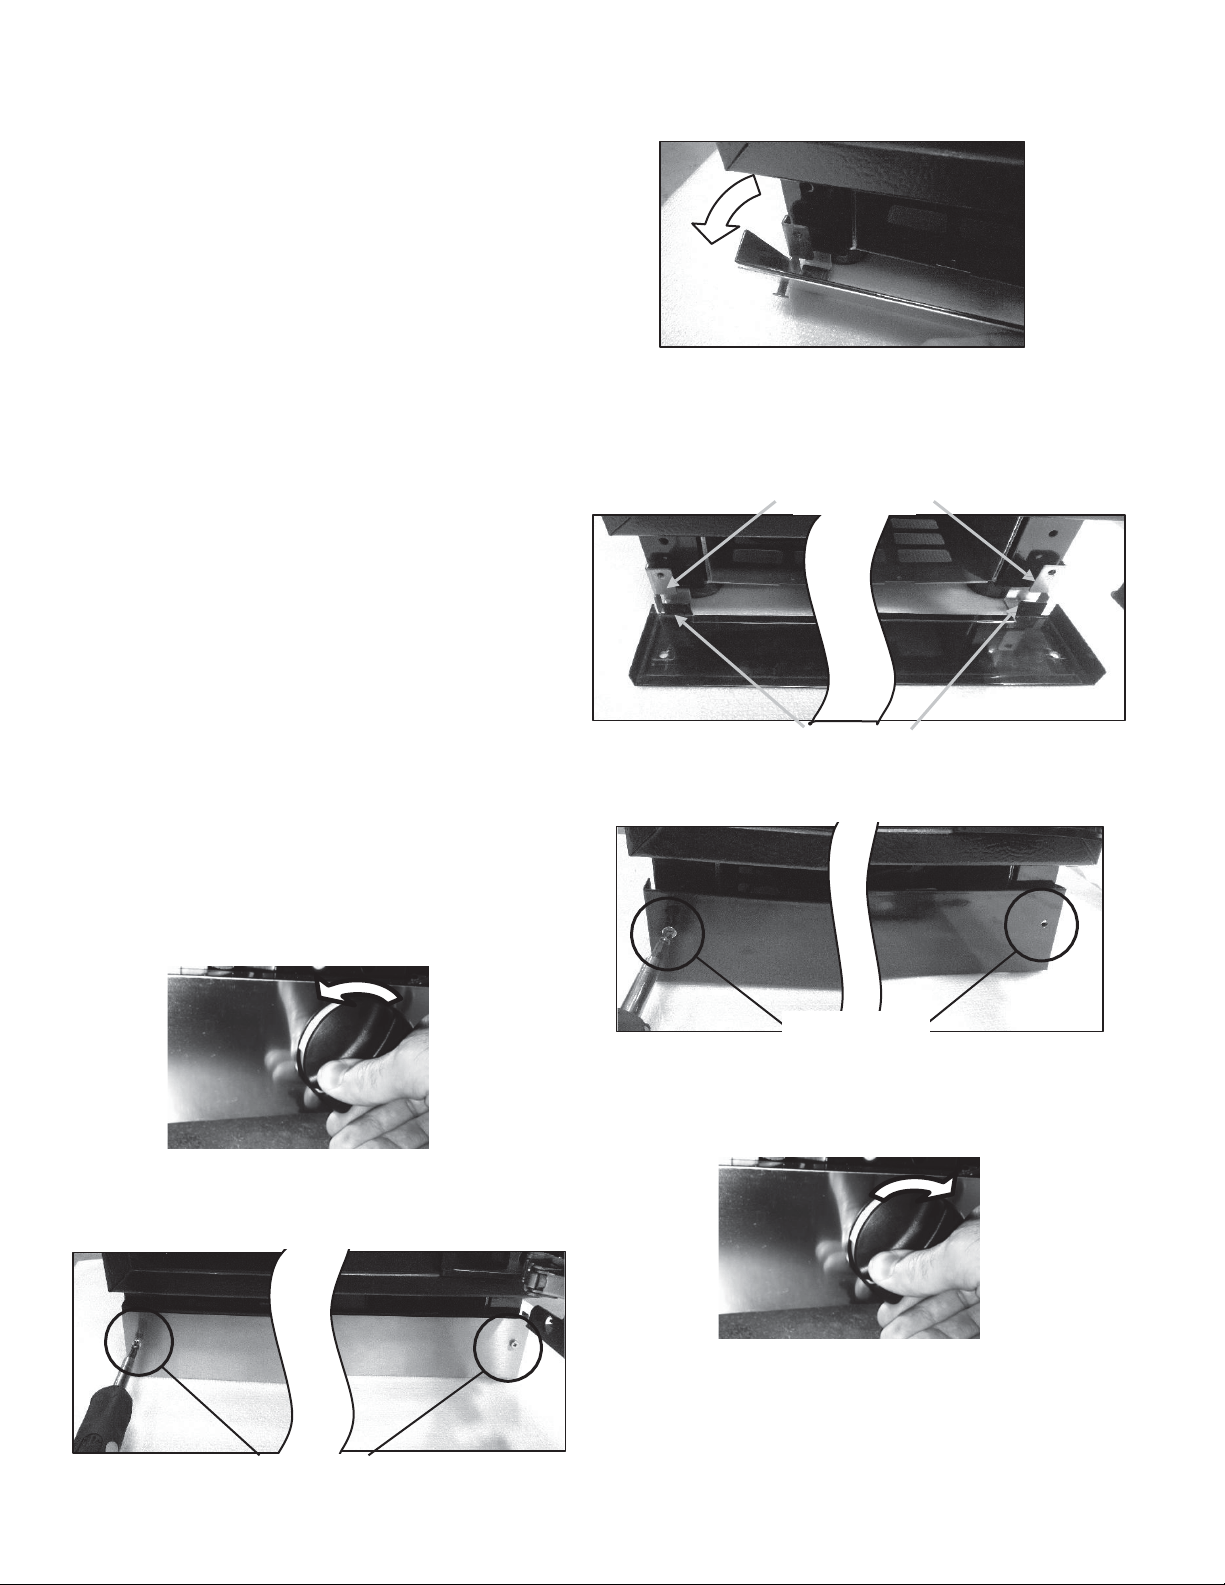
Toe-Kick
The Toe-Kick itself can be removed for service or
cleaning (see “Cleaning behind the Toe-Kick” in the
next section).
1.Remove the water filter by turning counter
clockwise (1/4 turn) the water filter cap and then
pulling the filter out.
2.Remove the stainless steel Toe-Kick by
unscrewing and removing the two front screws with
a Philips screwdriver.
Front screws
3. Pull the Toe-Kick out of the left and right mounting
brackets.
4.To reattach the Toe-Kick, slide over the left and right
mounting brackets, such that bottom tabs of the Toe-Kick
rest on top of the bracket bases. This will allow the Toe-
Kick and mounting bracket screw holes to align.
Bracket
bases
Bottom
tabs
5. Gently tighten with a Philips screwdriver. Take care not
to over-tighten the screws.
Front screws
6. Return the water filter and turn clockwise until it inserts
completely into the Toe-Kick. Continue turning clockwise (1/4
turn) until it locks into place.
Loading ...
Loading ...
Loading ...