Loading ...
Loading ...
Loading ...
English
50
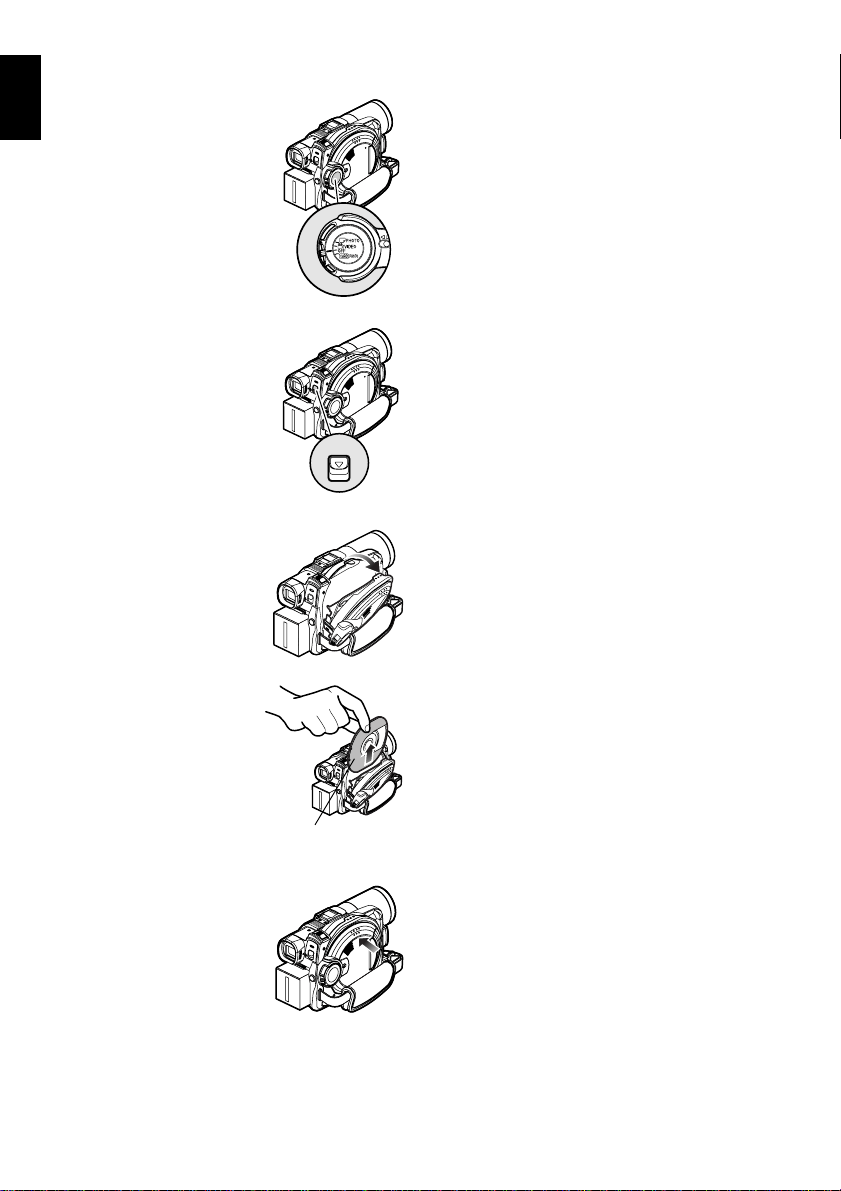
REMOVING DISC
1Set the power switch to
“POWER OFF” to turn the
DVD video camera/
recorder off.
2Press down the DISC EJECT
button once and release it.
In a moment, the cover of
disc insertion block will
open slightly.
3Gently open the cover until
it stops.
When the cover is fully
open, the disc will slightly
come out from the disc
guide, and stop.
4Remove the disc.
Hold the top of Round
DVD Holder as shown in
the illustration and
gently pull it out.
Note:
Be careful not to touch the
disc exposed portion when
removing the disc.
5Gently push the section
indicated “PUSH CLOSE”
on the cover of disc
insertion block, to close the
cover.
Note:
• Even after the DVD video camera/recorder is turned on,
the disc can be removed unless it is in recording status.
Hold down the DISC EJECT button for approximately 2
seconds, and then release it to remove the disc. (The
DISC EJECT indicator on the LCD screen will blink.) It is
recommended that you turn the DVD video camera/
recorder off before inserting or removing disc to prevent
misoperation.
• Do not remove the battery or disconnect the AC adapter/
charger during removal of the disc or until power is
completely turned off: If you do, the disc cover will not
open. If this happens, reattach the battery or AC
adapter/charger, push down the DISC EJECT button
once, and then release it.
• Do not insert anything other than the 8 cm DVD-RAM or
DVD-R disc into the disc insertion block: Doing so could
cause malfunctions.
• Set the power switch to “POWER OFF” to turn the DVD
video camera/recorder off.
• When inserting or removing the disc, be careful not to
touch the inside of DVD video camera/recorder
(especially, the lens of laser pickup (see “Terminology”,
P. 163)). Also, BE SURE NOT to look into the lens in laser
pickup: Doing so could damage your eyesight.
DISC EJECT
When grasping the
holder, avoid the disc
exposed portion.
Loading ...
Loading ...
Loading ...