Loading ...
Loading ...
Loading ...
PREPARATIONS ➤ Installation En 21
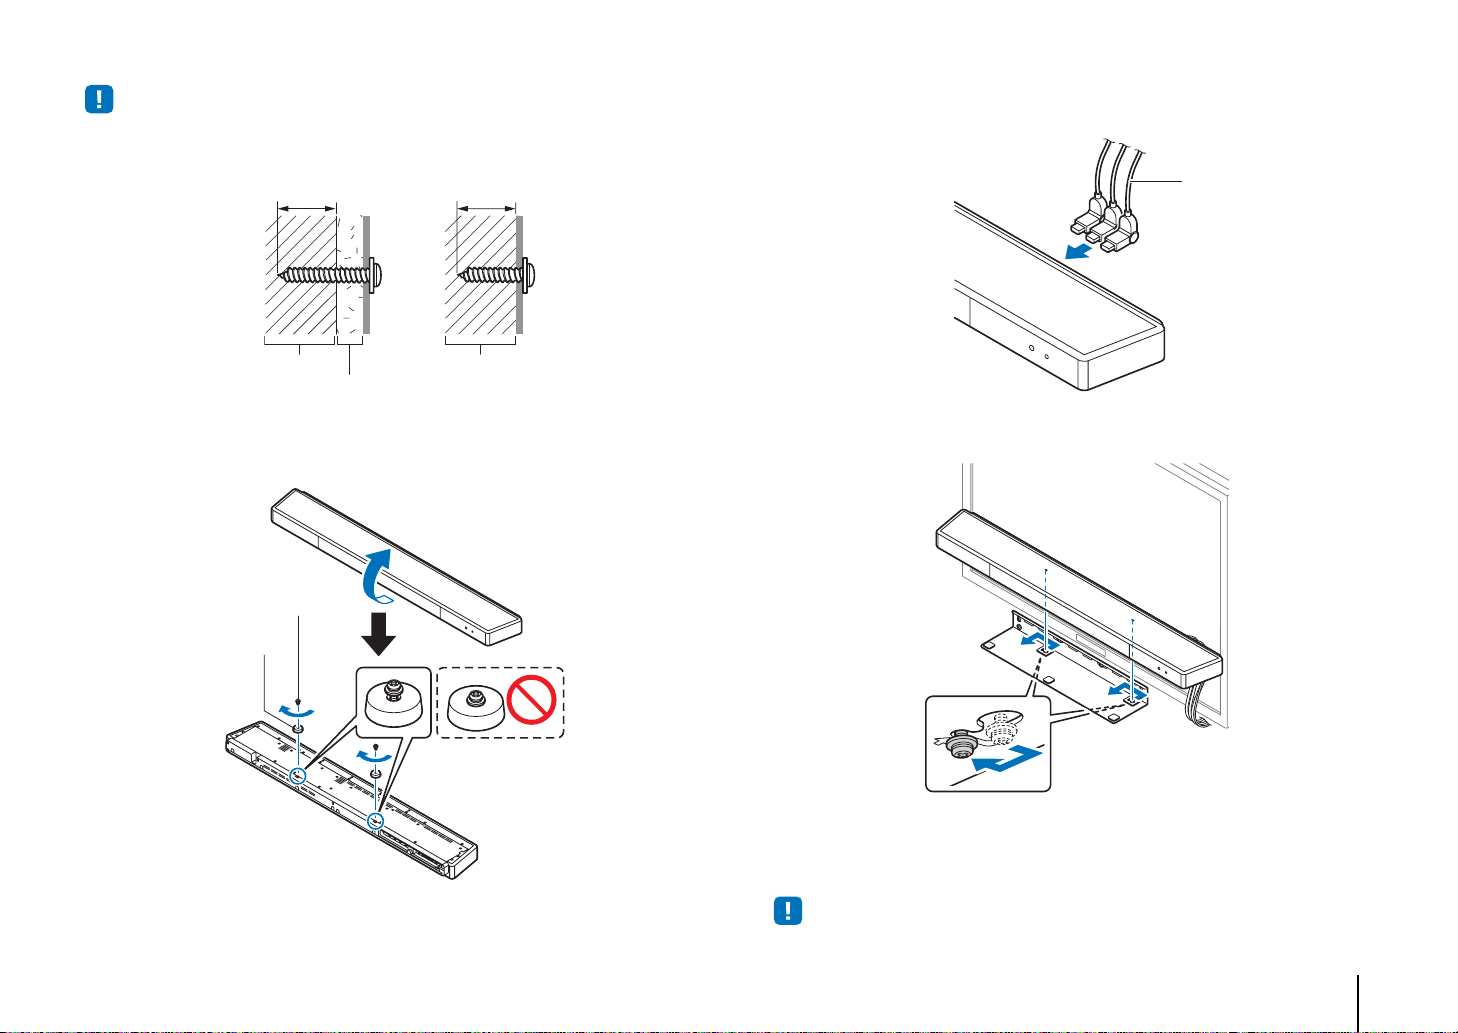
• Be sure that screws are inserted in a sturdy portion of the wall or pillar. Do not mount the bracket on a wall
made of materials such as mortar or veneer, which may chip or peel. If screws fall out, the wall mount
bracket will also fall, resulting in damage or injury.
4
Attach the spacer supplied with this unit to the bottom of this unit
using the screws also supplied with this unit.
Do not tighten the screws until this unit has been mounted on the wall mount
bracket.
5
Connect commercial cables to this unit.
6
Mount this unit on the wall.
Insert the screws on this unit into the mounting holes on the left and right sides
of the wall mount bracket, and then slide this unit to the left.
• When mounting or removing it, hold this unit firmly with both hands. If this unit falls, damage or injury
could occur.
25 mm or more
Beam, etc.
25 mm or more
Beam, etc.
Drywall
Screw
Spacer
Flexible HDMI cable or
right-angle connector
Loading ...
Loading ...
Loading ...