Loading ...
Loading ...
Loading ...
PREPARATIONS ➤ Installation En 16
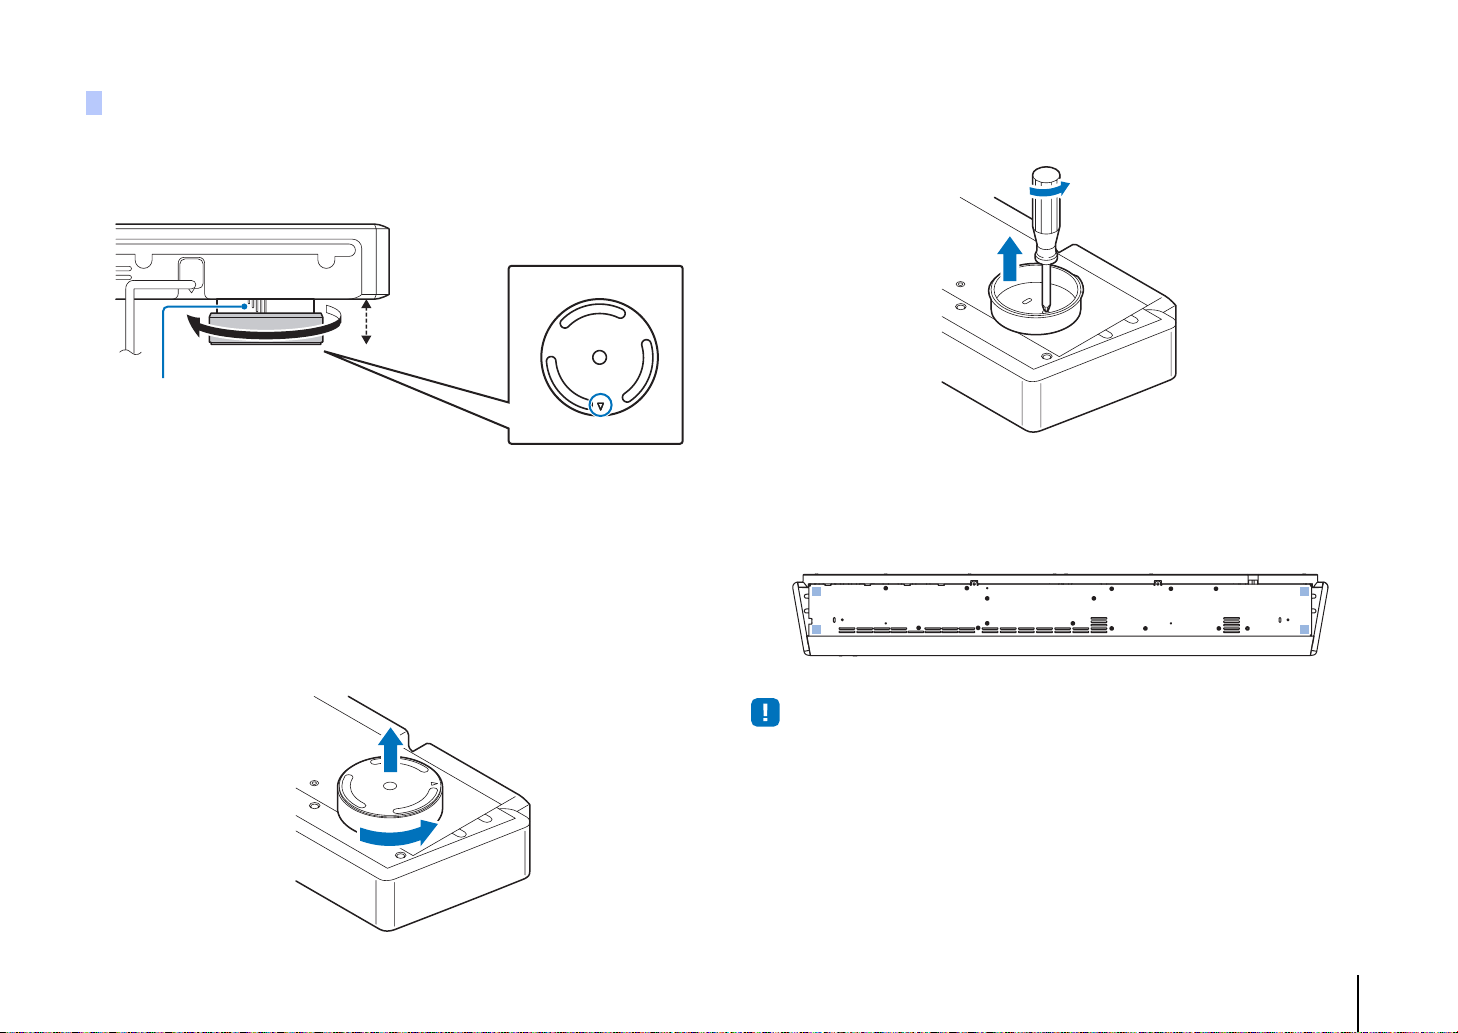
Turn the legs counter-clockwise to increase the height of the center unit if necessary.
Use the arrows (
U) on the bottom of the left and right legs, and the scale on the insides
of these legs, to confirm that the legs are positioned at the same height.
❑ Removing the legs
If the center unit obstructs the remote control sensor on the TV or signal transmitter for
3D glasses, remove the legs to decrease the height of the center unit.
The legs consist of components (inner legs) that are fixed to the center unit with screws,
and components (outer legs) that can be removed by rotating them.
1
Remove the outer legs.
Keep turning the outer legs counter-clockwise to remove them.
2
Remove the inner legs.
Use a screwdriver to remove the screws.
3
Attach the one of the four supplied non-skid pads at each of the four
corners on the bottom of the center unit.
An example of pad positioning is shown in the illustration below.
• Store the legs and screws in a safe place out of the reach of children for later use and to prevent children
from accidentally swallowing screws.
Adjusting the height of the center unit
Scale
Adjustable range:
22 to 35 mm
(7/8 to 1-3/8 in)
Loading ...
Loading ...
Loading ...