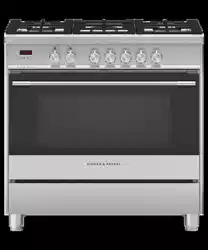
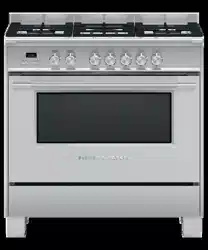
USER GUIDE Freestanding Cooker
INTRODUCTION
Before you start
- Make sure that the anti-tip bracket at the right rear of the cooker has been properly installed.
- Make sure that the installer has completed the ‘Final checklist’ in the Installation instructions.
- Read this guide, taking special note of the ‘Safety and warnings’ section.
- Remove all accessories and packaging from the oven and cooktop. Recycle items that you can. If any adhesive residue is left on surfaces, remove this using dishwashing liquid on a soft cloth. Do not use any harsh or abrasive cleaners.
- Make sure you follow the instructions under ‘First use’ before using your cooker for cooking.

FIRST USE
Control panel layout

Clock display and controls

Setting the clock
- When your oven is first turned on, or after a power cut, the display will flash. You will need to set the clock in order to use the oven.

Positioning the shelves
- Shelf positions are numbered from the bottom.
- Position the shelves you will need before turning the oven on.
- For advice on which shelf position to use, see sections ‘Oven functions’, ‘Cooking guide’, and ‘Cooking charts’.
IMPORTANT! Always position the oven shelves before turning the oven on. Remove any unused shelves and baking utensils from the oven.

Oven shelves

Full extension sliding shelves (some models only)
- The wire shelves and slides are built together as one unit.
- When positioned correctly, the slides will prevent the wire shelves from tilting when pulled forward.
- Beware: these shelves are heavy

To insert the sliding shelves (some models only)

1. Make sure the guard rail is at the back, facing up and the slides are not extended.

2. Hold the shelf firmly with both hands, making sure you grip the wire shelf too to stop it sliding forward.

3. Hook the rear tags over the wires of the desired shelf position on both side racks.
4. Push the shelf all the way into the oven, ensuring the front and rear tags either side are securely locked behind the side rack wires.
To remove the shelves
- Wait for the oven to cool down completely.
- Hold the shelf firmly with both hands, making sure you grip the wire shelf too to stop it sliding forward.
- Pull the shelf forward about ¾ of the way.
- Lift the rear of the shelf slightly so that the tags clear the side rack wires, then remove.
To insert the shelves

1. Make sure the guard rail is at the back, facing up

2. Position the shelf: it should rest on the side rack wires, as shown.

3. Tilt the front up slightly to help the safety stops clear the side rack wires.

4. Lower the shelf back onto the side rack wires and slide all the way into the oven.
To remove the shelves
- Wait for the oven to cool down completely.
- Pull the shelf forward about ¾ of the way.
- Tilt the front up slightly to help the safety stops clear the side rack wires.
- Remove the shelf.
Conditioning the oven
- It is important to condition your oven before using it for cooking and baking. Conditioning will burn off any manufacturing residues and ensure that you get the best results right from the start.
Before you start:
- Make sure you have removed all packaging and any cable ties used to secure the shelving during transit.
- Make sure all shelves are fitted in the oven.
- Make sure you have set the clock. If the clock has not been set the cooling fans will come on but the oven lights will remain off and the oven will not heat up.

1. Select the Bake function  .
.

2. Set the temperature to 200°C for 30 minutes.
- While the oven is heating up, the temperature indicator light will glow.
- When the oven has reached set temperature, the temperature indicator light will go out.

3. After 10 minutes, select the Fan Grill  function.
- Heat at 200°C for 10 minutes.
4. After 10 minutes, select the Fan Forced  function.
- Heat at 200°C for 20 minutes.
Note:
- There will be a distinctive smell and a small amount of smoke during the conditioning process as manufacturing residue is burnt off. This is normal, but make sure the kitchen is well ventilated while the oven is conditioning.
- Once cooled, wipe out the oven with a damp cloth and mild detergent, and dry thoroughly
OVEN FUNCTIONS
IMPORTANT!
- Use all the functions with the oven door closed.
- Safe food handling: leave food in the oven for as short a time as possible before and after cooking or defrosting. This is to avoid contamination by organisms which may cause food poisoning. Take particular care during warmer weather.

This is not a cooking function
- Only the oven light comes on. It remains on in all the cooking functions.

Upper outer and lower elements
- Heat comes from both the upper and lower elements. The fan is not used in this function.
- Ideal for cakes and foods that require baking for a long time or at low temperatures.
- This function is not suitable for multi-shelf cooking.
Ideal for moist foods that take a longer time to cook eg rich fruit cake or bread.

Upper elements
- This function delivers intense radiant heat from the upper elements.
- You can set the intensity of the heat by altering the temperature setting.
- For best results allow 5 minutes of preheat before placing food in the oven
- The most suitable function for ‘finishing off’ many meals, for example browning the top of potato gratin and frittata.
- Ensure you centre the dish under the inner grill element.
Ideal for toasting bread or for top browning to ‘finish off dishes’.

This is not a cooking function
- Only the oven light comes on. It remains on in all the cooking functions.

Fan and rear element
- By using the central rear heating element and fan, hot air is blown into the cavity, providing a consistent temperature at all levels, making it perfect for multi-shelf cooking.
- Trays of cookies cooked on different shelves are crisp on the outside and chewy in the middle.
- Meat and poultry are deliciously browned and sizzling while remaining juicy and tender.
- Casseroles are cooked to perfection and reheating is quick and efficient.
- When multi-shelf cooking it is important to leave a gap between trays (eg use shelves 3 & 5) to allow the air to move freely. This enables the browning of foods on the lower tray.
- If converting a recipe from Bake to Fan Forced, we recommend that you decrease the bake time or decrease the temperature by approximately 20°C.
- For items with longer bake times (eg over an hour) it may be necessary to decrease both time and temperature.
Ideal for multi-shelf cooking biscuits, cookies, scones, muffins and cupcakes.
Fan plus upper elements
- This function uses the intense heat from the upper elements for top browning and the fan to ensure even cooking of foods.
- Meat, poultry and vegetables cook beautifully; food is crisp and brown on the outside while the inside remains moist and tender.
Ideal for whole chicken, tenderloin of beef or grilling your favourite chicken, fish or steak.

This is not a cooking function
- Provides a constant low heat of less than 90°C.
- Use to keep cooked food hot, or to warm plates and serving dishes. To reheat food from cold, use another oven function to heat the food piping hot and only then change to Warm, as this function alone will not bring cold food up to a high enough temperature to kill any harmful bacteria.
Proving bread
This function is perfect for proving bread dough.
- Select the Warm function
- Adjust the temperature to 50°C
- Place dough in a lightly oiled bowl and cover with plastic wrap and/or a clean damp cloth
- Place the bowl into the warmed oven on shelf position 1

Fan plus upper outer and lower elements
- The oven fan circulates hot air from the top outer and the lower elements and distributes it around the oven cavity.
- Food cooked tends to brown more quickly than foods cooked on the traditional Bake function.
- You may need to decrease the time from that recommended in traditional recipes.
- Use Fan Bake at a low temperature eg 50°C for drying fruit, vegetables and herbs.
Ideal for single shelf baking that takes less than an hour to cook – foods such as muffins, scones and cupcakes or things like enchiladas.
SETTING THE TIMER
- You can use the timer at any time, even if you are not using the oven.
- The time counts down in minutes (hours:min) until the last 5 minutes of cooking, when it will countdown in seconds (min:sec).
- You can set the timer for up to 23 hours and 59 minutes.
IMPORTANT! The timer does NOT turn the oven off.
To set the timer

1. Press  .
.
- The clock will show
 and the timer indicator
  will flash.

2. Press  and
and  to set the time.
- The timer is now set and will begin counting down.
- The display will revert back to the time of day and the timer indicator will be solidly lit.
- To check the time remaining press .
To cancel the timer

- Press .
- Press until the time is reset to
When the set time is up
- The display will flash and a tone will sound.
- Press to stop the tone sounding.
USING YOUR GAS COOKTOP

Control dials
The dials control the flow of gas through the valve.

- Identify the dial of the burner you want to use.
- From the O (OFF) position push the dial in and turn it anticlockwise to HI.
- The ignitors on all the burners will spark.
- After the burner has lit keep the dial held in for a few more seconds before releasing.
- Releasing the dial too soon will extinguish the flame.

- When the burner has lit, adjust the flame anywhere between HI and LO.
- Do not adjust the dial between HI and O (OFF)

- When you have finished cooking, turn the dial clockwise back to O (OFF).
- If you are using LP gas, there may be a slight ‘extinction pop’ or flash at the flame spreader a few seconds after the burner has been turned off. This is normal for LP gas.
Flame failure protection
- Your cooktop is equipped with flame failure protection: the gas supply will automatically be cut off to a burner that is accidentally blown out by a draught or extinguished by a spill.
If a burner does not light
- Turn the control dial to O (OFF) and wait at least one minute before trying again, to all the gas to disperse.
If the burner still does not light, check that:
- the cooker is plugged in and the power supply is switched on
- there is no power failure in your home or neighborhood
- the gas is turned on
- the gas bottle is not empty (if you use bottled gas)
- the ignitors are sparking. If they are not sparking, they may be dirty or wet. Clean them with a toothbrush and methylated spirits, as shown below. See ‘Care and cleaning’ for instructions on removing and replacing the burner parts.
Cleaning the probe and ignitor

If the flame is irregular, check that the burner parts (flame spreader and burner cap) are:
- clean and dry
- positioned correctly, as shown below.
- For further advice, see sections ‘Care and cleaning’ and ‘Troubleshooting'

USING THE STORAGE COMPARTMENT
Storage compartment
Your cooker is equipped with a storage compartment below the oven.
- Use this to store bakeware, oven trays and shelves when not in use.
- Do not store flammable items in the compartment.
To access the storage compartment: Pull down the compartment door from the top to flip it open.

CARE AND CLEANING
DOS
- Read these cleaning instructions and the ‘Safety and warnings’ section before you start cleaning your cooker.
- Before cleaning or removing any part, make sure that everything on the cooker has been turned off.
- Unless suggested otherwise in the chart following, allow any part to cool to a safe temperature before cleaning. If you do need to handle a warm or hot part, take extreme care. Wear long protective mitts to avoid burns from steam or hot surfaces.
- Try using any cleaner on a small area first, to ensure it doesn’t stain.
- See the pages following this chart for instructions on removing and replacing different parts of the cooker for cleaning or maintenance.
- To help you identify any parts, see illustrations in section ‘Introduction’ and after this cleaning chart.
- Ensure the anti-tip device is re-engaged if you move the cooker for cleaning. Failure to do this may result in the oven tipping, and adults and children may be killed.
- To prevent soiling from becoming ‘baked on’ and stubborn, we recommend removing any easy-toreach spills, food or grease stains from the oven cavity enamel after each use.
DON’TS
- Do not use aerosol cleaners until the cooker has completely cooled. The propellant substance in these cleaners could catch fire in the presence of heat.
- Do not let soiling or grease accumulate anywhere in or on the cooker. This will make future cleaning more difficult and may present a fire hazard.
- Do not use any abrasive or harsh cleaners, cloths, scouring pads or steel wool. These will scratch your cooker and damage its appearance.
- Do not use a steam cleaner to clean any part of the cooker.
- Do not perform any cleaning or maintenance on parts not specifically named in the chart below. If in doubt, contact Customer Care.
Manual cleaning chart
COOKER EXTERIOR
| WHAT? |
HOW? |
IMPORTANT! |
|
Door frame exterior, Control panel, Cooktop base Back trim Storage compartment door
After every use
|
- Soften any stubborn stains under a hot soapy cloth.
- Clean with a solution of mild detergent and hot water, then wipe dry with a microfiber cloth.
For extra shine, use a suitable stainless steel cleaner and polish, following manufacturer’s instructions. Always rub the stainless steel in the direction of the polish lines.
|
- Always read the label to make sure your stainless steel cleaner does not contain chlorine compounds as these are corrosive and may damage the appearance of your cooktop.
- Do not use and take care not to spill any stainless steel cleaner on the control dials or oven handle. These are not stainless steel parts and their surface may be damaged by stainless steel cleaner.
|
| Dials Oven handles |
- Wipe with a damp cloth using a solution of mild detergent and hot water.
- Dry thoroughly with microfiber cloth.
|
Do not use stainless steel cleaner on these parts, as doing so may damage their coating. |
| Clock display and controls |
Take particular care when cleaning the clock and surrounding area. Only use a damp cloth with detergent. |
Do not use any oven cleaners, harsh or abrasive cleaners, scouring pads, steel wool or sharp metal scrapers on the glass. These may scratch and damage the surface. |
| Oven door glass (exterior) |
Clean using a soft cloth and a mixture of warm water and dishwashing liquid or glass cleaner. |
|
OVEN PARTS
| WHAT? |
HOW? |
IMPORTANT! |
| Enamel oven interior – light soiling |
- Wipe with a damp cloth and a solution of hot water and mild detergent.
- Wipe dry with a soft cloth.
Note: the oven door may be removed to make reaching into the oven easier.
|
To prevent soiling from becoming ‘baked on’ and stubborn, we recommend removing any easy-toreach spills, food or greasy stains from the enamel after each use. |
| Enamel oven interior – stubborn, ‘baked-on’ soiling |
- Remove everything from the oven: shelves, side racks, all utensils.
- Cover the floor in front of the oven with several layers of newspaper. This is to protect these surfaces from damage by oven cleaner seeping out or accidentally dripping on them.
- Apply an ammonia-based cleaner or oven cleaner following the cleaner. manufacturer’s instructions.
- After cleaning, replace the side racks and shelves.
|
- Oven cleaners are caustic and may permanently stain or damage some surfaces.
- When using, take care not to let it come in contact with any surface other than the oven interior. If it accidentally does, remove immediately
|
| Side racks, oven shelves, roast dish |
- Pre-soak any stubborn, burnton soiling, then clean with a solution of mild detergent and hot water and wipe dry with a microfiber cloth.
- Alternatively, clean these in the dishwasher.
|
|
| Upper and lower oven elements |
Do not clean these parts. They self-clean during normal use. |
|
| Oven door glass (interior) After every use |
- Use a soft cloth and a mixture of warm water and dishwashing liquid to remove light soiling after every use.
- For stubborn stains, try using a mixture of baking soda and warm water with a non-abrasive scrubbing pad, then wipe dry with a soft, lint-free cloth.
|
- Do not use oven cleaners or any other harsh/abrasive cleaners, cloths, scouring pads, steel wool or sharp metal scrapers to clean the oven door glass. These scratch the glass, which in turn could result in the glass cracking and shattering.
- Do not allow grease to build up on the glass or become baked on as this reduces visibility into the oven.
|
| Oven door seal |
Avoid cleaning this part. If you need to remove large food particles off it, proceed as follows:
- Dampen a sponge with clean hot water.
- Gently wipe off the soiling, but do not rub.
- Press a dry towel gently on the gasket to dry.
|
- Do not use any cleaning agent on the gasket.
- The gasket is essential for a good seal. Take care not to rub, displace, or damage it.
|
| Storage compartment (interior) |
- Wipe with a damp cloth and a solution of hot water and mild detergent.
- Wipe dry with a soft cloth.
|
To prevent soiling from becoming ‘baked on’ and stubborn, we recommend removing any easy-toreach spills, food or greasy stains from the enamel after each use |
| Drip tray under door |
- Remove oven door.
- Wipe with a damp cloth and a solution of hot water and mild detergent.
|
|
COOKTOP PARTS
| WHAT? |
HOW? |
IMPORTANT! |
| Aluminum and enamelled burner caps and flame spreaders |
- Check that the burner is turned OFF and allow it to cool.
- Lift off the burner cap and brass flame spreader.
- Wash them in hot soapy water, rinse, and dry.
- Use a stiff nylon brush or straight-ended paper clip to clear the notches of the flame spreader.
- Replace the flame spreader and burner cap correctly. See ‘Replacing the burner parts’
|
- Keep the notches of the flame spreaders clear. Soiling may clog these and cause ignition problems.
- Before replacing the burner parts, check that they are dry. Wet burner parts may result in an irregular flame.
- Before lighting a burner you have reassembled, check that all of its parts are positioned correctly. Incorrect assembly can cause dangerous irregular flames and ignition problems.
- Do not put any burner parts in the dishwasher as they will become discoloured.
|
| Ignitors |
- Check that the burner is turned OFF.
- Clean the ignitor with a small brush (e.g. old toothbrush) or cotton swab that has been dipped into rubbing alcohol
|
The ignitors must be kept clean and dry to work correctly. Dirty or wet ignitors could cause constant clicking and sparking, even if a flame is present. |
| Burner grates |
- Wait until the grates have cooled completely.
- Carefully lift the grates off the cooktop and place them on a protected surface.
- To remove stubborn stains, soak the grates in a mixture of clothes washing detergent and water.
- Wash in a mixture of hot water and dishwashing liquid, then rinse and allow to dry.
- The grates are also dishwasher-safe.
|
- Take care, the grates are heavy.
- Make sure you place a dish towel or other soft cover on the surface before putting a grate on it.
|
| Wok ring and small pan support |
- To remove stubborn stains, soak the grates in a mixture of clothes washing detergent and water.
- Wash in a mixture of hot water and dishwashing liquid, then rinse and allow to dry.
- The wok ring and small pan support are also dishwasher-safe.
|
|
Removing and replacing the oven door
IMPORTANT!
- Switch the oven off at the wall before removing the door.
- Do not lift the oven door by its handle. Doing so may damage the door.
- Make sure the oven and the door are cool before you begin to remove the door.
- Before removing the door, make sure there is a large enough clear, protected surface in the kitchen to rest the door on.
- Take care, the oven door is heavy!
To remove the oven door

1. Open the door fully.

2. Open the levers fully on both sides.

3. Holding the door firmly on both sides, gently close it about halfway.

4. Disengage the hinges and remove the door. Place on a protected surface
Removing and replacing the door glass panes for cleaning
- Once you have removed the oven door, you can remove the inner pane of glass for cleaning if needed.
- Make sure you follow the precautions and instructions below very carefully. Replacing the glass panes and the door incorrectly may result in damage to the oven and may void your warranty.
- Your oven door has 2 panes of glass. The inner pane may be removed for cleaning.

IMPORTANT!
- Take extreme care when handling the glass panes. Avoid the edges of the glass bumping against any surface. This may result in the glass shattering.
- Don’t use oven cleaners or any other harsh/abrasive cleaners, cloths, scouring pads, steel wool or sharp metal scrapers to clean the glass surfaces. These scratch the glass and may damage its special coating, which in turn could result in the glass cracking or shattering.
- If you notice any sign of damage on any of the glass panes (such as chipping or cracks), do not use the oven. Call your Authorised Repairer or Customer Care.
- Make sure you replace all the glass panes correctly. Do not use the oven without all glass panes correctly in place.
- If the glass feels difficult to remove or replace, do not force it. Call your Authorised Repairer or Customer Care for help.
Note: service visits providing assistance with using or maintaining the oven are not covered by your warranty.
To remove the door glass for cleaning

Open the latches securing the lower trim to the base of the oven door:
1 Loosen the inner and outer screws securing each of the latches by two turns.

- Do not loosen the middle screw.
- Do not fully remove the screws.
2. Slide the latches inwards so that the lower trim can be removed.

3. Press down on the tabs to release the lower trim and remove it.

4. Remove the inner pane of glass
- Lift the lower end slightly (a).
- Gently slide the glass out (b)

To replace the door glass after cleaning: When replacing the glass panes, make sure that:
- You replace all parts correctly, as shown on the following page.
- The inner pane must be in the position described below in order to fit into the door and to ensure that the oven operates safely and correctly.
- You take extra care not to bump the edges of the glass against any object or surface.
- You do not force the glass into place. If you are experiencing difficulties replacing the glass, remove it and start the process again from the beginning. If this still does not help, call Customer Care.

1. Replace the inner pane of glass.
- Ensure the angle cut corners are positioned at the bottom of the door.
- Insert the the glass into the top set of grooves in the bracket at the top of the door.
- Pull the pane slightly towards you.
- Gently lower into place.
IMPORTANT!
- Make sure the glass is facing the same way as when you removed it form the door.
- You should be able to read the wording on it as it faces you.

2. Align the lower trim with the door glass as shown. It should sit on the bottom edge of the outer door glass.
- Check that clamp in the centre is not damaged or misshapen.

3. Gently push the lower trim back onto the door glass until it clicks into place
IMPORTANT! Make sure the lower trim is fitted correctly and firmly in place and that the glass panes are secure.
4. Slide the two latches back into place on the base of the lower trim

5. Re-tighten the screws so that the latches and the lower trim are firmly secured.


6. Replace the door following the instructions in the following section.
To replace the oven door

1. Hold the door firmly in an approximately halfway open position.

2. Insert the hinge tongues into the slots, making sure that the notches on both sides drop into place as shown.

3. Open the door fully

4. Fully close the levers on the left and right hinges, as shown, then close the door.
Removing and replacing the oven side racks
IMPORTANT! Always turn off the cooker at the wall first. Ensure the oven has cooled down completely before starting.

Remove all shelves
1. Slide out all shelves and remove. For easier access we recommend removing the oven door, see ‘Removing and refitting the oven door’.
To remove the side racks

2. Use a small coin or a flat-head screwdriver to loosen and remove the fixing screws.

3. Remove the side racks
To replace the side racks

1. Make sure the side racks are the right way up, as shown.

2. Refit the fixing screws and tighten
Drop-down grill element
- To lower the grill element: use a flat-head screwdriver or a small coin to loosen the element fixing screws.
- When you have finished cleaning the oven ceiling, raise the grill element and screw the element fixing screws back onto the studs. Make sure that the fixing screws are tightened and the element is held securely in place.
- The grill element itself is self-cleaning.

Burner parts and trivets
- You can remove and clean these parts with hot soapy water or non-abrasive detergents.
- Clean spills regularly before they become burnt on. Do not wash these parts in a dishwasher.
- After cleaning, check that the burners and their flame spreaders are dry before replacing correctly.
- It is very important to check that the burner flame spreader and the cap have been correctly positioned. Failure to do so can cause serious problems.
- Check that the ignitor is always clean to ensure trouble free sparking. It must be cleaned very carefully using a toothbrush and methylated spirits.
- To avoid damage to the electronic ignition, do not try to light a burner without all burner parts in place.
Replacing the burner parts
- Carefully replace the burner parts as per the following illustrations.
- Fit the flame spreader to the housing as shown below. Make sure the burner is not able to rotate.
Check that:
- the ignitor is always clean to ensure trouble-free sparking.
- the probe is always clean to ensure correct operation of the safety valves.
- the flame spreaders are clean and the holes are not clogged.
- Both the ignitor and probe must be very carefully cleaned using a toothbrush and methylated spirits.
Replacing the semi-rapid, rapid and auxiliary burners

Replacing the wok burner
- Carefully replace the burner parts as per the following illustrations.
- Fit the flame spreader to the housing as shown below. Make sure the burner is not able to rotate.
Check that:
- the ignitor is always clean to ensure trouble-free sparking.
- the probe is always clean to ensure correct operation of the safety valves.
- Note: both the ignitor and probe must be very carefully cleaned using a toothbrush and methylated spirits.

Replacing an oven light bulb
IMPORTANT! Use a 25W, 220-240V 50Hz G9 halogen bulb for replacement. Do not use a standard light bulb in any oven, the heat will break it.
- Allow the oven (including the lamp cover and the bulb) to cool completely.
- Remove any shelves that may get in the way.
- Remove the door if the lamp will be hard to reach.
- Turn the power supply to the cooker off at the main fuse or circuit breaker panel. If you don’t know how to do this, contact an electrician. IMPORTANT! Failure to disconnect the cooker from the power supply may result in death or electrical shock.
- Remove the lamp cover.
- Upper lights: Wearing a rubber glove to improve grip, turn the cover counter-clockwise to unscrew.
- Remove the faulty bulb.
- Holding the replacement bulb in a soft cloth or tissue insert it into the socket. Do not touch the bulb with your fingers.
- Replace the lamp cover: for upper lights, turn it clockwise to tighten and then back a quarter turn.
- Turn the power supply to the cooker back on at the main fuse or circuit breaker panel.

TROUBLESHOOTING
If there is a problem, check the chart below to see if you can fix it. If the problem cannot be fixed or persists, call your Authorized Repairer or Customer Care.
General
| PROBLEM |
POSSIBLE CAUSES |
WHAT TO DO |
| The oven does not work. |
No power |
Check that the mains power supply (wall switch) is turned on, the fuse has not tripped and there is no power outage in your area. |
| The clock has not been set |
The oven will not work unless the clock is set. See ‘Setting the clock’. |
| The oven does not work but the display is lit. |
The oven is set for automatic cooking. |
See ‘Automatic cooking’ for instructions. |
| The oven is in Demo Mode |
Contact Customer Care |
| One or all of the lights do not come on, but the oven works |
The oven light bulb(s) have blown. |
Replace the light bulb(s). See ‘Care and cleaning’ for instructions. |
| The door is not correctly fitted. |
See ‘Care and cleaning’ for instructions on fitting the door correctly |
| The oven is in Sabbath setting and the ‘Light off’ option has been saved. |
To quit Sabbath setting, touch and hold the cancel x control. See ‘User preference settings’ for instructions on changing the ‘Light off’ option. |
| There is a power failure – can I still use the oven? |
Power outage in your home or neighborhood. |
In the event of power failure while cooking, return the oven dials in off position (O) to prevent overheating of the appliance. The oven cannot be used until power is restored. |
| The oven is not heating. |
The door is not properly closed or it is opened too frequently during cooking. |
The heating elements are disabled while the door is open. Make sure the door is properly closed and avoid opening it frequently during cooking. |
| A glass pane in the oven door has cracked, chipped, or shattered. |
Incorrect cleaning or the edge of the glass hitting against something |
You must NOT use the oven. Call your Authorised Repairer or Customer Care. |
| I can feel hot air blowing out of the vents after I have turned the oven off |
This is normal. |
For safety reasons the cooling fans will continue to run even when you have turned the function dial to ‘Off’. The fans will switch off automatically when the oven has cooled. |
| The oven fan comes on when I select a function that does not use a fan (eg bake or classic bake) |
This is normal. The fan comes on while the oven is preheating. It may turn off when the oven has reached the set temperature. |
Wait until a long tone sounds and the temperature dial halo turns white: the oven will then be ready to use. |
| The oven has reached the set temperature but the temperature indicator is still red (indicating that the oven is not ready to use). |
This is normal: when heating up from cold, your oven is designed to initially heat to a temperature somewhat higher than what you have set. This is to provide optimal baking conditions right from the start |
Wait until the temperature indicator has gone out. The oven will then be ready to use. |
| The oven cancels automatic cooking when I try to adjust the clock setting. |
The oven was set for automatic cooking when you were trying to adjust the clock setting. |
You can only adjust the clock setting while the oven is not set for automatic cooking. |
The temperature indicator stays lit when I use Grill  |
This is normal. The temperature indicator remains lit to indicate that the grill element provides instant radiant heat. |
|
| The displays work,and the function and temperature dials indicators come on but the oven does not heat up. |
The oven is in ‘Demo’ mode |
Call Customer Care. |
Oven
| PROBLEM |
POSSIBLE CAUSES |
WHAT TO DO |
| Condensation around oven (e.g. on control panel or top of oven door.) |
Food has high moisture content or local climate (temperature, humidity) is contributing to condensation. |
Wait until a long tone sounds and the temperature dial halo turns white: the oven will then be ready to use. |
| Condensation building up in the oven while cooking on Grill |
Food in your oven releasing moisture as it cooks. |
Wait until the temperature indicator has gone out. The oven will then be ready to use. |
| Steam coming from oven vents at the back of the cooker. |
Moisture from food evaporating during cooking. |
You can only adjust the clock setting while the oven is not set for automatic cooking. |
| Uneven baking. |
Oven not properly preheated. |
Wait until the temperature indicator has gone out before putting food in the oven. |
| Unsuitable or incorrectly arranged bakeware. |
See ‘Oven cooking guidelines’ for advice. |
Cooktop burners
| PROBLEM |
POSSIBLE CAUSES |
WHAT TO DO |
| None of the burners will light. |
No power supply |
Check that there is no power outage in your area and that the power supply to the cooker is switched on at the circuit breaker panel. |
| No gas. |
Check that the gas supply to the house is working. You should hear the gas when you turn a burner on. If you are using bottled gas, check that it is not empty |
| The ignitor keeps clicking (continuous spark) even when a burner has lit. |
Dirty or wet ignitor(s). |
Clean the ignitor(s). See ‘Care and cleaning’ for instructions. |
| Some burners will not light. Flames do not burn all around the burner cap. |
Burner parts or ignitors may be wet, dirty, or misaligned. |
Check that the burner parts are clean, dry, and correctly assembled. Check that the ignitors are clean and dry. See ‘Care and cleaning’ for instructions |
| There is no clicking when I try to light a burner |
The ignitor is dirty or there is a power outage. |
Clean the ignitor(s). See ‘Care and cleaning’ for instructions. |
| There is a power failure – can I still use the cooktop burners? |
Power outage in your area. |
You can still use your cooktop, but will need to matchlight the burner(s).
To do so, press in and turn the dial anticlockwise to Hi while holding a lighted match close to the side of the burner. Keep the dial held down for a few seconds after the burner has lit, then release. Wait until the flame is burning evenly before adjusting it.
IMPORTANT! If the flame is blown out during a power failure, turn the knob immediately to O (OFF).
|
| The flames have suddenly gone out. |
A draft or a spill has extinguished the flame. |
The flame failure protection will automatically cut the gas supply to the burner off, stopping unburnt gas from escaping.
Turn the affected burner off, then wait for at least 1 minute before attempting to relight. This is to allow for any small amount of gas that may have escaped to disperse.
|
| There is a slight ‘extinction pop’ or flash after I’ve turned a cooktop burner off. |
|
This is normal and requires no action. |
| The burner flames are uneven, very large, yellow or yellow-tipped or sooty. |
Technical fault: the gas is the wrong type or hasn’t been adjusted properly |
Do not use your cooktop burners. Contact your Authorised Service Center or Customer Care. |
ALERT CODES
If there is a problem with the oven, the cooker will:
- automatically suspend all oven functions
- beep five times
- display an alert code.
IMPORTANT! Do not turn off the mains power supply to the cooker (wall switch) if you get an alert code, unless the instructions in the chart following specifically instruct you to. There are cooling fans within the cooker which are needed to cool the cooker components. Turning off the power while the cooker is too hot may damage the cooker and its surrounding cabinetry.
What to do if an alert code (eg )  ) is displayed
- If the beeping hasn’t stopped already, touch any control to stop it.
- Make a note of the alert code displayed. You may need this information.
- Call your Authorised Repairer or Customer Care with the alert code information.