Loading ...
Loading ...
Loading ...
10
ENG
English
ASSEMBLING AND PREPARING
10 cm
10 cm
10 cm
10 cm
IfyouintendtomounttheMonitorsettoawall,
attachWallmountinginterface(optionalparts)to
thebackoftheset.
WhenyouinstalltheMonitorsetusingawall
mountinginterface(optionalparts),attachit
carefullysoitwillnotdrop.
1
Please,Usethescrewandwallmountinterface
inaccordancewithVESAStandards.
2
Ifyouusescrewlongerthanstandard,the
monitormightbedamagedinternally.
3
Ifyouuseimproperscrew,theproductmightbe
damagedanddropfrommountedposition.In
thiscase,LGElectronicsisnotresponsiblefor
it.
4
VESAcompatible.
5
PleaseuseVESAstandardasbelow.
784.8mm(30.9inch)andunder
*WallMountPadThickness:2.6mm
*Screw:Φ4.0mmxPitch0.7mmx
Length10mm
787.4mm(31.0inch)andabove
*PleaseuseVESAstandardwallmountpad
andscrews.
Unplugthepowercordbeforemovingorin-
stallingthemonitortoavoidelectricshocks.
Installingthemonitorontheceilingorona
slantedwallmayresultinthemonitorfalling
off,whichcouldleadtoinjury.Pleaseuse
aLGwallmountingbracketwhenusinga
VESAmount.Formoreinformation,contact
yourlocalretailstoreoraqualifiedinstaller.
Applyingexcessiveforcewhenfastening
screwsmaycausedamagetothemoni-
tor.Damagecausedinthiswaywillnotbe
coveredbytheproductwarranty.
Usethewallmountingbracketandscrews
thatconformtotheVESAstandard.Dam-
agecausedbytheuseormisuseofinap-
propriatecomponentswillnotbecovered
bytheproductwarranty.
UsethescrewsspecifiedintheVESAstan-
dard.
Thewallmountkitincludestheinstallation
guideandnecessaryparts.
Thewallmountingbracketisoptional.The
accessoriescanbepurchasedatyourlocal
retailstore.
Thelengthofthescrewmaydifferforeach
wallmountingbracket.Ensurethecorrect
lengthofthescrewisused.
Formoreinformation,pleaserefertotheuser
manualforthewallmountingbracket.
Model
N2210WZ
VESA (A x B)
75x75
Stand Screw
M4
Required Screw
4
Wall Mount Plate
(Optional)
RW120
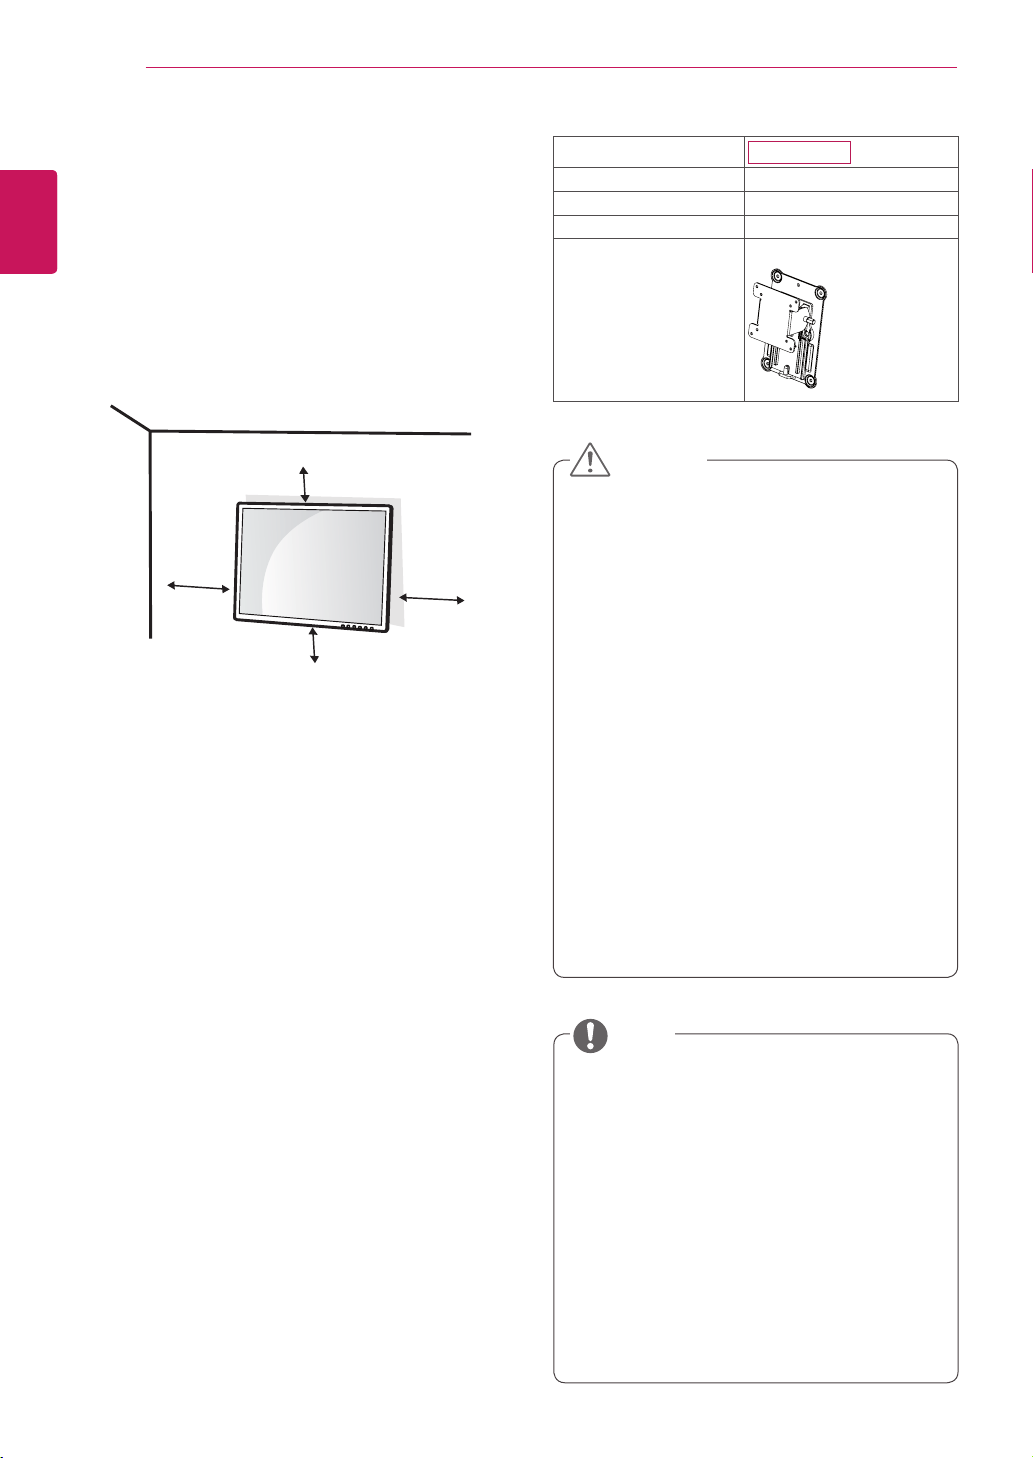
Mounting on a wall
Installthemonitoratleast10cmawayfromthe
wallandleaveabout10cmofspaceateachside
ofthemonitortoensuresufficientventilation.De-
tailedinstallationinstructionscanbeobtainedfrom
yourlocalretailstore.Pleaserefertothemanual
toinstallandsetupatiltingwallmountingbracket.
CAUTION
NOTE
Loading ...
Loading ...
Loading ...