Loading ...
Loading ...
Loading ...
Rear Suspension Adjustments
138 Adjustments for Competition
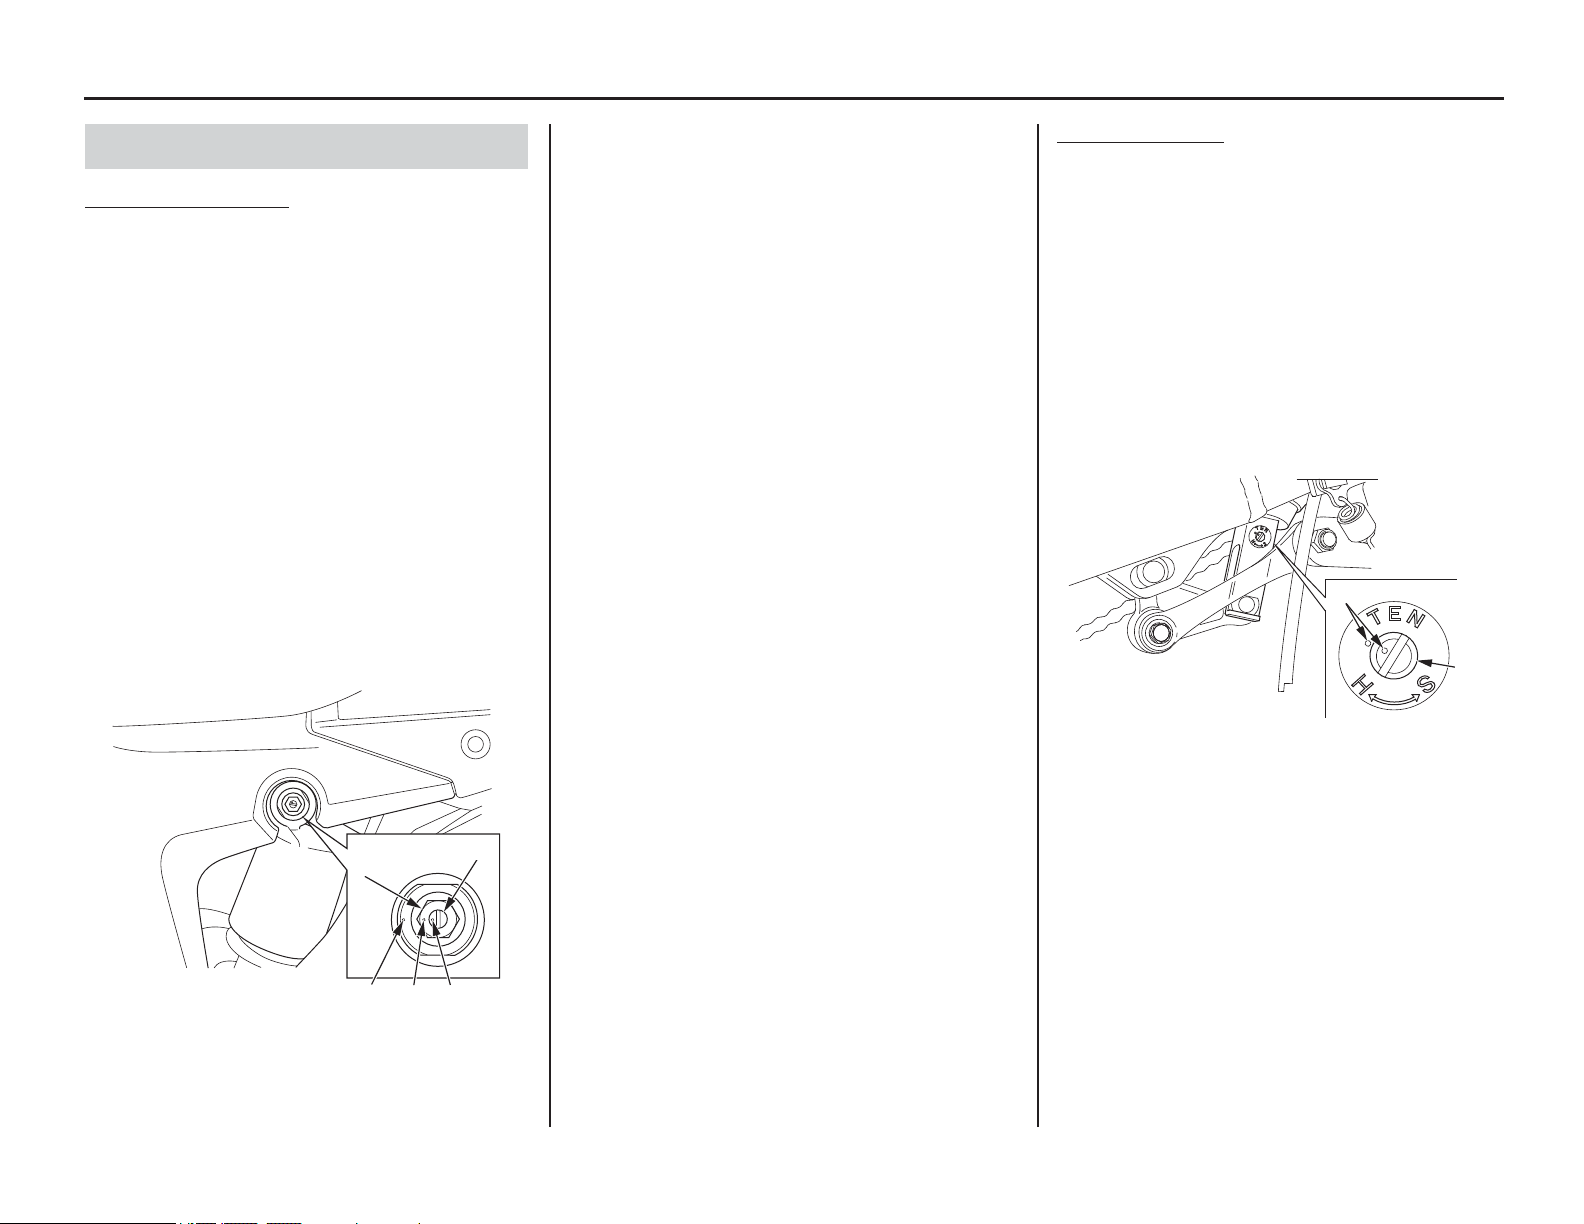
Compression Damping
Compression damping may be adjusted in two
stages with separate adjusters.
The high speed damping adjuster (1) is effective
when damping adjustment is desired for high
speed operation. The low speed damping adjuster
(2) should be used when damping adjustment is
desired at relatively low speeds.
• When adjusting the compression damping
adjusters, make sure to use the proper size tool
to avoid damage.
• Both the high and low speed compression
damping can be increased by turning the
appropriate adjuster clockwise.
• Adjust the high speed compression adjuster in
1/12 turn increments.
• Be sure the low speed compression adjuster is
firmly located in a detent, and not between
positions.
High Speed Damping:
The high speed damping can be adjusted by
turning the hexagonal portion of the compression
adjuster.
The high speed damping adjuster has 3 1/2 turn or
more.
To adjust to the standard position:
1. Turn the adjuster clockwise (harder) until it
will no longer turn (lightly seats).
2. Turn the adjuster counterclockwise (softer)
2 11/12 – 3 5/12 turns and adjust it until the
punch mark (3) on the adjuster and the punch
mark (4) on the adjuster body are aligned.
Low Speed Damping:
The low speed damping can be adjusted by turning
the center screw of the compression adjuster.
The low speed compression adjuster has 13
positions or more.
Turning the adjuster one full turn clockwise
advances the adjuster 4 positions.
To adjust to the standard position:
1. Turn the adjuster clockwise (harder) until it
will no longer turn (lightly seat). Turn the
adjuster counterclockwise (softer) until it
clicks. This click is position 1.
2. Set the adjuster position 10 (10th click) and
adjust it until the punch mark (5) on the
adjuster and the punch mark (4) on the adjuster
body are aligned.
Rebound Damping
The rebound damping adjuster (6) is located at the
lower end of the rear shock absorber.
It has 17 positions or more. Turning the adjuster
one full turn advances the adjuster 6 positions.
• When adjusting the rebound damping adjuster,
make sure to use the proper size tool to avoid
damage.
• Rebound damping can be increased by turning
the adjuster clockwise.
• Be sure that the rebound adjuster is firmly
located in a detent, and not between positions.
To adjust to the standard position:
1. Turn the adjuster clockwise (harder) until it
will no longer turn (lightly seat). Turn the
adjuster counterclockwise (softer) until it
clicks. This click is position 1.
2. Set the adjuster position 8 (8th click) and
adjust it until the punch marks (7) on the
adjuster and the rear shock absorber are
aligned.
Rear Suspension Damping
(1) high speed damping adjuster
(2) low speed damping adjuster
(3) high speed damping adjuster punch mark
(4) adjuster body punch mark
(5) low speed damping adjuster punch mark
(1)
(2)
(4) (3) (5)
(6) rebound damping adjuster (7) punch marks
(6)
(7)
Loading ...
Loading ...
Loading ...