Loading ...
Loading ...
Loading ...
Replacing the Presser Foot
GETTING READY
Basic operations B-31
B
Replacing the presser foot
a
Press (Needle position button) once or twice to
raise the needle.
b
Lower the presser foot.
c
Press .
• If is pressed while the presser foot is raised, an
error message appears. Lower the presser foot.
→ The screen changes, and all keys and operation
buttons are locked (except ).
d
Raise the presser foot lever.
e
Press the black button at the back of the presser foot
holder.
1 Black button
2 Presser foot holder
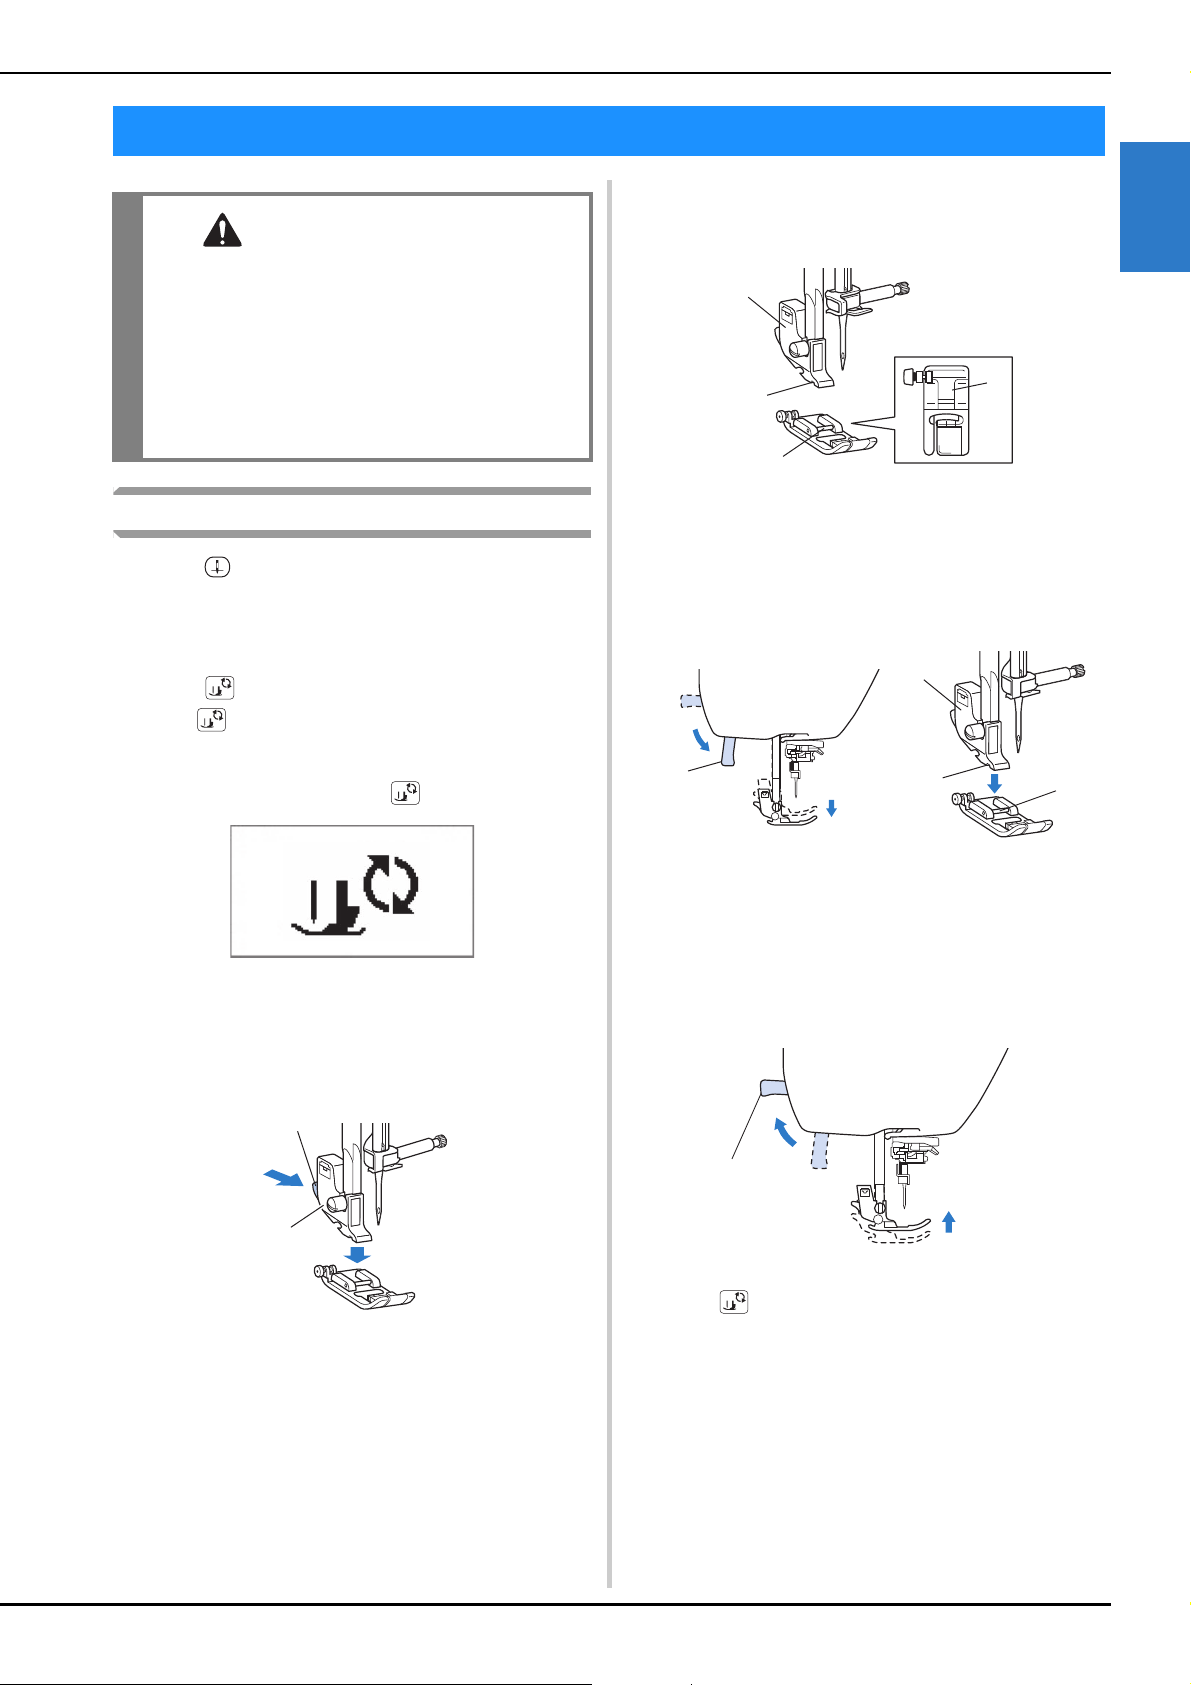
f
Place a different presser foot below the holder so that
the presser foot pin is aligned with the notch in the
holder.
1 Presser foot holder
2 Notch
3 Pin
4 Presser foot type
g
Slowly lower the presser foot lever so that the presser
foot pin snaps into the notch in the presser foot holder.
1 Presser foot lever
2 Presser foot holder
3 Notch
4 Pin
→ The presser foot is attached.
h
Raise the presser foot lever to check that the presser
foot is securely attached.
1 Presser foot lever
i
Press to unlock all keys and buttons.
Replacing the Presser Foot
CAUTION
• Use the presser foot appropriate for the type
of stitch that you wish to sew, otherwise the
needle may hit the presser foot, causing the
needle to bend or break.
• Only use presser feet designed specifically for
this machine. Use of any other presser foot
may result in injuries or damage to the
machine.
a
b
1
2
3
4
J
2
3
4
1
1
Loading ...
Loading ...
Loading ...