Loading ...
Loading ...
Loading ...
LCD
B-12
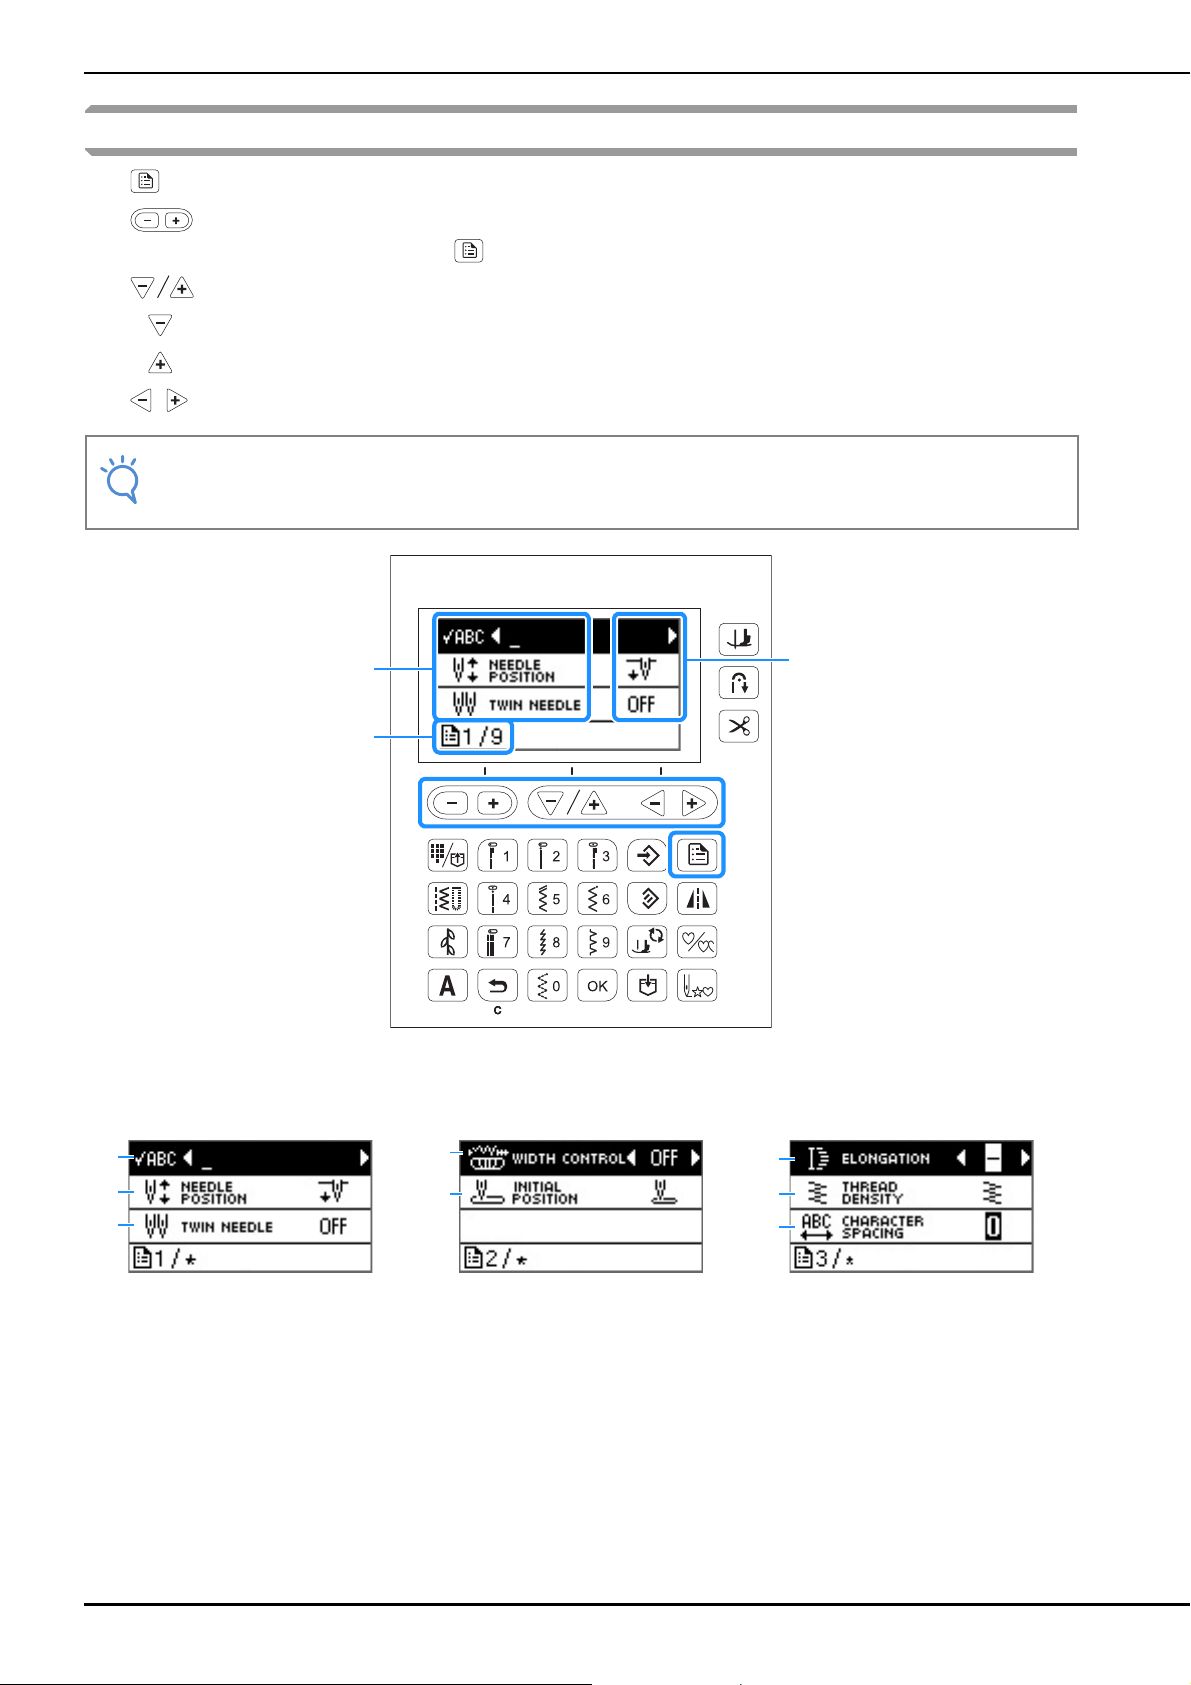
Settings screen
Press to change various sewing machine operations and sewing settings.
Press to move to previous/next pages.
* You can also move to next pages by pressing .
Press to select the next/previous items.
* Press (Downward arrow) to select the next item.
* Press (Upward arrow) to select the previous item.
Press to change the value of the selected item.
1 Page number (The page numbers vary depending on your machine model.)
2 Machine settings
3 Value
1 Use to check the pattern when the specified pattern is not displayed on the screen. For details, refer to “Checking the selected
pattern” in the “Decorative sewing” section.
2 Select the needle stop position (the needle position for when the machine is not being operated) to be up or down.
3 Set to “ON” when using twin needle. For details, refer to “Using the twin needle” on page B-25.
4 Allows the stitch width to be adjusted using the sewing speed controller. For details, refer to “Satin stitching using the sewing
speed controller” in the “Sewing” section.
5 Select either “01 Straight stitch (Left)” or “03 Straight stitch (Middle)” as the utility stitch that is automatically selected when the
machine is turned on.
6 Changes the stitch length when 7 mm satin stitch patterns are selected. For details, refer to “Changing the pattern length” in the
“Decorative sewing” section.
7 Changes the thread density when satin stitch patterns are selected. For details, refer to “Changing the stitch density” in the
“Decorative sewing” section.
8 Changes the character spacing. For details, refer to “Changing character spacing” in the “Decorative sewing” section.
Note
• The parameters and number of pages in the settings screens differ depending on the model of your machine. For
details on the settings screen for your machine, refer to the Quick Reference Guide.
2
1
3
1
2
3
4
5
6
7
8
Loading ...
Loading ...
Loading ...