Loading ...
Loading ...
Loading ...
36
TUTORIAL—TAKING PHOTOGRAPHS
1
—Adjusting Camera Settings
This section describes how to take a photograph using single-frame mode, single-
servo autofocus, matrix metering, programmed auto-exposure, a sensitivity (ISO
equivalency) setting of 125, a normal image quality setting, and auto white balance.
The description below assumes that you are using a type G or D AF-Nikkor lens.
These settings will produce optimal results in most situations, with no delay between
exposures to adjust camera settings for the next shot. To use these settings, adjust
camera controls as shown in the following steps. More information on the settings
described here is available on the pages listed below.
1
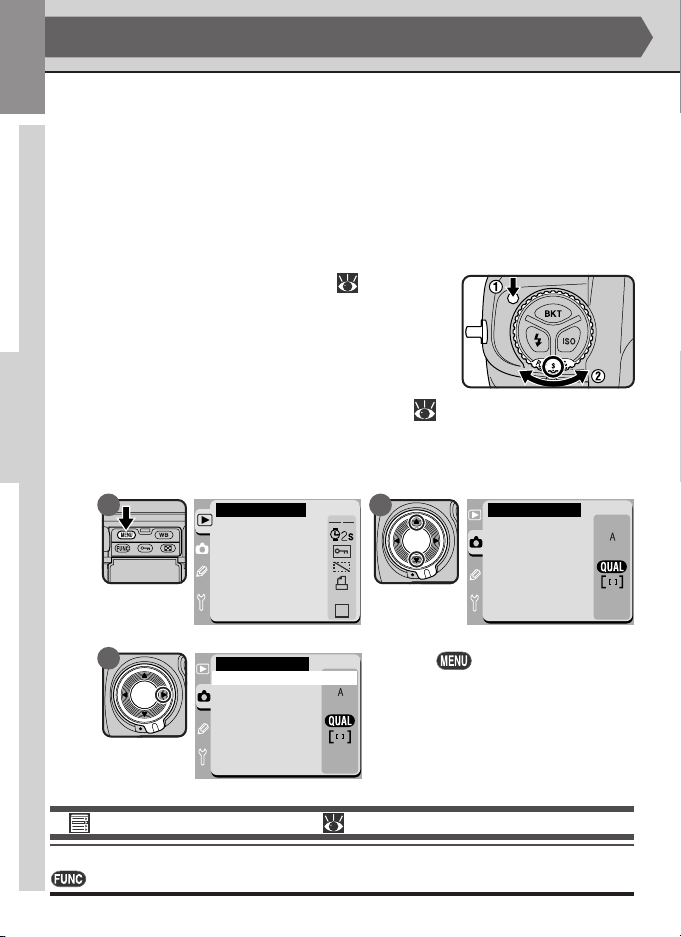
.1 Choose an operating mode ( pp. 52–55)
Hold the mode-dial lock release down and turn
the mode dial to S (single-frame mode). In this
mode, the camera will take a single photograph each
time the shutter-release button is pressed.
STEP 1
1
.2 Choose an image quality and format ( pp. 56–61)
This section describes how to take large color photographs at an image qual-
ity of JPEG Normal, which provides the best trade-off between file size and
image quality.
The Assign FUNC Menu ( pg. 116)
When Qual is selected in the Assign FUNC menu, image quality can be adjusted using the
button in combination with the command dials.
A B
N
Delete
Slide Show
Protect
Hide Image
Print Set
Folder Designate
Display Mode
D1X
PLAYBACK MENU
NORM
OFF
OFF
Image Quality
White Bal
ISO
Assign FUNC
AF Area Mode
File No. Seq.
Command Lock
SHOOTING MENU
125
Press the button to display the cam-
era menus (A), then unlock the multi se-
lector and press it up or down until the
shooting menu is displayed (B). Press the
multi selector to the right to enter the
shooting menu (C).
C
SHOOTING MENU
Image Quality
White Bal
ISO
Assign FUNC
AF Area Mode
File No. Seq.
Command Lock
OFF
OFF
NORM
125
Loading ...
Loading ...
Loading ...