Loading ...
Loading ...
Loading ...
TUTORIAL—FIRST STEPS
25
When No Lens Is in Place
When no lens is in place, cover the lens mount with the BF-1A
body cap supplied with the camera. If the lens mount is not
covered, dust may find its way onto the mirror or viewfinder
screen.
22—Aperture Setting ( pg. 173)
By default, aperture is set automatically by the camera or (when the exposure mode is set to
manual or aper ture-priority auto) using the sub-command dial. Custom Setting 22 allows
aperture to be set manually using the lens aperture ring.
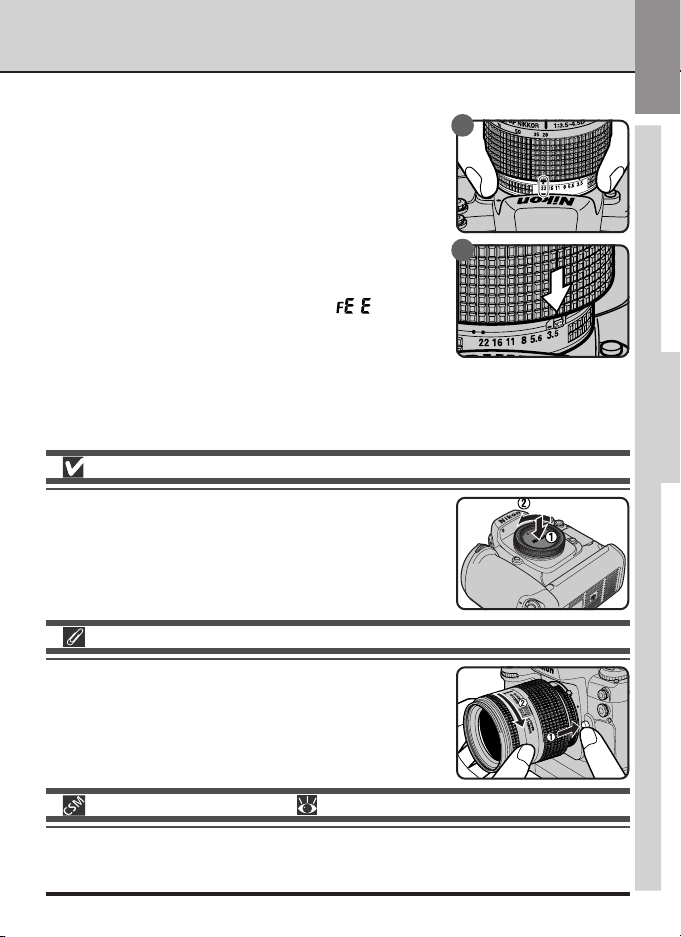
2
.2 Set the lens aperture to the minimum setting
You will not need to perform this step if you are
using a type G lens (type G lenses are not equipped
with an aperture ring). If you are using another
type of lens, set the lens aperture to the highest f-
number (minimum aperture). If you do not intend
to set aperture manually with the lens aperture
ring, lock aper ture at this setting (B).
If the lens is not set to the minimum aperture when
the camera is turned on, a blinking
indicator
will be displayed in the viewfinder and in the con-
trol panel on top of the camera. Photographs can
not be taken while this indicator is displayed.
STEP 2
2
2
f
t
m
2
8
7
0
5
0
3
5
2
8
8
5
1
0
5
2
2
Detaching the Lens
After confirming that the camera is off, turn the lens clockwise
while holding down the lens-release button.
A
B
Loading ...
Loading ...
Loading ...