Loading ...
Loading ...
Loading ...
TEC_TM_009 Rev. B
December 31, 2019 Page 21 of 50
5.18 SD
NO T E: MAKE SURE THE ANTI-TIP BRACKETS ARE INSTALLED PER INSTALLATION MANUAL INSTRUCTIONS.
EACH UNIT WILL ALSO NEED TO BE PROPERLY LEVELED PER INSTALLATION MANUAL INSTRUCTIONS.
TOOLS REQUIRED
• Phillips screwdriver
• Power drill
• 3/32" drill bit
• 7/16" socket
• 1/4" socket
• Pop rivet gun
STEP 1
Unplug the cabinet(s).
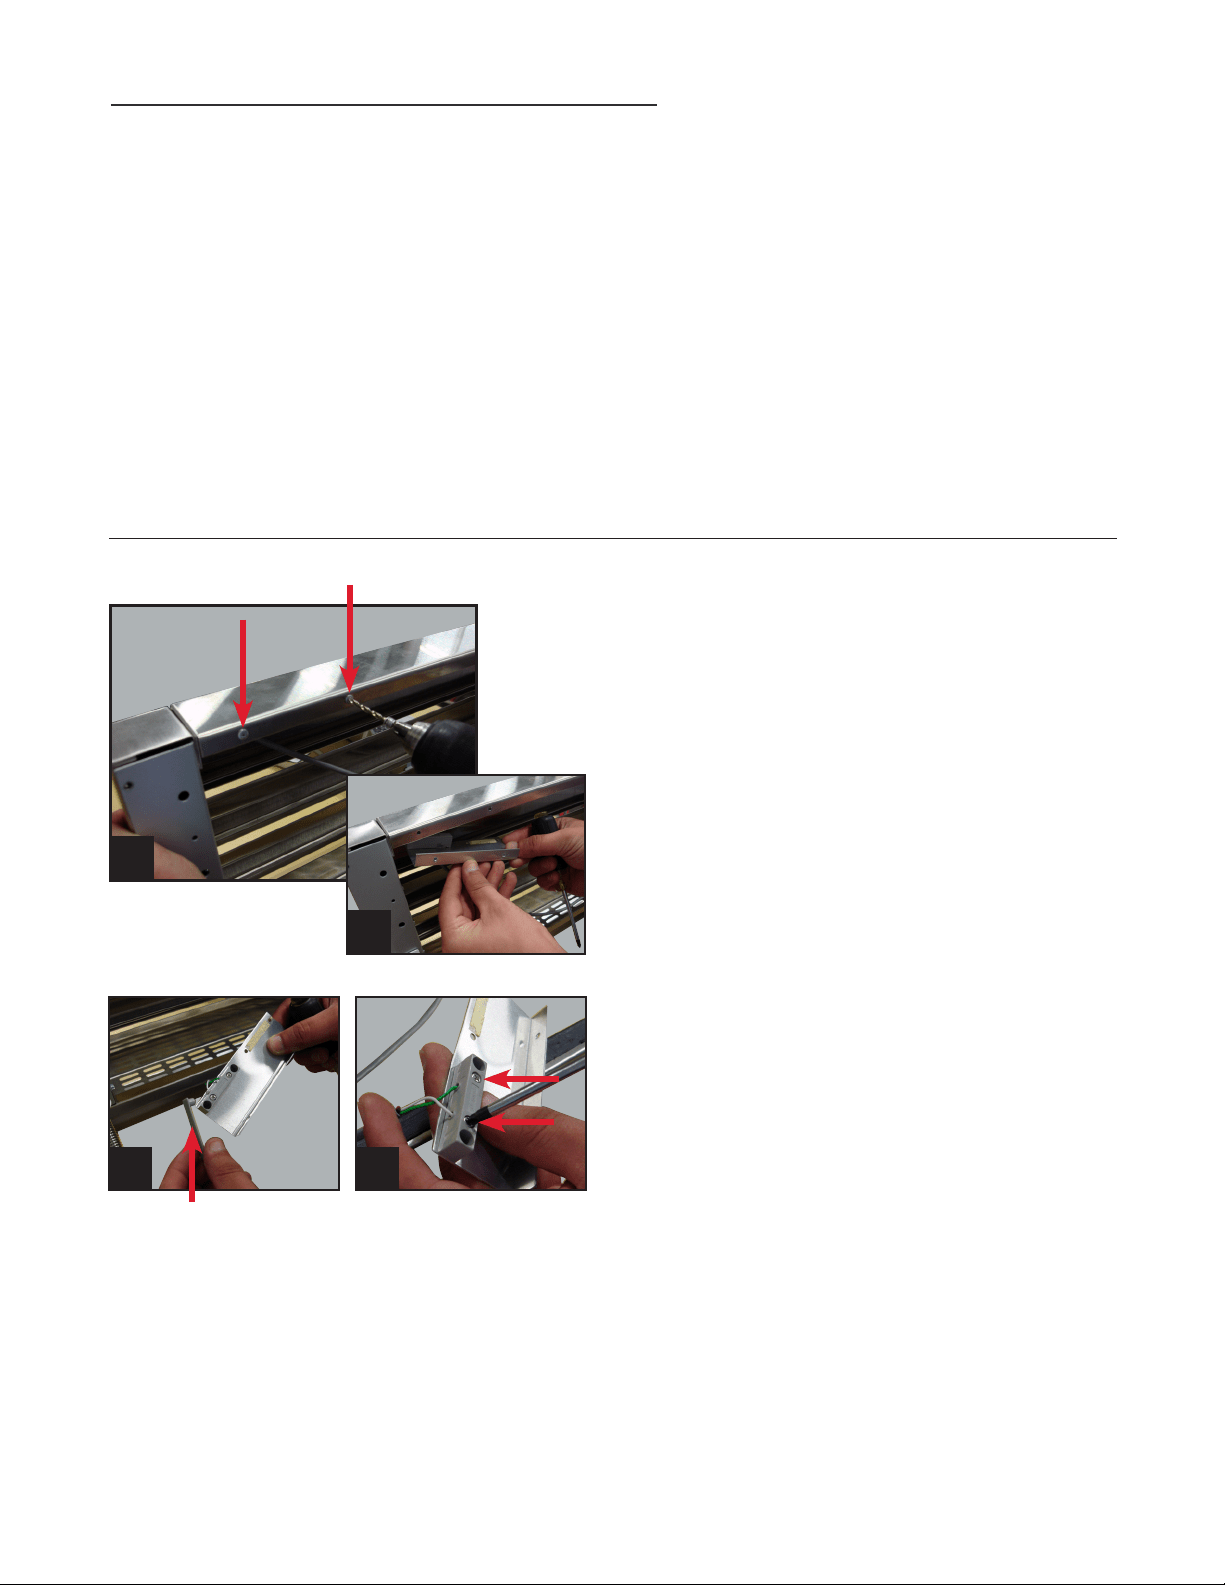
STEP 2
Drill out the two pop rivets from the rain shield and
remove reed switch bracket.
Make note of the bracket orientation, and mount
the same way when reinstalling. When installed
properly, you should see the back side of the metal
bracket, and not the reed switch.
Images 2a & 2b.
STEP 3
Remove the plastic cover on the reed switch
to expose the two Phillips screws. Unscrew the
Phillips screws to disconnect the wires from the
reed switch.
Images 3a & 3b.
NOTE: SET BRACKET CONTAINING REED SWITCH
ASIDE FOR REINSTALLATION ON NEW GRILL.
2a
2b
3a 3b
Plastic Cover
KIT INCLUDES
A. 60" Grill or 90" Grill
B. Anti-sweat foam end panels
C. Pop rivets
D. Lower joining bracket
E. Joining bracket bolts
F. Joining bracket lock washers
TR-30 60"/90" JOINING KIT INSTALLATION
Loading ...
Loading ...
Loading ...