Loading ...
Loading ...
Loading ...
14
Removing the door cover
The oven door cover can become discoloured. To carry out
thorough cleaning, you can remove the cover.
1. Open the oven door fully.
2. Unscrew the oven door cover. To do this, undo the left and
right screws (figure A).
3. Remove the cover (figure B).
Make sure that the oven door is not closed while the cover is
removed. The inner panel may be damaged.
Clean the cover with a stainless-steel cleaning agent.
4. Replace the cover and secure it in position.
5. Close the oven door.
Removing and installing the door panels
To facilitate cleaning, you can remove the glass panels from the
oven door.
When removing the inner panels, pay attention to the sequence
in which the panels are removed. In order to reassemble the
panels in the correct sequence, use the numbers that appear
on each panel.
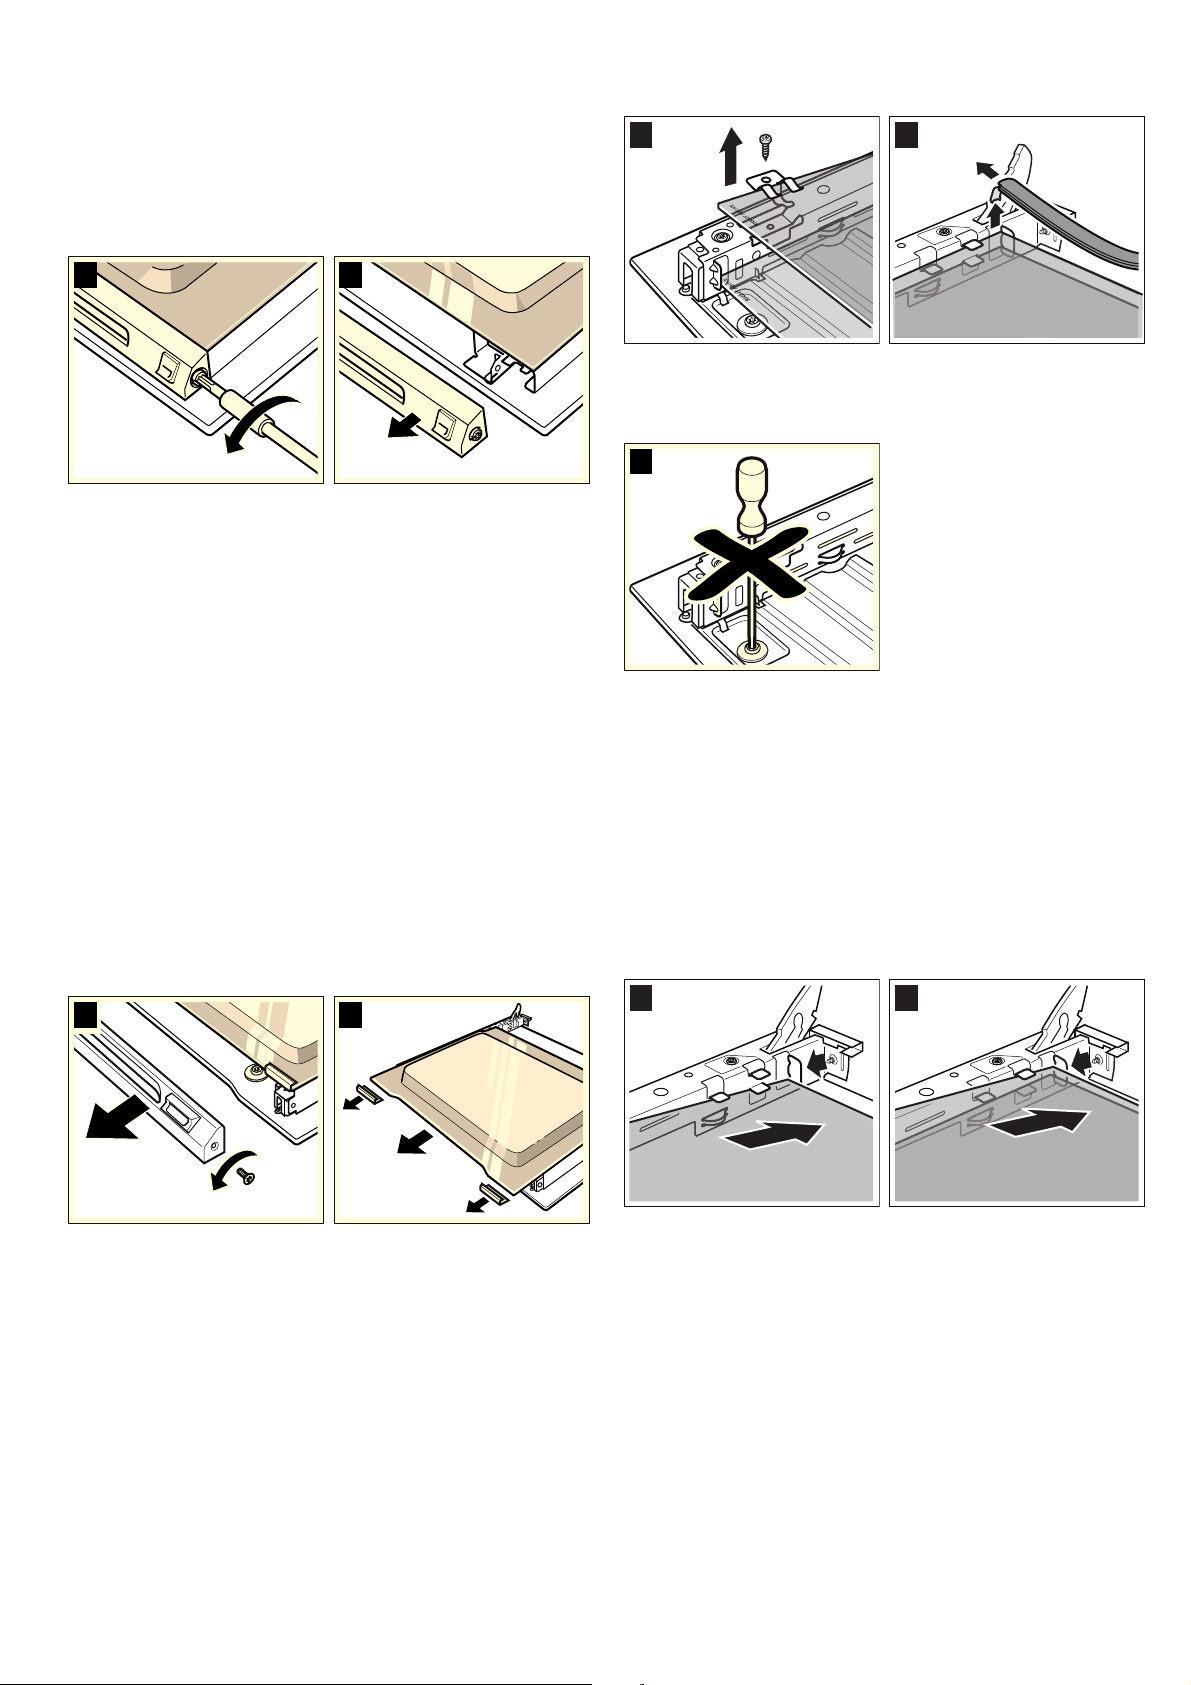
Removal
1. Detach the oven door and lay it on a cloth with the handle
facing down.
2. Unscrew the cover at the top of the oven door. To do this,
unscrew the left and right screws (fig. A).
3. Lift the top panel up and pull it out and remove the two small
seals (fig. B).
4. Unscrew the retaining clips on the right and left. Lift the panel
and remove the clips from the panel (fig. C).
5. Remove the seal from the bottom of the panel (fig. D). Pull
the seal and remove it up and out. Pull out the panel.
6. Pull the lower panel at an angle, upwards and out.
7. Do NOT unscrew the left and right-hand screws from the
sheet metal part (fig. E).
Clean the panels with glass cleaner and a soft cloth.
: Risk of injury!
Scratched glass in the appliance door may develop into a
crack. Do not use a glass scraper, sharp or abrasive cleaning
aids or detergents.
Installation
During installation, make sure that the lettering "top right" is
upside down at the bottom left of both panels.
1. Insert the lower panel at an angle towards the back (fig. A).
2. Slide in the middle panel (fig. B).
3. Stick the retaining clips onto the right and left-hand side of
the panel, aligning them so that the retaining carriers are over
the screw holes, and then screw into place (fig. C).
%
$
%$
'
&
(
%$
Loading ...
Loading ...
Loading ...