Documents: Go to download!
User Manual
- Owner's manual - (English)
- Specification Sheet - (English)
- Camera Introduction
- Setup and Installation
- View Your Camera
- Alarm and Detection
- Recording and Playback
- FAQs and Troubleshooting
Table of contents
User Manual
Camera Introduction
Device Overview
RLC-510A/RLC-410/B400
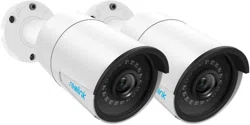
RLC-510A: Boasting a high resolution of 2560x1920 with nearly 5 million pixels,
RLC-510A security IP camera can capture crystal clear video with fine details. With the built-in microphone, it also picks up ambient sound for an extra layer of security.
RLC-410: 5MP RLC-410 is with a pixel resolution of 2560x1920, that is, nearly 2.4X the resolution of 1080p Full HD, and even 1.3X the resolution of 1440p. It sees your home security more clearly, with more details.
B400: 4MP B400 with 2560x1440 high resolution to capture beautiful and smooth
4-megapixel live video streaming and video clips than 720p and 1080p cameras. No details will be missed!
Note: B400 is an add-on camera, which cannot work independently. It works perfectly when connected to Reolink 8-channel NVR RLN8-410, 16-channel NVR RLN16-410, or in Reolink PoE surveillance systems.
Setup and Installation
Power on PoE Cameras
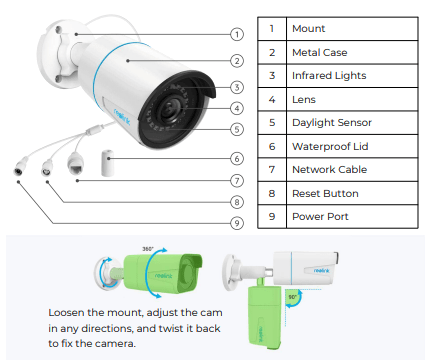
You may power on Reolink PoE cameras via PoE injector/switch or PoE NVR directly, or by using the power adapter. Method 1: Power via PoE Injector/Switch
For Reolink RLC-423, you need to make sure that the PoE injector/switch is 802.3at compliant (48V) and supports active mode. For other Reolink PoE cameras, please make sure that the PoE injector/switch is 802.3af compliant (48V) and supports active mode.
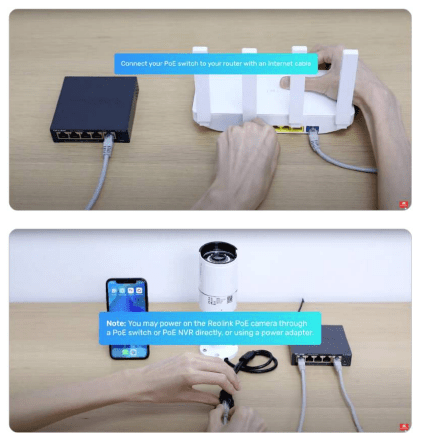
Method 2: Power by PoE NVR
Connect your PoE camera to the PoE NVR by a single network cable, then the PoE camera will get power via the PoE
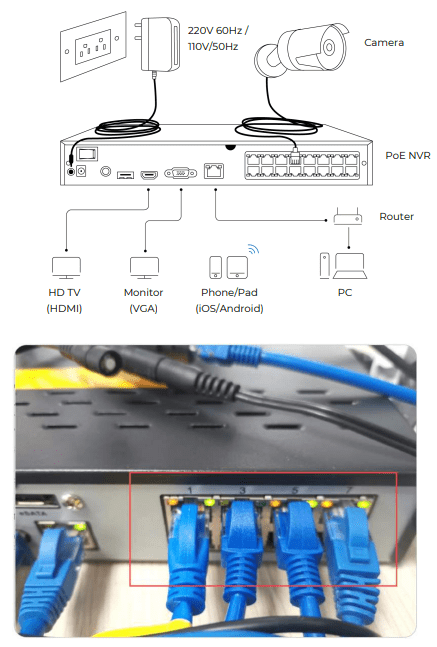
Method 3: Power by Using the Power Adapter
Alternatively, you can power on the camera in another way – by using a power adapter. For Reolink RLC-423, the ratings of power adapter should be DC 12V 2A. For other Reolink PoE camera models, the ratings of power adapter should be DC12V 2/1A
Set up PoE Cameras on App
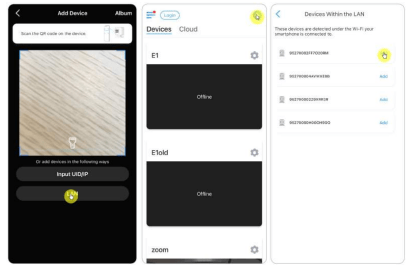
Please power on your camera properly before the initial setup, and refer to the steps below. Step 1. If you've opened the Add Device Automatically option in the Settings page, you can click this device in the Devices page and turn to step 2 directly. If you don't enable that option, you can click + on the upper right corner, scan the QR code on the camera to add this device
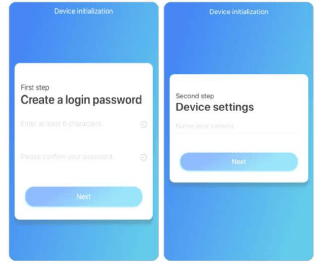
Step 2. Create the password, name the device, and then start live view
View Your Camera
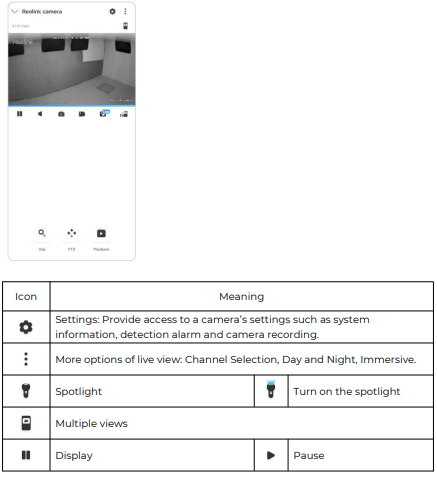
Live View
Note:
The live view screen may vary for different mode
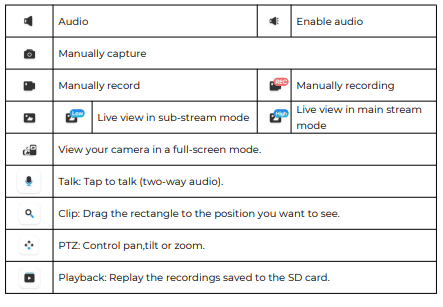
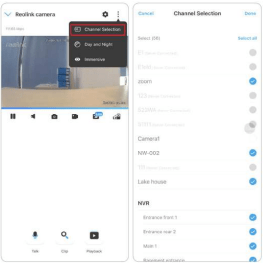
Channel Selection
You can choose the devices you want on the device list.
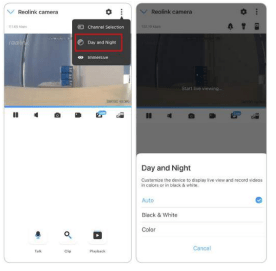
Day and Night
Set the camera’s color mode during different times of the day and night. Set the camera’s color mode during different times of the day and night.
- Color: The camera will capture color images that usually appear during the day.
- Black & White: The camera will capture black-and-white images that usually appear during the night with the IR LEDs on.
- Auto: The camera will automatically switch between Color and Black & White modes according to the light conditions.
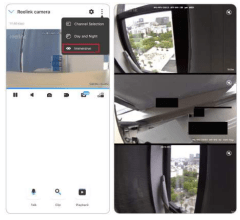
Immersive
The immersive mode has a larger viewing area with less interference and focuses on previewing. It is suitable for viewing 2 or 3 cameras on one screen.
Note: One screen can accommodate up to three cameras. You could slip the screen to preview other camera
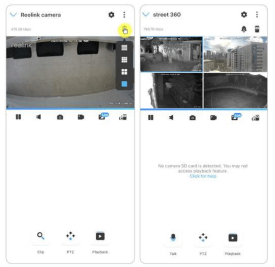
Multiple Views
If you have several cameras added in your Reolink App, you can view multiple streams at the same time on Reolink App.
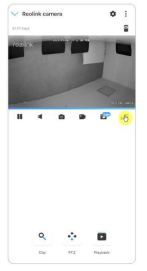
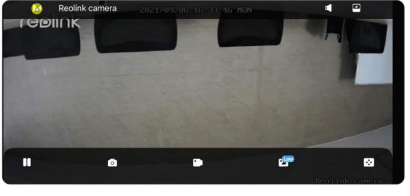
Full-Screen View
Click  to enter the full-screen mode.
Click  to return back.
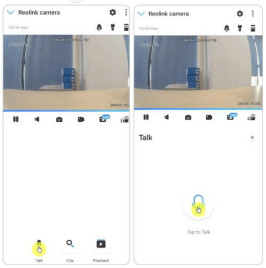
Two-Way Audio
Note:
Two-way audio is only available for RLC-811A and RLC-823A.
Step 1. Click  to enter into the two-way audio page;
Step 2. Click  to talk.
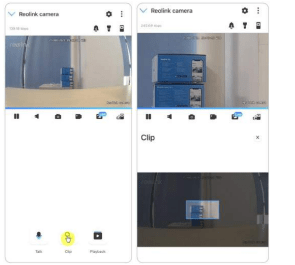
Clip
Step 1. Click  to enter into the clip page;
Step 2. Drag the rectangle to the position you want to see.
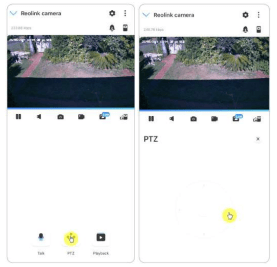
PTZ
Step 1. Click  to enter into the PTZ page;
Step 2. Choose the direction you want the camera to pan and tilt.
Lights and LED
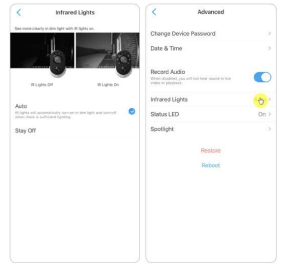
Infrared Lights
By default, the infrared lights on the cameras are set to Auto. They will be automatically turned on in dim environment. If there is enough illumination, you may choose to turn off the infrared lights.
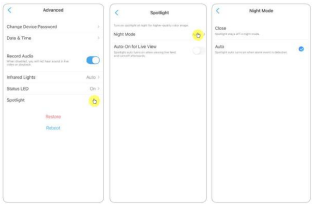
Spotlight
When an alarm event is detected, it will be automatically turned on, and the spotlight can also add light sources to produce full-color images. By default, the Night Mode is set as Auto.
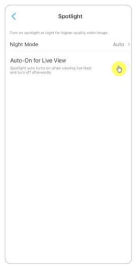
And you can also enable the Auto-On for Live View, which means the spotlight will automatically turn on when viewing the live feed
Alarm and Detection
Set up Motion Detection
Reolink camera judges whether each macroblock has moved by dividing the grid. When the number of moved blocks reaches a certain proportion of the number of armed blocks, the alarm will start. The working principle of motion detection is that a camera will judge it as a motion when differences in 2 frames reach 0.5%-10% (customize by adjusting motion sensitivity) of the image. When the picture changes, the number calculated and compared will exceed the threshold and instruct the system to automatically make corresponding process.
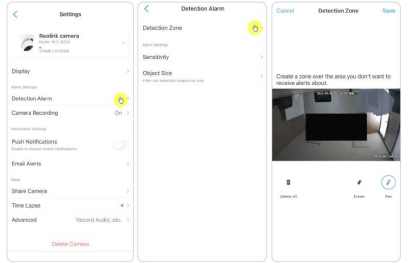
Detection Zone
Detection Alarm > Detection Zone > Create a zone over the area you don’t want to receive alerts about.
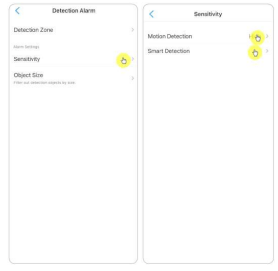
Sensitivity
Sensitivity can be set for motion detection and smart detection.
Note:
Smart detection is only for PoE cameras which support the smart person and vehicle detection.
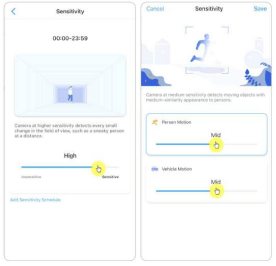
Drag the bar to adjust the sensitivity from low, mid to high. For the sensitivity of motion detection, you can also add sensitivity schedule.
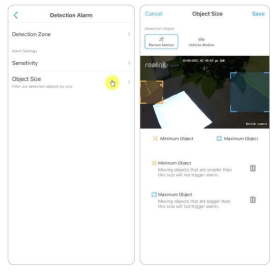
Object Size
You can set the minimum and maximum object size. Moving objects that are smaller or bigger than the size will not trigger alarm.
Recording and Playback
Set up Recording
Reolink PoE cameras support both motion recordings and continuous recordings. And recordings can be saved into micro SD cards and uploaded to FTP server. For how to set up the motion recording, please refer to chapter 4 “Set up Motion Recording”.
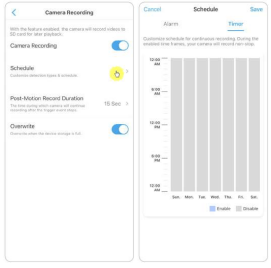
Set up Continuous Recording
And you can also set continuous recording to the SD card by choosing Timer.
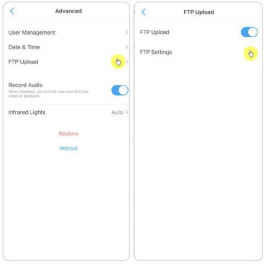
FTP Settings
Step 1. Go to Advanced > FTP Upload page, enable FTP Upload option and then click FTP Settings
Step 2. Complete the information required and click Save to save all the settings.
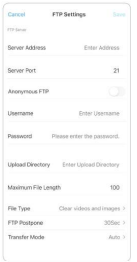
Server Address: Type in the address of your FTP server and FTP Port. The default FTP Port for Reolink products is 21.
User Name and Password: Enter the User Name and Password of your FTP server. If there is no username and password required, please enable Anonymous FTP.
Upload Directory: Set an upload directory for device video recording. You may also leave it blank. Maximum File Length: You can enter the file length here.
File Type: Choose to upload both video and picture or picture only.
FTP Postpone: Set the record time limit after a motion is detected. This option is only available when File Type is Video and FTP Schedule is Motion.
Transfer Mode: This option consists of Auto, PORT, and PASV three modes. We recommend you choose the Auto option.
Replay and Download Recordings
Replay Recordings
1. Open live view of the camera. Then tap on Playback on the bottom.
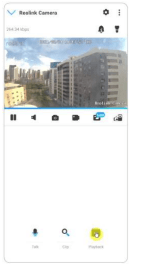
2. Select a date to search the recordings. Slide through the timeline to find the recordings you want to replay, tap on the selected recording and it’ll automatically starts to play.
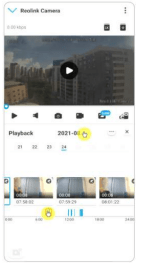
3. Tap on  to choose Fluent or Clear to replay the recordings in clear mode or fluent mode
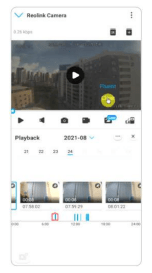
4. Tap show alarm icon  on the bottom to show the alarm recordings only. For PoE cameras supporting the smart person and vehicle detection, you can select motion recording type of Person,Vehicle or Any Motion to replay.
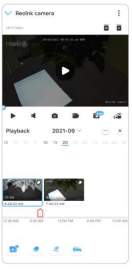
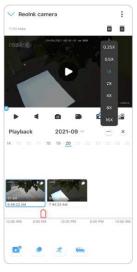
5. To replay the recording in slow or fast speed, please tap on the icon  and then choose the playback speed at 0.25X, 0.5X, 1X, 2X, 4X, 8X or 16X
FAQs and Troubleshooting
FAQs
Q1: Can the Recordings Saved to FTP Server be Overwritten?
A: Sorry to tell you that our device does not have permission to delete FTP files. Whether the recordings saved to the FTP server can be overwritten depends on the function of the FTP server. Some FTP servers support overwrite function, and you can set on FTP.
Q2: Specification of Ethernet Cables that Reolink PoE Cameras Require.
A: Reolink PoE cameras support T-568B connectors and CAT5, CAT6, CAT7 with 8 PIN Ethernet cable. You may buy an Ethernet cable like the one in the link.
The maximum cable length that the camera supports is 80 meters (264feet).
Q3: Which PoE Injector/Switch Can I Use for Reolink PoE Cameras?
A: The PoE injector/switch is not included in the package of our product and it’s not sold in Reolink stores. You may purchase the PoE injector/switch separately.
Please refer to the standards we support below:
For Reolink RLC-423, you need to make sure that the PoE injector/switch is 802.3at compliant (48V) and supports active mode. For other Reolink PoE camera models, please make sure that the PoE injector/switch is 802.3af compliant (48V) and supports active mode.
Q4: Can Two Cameras be Connected via One Cable?
A: Reolink PoE cameras can be powered over the Ethernet cable, and the Ethernet cable can transmit both data and power.
You may run 1 Ethernet cable from the NVR to a PoE switch, then plug 2 cameras(up to 3 cameras) to the PoE switch.
However, please don't split 1 Ethernet cable into 2 RJ45 connectors, as 1 PoE port can't provide enough power for 2 cameras. And also, the Ethernet splitter doesn't support 2 cameras to connect to network at the same time.
Q5: Can I Rotate Camera Image 90 Degrees?
A: Rotating image 90 degrees is not supported. Please note that mounting cameras sideways is not recommended.
Q6: Can I Play back or Download Recordings Remotely?
A: If you access the camera with the user accounts of an admin user, you can play back and download recordings remotely. But if you access the camera with the user accounts of a common user, you cannot do that.
Q7: Can I Download All Recordings at Once on Reolink App?
A: No, Reolink App only supports downloading one file at once. And the video is cut into a moderate length by default. You can customize the video length (up to 120 seconds).
Q8: Can this camera record continuously?
A: Yes, the camera of the latest firmware supports recording continuously.
Q9: Can I Use Reolink Cameras with iCloud?
A: Due to the hardware and software limitation, the cameras temporarily do not support the icloud, but you can use cameras with the Reolink cloud storage.
The models which support the Reolink cloud storage: Argus 2, Argus Pro, Argus PT, Argus Eco, Reolink Go, Reolink Go PT, Reolink E1, Reolink E1 Pro, E1 zoom, Reolink Lumus.
The countries which support the Reolink cloud storage: United States, Canada, Australia, New Zealand, Thailand, Vietnam, Malaysia, South Korea, Philippines, Indonesia, Hong Kong (China), Macau (China), Israel, Qatar, Bahrain, United Arab Emirates, Saudi Arabia, Kuwait, Lebanon, Singapore.
Q10: Can I Add a PoE Switch Between the Reolink PoE Cameras and Reolink PoE NVR?
A: Yes. But we don't recommend to connect in this way. If you have to connect in this way because of the inconvenience to hook multiple wires in the scenes like between two buildings, please make sure do not add more than three cameras into the PoE switch and then connect the switch to the PoE port on the NVR
If you added more than 3 cameras on one PoE switch and connect the switch to the PoE port on the NVR, the video stream may be delayed or frozen.
Troubleshooting
Camera Is Not Powered up
If your camera is not powered up, please try the following solutions:
1. Please change another working adapter/working cable/working port to connect the camera.
2. Please refer to this user manual to reset the camera.
3. Then please cover the day/night sensor or place the camera in a dark environment to check if the IR lights are on.
Camera does not work with the third-party software
Reolink IP cameras (battery-powered models not included) are ONVIF2.1 compliant, which means they can be added to some third-party surveillance software for monitoring and recording. For the surveillance software you mentioned, sorry that we’re not able to assure you that it will be fully compatible with Reolink cameras as we didn’t test it or made any adaptations.
Fail to upgrade the firmware
If you fail to upgrade the firmware for your camera, here are some steps for your confirmation:
1. Check what is the firmware version of your camera, and what is the firmware version you want to upgrade. The camera model and hardware number should match, this way to make sure you upload the correct firmware.
2.Ensure to unzip the downloaded zip file and check the format of the file a pak. file.
3.Re-download the firmware to try upgrade again.
4.Reset the camera to factory settings then try upgrade the firmware again
See other models: RLC-410-5MP RLC-511W Reolink Argus 2 Argus 2 2 pack Argus Eco2 Pack
