* Spare Filter ( VR05R5050** : O ) ( VR05R503P** : X )
* Mop ( VR05R5050** : X2 ) ( VR05R503P** : X1 )
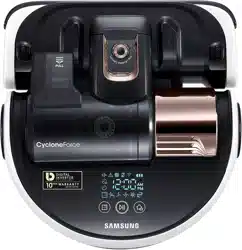
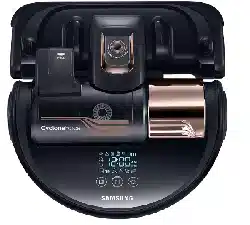
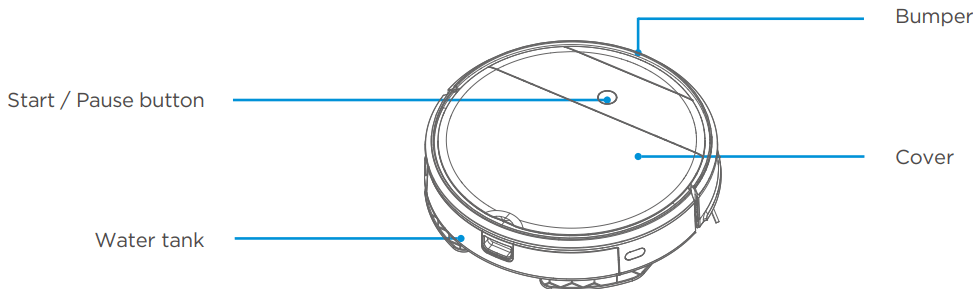
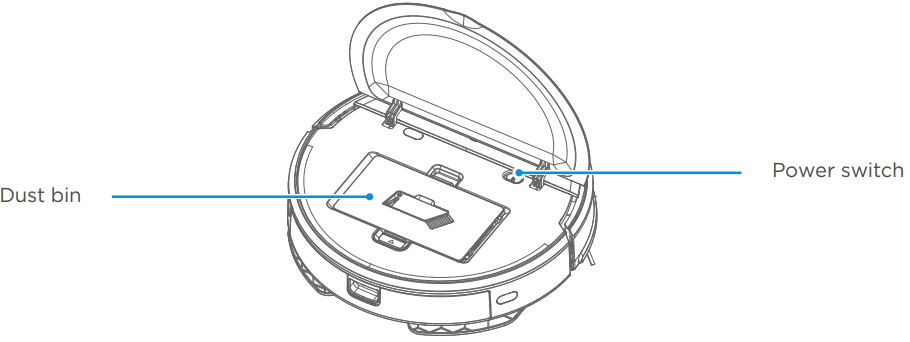
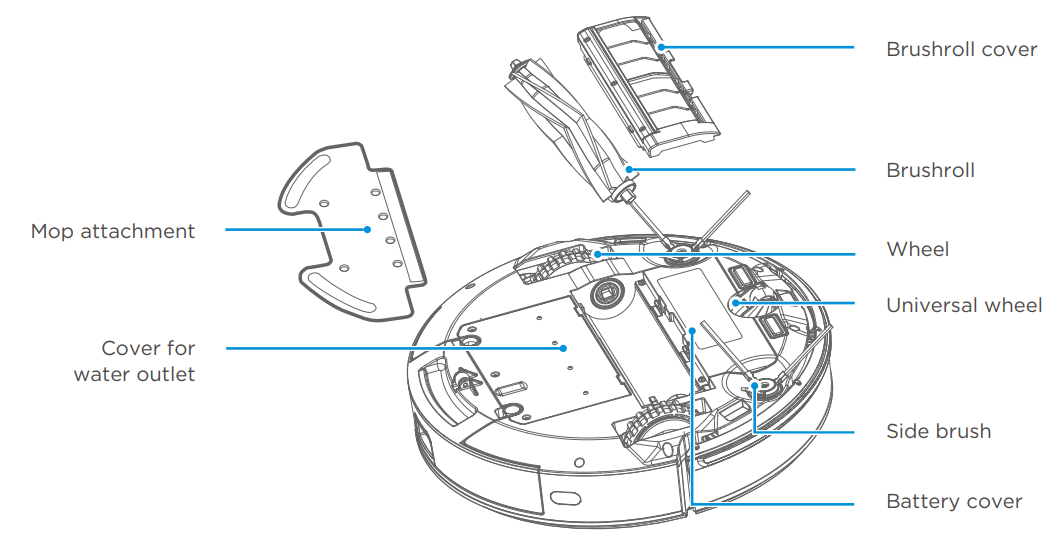
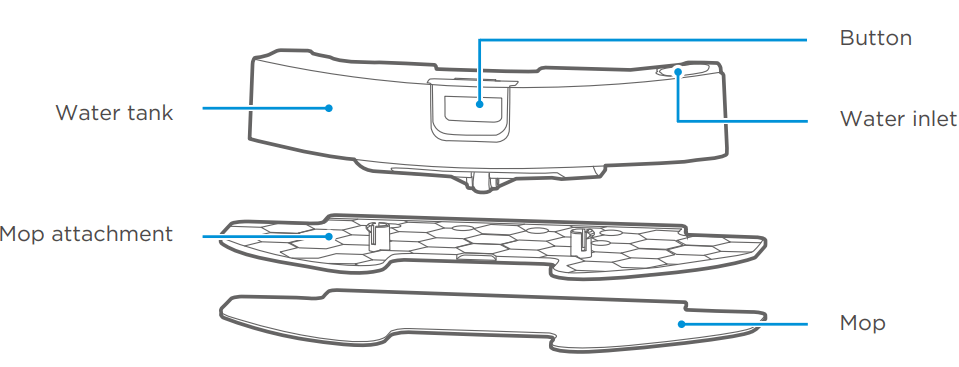
Illustration of Appliance
Introduction of Components
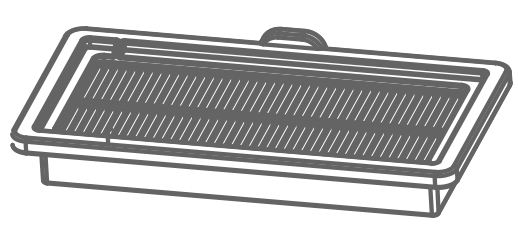
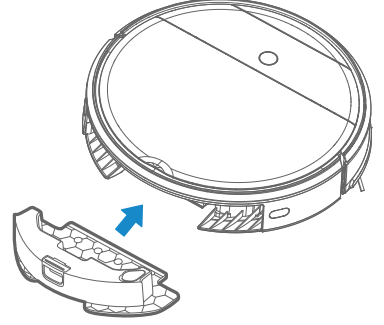
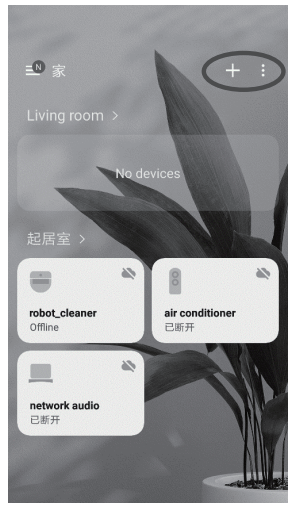
Dust bin
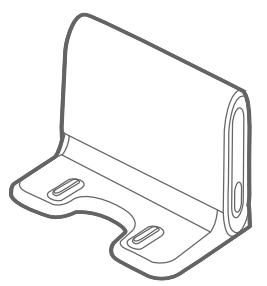
Docking station
Water tank assembly
Product Operation
1. Do not use your robot on wet surfaces or surfaces with standing water. Before using the product on a rug with tasseled edges, please fold the rug edges under.
2. It may be necessary to place a physical barrier at the edge of a drop to stop the unit from falling over the edge.
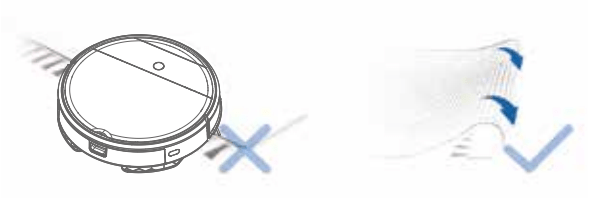
3. Remove power cords and small objects from the floor that the robot could be obstructed by, and tidy up the area to be cleaned by putting furniture, such as chairs, in their proper place.
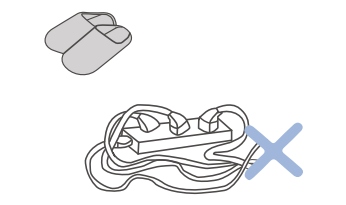
4. Please remove all the stuff on the floor, like slippers, cords, curtains, etc. to make sure the robot works regularly.
Installation
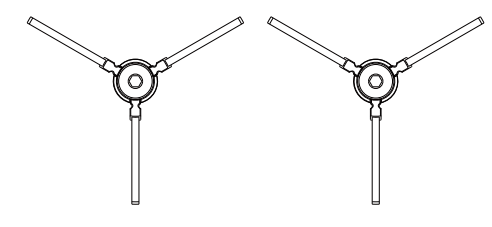
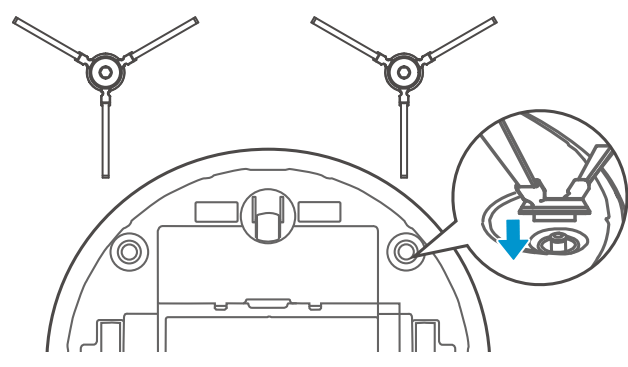
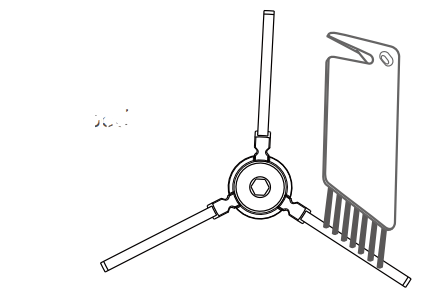
Push the side brush directly into the convert shaft of the base of side brush.
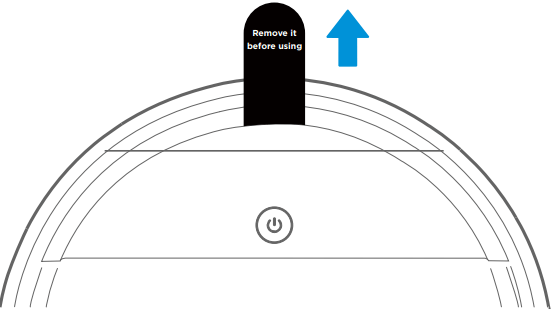
Please remove a "White bumper gasket" before using.
Appliance Charging
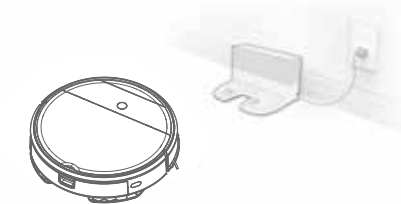
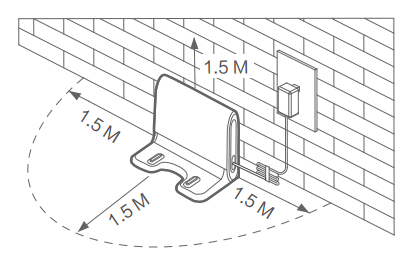
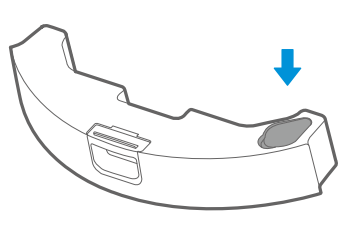
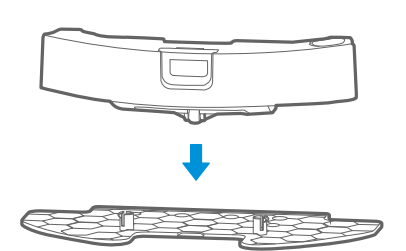
1. Put the docking station well: Place the docking station against a wall and remove all of obstructions around the docking stand, as shown in the figure below.
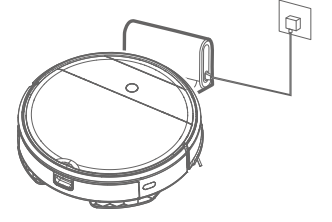
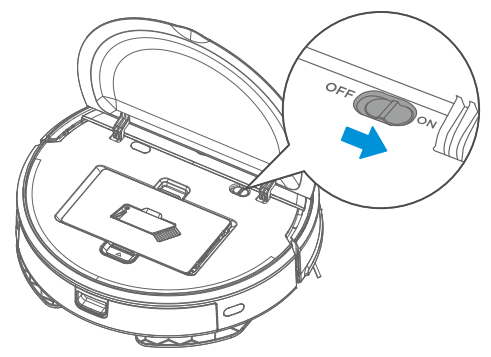
2. Switch the power on after opening the cover.
3. Place the appliance on the docking station, as shown in the pic.
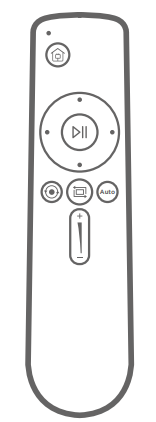
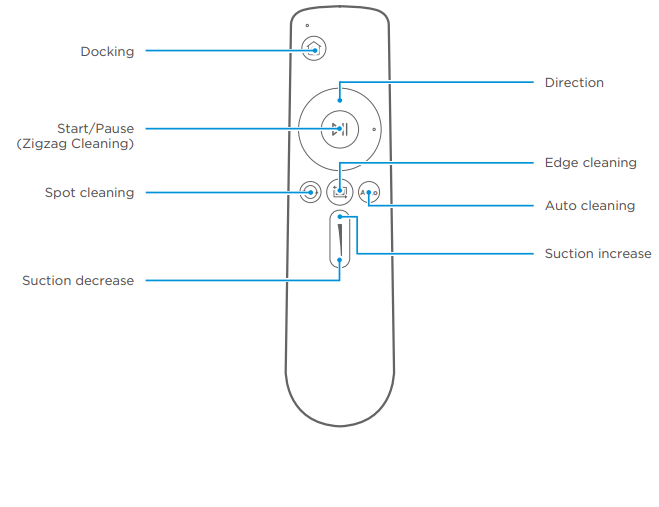
Introduction of Remote Control
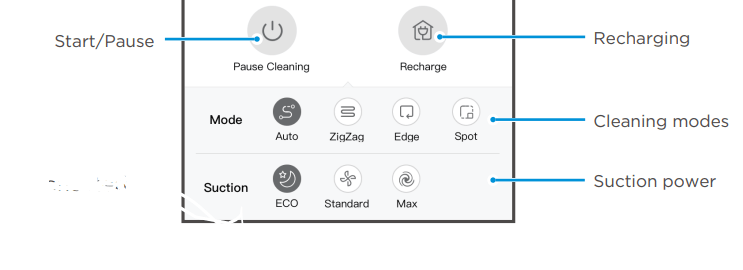
1. Docking: When in standby or working mode, appliance will return docking station for charging.
2. Direction: Controlling the moving direction by forward/left/right key
3. Start/Pause (Zigzag Cleaning): When in standby mode,appliance starts working or pause with zigzag cleaning.
4. Spot cleaning: Start to cleaning by Spiral mode in certain zone
5. Edge cleaning: Cleaning by the edge of obstacle
6. Auto cleaning: The robot will clean randomly
7. Suction increase: Increasing the suction power.
8. Suction decrease: Decreasing the suction power.
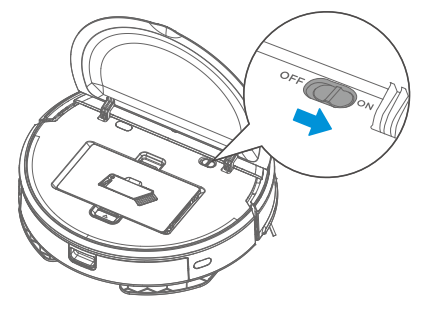
Power ON/OFF
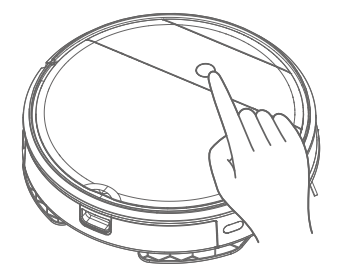
1. Power on: Open the cover, power on by turning the power switch to "ON", and then press the start button, the indicator lights up .
2. Power off (when not be used for a long time) : Power off the appliance by turning the power switch to "OFF" and the light goes out .
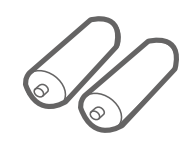
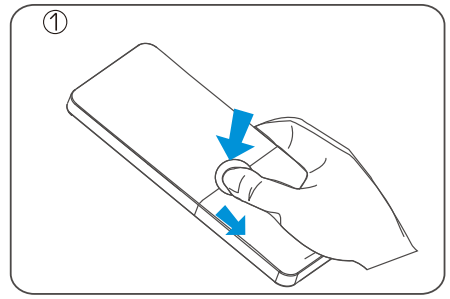
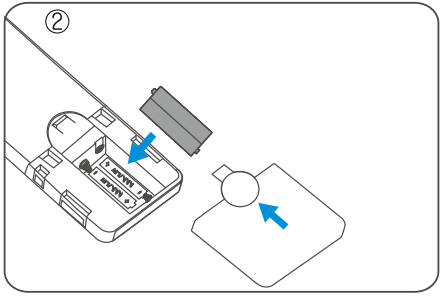
Insert batteries
Open the battery cover by lifting it while pressing the locking tab and insert the batteries as shown in the illustration. Then close the cover until it clicks into place.
Clean/Pause
Clean
1. Make sure the power switch is in the "ON" position
2. In standby mode, press the " " key to start zigzag cleaning
Pause
Standby means that the power supply is on, waiting for the user to operate, and the appliance enters into the PAUSE by pressing the “ ”;
Mopping operation
1. Attach the mop to the mop attachment.
2. Press the button on tank and remove the tank.
3. Fill the water.
4. Mount the water tank onto the mop attachment.
5. Then insert the water tank assembly into the appliance.
6. Press ‘‘ ’’ and start mopping.
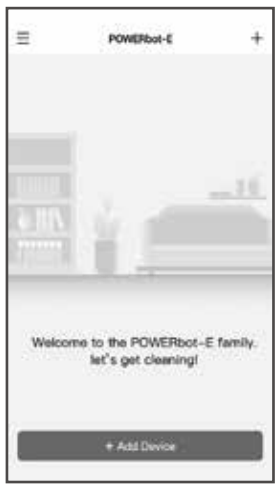
APP Guide Line (POWERbot-E)
App quick guide
Step 1
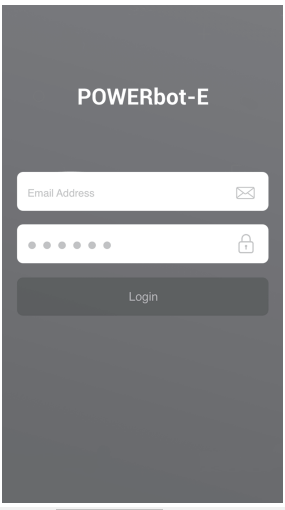
Search “POWERbot-E” in APPLE App Store or Google Play Store, and download the App. Follow the instructions on the interface to register and log in App.
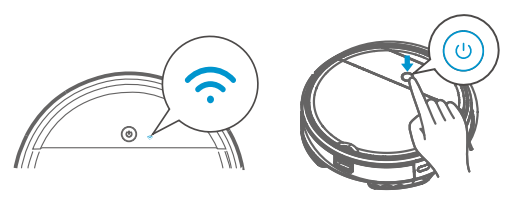
Step 2
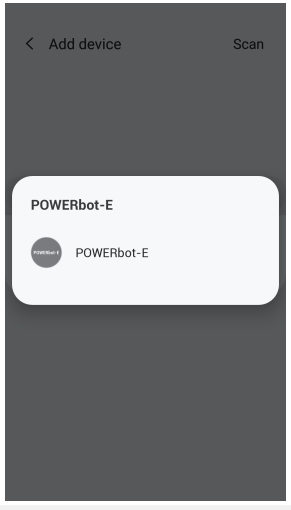
Click "+ Add Device" on the interface and operate as instructed
Step 3
When first used, slow flickering of WiFi indicator light indicates that the cleaner gets into the state of network accessing configuration, now click “Next Step” on App and conduct network accessing config operation as per the prompts on the interface.
Remarks: If WiFi indicator light doesn’t flicker, long press “ ”key for 3 seconds and release after a tick sound is heard.
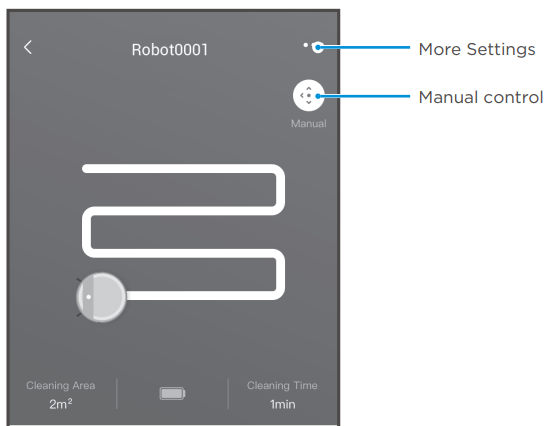
Step 4
Once the network access is configured successfully, you can operate your cleaner by App
APP Guide line(SmartThings)
If you want to use your SmartThings App to control the robot.
STEP 1. Finish the POWERbot-E App registration.
STEP 2. Download the SmartThings App, search “SmartThings” in APPLE App store or Google Play Store and download.
- You must sign in to a Samsung account before using the SmartThings app.
- To set up a Samsung account, you can follow the directions provided by the SmartThings app.
STEP 3. Register in the SmartThings App and login in.
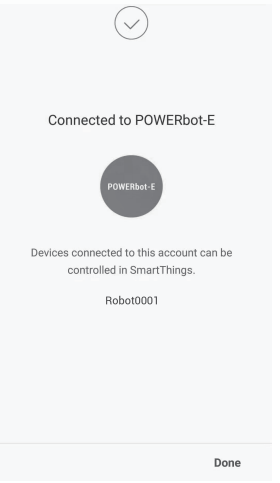
STEP 4. Link the SmartThings App and POWERbot-E App as below instruction, and then can control your robot via SmartThings App
Setting up the wireless router
• Samsung POWERbot-E supports only Wi-Fi 2.4 Ghz.
• Samsung POWERbot-E supports IEEE 802.11b/g/n and Soft-AP.
– IEEE 802.11n is recommended.
• Samsung POWERbot-E supports only DHCP (Dynamic Host Configuration Protocol).
Please make sure that the DHCP server option is activated on your wireless router.
• POWERbot-E supports the WEP-OPEN, WPA-PSK/TKIP, and WPA2-PSK/AES for the authentication and encryption protocols.
– WPA2-PSK/AES is recommended.
– Confirm that your router has a unique SSID and password.
• The quality of your wireless network connection may be influenced by the surrounding wireless environment.
• If your Internet service provider has permanently registered the MAC address (a unique identification number) of your PC or modem, your POWERbot-E may not be able to connect to the Internet. Ask your Internet service provider about the procedure to connect an apparatus other than a PC to the Internet.
• If your internet service provider requires your ID or password to connect to the internet, your POWERbot-E may not be able to connect. If this is the case, you must enter your ID or password when connecting to the Internet.
• The POWERbot-E may not be able to connect to the Internet because of firewall issues. Contact your Internet service provider to resolve these issues.
• Some wireless routers may transmit an abnormal Domain Name Server (DNS) address even if the Internet is not connected. If this occurs, contact the manufacturer of your wireless router and your Internet service provider.
• If you still cannot connect to the Internet even after trying the procedure provided by your Internet service provider, please contact an authorized Samsung service center.
• If your router is not a Wi-Fi certified product, The POWERbot-E may not be able to connect to the Internet.
Setting up a Samsung account
• You must sign in to a Samsung account before using the SmartThings app.
• To set up a Samsung account, you can follow the directions provided by the SmartThings app.
• Or, if you have a Samsung smartphone, you can add your Samsung account in the setting app of your smartphone. Then, it will automatically sign in to your Samsung account.
• Adding a device to the SmartThings APP
• Connect your smartphone to your wireless router. – If the smartphone is not connected, turn on the Wi-Fi in the Settings App and select a wireless router you want to connect to. – Disable the "Mobile data" use option of a smartphone to use Wi-Fi only and connect a device.
• Launch the SmartThings app on your smartphone.
• If a pop-up saying that a new device has been found appears, tap ADD NOW.
– If the pop-up doesn’t appear, tap the + button and select the device which you want to connect from the list of AVAILABLE DEVICES.
– If your device doesn’t appear in the list, add the device manually by selecting the device type and selecting the specific device model.
• [Android] The connection to your device will be progressed automatically.
– [iOS] Open the setting app, and select POWERbot-E in the Wi-Fi list.
• Provide the authentication when you are directed to do so.
• [Android] The connetion to your wireless router will be progressed automatically.
– [iOS] Open the setting app, and select the wireless router in the Wi-Fi list.
• The remaining setup will be automatically done. Then, a new Device Card will be added
Product Maintenance
Cleaning
1. Check whether the side brush is damaged or has wrapped
2. Clean the side brush with a cleaning tool or a rag
3. If curl or deformation occurs, remove the side brush and put it in warm water for about 5 seconds;
4. When the side brush is damaged and cannot be used, please replace as soon as possible.
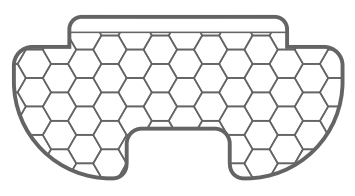
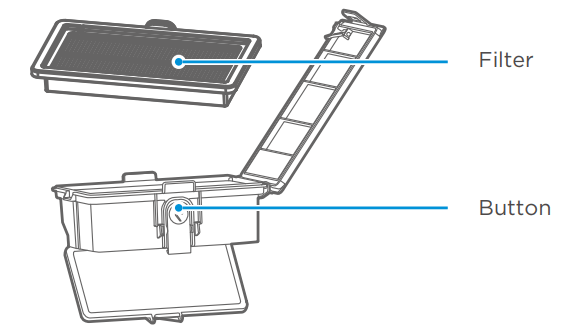
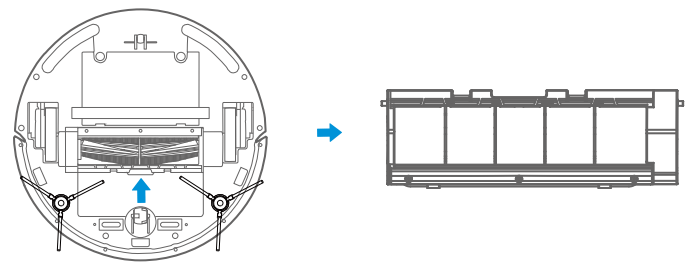
Cleaning of Dust Bin and Filter
The steps are as follows
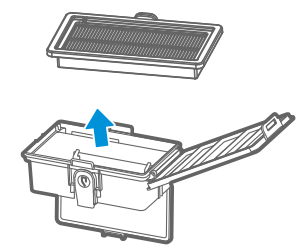
1. Open the cover by lifting the mark on the cover with fingers;
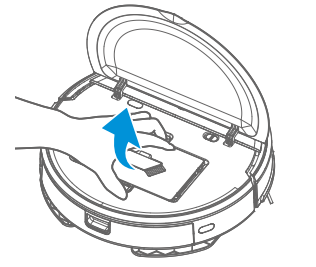
2. Take out the dustbin;
3. Press a button to empty trash in the dust bin;
4. Take out the filter;
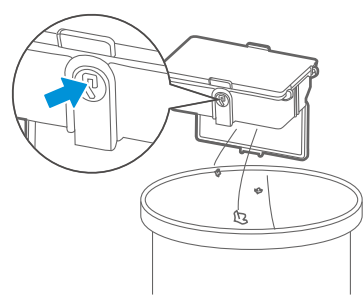
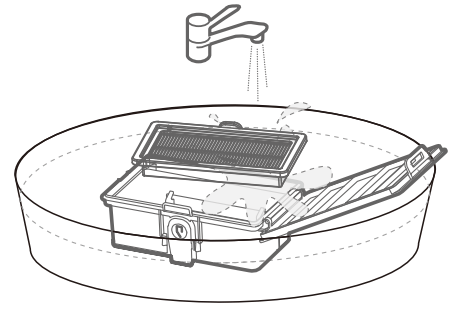
5. Clean the dust bin and filter by water
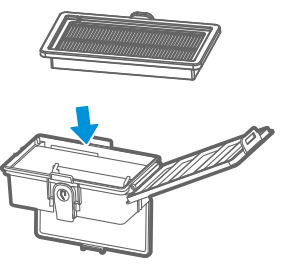
6. Insert the filter into the dustbin
Cleaning of Water Tank
1. After the floor is mopped, pull out the water tank assembly from the rear of the main unit and remove the mop attachment and mop.
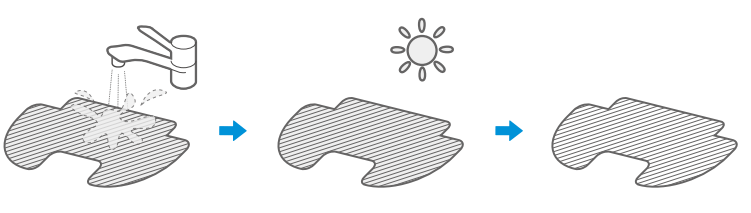
2. Wash mop, and leave it dry;
3. After the floor is mopped, pour the remaining water in the tank.
4. Wipe the water tank and leave it dry. Sunlight exposure is not allowed.
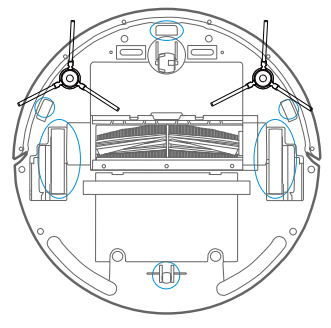
Cleaning of Sensor and Wheel
1. Wipe the sensor and the wheel gently with a cleaning tool or a soft cloth, as shown in the figure below
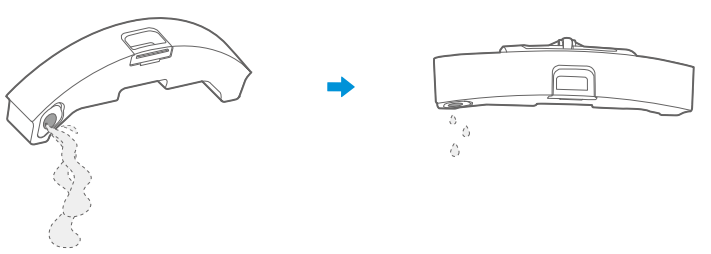
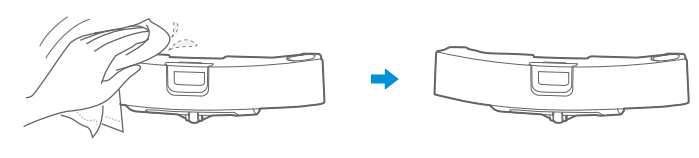
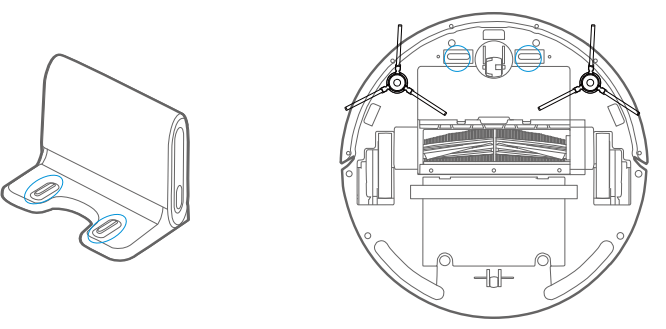
Cleaning of Charge Terminal
1. Clean the charging base and the charging terminal on the appliance with a cleaning tool or a soft cloth, as shown in the figure below.
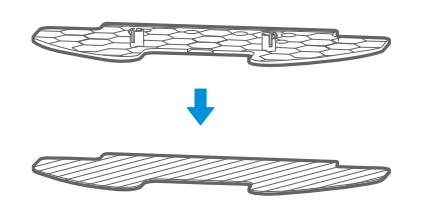
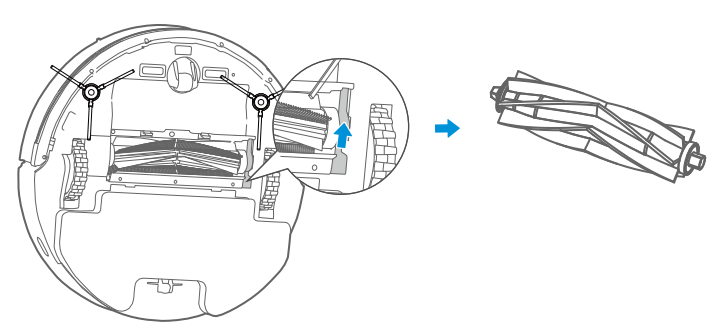
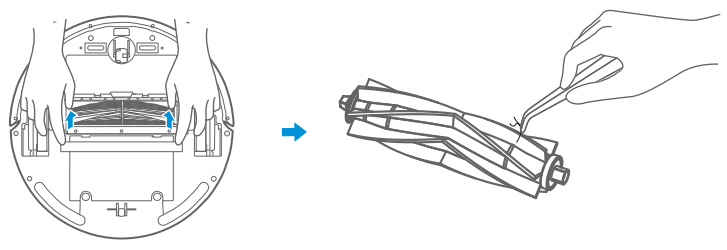
Cleaning of Brushroll Assembly
1. Take the brush roll cover down.
2. Open the brush roll block upwards and remove brush roll
3. Clean the brush roll bar and brush roll cover with a cleaning tool or a soft cloth. (brush roll can be washed with water)
Trouble Shooting
Problem
Possible reason
Solution
The appliance will not be charged
- The power switch is not turned on while charging
- The appliance and charging terminals are not in full contact
- Power on the appliance
- Make sure the appliance is fully in contact with the charging terminal
The appliance gets stuck
- The appliance is covered by wires on the ground, dropping curtain fabric or blankets are twined
- Side brush and brush roll, etc. get stuck, and the appliance can not run normally
- The appliance will automatically start the escape mode. If it is not out of trouble, it needs manual help
- Clean the windings on the side brush and restart it. If not, contact the after-sales department
Not cleaned completely, and robot goes to recharge
- Robot battery is lower than 20%, and it automatically back to recharge
- Robot cleans a certain place and is considered as “Cleaning finished”
- Charge the appliance
- Restart the appliance and choose the “auto” cleaning mode to start the cleaning that may be more appropriate for your home layout
No cleaning according to the preset time
- The power switch is not on
- Scheduled appointment is canceled
- Turn on the power switch of appliance
- Reset and make appointment
After the mop attachment installed, the appliance is impermeable
- The mop holder magnet falls off
- There’s no water in water tank
- The appliance base outlet hole is blocked
- Contact the aftersales service center
- Add water
- Clearwater outlet and tank filter
Appliance does not work
- The power switch is not turned on
- Low battery
- wheels are dropped and the three groups of drop sensors are in a falling state
- Turn on the power switch
- Charge the appliance
- Place the appliance close to the ground
- Contact aftersales service center
Appliance retreats
- There’s obstacle ahead
- Bumper rail is clamped
- Clear the front obstacles
- Tap the bumper rail to check for if there’s foreign matter stuck
The appliance restart sometimes.
- This is a symptom caused by instantaneous discharge of static electricity caused by carpet.
- The appliance will be normal if it restarts within 3 seconds
Keep hitting obstacles.
- When detecting an obstacle, reduce the speed and clean it in close proximity until it touches the obstacle.
- It's normal.
It may bump into furniture and obstacles on moving.
- It tries to clean near furniture and obstacles so that it can bump into them.
- It's normal.
Problem
Cause
Troubleshooting
Solution
App displays disconnection
Disconnection between the mobile phone and the equipment
- Judge if the mobile phone is accessed to network
- Judge if the router works normally
- The cleaner is required to be powered
- The WiFi configurations of the equipment are cleared
- The WiFi password or network is changed
- The mobile phone shall be accessed to network once again
- Re-start the router
- Power on the cleaner once again
- Add new appliances into App
- After system start-up, long press “ ” 3 seconds and release it after a tick sound is heard
- Clear all WiFi configurations of the cleaner and add household electrical appliances once again for operation
Slow App operation
Network connection is not so smooth
- Network busy
- Poor WiFi signal reception of the mobile phone
- The network bandwidth is not so adequate
- Re-start the router and reduce the number of access users
- Check the settings of the mobile phone itself
- Broaden network bandwidth
Specifications
* You can set the schedule function via App.
* Charing time and cleaning time may differ according to the use of conditions.


 " key to start zigzag cleaning
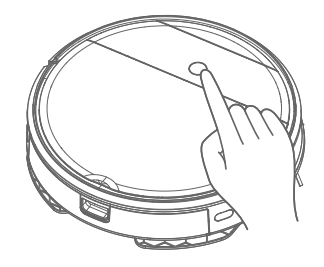


 on the cover with fingers;
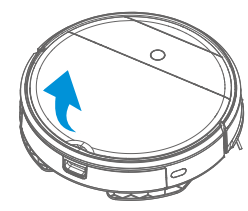

 ” 3 seconds and release it after a tick sound is heard