Loading ...
Loading ...
Loading ...
14 Chef 540 Upright Cooker
using the gas cooker
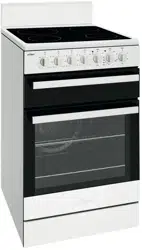
Gas hotplate
Ensure burner caps, crowns and trivets are properly
assembled.
For wok ONLY use the trivet and burner dedicated for
wok cooking.
Burner cap and burner crown must be clean and located
correctly for the burner to light.
Burner
Crown
Burner
Cap
Spark Plug
Flame Sensor
(Thermocouple)
Burner
Cap
Burner
Crown
Spark
Plug
Flame Sensor
(Thermocouple)
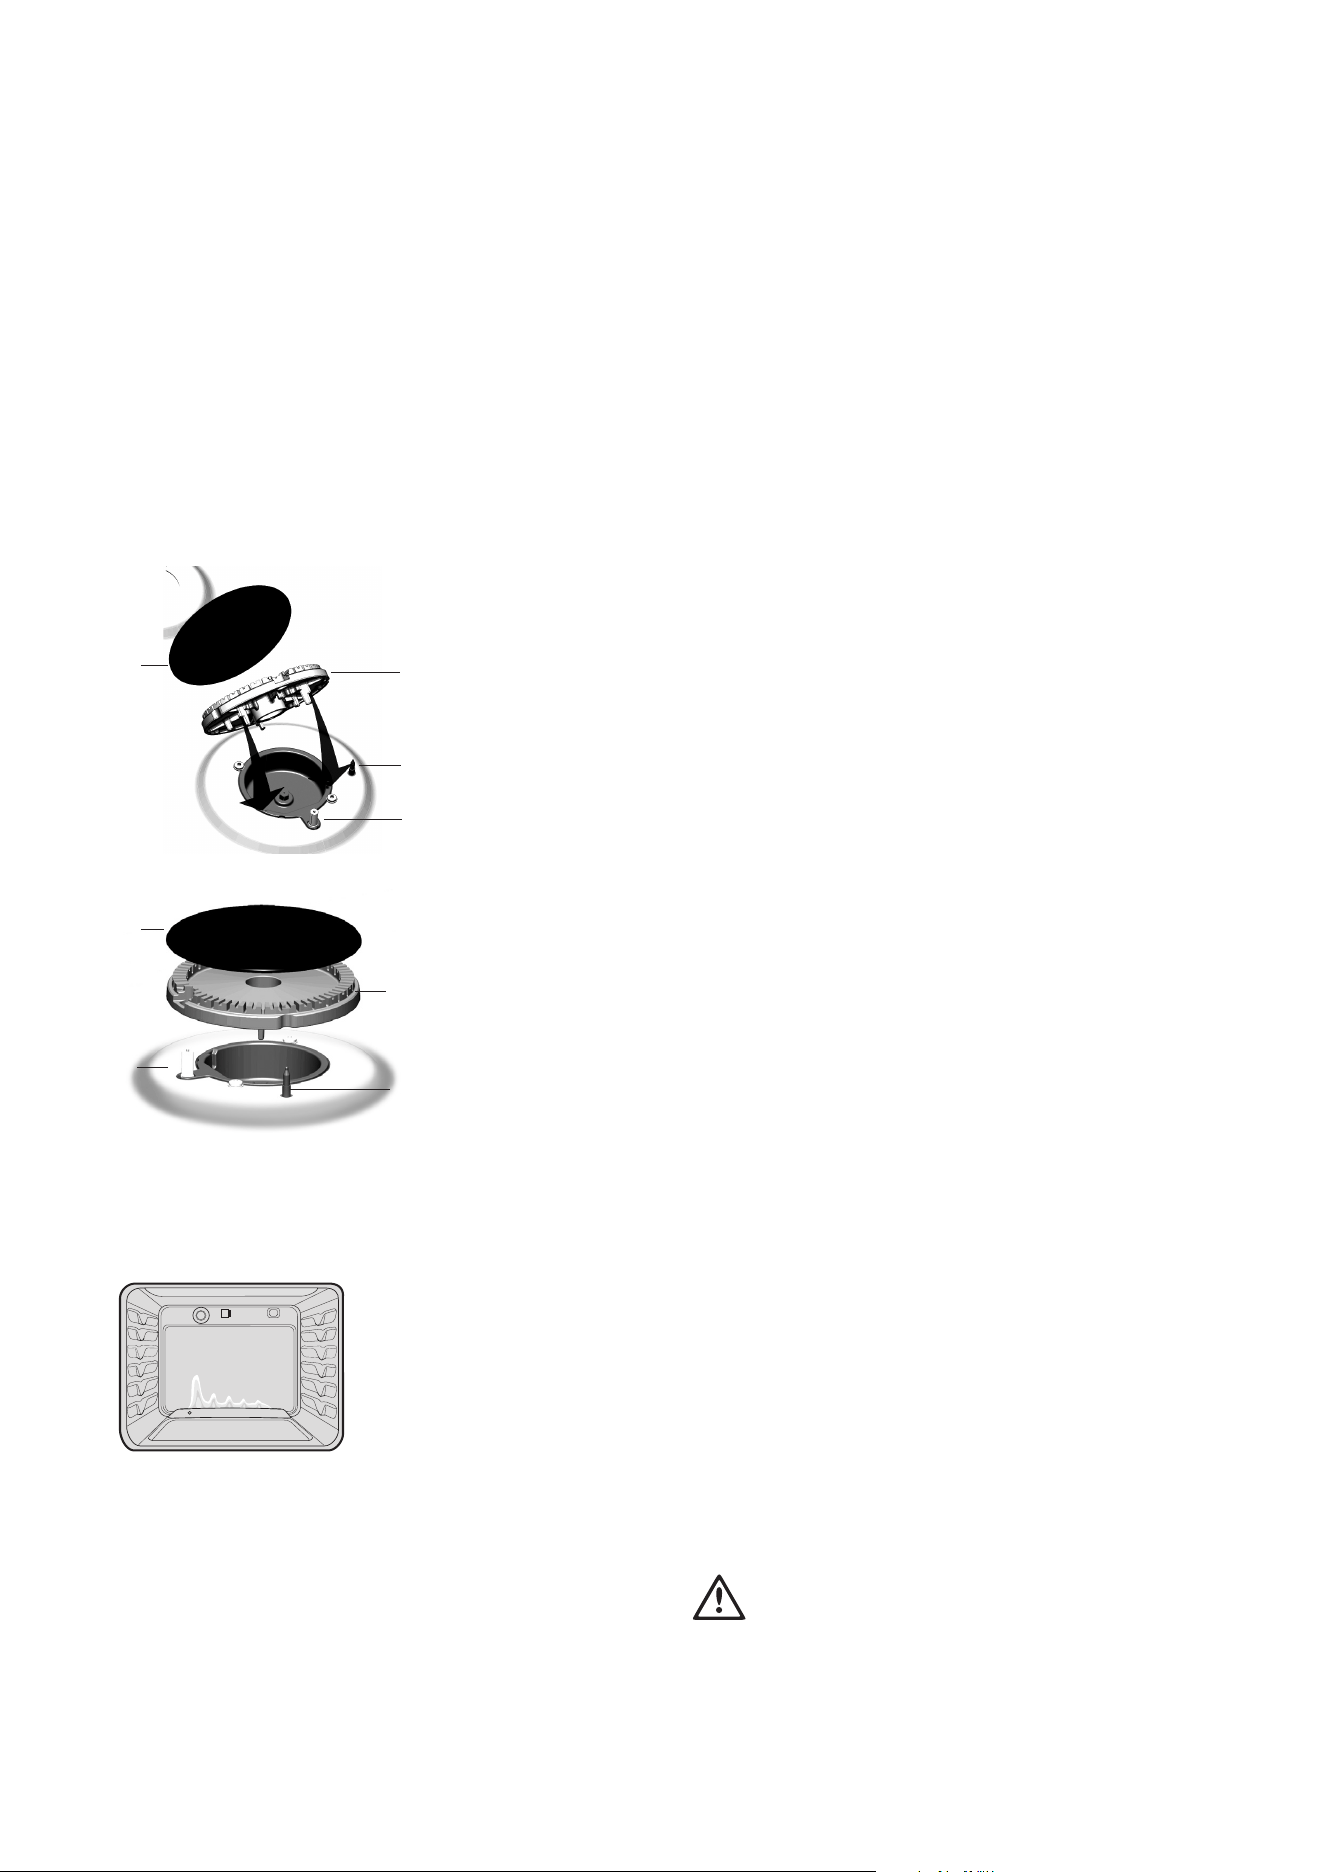
Gas oven burner flame
From a cold start the oven burner flame will be higher
on the left hand-side. After reaching the set temperature, the
flame will become even. This does not affect cooking results.
LIGHTING GAS HOTPLATE, GRILL AND OVEN
Electronic ignition with flame safeguard
This hob is fitted with mains powered electronic ignition.
When the appliance has been connected and the power is
on, depressing ignite button will release sparks to all burners.
To light a burner, depress the corresponding knob fully
and while continuing to depress knob for approximately 5
seconds, turn anticlockwise to ‘HI’ position. The flame sensor
must warm-up in order for the flame to stay alight.
The knob may be released once the flame is established,
and turned further anticlockwise to reduce the flame height as
desired.
• Before releasing the knob, ensure the knob is fully
depressed.
• If the flame goes out when the knob is released, simply
repeat the ignition procedure again.
Hotplate Ignition – (Manual)
To light a burner, depress the corresponding knob fully
and while continuing to depress the knob approximately 5
seconds, turn anti-clockwise to 'HI' position. At the same time,
hold hand-ignitor next to the burner and ignite (hand-ignitors
not supplied). The flame sensor must warm up in order for the
flame to stay alight
Grill Ignition – Electronic
While pressing the electronic ignitor switch, depress the
corresponding knob fully and while continuing to depress
the knob for approximately 5 seconds, turn anti-clockwise to
'HI' position. The flame sensor must warm up in order for the
flame to stay alight.
Grill Ignition – Piezo
Depress the grill control knob fully and while continuing to
depress the knob for approximately 5 seconds, turn anti-
clockwise to 'HI' position. The flame sensor must warm up in
order for the flame to stay alight.
Grill – in Oven
Grill is electric and is operated by control knob only.
Oven Ignition – Electronic
While pressing the Electronic Ignitor Switch, push turn and
hold the Oven Control Knob to the desired temperature. Hold
Control Knob in for 15 seconds after ignition.
Oven Ignition – Piezo
With the left hand push and hold the Oven Control Knob in
and turn it a quarter of the way anti-clockwise. Keep the oven
Control Knob pushed in firmly and at the same time push the
Oven Piezo Ignitor button on the right hand side of the control
panel (several times if necessary). It will make a loud ‘clack’
noise as the Piezo mechanism creates a spark.
Hold control knob in for 15 seconds after ignition.
WARNING
warning
• Keep hands clear of burners when lighting.
• If burner does not light within 5 seconds, turn knob to ‘Off’
position, allow gas to disperse, then try lighting again.
• Burners MUST be operated between ‘HIGH’ and ‘LOW’
settings only.
Loading ...
Loading ...
Loading ...