Loading ...
Loading ...
Loading ...
54
VR MODE
DVD RW
VIDEO MODE
DVD RW
DVD R
Important!
• Check that the clock is displaying the
correct time.
• When you record SAP broadcast, setting
“SAP” in “RECORD SETUP” to “ON” (See
page 87).
• When you press ■STOP to stop timer
recording, the timer standby mode will be
canceled. Press TIMER ON/OFF to enter
the timer standby mode if you set other
timer recordings. The TIMER indicator
lights up.
NOTE
• Up to 8 timer programs can be stored in
the recorder.
• “DV” cannot be set for the channel
reserved for timer recording.
• When “0h00m” is blinking as the remaining
recording time in the disc information after
disc identification, the disc loaded cannot
be used for recording. Replace it with a
different disc.
• Set the duration of recording time to at
least 2 minutes. Recordings of 1 minute
cannot be programmed.
Example: Recording a TV program in the FINE
mode: the TV program is on channel
7 starting at 9:05 PM and stopping
at 10:35 PM on August 10
th
.
1
Turn on the recorder and load a
recordable disc.
• Timer recording does not work during
loading a disc. Start the timer setting
after the disc is finished being
identified.
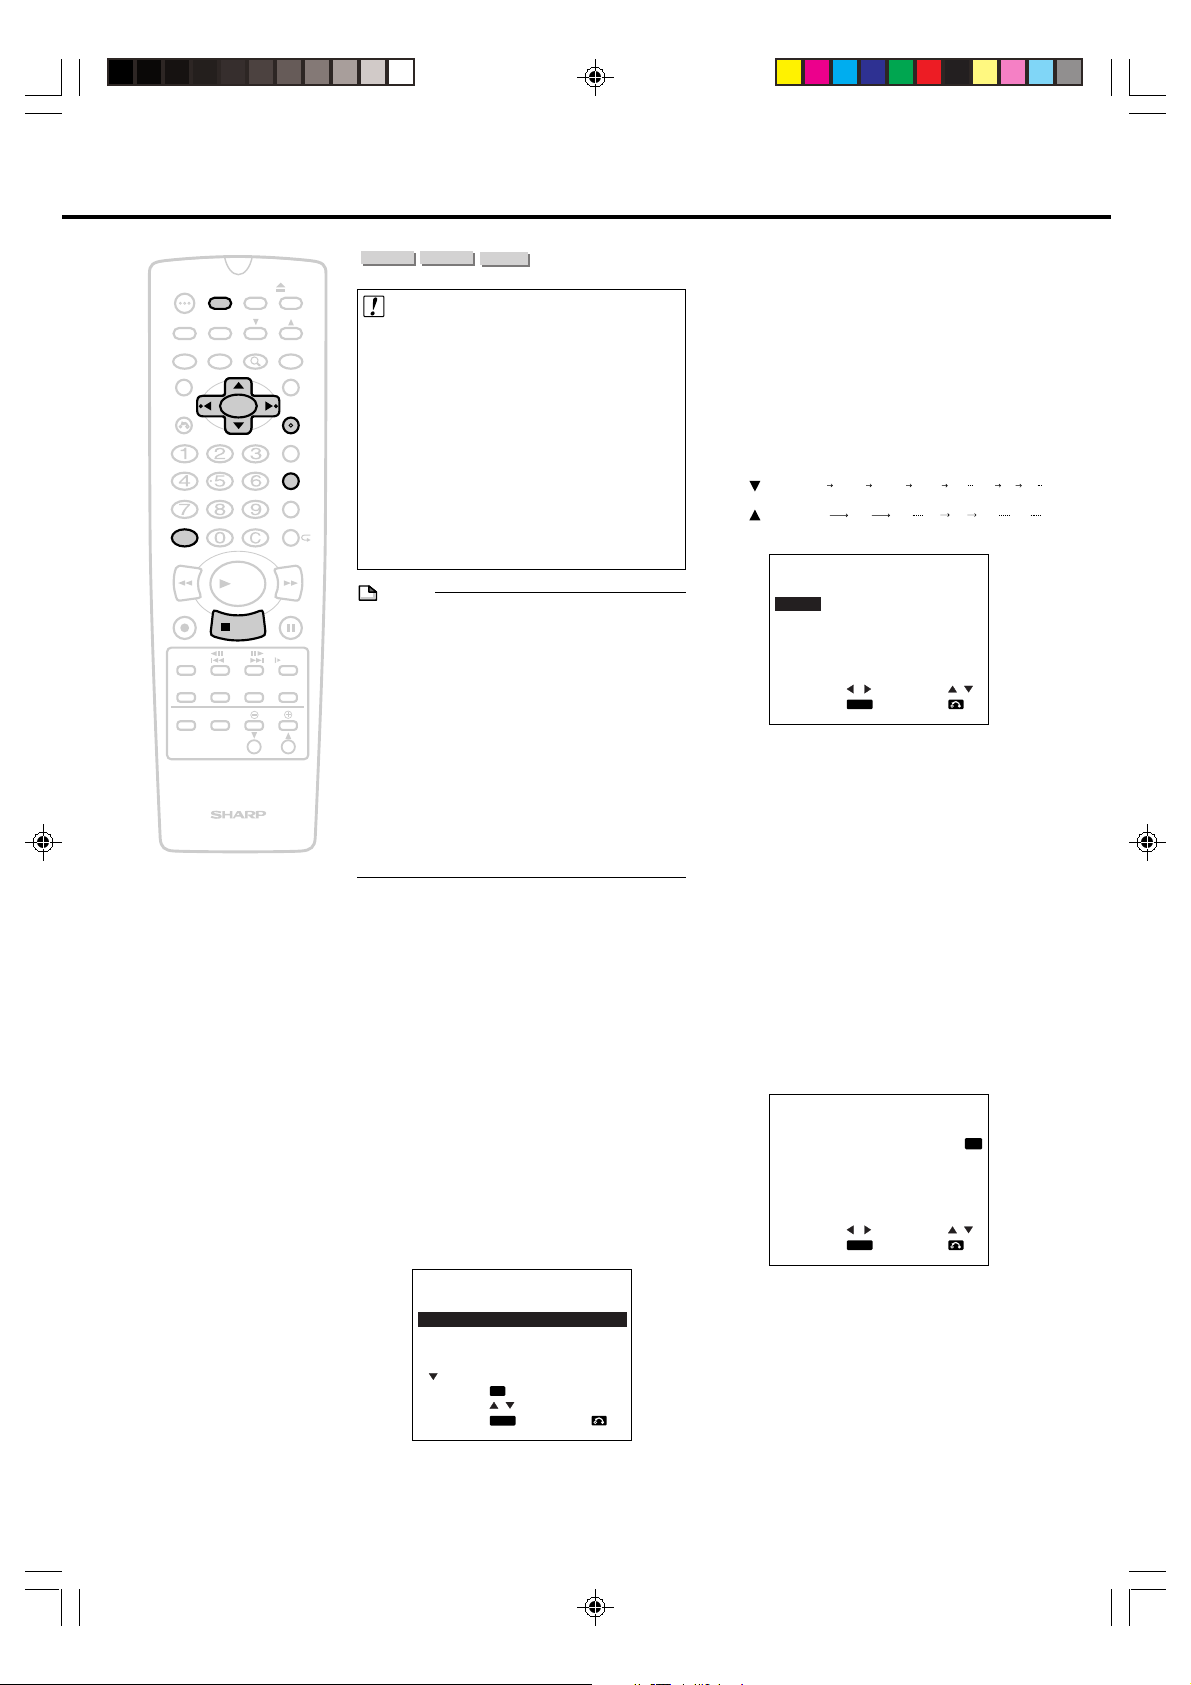
2
Press TIMER PROG. to display
the TIMER PROGRAM screen.
• If you press TIMER PROG. when the
clock has not been set, the clock
setting screen will appear.
TIMER PROGRAM 1/2
DATE CH START STOP
-/-- --- --:-- --:----
-/-- --- --:-- --:----
-/-- --- --:-- --:----
-/-- --- --:-- --:----
2/2 REMAIN: 1h11m
FINE
SELECT :
CLEAR :
C
ENTER : RETURN:
ENTER
3
Press SET/ENTER to set the
timer program.
Timer Recording
EDIT
100
OPEN/
CLOSE
POWER
SKIP
SEARCH
AUDIO
TIMER
ON/OFF
TITLE
MENU
ANGLE
SETUP/
FUNCTION
DNR
RETURN
REV FWD
SET/
ENTER
VCR PLUS
+
TIMER PROG.
REC MODE
PROGRAM
AM/PM ERASE
STILL/PAUSE
REC
PLAY
STOP
SLOW
SKIP
F.ADV
ORIGINAL/
PLAY LIST
DISC
TIMER
CH
DISPLAY
ON
SCREEN
POWER
INPUT
VOL
CH
TV CONTROL
ZOOM
INPUT
4
Press ' / " to select the desired
month/day (DATE) and then press
|. The cursor will move to the
next column.
Example: August 10th
• If you want to record every day or
week at the same time, hold when
you select the date.
When pressing: The recording date changes in this sequence:
8/10 MO-FR MO-SA DAILY SAT SUN 8/9 8/8
8/10 8/11 8/12 8/8 8/9 SUN SAT
(next year)
(next year)(present) (tomorrow)
TIMER PROGRAM 1/2
DATE CH START STOP
8/10 --- --:-- --:--
FINE
-/-- --- --:-- --:----
-/-- --- --:-- --:----
-/-- --- --:-- --:----
REMAIN: 1h11m
FINE
SELECT : CHANGE:
ENTER : RETURN:
ENTER
5
Press ' / " to select the desired
channel and then press |.
6
Press ' / " to set the recording
start time (hour digits and minute
digits) and then press |.
Press AM/PM to select “AM” or “PM”.
7
Press ' / " to set the recording
stop time and then press |.
It is not necessary to select AM or PM.
8
Press ' / " to select
the recording
mode.
Example: SP
TIMER PROGRAM 1/2
DATE CH START STOP
8/10 07 9:05
PM
10:35SP
-/-- --- --:-- --:----
-/-- --- --:-- --:----
-/-- --- --:-- --:----
REMAIN: 1h11m
FINE
SELECT : CHANGE:
ENTER : RETURN:
ENTER
DV_RW2U#p54-61.p65 03.1.9, 7:39 PM54
Loading ...
Loading ...
Loading ...