Loading ...
Loading ...
Loading ...
SONOS USER GUIDE
Connect the cables
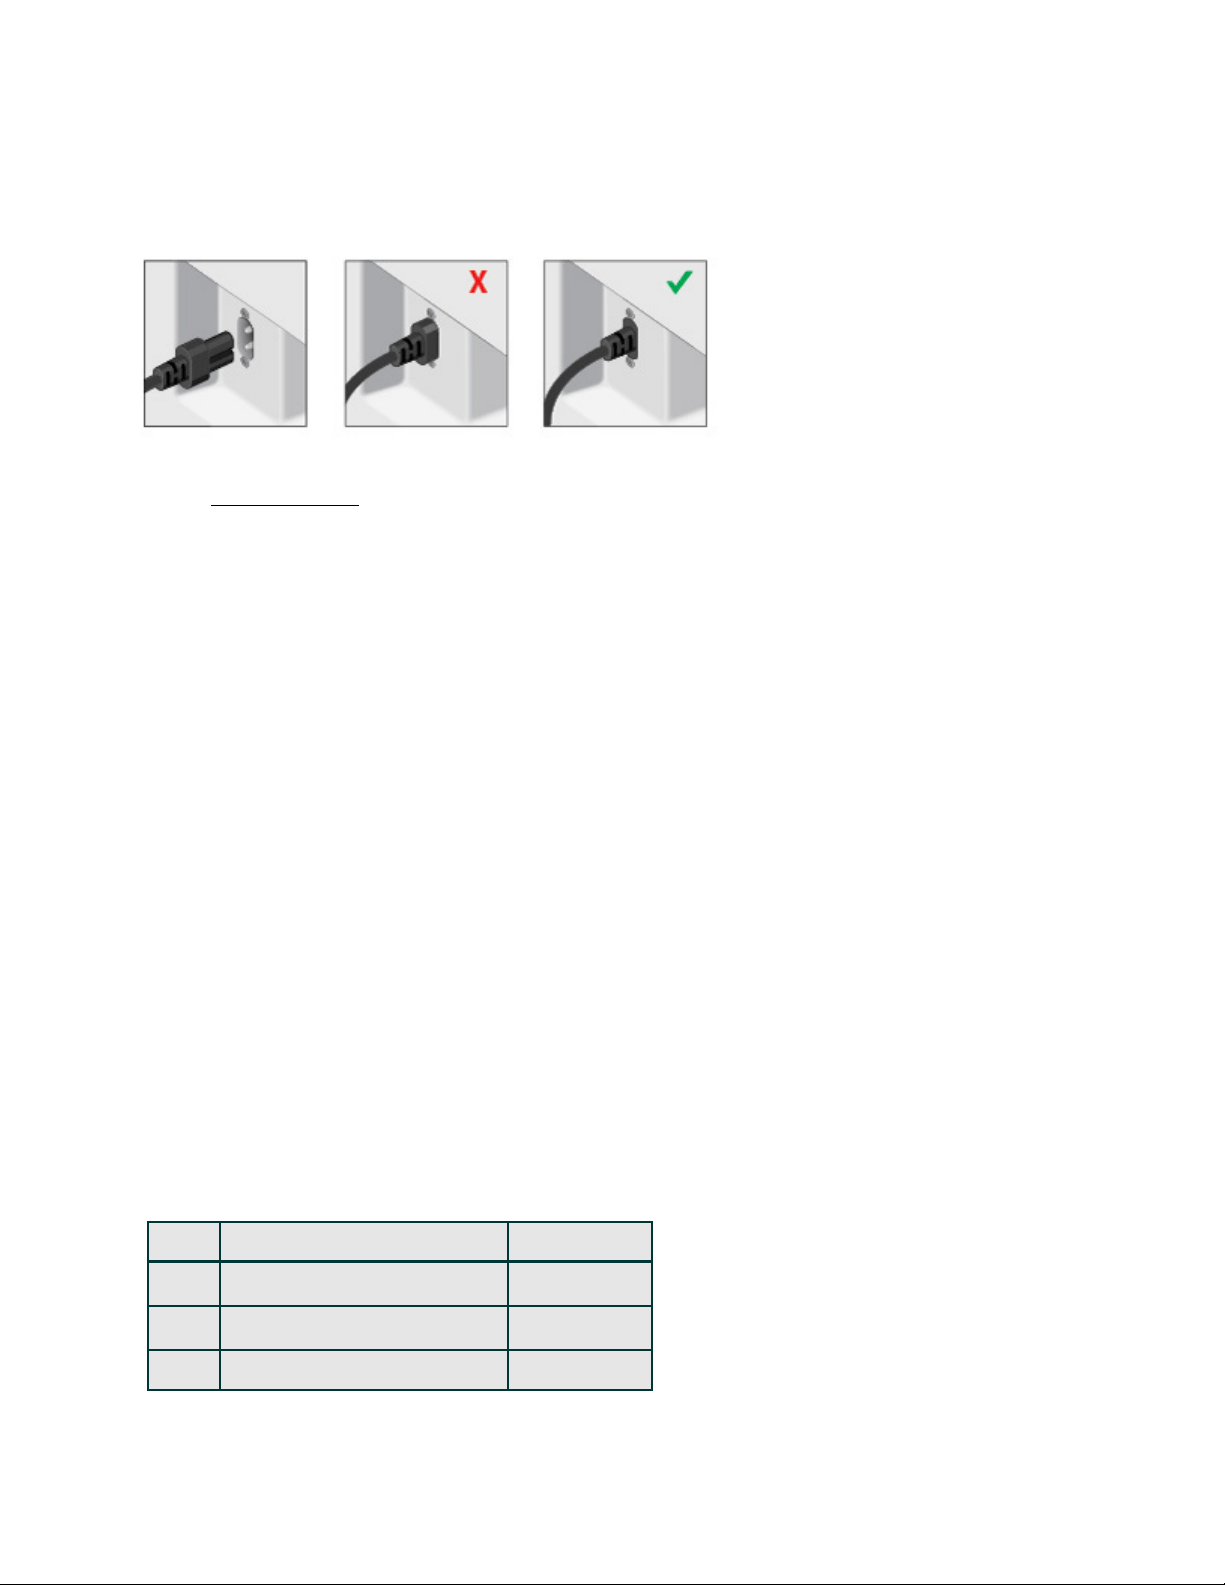
Attach the power cord and plug in the Sub. Be sure to push the power cord firmly into the Sub until it is flush
with the surface.
If you don’t have the app, download it from the app store. You’ll use it to set up and control your Sonos
system. See Getting started. Make sure you set up at least one speaker before adding the Sub.
Note: After the Sub is paired with a Sonos speaker, you won’t see it displayed separately in Rooms. Any
changes you make to that Sonos speaker (volume, mute, music selection) will also affect the Sub.
Sub settings
The Sub’s settings are set during the initial setup process, but you can make changes anytime.
1. Go to the sound settings for the room that’s associated with your Sub.
It appears as room (+Sub) in your list of rooms.
2. Ta p Sub Audio.
3. Choose one of the following options:
• Sub: Choose On or Off to turn the sound from the Sub on and off.
• Sub Level: Use the slider to increase or decrease the volume of the Sub. (You can use this setting to
match the subwoofer level to the level of your main speakers.)
• Phase Control: Choose 0° or 180° to set the phase control for your Sonos Sub or third-party subwoofer.
This can help integrate your subwoofer with other speakers in the room. (You’ll see this setting when you
pair a Sonos Sub or third-party subwoofer with a Sonos Amp or Connect:Amp.)
• Crossover Frequency: Adjust the frequency at which the sound transitions to the subwoofer. By default
this is 80 Hz.
You may wish to choose a different crossover frequency if:
• The main speakers sound distorted at high volumes—moving to a smaller speaker size setting can
help.
• Your attention is drawn to the Sub's location while listening to music—moving to a larger speaker size
setting can help.
1 Compact 110 Hz
2 100 Hz
3 90 Hz
4 Bookshelf / Ceiling 80 Hz
Loading ...
Loading ...
Loading ...