Loading ...
Loading ...
Loading ...
9
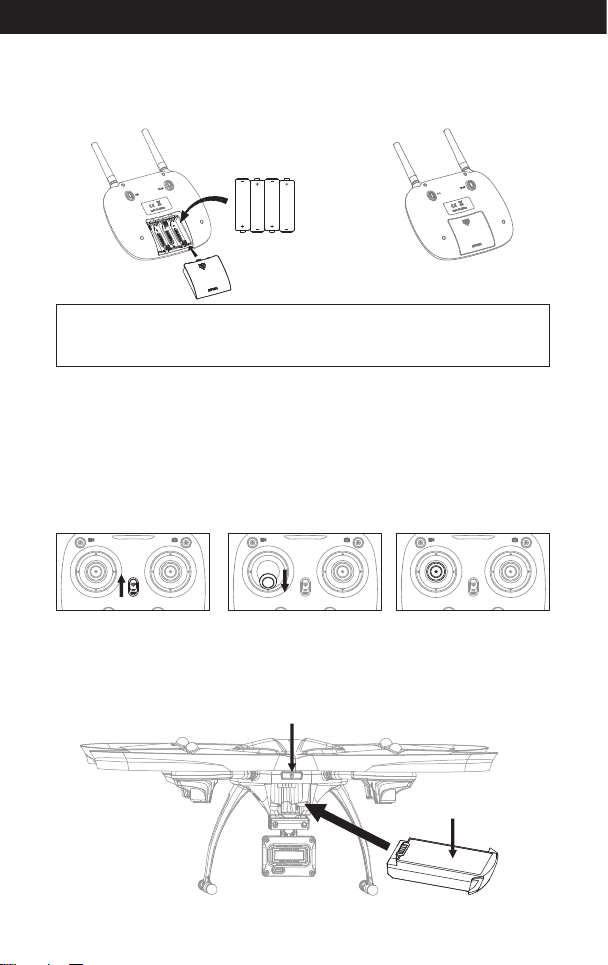
Battery installation:
Open the battery cover on the back side of the transmitter and put 4 alkaline
batteries (AA, not included) into the box in accordance with electrode instructions
as Picture 1(battery not included) ,close the battery cover(Picture 2).
Picture 2Picture 1
1. Make sure the electrodes are correct. 3. Do not mix different type of batteries.
2. Do not mix new with old batteries. 4. Do not charge the non rechargeable battery.
Notice:
Battery Cover
4*1.5V
Battery Cover
Picture 7 Picture 8 Picture 9
1. Turn on the transmitter switch (Picture 7) and the power indicator light flashes
rapidly. Push the Left Stick all the way down to the lowest position and then
release. (Picture 8/9). The power indicator light flashes slowly, which indicates
the transmitter is ready for frequency pairing.
2. Install the Li-po battery into the drone in accordance with the direction of arrow
(Picture 10) , you need to squeeze down the battery buckle, push the battery
until it is secured in its position (Picture 11).
Pre-flight Operation Instruction
Frequency Pairing
Picture 10
Side of sticker up
Drone Power Switch
www.udirc.com
Loading ...
Loading ...
Loading ...