Loading ...
Loading ...
Loading ...
18
2
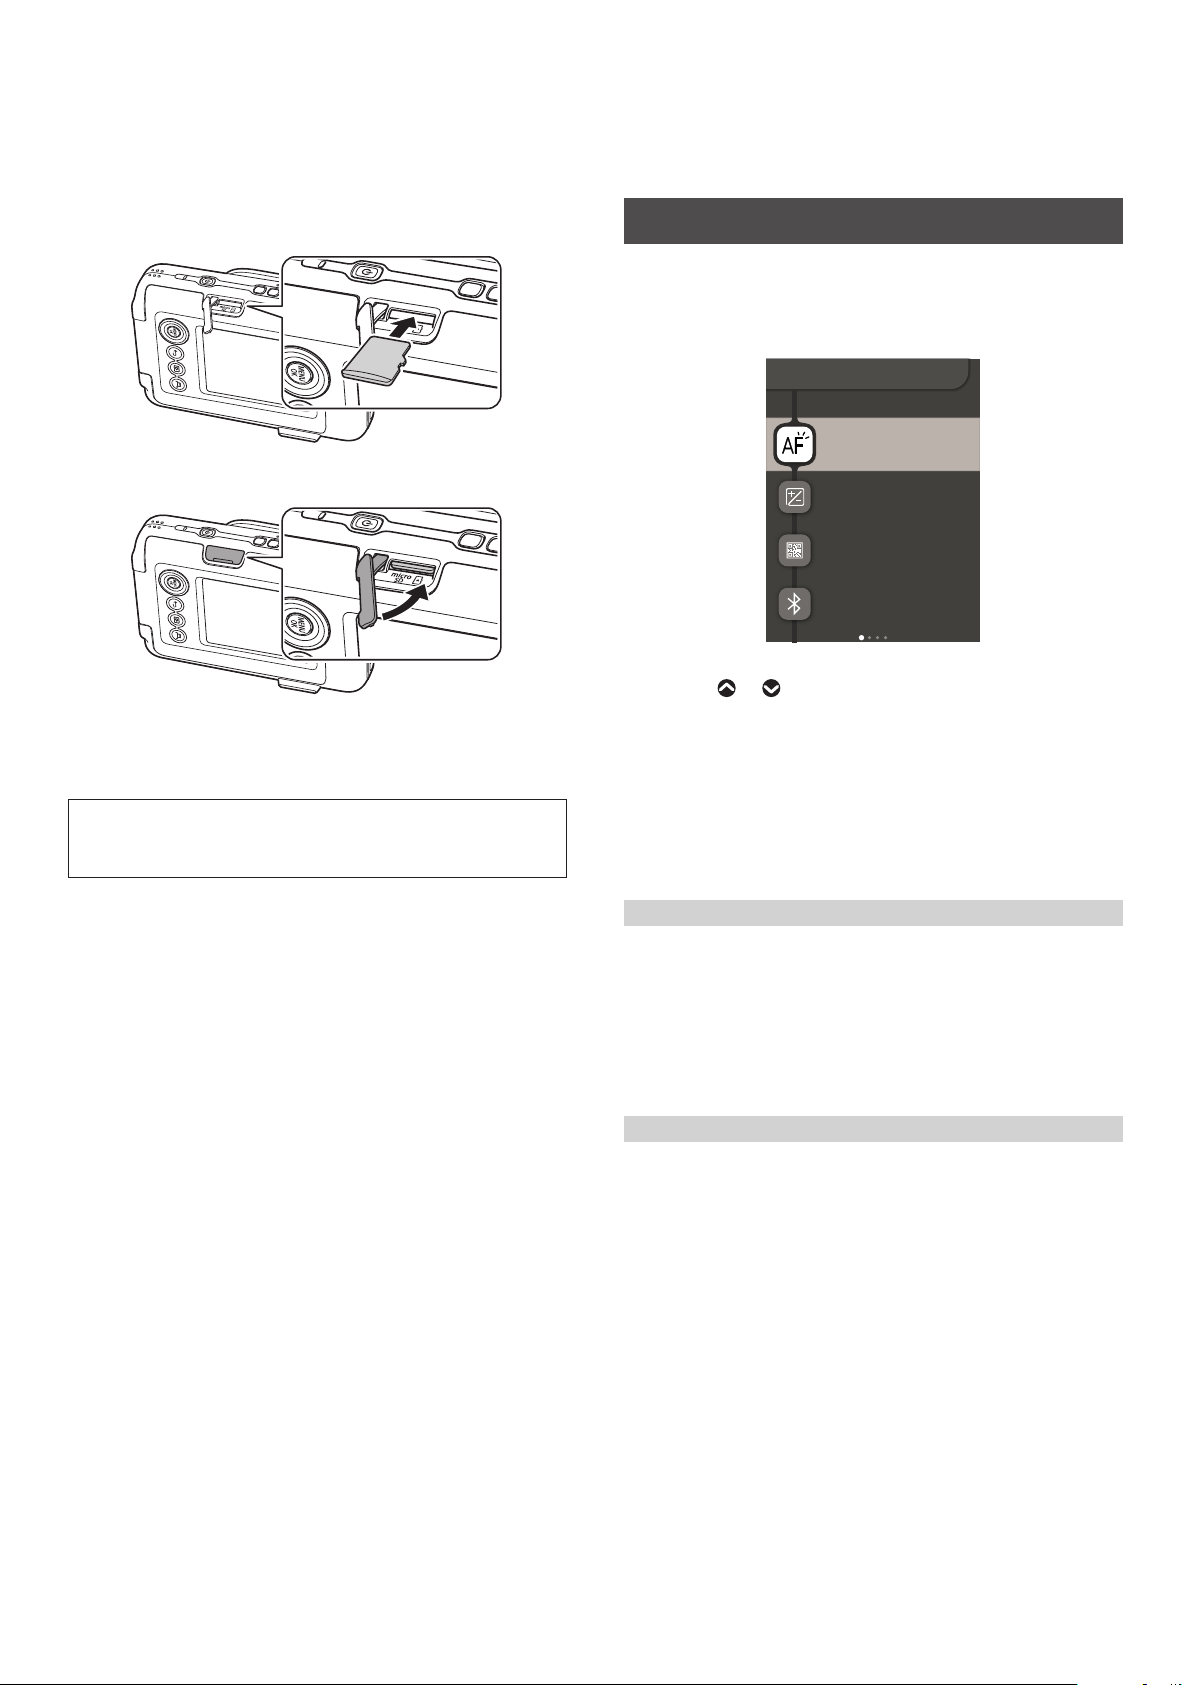
Insert the memory card all the way in until it clicks in
the correct orientation as shown below
1
2
3
FILM
2
3
3
Close the card slot cover
1
2
3
FILM
2
3
• When removing a memory card, push the memory card with
your finger and slowly release your finger. The lock is released
and the memory card can be removed.
Note
When removing a memory card, it may pop out quickly if you
release your finger suddenly. Please release your finger gently.
Using the Shooting Menu
You can change various settings related to shooting from the
Shooting Menu.
1
Press [MENU/OK] on the Shooting Screen
The Shooting Menu displays.
AF ILLUMINATOR
EXPOSURE
PRINT SETTINGS
Bluetooth
SETTINGS
SHOOTING MENU
2
Press or to select the item to set
• For a description of each item, please refer to “Shooting
Menu Items”.
3
Change the settings
4
Press [MENU/OK]
The settings are applied and the display returns to the
Shooting Screen.
■ Shooting Menu Items
[AF ILLUMINATOR]
If you select ON, the AF Illuminator will be lit during the period
from when you press the shutter button halfway until the subject
is in focus, making it easier to focus on dark subjects.
• Depending on the scene, it may be difficult to focus even if the
flash is used.
• When shooting close to the subject, the effect of the AF
Illuminator may not be sufficient.
• Do not use the AF Illuminator close to human eyes.
[EXPOSURE]
Exposure is used when the subject is too bright or too dark, or
when the contrast between the subject and the background
(difference in brightness) is large. Change the exposure value and
adjust the brightness of the image.
• The set exposure value is retained even after moving the image
data to a PC, etc.
For a description of the following items, please refer to “Using the
Set-up Menu”. (See p. 19)
[PRINT SETTINGS] / [Bluetooth SETTINGS] / [CROSS KEY GUIDE] /
[DATE/TIME] / [言語/LANG.] / [SOUND SET-UP] / [PLAYBACK
VOLUME] / [AUTO POWER OFF] / [RESET] / [FRAME DATA RESET] /
[FORMAT] / [FIRMWARE UPGRADE]
Loading ...
Loading ...
Loading ...