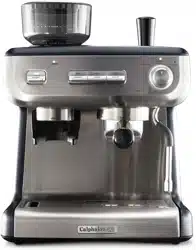
The removable 250g capacity Bean Hopper features 30 easily adjustable Grind Settings. Turn the Hopper from coarse to fine to adjust the Grind Setting & maximize the taste of your espresso.
B. Illuminated Grind Area
LED illumination starts when grinding begins. The coffee grinds are illuminated as they are delivered directly into the Filter Basket. The light automatically fades when grinding is complete.
C. Grinding Cradle
The unique Grinding Cradle holds the portafilter to provide seamless one-touch on-demand grinding. This helps you to control the amount of coffee grinds straight into the Filter Basket.
D. Accessories Storage Home
Area behind the Drip Tray, for storing the One & Two Cup Filter Baskets, Cleaning Disc, Cleaning Brush & Cleaning Pin.
E. Removable Drip Tray, Grill & Grind Bin
Includes a Water Level Indicator which floats through the Stainless Steel Grill to indicate when the tray is full of water & requires emptying.
A removable Grind Bin for collecting overflowed coffee grinds, separate from the water, is located in the Drip Tray. Simply remove the Grind Bin & discard grinds as required.
F. Cord Storage
Conveniently stow excess cord by pushing the cord inside the machine to keep countertop tidy.
G. Non-slip Feet
The non-slip silicone feet ensure that the espresso machine remains stable on the countertop during use.
H. Warming Plate with Tamper Home
Preheats cups & glasses which helps to retain the essential characteristics of true espresso aroma & a rich, sweet taste.
Tamper home located on the top of the Warming Plate for convenient access & storage.
I. Removable 2.8L Water Reservoir
Push back the lid & fill with cold water, or remove the Water Reservoir by opening the Lid, lifting upwards using the Handle located inside.
J. Group Head - 58mm Commercial Size
The wider size allows more even extraction of the tamped coffee grinds.
K. Portafilter - 58mm Commercial Size
The wider size ensures the coffee grinds are more evenly spread, and easier to tamp.
L. Steam & Hot Water Wand
Ball joint movement with silicone cover, allows movement of the Steam Wand to desired position without burning fingers.
M. Extra Tall Cup Height
A large 4 inch space for extracting coffee directly into tall mugs & glasses.
N. Removable Top Burr
Easily removable by lifting the Burr handles when cleaning. (For more information, see pages 28-29]
O. GRINDER Light
Fully illuminated white when ready.
Flashes whilst attempting to grind to indicate the Hopper Gates are not completely open.
Fully illuminated red when Grinder Motor is in protection mode. (For more information, see page 36)
P. ON/OFF Button & Light
Press button to turn on the machine. The ON/OFF LIGHT will illuminate & pulse to indicate it is heating up.
The ON/OFF LIGHT stays fully illuminated when ready.
The machine will automatically enter sleep mode after 20 minutes, the ON/OFF LIGHT will stop illuminating.
Q. Espresso Extraction Buttons
1. ONE SHOT Button
Pours 1 shot of espresso - 1 oz then automatically stops.
2. TWO SHOT Button
Pours 2 shots of espresso - 2 oz then automatically stops.
3. MANUAL SHOT Button
Allows for shot volumes in addition to one & two shot presets.
Press button to start extraction, when desired pour volume is reached press button again to stop.
Automatically stops after 6 ounces.
R. DIAL Features & Lights
DIAL Light
Fully illuminated when ready.
Shuts off when brewing or ® dispensing steam.
Steam Light
Fully illuminated when ready to steam.
Flashes when warming up to steam temperature & when cooling down [purging water] to espresso temperature.
STEAM
Use to heat & froth milk.
HOT WATER
Pours 6 ounces then automatically stops. Use for long black coffee, hot drinks such as tea, instant soups and to warm cups prior to making espresso.
S. CLEAN Light
Fully illuminated blue when a cleaning cycle for the Group Head & Shower Head is required. (For Cleaning Cycle information, see page 25]
Before First Use
Step 1. Remove Packaging
- Ensure all packaging has been removed.
Important: Remove the red plug found at the base of the Water Reservoir.
Step 2. Position Machine
- Ensure the machine is positioned onto a dry, stable, flat & horizontal countertop.
Step 3. Wash & Dry Parts
-Wash the parts listed below in warm water with a mild detergent: Stainless Steel Milk Pitcher Stainless Steel One Cup Filter Basket Stainless Steel Two Cup Filter Basket Hardened Stainless Steel Top Burr Water Reservoir Portafilter Bean Hopper Tamper
- Rinse & allow thorough air drying.
Step 4. Place Accessories
- Accessories Storage Home behind the Drip Tray for the Cleaning Brush & Cleaning Pin. On the left is storage space for nesting the Cleaning Disc, One & Two Cup Filter Baskets.
- Insert the Grind Bin in the space provided on the left side of the Drip Tray.
- Place the Tamper in the detail provided on the Warming Plate.
Step 5. Insert Parts into the Grinder * Removable Top Burr
- Using the two handles insert the Top Burr into the Grinder Collar.
- The arrows on the Top Burr should align to arrows on the Grinder Collar.
- When correctly seated, the Top Burr will be flush with the surface of the Grinder Collar.
- Place handles down, one on each side.
•Removable Bean Hopper
- Align the Hopper Guide with the red Grinder Interlock.
- Insert Bean Hopper into the Grinder Collar.
- Lightly pushing down, turn the Bean Hopper in a clockwise direction to lock the Hopper into place.
- This opens the Hopper Gates [to release coffee beans onto the Burrs). At Grind Setting 30, Hopper Gates are fully open.
- Continue to turn the Bean Hopper in a clockwise direction to set the Grind Setting.
- As a starting point for espresso extraction try Grind Setting 20.
[Further Grind Setting adjustment might be required, see information on pages U-15).
- Fill the Bean Hopper with freshly roasted coffee beans.
Step 6. Preparing to Prime Machine
Important: This priming step must be completed prior to first use.
• Fill Water Reservoir
- Open the Lid and lift upwards using the Handle inside.
- Fill with cold water from the tap.
- Insert the Water Reservoir into position & close the Lid.
Note: Make sure that the Water Reservoir is clean & free of any debris, as any fine particles can block the water flow.
• Power
- Ensure that the Steam & Hot Water DIAL is in the vertical position.
- Insert the Power Plug into a 120V AC power outlet & switch the power on.
- Press the ON/OFF BUTTON to turn on the machine.
- The ON/OFF LIGHT will illuminate & pulse to indicate the Thermoblock is heating up.
- The GRINDER LIGHT will be fully illuminated from turn on.
- When the ON/OFF, and READY LIGHTS are illuminated, the machine is in the READY state for EXTRACTION & DIAL features.
• Insert Portafilter
- Insert the Two Cup Filter Basket in the Portafilter.
- Align the Portafilter with the 'INSERT' position located on the left of the Group Head.
- Insert the Portafilter flat against the Group Head, then turn the Portafilter right all the way to the center position.
Note: Turning the Portafilter to the center position might be tight for the first few uses.
Step 7. Prime Espresso Machine
- Press the TWO SHOT BUTTON & water should start flowing from the Group Head.
- Allow water to run through until it stops.
- The machine will return to the READY state.
Note: For the first few seconds the Pump will make a louder than usual noise as it begins pumping the water through.
- Position Steam Wand over the Drip Tray. -Turn DIAL to HOT WATER.
- Allow water to run through for 20 sec.
- Return DIAL to vertical position.
- The machine will return to the READY state.
- Now the Espresso Machine should be thoroughly primed.
- Wash Portafilter & FiLter Basket in warm water & dry before making your first coffee.
- If water is not flowing from the Group Head or Steam Wand, repeat Step 7.
- If water is still not running through, contact Calphalon Customer Care. Details are on the back page.
Espresso Making Guide
1. Check Water & Beans
Barista Tip: For best espresso results, use filtered water & freshly roasted coffee beans.
2. Start Up
Press ON/OFF BUTTON, LIGHT pulses ON/OFF, & READY LIGHTS are fully = heating up. GRINDER LIGHT fully illuminated = Espresso Machine illuminated = Grinder ready to use. ready to use.
3. Warm Cup - by Hot Water
OR by Warming Plate
Cup can be warmed on the top of the machine when it is ON.
4. Select Filter Baskets
Select either:
- One Cop Filter Basket.
- Two Cup Filter Basket.
5. Warm Group Head, Portafilter & Filter Basket
6. Dose Coffee Grinds
7. Tamp
8. Wipe Excess Grinds
9. Insert Portafilter
10. Position Cup
11. Espresso Extraction
12. Remove Coffee Cake
13. Prep Milk Pitcher
14. Before Frothing Milk
Barista Tip:
For best milk frothing results, ensure steam has first heated up (STEAM LIGHT fully ON).
You will hear the Pump start.
15. Position Steam Wand
16. Start Frothing Milk
17. Milk Frothing
18. Purge & Clean Steam Wand
Barista Tip:
To keep optimum Steam Wand performance, always purge & clean the Steam Wand after frothing milk.
19. Milk Finishing Touches
20. Thermoblock Auto Purge
21. Wash Parts
22. Drip Tray Clean Up
Care & Cleaning - Espresso Machine
The espresso making process involves extracting oils out of coffee grinds. Deposits of grinds & oils build up over time, affecting the taste of the coffee & operation of the Espresso Machine.
Purging water through the Group Head & Steam Wand, before & after making each coffee, is the easiest way to keep your Espresso Machine clean.
[See Espresso Making Guide pages 10-13]
Cleaning Accessories & Removable Parts
- Clean parts in warm water with a mild detergent, rinse & dry.
Dishwasher Safe parts:
- Stainless Steel Milk Pitcher
- Stainless Steel Drip Tray GrilL
- Stainless Steel One Cup Filter Basket
- Stainless Steel Two Cup Filter Basket
- Cleaning Disc
Dishwasher Safe TOP SHELF ONLY parts:
- Hardened Stainless Steel Top Burr
- Grind Bin
NON Dishwasher Safe parts:
- Water Reservoir
- Portafilter
- Bean Hopper
- Drip Tray
- Tamper
- Cleaning Pin
- Cleaning Brush
Cleaning Warming Plate & Exterior
• When Required
Wipe over the machine with a soft damp cloth with a mild detergent and wipe dry.
CAUTION: To prevent damage to the appliance do not use alkaline cleaning agents, abrasives or metal scourers.
CAUTION: Do not immerse the machine in water.
Cleaning Drip Tray & Grind Bin
•When Required
Empty if the red Water Level Indicator appears through the Stainless Steel Grill, otherwise water will overflow.
Note: Over time it is normal for the inside of the Drip Tray & Grind Bin to be stained by the oils in the coffee grinds.
• Weekly
Clean in warm water with a mild detergent, rinse & dry.
Cleaning Portafilter & Filter Basket
• Every Time
Wash after each use by rinsing them with warm water under the tap.
• Regular Intervals
In warm soapy water using a mild detergent, rinse & dry.
Cleaning Shower & Group Head
• Every Time
Run water through before making an espresso.
[See Espresso Making Guide pages 10]
• Weekly
- Purge water through the Group head by pressing the ONE SHOT BUTTON.
- Allow water to run through until it stops.
- With the Cleaning Brush remove any coffee grinds from around the Group Head inside rim and Silicone Seal. Wipe the Shower Head with a damp cloth.
Cleaning Tablet
Espresso Machine Cleaning Tablets are available for purchase online or at major retailers.
Cleaning Cycle
The CLEAN LIGHT will illuminate blue to indicate a Cleaning Cycle is required.
The Cleaning Cycle takes approximately 7 minutes to complete.
• Preparing for Cleaning Cycle
- Ensure there is at least 1 Liter of water in the Reservoir.
- Empty the Drip Tray & replace.
- The machine is on and in the READY state.
- Place the Two Cup Filter Basket & the Cleaning Disc into the Portafilter.
- Place one Espresso Machine Cleaning Tablet in the middle of the Cleaning Disc in the space provided.
- Insert PortafiLter into the Group Head.
•Start the Cleaning Cycle
- Simultaneously press & hold the ON/OFF & MANUAL BUTTONS for 4 seconds. The machine will beep and the Cleaning Cycle will start.
Note: The Cleaning Cycle can be exited at any point by pressing the ON/OFF BUTTON.
- The ON/OFF & CLEAN LIGHTS will flash during the cleaning cycle.
- Water will purge into the Drip Tray and small amounts of water will pour from the Portafilter spouts.
•Cleaning Cycle Complete
- The machine will beep and the ON/OFF & CLEAN LIGHTS will stop flashing.
- The machine will return to the READY state.
- Remove the Portafilter from the Group Head. Check tablet has been dissolved.
Note: If the tablet has not been dissolved, insert the Portafilter back into the Group Head, empty the Drip Tray & replace.
Repeat the 'Start the Cleaning Cycle' section.
•Cleaning Cycle Clean Up
- Purge the Group Head by pressing the ONE SHOT BUTTON and water should flow.
- Allow water to run through until it stops.
- Wash the Drip Tray, Portafilter & Cleaning Disc in warm water with a mild detergent, rinse & dry.
Group Head Silicone Seal
A Silicone Seal is located in the Group Head and creates a seal against the Filter Basket when making an espresso.
Important: When not being used, we recommend not to leave the Portafilter inserted into the Group Head, as this will reduce the life of the Silicone Seal.
Cleaning Steam Wand
• Every time
- After frothing milk purge the Steam Wand by turning the DIAL to HOT WATER for just 1-2 seconds.
- Wipe the Steam Wand with a damp cloth. (See Espresso Making Guide page 13)
• 2-3 Months
- Soak the Steam Wand overnight in the Milk Pitcher with warm water & one Espresso Machine Cleaning Tablet.
- In the morning remove the Pitcher and rinse ensuring that all traces of the solution have been removed.
- Wipe Steam Wand with a damp cloth ensuring that all traces of the cleaning tablet have been removed.
- Run Hot Water through the Steam Wand for 40 seconds.
• Unblocking Steam Wand
If the Steam Wand Tip becomes clogged with milk residue:
- Insert the thicker 'STEAM' Cleaning Pin up the Steam Wand Tip hole and remove.
- Run Hot Water through the Steam Wand for 40 seconds.
• Steam Wand Remains Blocked:
- Unscrew the Steam Wand Tip and soak overnight in the Milk Pitcher with warm water & one Espresso Machine Cleaning Tablet.
- In the morning rinse the Pitcher & Steam Wand Tip under running water ensuring all traces of the cleaning tablet have been removed.
- Use the thicker 'Steam' Cleaning Pin to clean the Steam Wand Tip.
- Ensure red 0-ring is present & undamaged.
- Screw the Steam Wand Tip back into the Steam Wand Arm.
- Run Hot Water through the Steam Wand for 40 seconds.
Cleaning Filter Baskets
• 2-3 Months
- Soak the Filter Basket(s) overnight in the Milk Pitcher with warm water & one Espresso Machine Cleaning Tablet.
- In the morning rinse the Pitcher & Filter Basket(s) under running water ensuring all traces of the cleaning tablet have been removed.
- Place a Filter Basket into Portafilter (without coffee grinds) and insert into Group Head.
- Press the ONE CUP BUTTON.
- Allow water to run through until it stops.
• Unblocking Dual Wall Filter Baskets
If the Dual Wall Filter Basket (not supplied with the Espresso Machine) becomes clogged with coffee grinds:
- Insert the thinner 'FILTER' Cleaning Pin in the exit hole and remove.
- Place Filter Basket into Portafilter (without coffee grinds) and insert into Group Head.
- Press the ONE CUP BUTTON.
- Allow water to run through until it stops.
- Repeat if needed.
Care & Cleaning - Grinder
Conical Burrs are used to grind coffee beans to a suitable size for espresso extraction. Deposits of grinds & oils build up over time, affecting the taste of the espresso & operation of the integrated Grinder.
Cleaning Grinding Cradle & Grind Outlet
• Weekly
Remove any coffee grinds from the Grinding Cradle & Grind Outlet with the Cleaning Brush and wipe with a damp cloth, wipe dry.
Cleaning the Bean Hopper
• 2-3 Months
If the Grinder is used frequently [everyday), the Bean Hopper needs to be cleaned to ensure best performance.
CAUTION: To prevent damage to the appliance do not use alkaline cleaning agents, abrasives or metal scourers.
CAUTION: Do not immerse the machine in water.
• Preparing to Clean Bean Hopper
- Turn off the machine, switch off & unplug at power outlet.
- Make note of the current Grind Setting [to use as the starting point after cleaning).
• Remove and Clean Bean Hopper
-Turn Bean Hopper fully counterclockwise, to close the Hopper Gates and unlock the Bean Hopper.
- Remove the Bean Hopper from the Grinder Collar and store any remaining beans in an airtight container to preserve their freshness.
- Wash the Bean Hopper in warm soapy water, then rinse & dry. Let the Bean Hopper stand to allow thorough air drying before replacing.
•Replace Bean Hopper
- Ensure the Grinder Collar is clear of coffee beans or grinds.
Note: Coffee grinds caught under the Top Burr may prevent the Bean Hopper from seating correctly. If this happens grind off excess coffee beans, see page 28.
- Ensure the Hopper Guide is aligned with the vertical white lines on the Hopper base.
- Align & insert the Bean Hopper into the Grinder Collar and firmly pushing down turn clockwise to lock into place and open the Hopper Guide.
- Reset to the Grind Setting noted prior to cleaning.
Note: After cleaning, the optimum Grind Setting may have changed. To find the optimum Grind Setting use the information on pages 14-15.
Cleaning & Unblocking Grinder Burrs, Collar, Grind Chamber and Outlet
• 1-2 Months
If the Grinder is used frequently [everyday), the Burrs need to be cleaned to ensure best performance of the integrated Grinder. Regular cleaning helps the Burrs achieve consistent grinding results, which is especially important when grinding coffee beans for espresso.
•Grind Off Excess Coffee Beans
- The machine is on and in the READY state.
- Make note of the current Grind Setting (to use as the starting point after cleaning).
- Insert Two Cup Filter Basket into the Portafilter.
- Insert Portafilter into Grinding Cradle.
-Turn Bean Hopper fully counterclockwise to close the Hopper Gates and unlock the Bean Hopper. The Bean Hopper will pop up slightly.
- Place your hand on top of the Bean Hopper and push down lightly. At the same time push down the Portafilter to activate the Grinder. Continue grinding until no more coffee grinds are emitted from the Grinder.
- Remove the Portafilter and dispose of the waste grinds as these will be too coarse for espresso coffee.
- Remove the Bean Hopper from the Grinder Collar and store any remaining coffee beans in an airtight container to preserve their freshness.
• Preparing to Clean
- Turn off the machine, switch off & unplug at power outLet.
CAUTION: Ca re should be taken when cleaning Grinder Burrs as they are sharp.
• Cleaning Top Burr
- Fold the two handles up and lift the Top Burr from the Grinder Collar.
- Wash the Top Burr in warm soapy water with a mild detergent, rinse & dry.
Note: Spots & marks on the surface of the Burrs are part of the hardening process [for extra-long life). These marks do not affect the performance of the Grinder or the taste of the espresso.
•Cleaning & Unblocking Bottom Burr and Grind Chamber
- Use the Cleaning Brush or a Vacuum Cleaner to thoroughly clear the parts and surfaces in the Grind Chamber of fine coffee grinds. A damp cloth can be used to wipe the inside of the Grind Collar.
- Allow thorough air drying.
CAUTION: Do not pour water or any other liquid into the Grind Chamber.
• Cleaning & Unblocking Grind Outlet
- Feed the Cleaning Brush up into the Grind Outlet from below, wiping & brushing the inside surfaces.
- If the Grind Outlet is clear the bristles will be visible inside the Grind Chamber.
•ReplaceTop Burr
- Ensure the dot on the Top Cover aligns with the dot on the Grinder Collar.
- Using the two handles insert the Top Burr into the Grinder Collar.
- The arrows on the Top Burr should align to arrows on the Grinder Collar.
- When correctly seated, the Top Burr will be flush with the surface of the Grinder Collar.
- Place handles down, one on each side.
• Replace Bean Hopper
- Ensure the Hopper Guide is aligned with the vertical white lines on the Hopper base.
- Align & insert the Bean Hopper into the Grinder Collar and firmly pushing down turn clockwise to lock into place and open the Hopper Guide.
- Reset to the Grinder Setting noted prior to cleaning.
- Refill the Bean Hopper with coffee beans.
Note: After cleaning, the optimum Grind Setting may have changed. To find the optimum Grind Setting use the information on pages 14-15.
Note: This appliance has no user serviceable parts. Any servicing beyond that described in the Cleaning Section should be performed by an Authorized Service Representative only. See warranty available online.
Troubleshooting Guide
Espresso Machine
PROBLEM
Possible Cause
What To Do
Portafilter is tight to turn in the Group Head
The Group Head Silicone Seal is new and needs bedding in.
Keep using. This Seal will bed in during the first few uses and become easier to turn.
Too many coffee grinds used
Dose less coffee grinds.
Portafilter is loose or comes off during espresso extraction
Portafilter is not attached correctly or has not been tightened sufficiently.
Ensure all three tabs of the Portafilter are fully inserted into the Group Head and rotated to the center position. See Espresso Making Guide, page 11.
No Filter Basket inserted in the Portafilter.
Ensure a Filter Basket is inserted into the Portafilter before using in the Group Head.
Espresso squirts or trickles down the side of the Group Head during extraction
Coffee grind is too fine.
Change to a coarser Grind Setting.
Too many coffee grinds used.
Dose less coffee grinds.
Coffee grinds tamped too hard.
Apply less force during tamping.
Top edge of Filter Basket has not been cleaned of loose coffee grinds.
Wipe around top edge of the Filter Basket before inserting into Group Head. See Espresso Making Guide, page 11.
Group Head inside rim, Silicone Seal or Shower Head is dirty.
Clean the parts with the Cleaning Brush and damp cloth.
See Care & Cleaning, page 24.
Espresso is too cold
Coffee beans being stored in the fridge or freezer
Store coffee beans in a dry, airtight container Place in a cool dark cupboard.
Custom extraction temperature being used.
Use the default 198°F extraction temperature. See Customizable -Extraction Temperature, page 22
Cup or glass was cold prior to espresso pour.
Pour hot water from the Steam Wand into the cup before extracting espresso. See Espresso Making Guide, page 10.
Group Head or Portafilter not warmed before use.
Hold the Portafilter under the Group Head and press the ONE SHOT BUTTON. Allow water to run through. See Espresso Making Guide, page 10.
No espresso pours
No water in the Water Reservoir.
Fill reservoir with water. Prime water through the Group Head, press the ONE SHOT BUTTON. Allow water to run through.
Coffee grind is too fine.
Change to a coarser Grind Setting.
Too many coffee grinds used.
Dose less coffee grinds.
Coffee grinds tamped too hard.
Apply less force during tamping.
Custom shot volume being used.
Reset to the default shot volumes. See Customizable - Shot Volumes Temperature, pages 20-21
The Filter Basket is blocked.
See Care & Cleaning, pages 24 & 26.
Group Head is dirty.
A Cleaning Cycle is required. See Cleaning Cycle, page 25.
Group Head is bLocked.
A DescaLing Cycle is required.
See Descaling Cycle, pages 30-31.
Espresso pours out in drips
[Over Extracted]
Coffee grinds are too fine.
Change to a coarser Grind Setting.
Too many coffee grinds used.
Dose less coffee grinds.
Coffee grinds tamped too hard.
Apply less force during tamping.
Espresso Machine has scale build up.
A Descaling Cycle is required.
See Descaling Cycle, pages 30-31.
Espresso does not have any crema, or crema is thin
(Under Extracted]
Coffee beans are old or dry.
Use freshly roasted coffee beans. See Tips for Grinding, page 14.
Coffee grinds too coarse.
Change to a finer Grind Setting.
Not enough coffee grinds used.
Dose more coffee grinds.
Grinds not tamped (compacted] enough.
Tamp more firmly. See Espresso Extraction Guide section, page 15.
Espresso shot volume too much or too little
Custom shot volumes being used.
Restore to default shot volumes or change your custom shot volumets]. See Customizable - Shot Volumes, page 21
Espresso tastes bitter
Type of coffee beans being used.
Try different brands of coffee beans.
Custom extraction temperature being used.
Use the default 198°F extraction temperature. See Customizable -Extraction Temperature, page 22
Steam function has been used just before extracting espresso.
Allow time for water to purge the Thermoblock and cool down before extracting espresso. The STEAM LIGHT should have finished flashing.
(used] espresso puck is wet
A little water will remain on top of the used espresso puck.
Rest Portafilter on the Drip Tray for 5 sec to allow the water to dissipate before disposing puck.
Too many coffee grinds used.
Dose less coffee grinds.
Dual Wall Filter Baskets being used.
Dual Wall Filter Baskets will keep the puck more wet than Single Wall Filter Baskets.
Espresso
Uneven tamping.
Ensure coffee grinds are tamped evenly.
pours into cup unevenly
Obstruction in the Group Flead or PortafiIter.
Check there is nothing obstructing the Group Flead or Portafilter & clean.
Pump makes an unusual noise
No water in the reservoir.
Fill reservoir with water.
Let the machine return to the READY state if it is cooling down after steam. Prime water through the Group Flead, press the ONE SHOT BUTTON. Allow water to run through.
Water Reservoir is not correctly positioned.
Insert the Water Reservoir into the back of the unit.
Red Plug from the packaging may still be inserted.
Remove the red packaging plug found at the base of the Water Reservoir
New Pre-infusion Profiles has been selected.
Different Pre-infusion Profiles make different noise at the start of an espresso extraction. See Customizable - Pre-infusion Profiles, page 23.
Water around Drip Tray area or on countertop
Water overflowing from Drip Tray.
Empty if the red Water Level Indicator appears through the Drip Tray Stainless Steel Grill.
Drip Dray not present when Thermoblock is auto purging.
Keep Drip Tray in place, when cooling to espresso temperature. The STEAM LIGHT flashes and water purges into Drip Tray. See Espresso Making Guide, page 13.
Milky coffee is too cold
Milk may not be heated enough.
Ensure that milk is heated properly during frothing, but be sure not to heat too much and boil the milk.
See Tip for Milk Frothing, pages 16-17.
No steam from the Steam Wand
Steam Wand Tip is blocked.
See Care & Cleaning, page 26.
No water in the Water Reservoir.
Fill reservoir with water. Run hot water through the Steam Wand to ensure water flows.
Espresso Machine has scale build up.
A Descaling Cycle is required.
See Descaling Cycle, pages 30-31.
Steam Wand making a screeching noise
Steam Wand Tip too deep.
Lower Milk Pitcher. Ensure the Steam Wand Tip is positioned correctly when frothing. See Tip for Milk Frothing, pages 16-17.
Not enough foam when frothing
Milk is not fresh.
Ensure the milk being used is fresh.
MiLk temperature is too warm.
Ensure you start frothing with milk that is around 39°F.
Type of Milk Pitcher being used.
For best results use a chilled Stainless Steel Milk Pitcher.
Milk has been boiled.
Start again with fresh, chilled milk. Heat till the MiLk Pitcher can only be held for approximately 3 second, 140-U9°F.
The milk is making bubbles rather than microfoam.
Ensure the Steam Wand Tip is positioned correctly when frothing. Tap the Pitcher on the countertop when finished to release trapped air bubbles. See Tip for Milk Frothing, pages 16-17.
MiLk is not taking in enough air.
Keep the Steam Wand Tip just under the surface of the milk. This will help introduce air into the milk to create microfoam.
Grinder
Optimum Grind Setting is producing an under extracted espresso
New Burrs are bedding in. This is normal for the first few uses.
Turn the Bean Hopper clockwise in small increments to a finer Grind Setting to keep an optimum espresso extraction. Use the information on pages U-15 to help.
Beans are losing freshness.
Not enough coffee grinds used.
Dose more coffee grinds.
Grinds not tamped (compacted) enough.
Tamp more firmly. See Espresso Extraction Guide section, page 15.
GRINDER LIGHT does not illuminate after pressing ON/OFF BUTTON
The machine is not plugged into the power outlet.
Insert in the Power Plug into power outlet & switch on.
The Bean Hopper is not seated correctly & not activating the red Interlock Pin.
Turn the Bean Hopper in a clockwise direction to lock into place.
See Care & Cleaning, page 29.
GRINDER LIGHT flashes when trying to grind beans.
Hopper Gates are closed or not fully open.
Turn the Bean Hopper in a clockwise direction to a Grind Setting between 30-0 to fulLy open the Hopper Gates. See Removable Bean Hopper section, page 8.
GRINDER LIGHT illuminated red
Grinder Motor in protection mode to prevent overheating. Grinder has been used for long periods in a short space of time.
Leave the Grinder for 5 minutes. The GRINDER LIGHT will illuminate white to indicate normal use can be resumed.
No coffee grinds coming from the Grinder Outlet
No coffee beans in the Bean Hopper.
Fill the Bean Hopper with freshly roasted coffee beans.
Hopper Gates are closed or not fully open.
Turn the Bean Hopper in a clockwise direction. At Grind Setting 30, Hopper Gates are fully open. See Removable Bean Hopper section, page 8.
The Grind Chamber or Outlet is blocked.
Grinder needs cleaning.
See Care & Cleaning, pages 28-29.
Coffee grinds are coarse when on a fine Grind Setting
Grind Setting not correct.
Adjust the Grind Settings by turning the Bean Hopper. See Tips for Grinding, & Extraction, pages 14-15.
Top Burr not seated correctly. Coffee beans or grinds are caught around & under the Top Burr.
Top Burr needs cleaning.
See Care & Cleaning, pages 28-29.
Espresso is under extracted even with a fine coffee grind
Not enough coffee grinds used.
Dose more coffee grinds.
Beans are too old.
Use freshly roasted beans. Old coffee beans, no matter the Grind Setting, will have a fast extraction and will produce an under extracted tasting espresso.
Grind Setting cannot be adjusted
The Bean Hopper is not seated correctly.
Remove the Bean Hopper & replace. See Replace Bean Hopper section, page 27.
Coffee beans or grinds are caught around the Top Burr or Grinder Collar.
Remove the Bean Hopper & Top Burr. Use the Cleaning Brush or Vacuum Cleaner as necessary to clear loose coffee beans or grinds. See Replace Bean Hopper section, page 27.
Bean Hopper cannot be locked into position
Grinder Collar not aligned to the Top Cover.
Ensure the dot on the Top Cover aligns with the dot on the Grinder Collar.
See Replace Top Burr section, page 29
Coffee beans or grinds are caught in the Top Burr or Grinder Collar.
Remove the Bean Hopper & Top Burr. Use the Cleaning Brush or Vacuum Cleaner as necessary to clear loose coffee beans or grinds. See Replace Bean Hopper section, page 27.
The Top Burr is not seated correctly.
Make sure the Top Burr is correctly aligned and that the two handles are placed one on each side.
See Replace Top Burr section, page 29.
Top Burr does not sit in the Grinder Collar correctly
Grinder Collar not aligned to the Top Cover.
Ensure the dot on the Top Cover aligns with the dot on the Grinder Collar.
See Replace Top Burr section, page 29.
Coffee beans or grinds are caught around & under the Top Burr
Remove the Top Burr and replace the Bean Hopper. Hold the Bean Hopper down with your hand, do not turn. Insert the Portafilter into the Grinding Cradle and push down to activate the Grinder. The coffee grinds will fall out the Grind Outlet.
The Top Burr is not seated correctly.
Make sure the Top Burr is correctly aligned and that the two handles are placed one on each side.


 Fully illuminated white when ready.
 Flashes whilst attempting to grind to indicate the Hopper Gates are not completely open.
 Fully illuminated when ready.
 Shuts off when brewing or ® dispensing steam.
 Flashes when warming up to steam temperature & when cooling down [purging water] to espresso temperature.