All parts that come into contact with water, coffee or milk are BPA Free
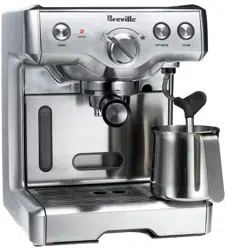
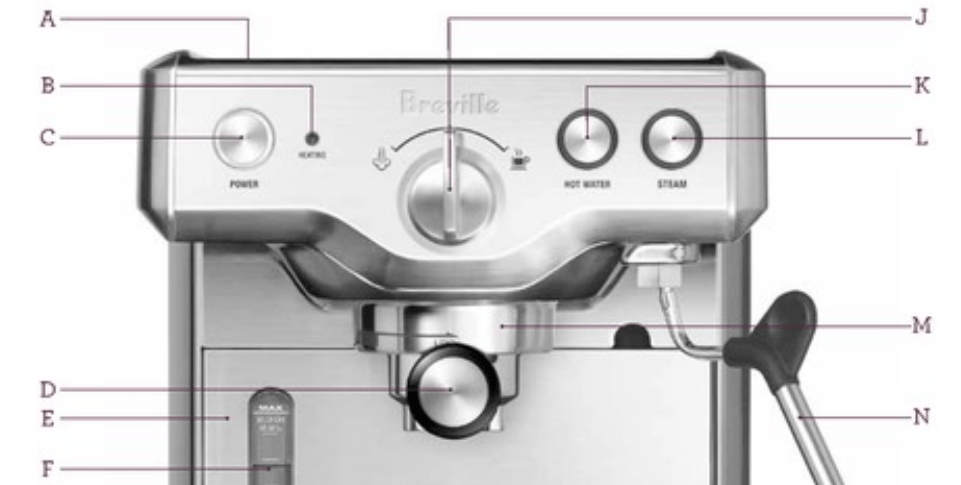
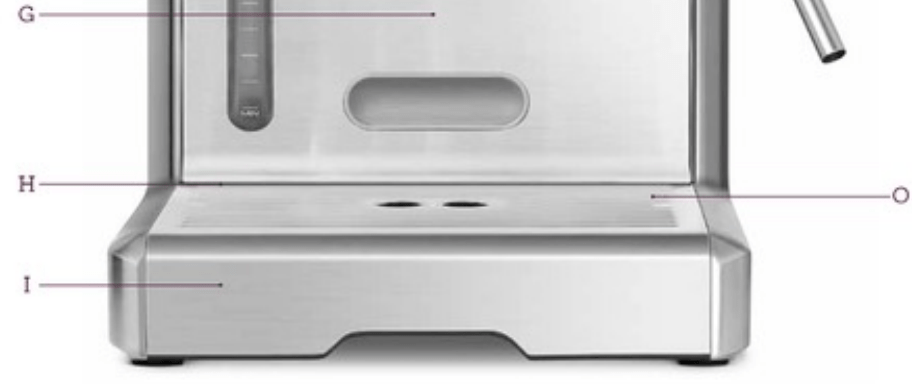
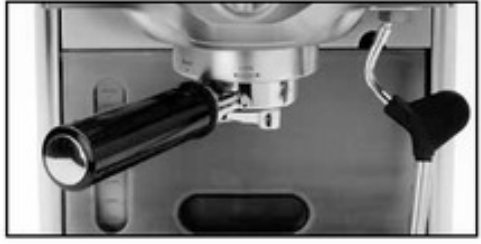
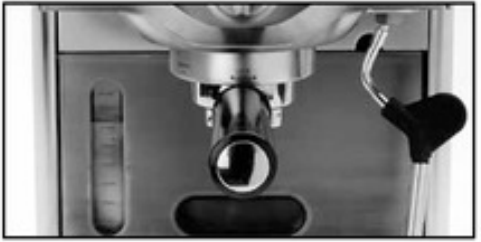
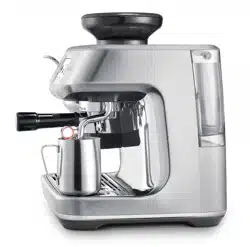
A. Cup warming tray B. HEATING light C. POWER button D. Portafilter E. Removable 75oz (2.2L) water tank F. Water level indicator G. 4" cup height clearance H. ‘Empty Me’drip tray indicator I. Removable drip tray and grid J. Selector control K. HOT WATER button L. STEAM button M. Group head N. 360® swivel steam wand with removable froth enhancer O. Concealed storage tray
NOT SHOWN
Italian Made IS Bar Pump
Thermoblock Heating System
1 Cup & 2 Cup ‘Dual Wall' Filters
ESE Pod Filter
Stainless Steel Frothing Jug
Measuring/Tamping Spoon
Cleaning Tool
Breville Assist” Plug
Assembling your Breville Product
Ensure you have located all parts and accessories before throwing out the packaging.
WASHING ACCESSORIES
Remove the Drip Tray and Water Tank and wash all parts and accessories in warm, soapy water using a non-abrasive washing liquid. Rinse and dry thoroughly.
REASSEMBLY
Step 1
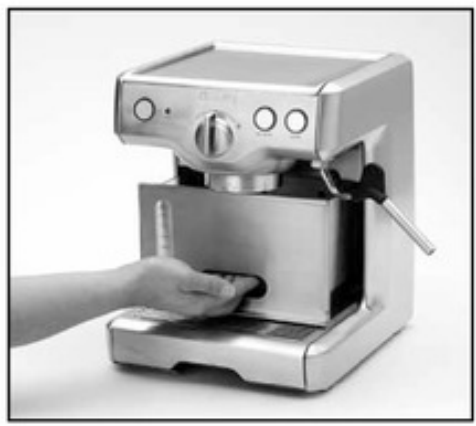
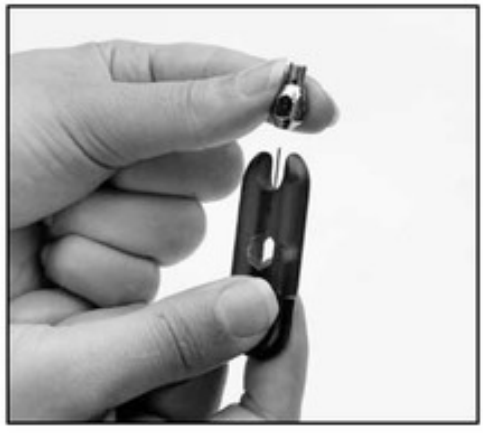
Insert the Storage Tray into the base of the machine and slide it towards the back wall. This is a convenient location to store the Cleaning Tool, Filters, and Measuring/ Tamping Spoon when not in use.
Step 2
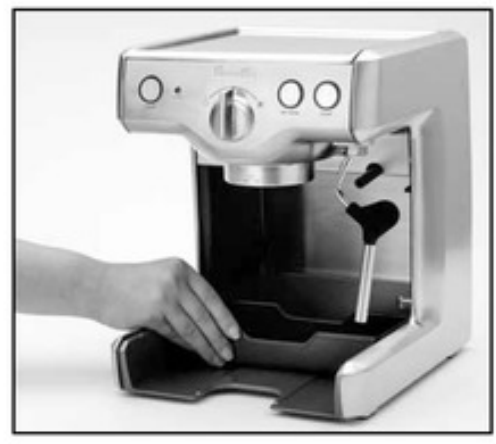
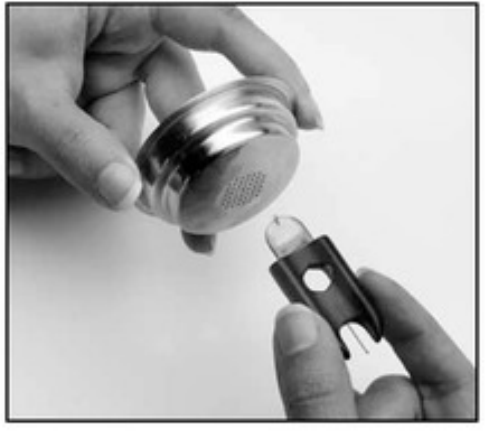
Slide the Drip Tray, with the Drip Tray Full Indicator and Grid in place, into the base of the machine.
Step 3
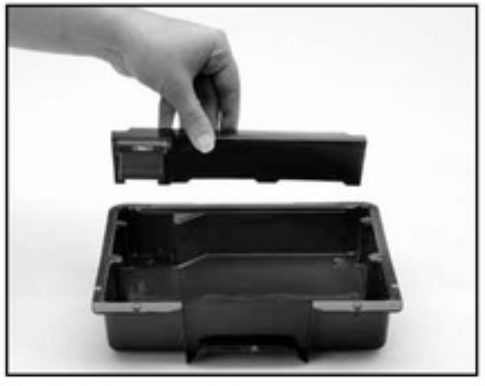
Slide the Water Tank over the Drip Tray. Ensure the Water Tank aligns flush with the sides of the machine
Operating your Breville Product
STEP 1 - FILLING THE WATER TANK
• Ensure the Power On/Off button is ‘Off’, the Selector Control is in the center 'Standby' position and the power cord is removed from the power outlet.
• Remove the Portafilter if locked into the Group Head and move the Steam Wand to the side of the machine.
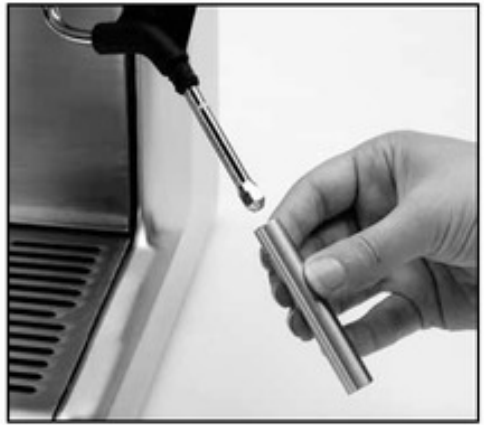
• Remove the Water Tank by gripping the handle insert.
• When the Water Tank is removed a black tube extends out from the Water Tank storage area. Do not touch or try to remove this tube, it will automatically slide back into position when the Water Tank is reinserted.
• Fill the Water Tank with cold, preferably filtered water to the MAX mark. Slide the Water Tank carefully back into position. Ensure it aligns flush with the sides of the machine.
STEP 2 - PREPARING THE COFFEE
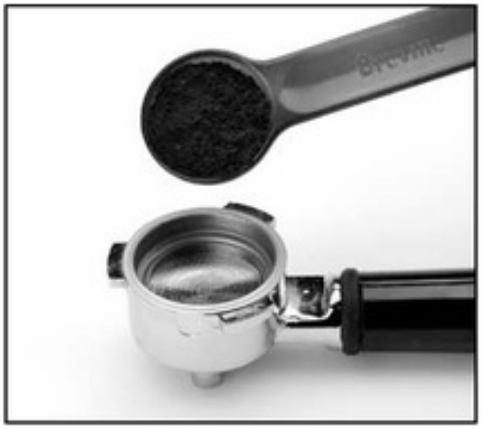
• Place the 1 Cup Filter or 2 Cup Filter into the Portafilter. Use the 1 Cup Filter when brewing a single cup and the 2 Cup Filter when brewing two cups or a stronger single cup or mug.
• With the provided Measuring/Tamping Spoon, measure 1 level spoon of ground espresso coffee for the 1 Cup Filter or 2 level spoons for the 2 Cup Filter. Always ensure to use ground coffee suitable for espresso/cappuccino machines (refer to 'Hints & Tips', page 19).
STEP 3 - TAMPING THE COFFEE
• Tap the Portafilter several times to distribute the coffee evenly in the Filter. Tamp down with the tamping end of the provided Measuring/Tamping Spoon. Wipe excess coffee from the rim of the Filter to ensure a proper seal in the Group Head is achieved
STEP 4 - PURGING THE GROUP HEAD
• Ensure the Selector Control is in the center ‘Standby’ position and plug the power cord into a 110/120V power outlet. Press the Power On/Off button to‘On’. The button surround will illuminate. A vibrating sound will be heard, this is normal.
• The heating light will flash while the machine is heating. During this time you may notice some water is automatically released into the Drip Tray. This is normal. It ensures the internal thermoblock heating system is at the optimal temperature for extracting espresso. When the machine has reached the correct operating temperature, the heating light will go out.
• Before placing the Portafilter into the Group Head, run a short flow of water through the Group Head. This stabilizes the temperature prior to extraction. To do this, turn the Selector Control to the right ‘Espresso' position. A pumping noise will be heard then water will flow through. After 5 seconds, turn the Selector Control back to the center 'Standby' position to stop the water flow. You may notice water and steam is automatically released into the Drip Tray. This is normal.
STEP 5 - PRE-HEATING THE CUP
• A warm cup will help maintain the coffee's optimal temperature. Pre-heat your cup by rinsing with hot water (refer to 'Steam & Hot Water Button', page 18) and place on the Cup Warming Tray.
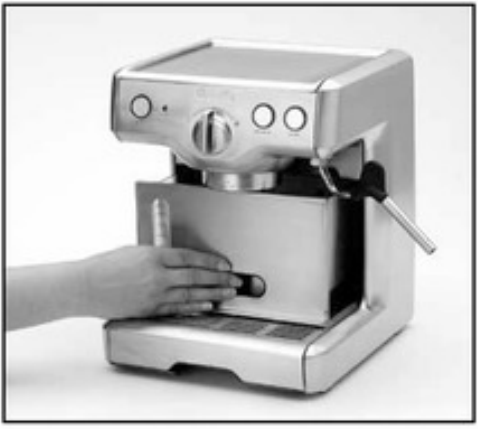
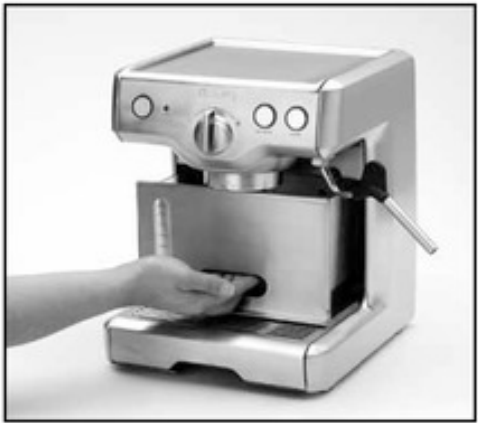
STEP 6 - INSERTING THE PORTAFILTER
• Place the Portafilter underneath the Group Head so that the handle is aligned with the INSERT position. Insert the Portafilter into the Group Head and rotate the handle towards the center until resistance is felt. This will be at an approximate 90° angle to the machine.
STEP 7 - EXTRACTING ESPRESSO
• Ensure the heating light is not flashing or illuminated before extracting espresso.
• Place pre-warmed cup(s) beneath the Portafilter.
• Turn the Selector Control to the right 'Espresso' position. A pumping noise will be heard.
• After a few seconds, aromatic coffee will start to flow
• When sufficient coffee has flowed, turn the Selector Control back to the center 'Standby' position.
• You may notice the heating light illuminate and water and steam automatically release into the Drip Tray. This is normal.
STEP 8 - TEXTURING MILK
The espresso machine features a 360' Swivel Steam Wand with removable Froth Enhancer. The Froth Enhancer creates a large amount of froth with very little effort. If less froth is required, remove the Froth Enhancer and store it in the Storage Tray. To reattach the Froth Enhancer, ensure the steam holes on either end are clear. Slide either end onto the Steam Wand, firmly pushing upwards onto the rubber surround.
• There are two phases to texturing milk. The first is stretching the milk to aerate it and the second is swirling the milk to make it silky smooth. These two operations should blend into one.
• Always start with fresh cold milk. Fill the jug halfway.
• Position the tip of the Steam Wand over the Drip Tray. Press the Steam button then turn the Selector Control to the left ’Steam/Hot Water position. The heating light will flash and then illuminate completely. During this time, condensed water may purge from the Steam Wand before steam starts to flow. This is normal.
• Before inserting the Steam Wand into the milk, pause the steam by returning the Selector Control to the center 'Standby position. Very quickly insert the tip of the Steam Wand v4-%" (l-2cm) below the surface of the milk, close to the right hand side of the jug at the 4 o'clock position. Very quickly turn the Selector Control back to the left 'Steam/ Hot Water position. Pausing the steam avoids the milk splashing out of the jug (this pause function lasts for 5 seconds only).
• Keep the tip just under the surface of the milk until the milk is spinning clockwise, producing a vortex (whirlpool effect). With the milk spinning, slowly lower the jug. This will bring the tip of the Steam Wand to the surface of the milk & start to introduce air into the milk. You may have to gently break the surface of the milk with the tip to get the milk spinning fast enough.
• Keep the tip at or slightly below the surface, continuing to maintain the vortex. Texture the milk until sufficient volume is obtained.
• Lift the jug to lower the tip beneath the surface, but keep the vortex of milk spinning. The milk is at the correct temperature (140-149T or 60-65°C) when the jug is hot to touch.
• Turn off steam BEFORE taking the tip out of the milk.
• Set the jug to one side, immediately turn steam on to purge out any residual milk from the Steam Wand, then wipe the Steam Wand with a damp cloth.
• Tap the jug on the bench to collapse any bubbles.
• Swirl the jug to "polish" and re-integrate the texture.
• Pour milk directly into the espresso. The key is to work quickly, before the milk begins to separate.
REMOVING THE COFFEE PUCK
• After texturing the milk, remove the Portafilter from the Group Head. Turn the Portafilter upside down and tap firmly to remove the used coffee puck.
• The Filters are firmly lodged inside the Portafilter to ensure they do not get dislodged when the coffee puck is tapped out of the Portafilter. To remove the Filter, grip the grooves on the Portafilter and lift the Filter out. Alternatively, use the edge of another Filter to leverage the Filter out of the Portafilter.
• Rinse the Filter and Portafilter and allow to dry.
AUTO PURGE
For extracting espresso immediately after using the steam function, the machine features an auto purge function.
The auto purge function ensures the ground coffee will not be burnt by the initial water flow from the thermoblock heating system being too hot. The initial water is automatically released into the Drip Tray after steaming to ensure the thenr.oblock is at the optimal temperature for extracting espresso. Your espresso will always be extracted at the optimal temperature ensuring only the best flavors are extracted. If you find water around the front of the machine, it may be the auto purge function. Ensure the Drip Tray is firmly pushed in place after extracting an espresso or using the steam and hot water functions. Empty the Drip Tray regularly
STEAM & HOT WATER BUTTON
• The machine will automatically default to the Steam button when the machine is first turned on.
• Both buttons cannot be operated at the same time.
• To select steam, position the tip of the Steam Wand over the Drip Tray. Press the Steam button then turn the Selector Control to the left 'Steam/Hot Water position. The heating light will flash then illuminate completely. During this time, condensed water may purge from the Steam Wand before steam starts to flow. This is normal.
• To select hot water, remove the Froth Enhancer from the Steam Wand. Press the Hot Water button then turn the Selector Control to the left 'Steam/Hot Water' position. Hot water will dispense from the Steam Wand. Hot water can be used to pre-heat cups or to make Americanos, tea, hot chocolate or instant oatmeal.
• If the machine remains on. the last button used (Steam or Hot Water) will stay illuminated.
HINTS & TIPS
The flavor of your coffee will depend on many factors, such as the type of coffee beans, degree of roast, freshness, coarseness or fineness of the grind, dose of ground coffee, and tamping pressure. Experiment by adjusting these factors just one at a time to achieve the taste of your preference.
The Coffee
• We recommend using freshly roasted coffee beans, with a 'roasted on' date and use within 2 weeks of 'roasted on* date. The beans should be ground immediately before brewing as ground coffee quickly loses its flavor and aroma.
• Pre-ground coffee can be used but should not be kept for longer than 1 week as the flavor will diminish.
• Store coffee (beans or pre-ground) in a cool, dark and dry container. Vacuum seal if possible. Do not refrigerate or freeze.
• Buy coffee (beans or pre-ground) in small batches to reduce the storage time and store no more than one week's supply at any time.
The Grind
• Always ensure the grind size of the coffee is suitable for espresso/ cappuccino machines. The grind size should be fine but not too fine. The grind size will affect the rate at which the water flows through the ground coffee in the Filter and the taste of the espresso.
• If the grind is too fine (looks like powder and feels like flour when rubbed between fingers), the water will not flow through the coffee even when under pressure.
The resulting espresso will be OVER EXTRACTED, dark in color and bitter in flavor.
• If the grind is too coarse the water will flow through the ground coffee in the Filter too quickly. The resulting espresso will be UNDER EXTRACTED and lacking in color and flavor.
Care & cleaning
CLEANING THE STEAM WAND & FROTH ENHANCER
Always clean the Steam Wand and Froth Enhancer after every use.
• After milk texturing, immediately turn steam on to purge out any residual milk from the Steam Wand.
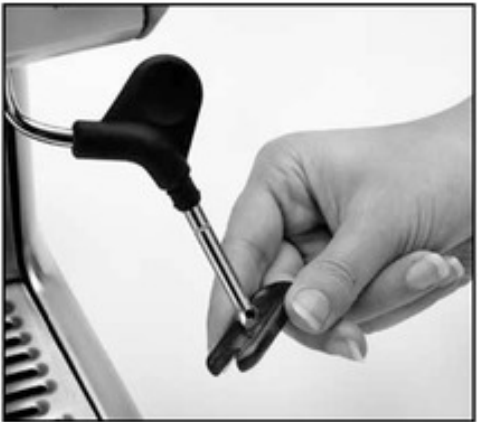
• Remove the Froth Enhancer. Wipe the Steam Wand with a damp cloth and rinse the Froth Enhancer in warm tap water. Ensure the steam holes on either end of the Enhancer are clear. Use the pin on the end of the provided Cleaning Tool to unblock the hole(s).
• If the hole in the tip of the Steam V/and becomes blocked, ensure the Selector Control is in the center 'Standby position, the Power On/Off button is ‘Off’ and the power cord is removed from the power outlet. Allow the machine to cool. Use the pin on the end of the provided cleaning tool to unblock the hole.
• If the Steam Wand remains blocked, remove the tip using the integrated spanner in the Cleaning Tool and soak in hot water. Use the pin on the end of the provided Cleaning Tool to unblock the hole before reattaching to the Steam Wand.
CLEANING THE FILTERS & PORTAFILTER
• The Filters and Porta filter should be rinsed under hot water immediately after use to remove all residual coffee oils.
• If any of the holes in the Filter become blocked, use the pin on the covered end of the provided Cleaning Tool to unblock the hole(s).
• If the hole(s) remain blocked, dissolve a cleaning tablet in hot water and soak the Filter and Portafilter in the solution for approx, 20 minutes. Rinse thoroughly. Cleaning tablets can be purchased by contacting Breville Consumer Service.
CLEANING THE SHOWER SCREEN
• The Group Head interior and shower screen should be wiped with a damp cloth to remove any ground coffee particles.
• Periodically purge the machine. Place an empty Filter and Portfilter into the Group Head. Perform an extraction to rinse out any residual coffee.
CLEANING THE DRIP & STORAGE TRAY
• The Drip Tray should be removed, emptied, and cleaned after each use (after the auto-purge feature, see page 18) or when the Drip Tray is showing Empty Me!
• Remove the Grid from the Drip Tray. Wash both in warm soapy water. The Empty Me! indicator can also be removed from the Drip Tray.
• The Storage Tray can be removed and cleaned with a soft, damp cloth (do not use abrasive cleansers, pads, or cloths which can scratch the surface).
CLEANING THE OUTER HOUSING & CUP WARMING TRAY
The outer housing and cup warming tray can be cleaned with a soft, damp cloth. Polish with a soft, dry cloth. Do not use abrasive cleansers, pads or cloths which can scratch the surface.
DECALCIFYING
After regular use. hard water can cause mineral build-up in and on many of the inner functioning components, reducing the brewing flow, brewing temperature, power of the machine, and taste of the espresso.
We advise decalcifying the machine every month and especially if not using the machine for an extended period eg. before going on vacation.
• Remove the Portafilter.
• Pour a 50/50 mixture of white vinegar and cold tap water into the Water Tank.
• Place a large container beneath the Group Head and Steam Wand.
• Ensure the heating light is not flashing.
• Turn the Selector Control to the right 'Espresso' position. A pumping noise will be heard. After a few seconds, water will flow. Once half the decalcifying mixture has run through the Group Head, turn the Selector Control back to the center 'Standby' position.
• Press the Steam button then turn the Selector Control to the left 'Steam/
Hot Water position. The heating light will flash and then illuminate completely. Condensed water may purge from the Steam Wand before steam starts to flow. Allow the steam to run through the Steam Y.rand for approximately 2 minutes then turn the Selector Control back to the center 'Standby' position.
• If any of the mixtures remains in the Water Tank, allow it to run through the Group Head.
• In harder water environments, we recommend repeating this cycle.
• After decalcifying, remove the Water Tank, rinse thoroughly then refill with fresh cold water only. To rinse the machine, repeat the steps above.
Troubleshooting
PROBLEM
POSSIBLE CAUSE
WHAT TO DO
No espresso / Espresso only drips from the portafilter
• Machine is not turned on or plugged in.
Ensure the machine is plugged in and the Power On/Off button is 'On'.
• Selector Control not in 'Espresso’ position
Turn the Selector Control to the right ’Espresso’ position.
• Water tank is empty or not securely in place
Fill the water tank. Slide it carefully back into position, ensuring it aligns flush with the sides of the machine.
• Coffee grind is too fine
Use a slightly coarser grind.
• Too much coffee in the filter
Lower dose of coffee.
• Coffee tamped too firmly
Use a lighter tamp.
• The filter is blocked
Use the pin on the end of the provided cleaning tool to unblock the hole(s). If the ho!e(s) remain blocked, dissolve a cleaning tablet in hot water and soak filter and portafilter in solution for approx. 20 minutes. Rinse thoroughly.
To purchase cleaning tablets, call Breville Consumer Service on: 1-866-273-8455 (USA) 1-855-683-3535 (Canada).
As you become more experienced, consider trying Single Wall Filters. These allow you to experiment with grind, dose and tamp to create a more balanced espresso. They can be purchased by contacting Breville Consumer Service on: 1-866-273-8455 (USA) 1-855-683-3535 (Canada).
• Machine needs to be decalcified
Refer to ’Decalcifying’, page 23.
Espresso runs out too quickly/No crema
• Coffee grind is too coarse
Use a slightly finer grind.
• Not enough coffee in the filter
Increase dose of coffee.
• Coffee not tarr.ped firmly enough
Use a firmer tamp.
Coffee runs out around the edge of the portafilter
• Portafilter is not inserted into the group head correctly
Ensure portafilter is completely inserted and rotated until resistance is felt.
• There are coffee grounds around the filter rim.
Clean excess coffee from the rim of the filter to ensure a proper seal in group head.
• Too much coffee in the filter
Lower dose of coffee.
• Coffee has been tamped too firmly
Use a lighter tamp.
• The silicone seal in the group head (surrounding the shower screen) needs to be replaced to ensure the portafilter is properly secured into the group head
Call Breville Consumer Service on:
1-866-273-8455 (USA) 1-855-683-3535 (Canada).
Wet coffee puck after extraction
• Due to high water pressure in the group head, the used coffee puck will be wet after extraction. This is normal.
For a drier coffee puck, we recommend leaving the portafilter in the group head while texturing milk. Once complete, remove the portafilter then tap out the used coffee puck.
Machine is vibrating / Making strange noises
• Water tank is empty or not securely in place
Fill water tank. Slide it carefully back into position, ensuring it aligns flush with the sides of the machine.
• The machine will make a vibrating or thumping noise while it preheats, during the pre-brew Triple Prime”' (page 15), while brewing, steaming & dispensing hot water and while it auto purges after steaming (page 18). During this time you may also notice water and steam is automatically released into the drip tray. This is normal.
Coffee is too cold
• Machine not preheated
Ensure the heating light is not flashing or illuminated before extracting espresso.
• Cups not preheated
A warm cup will help maintain the coffee s optimal temperature. Pre-heat your cup by rinsing with hot water (refer to ’Steam & Hot Water Button’, page 18) and place on the Cup Warming Tray.
• Milk not hot enough (if making a cappuccino or latte etc)
Heat milk until base of the jug becomes hot to touch.
Milk is not foamy after frothing
• Not enough steam
Steam wand may be blocked. Refer to ’Cleaning the Steam Wand & Froth Enhancer’, page 21. Use the provided Froth Enhancer.
• Milk is not fresh and cold
No steam is generated
• Machine is not turned on
Ensure the machine is plugged in and the Power On/Off button is 'On'.
• Water tank is empty or not securely in place
Fill water tank. Slide it carefully back into position, ensuring it aligns flush with the sides of the machine.
• Selector Control not in ‘Steam’ position
Press the Steam button then turn the Selector Control to the left 'Steam' position.
• Steam wand is blocked
Refer to 'Cleaning the Steam Wand & Froth Enhancer, page 21.
Water leaking
• Auto purge feature. Water is automatically released into the drip tray after the steam and hot water functions to ensure the thermoblock is at the optimal temperature for extracting espresso.
Ensure the drip tray is firmly pushed in place after extracting an espresso or using the steam and hot water functions. Empty the drip tray regularly.
• Water tank is not securely in place
Slide it carefully back into position, ensuring it aligns flush with the sides of the machine.
• Droplets of condensed water are dripping from the steam wand. This is normal.
Position the steam wand tip over the drip tray after use.
Drip tray fills too quickly
• Auto purge feature. Water is automatically released into the drip tray after the steam and hot water functions to ensure the thermoblock is at the optimal temperature for extracting espresso.