Loading ...
Loading ...
Loading ...
INSTALLATION INSTRUCTIONS: DUCT COVERS
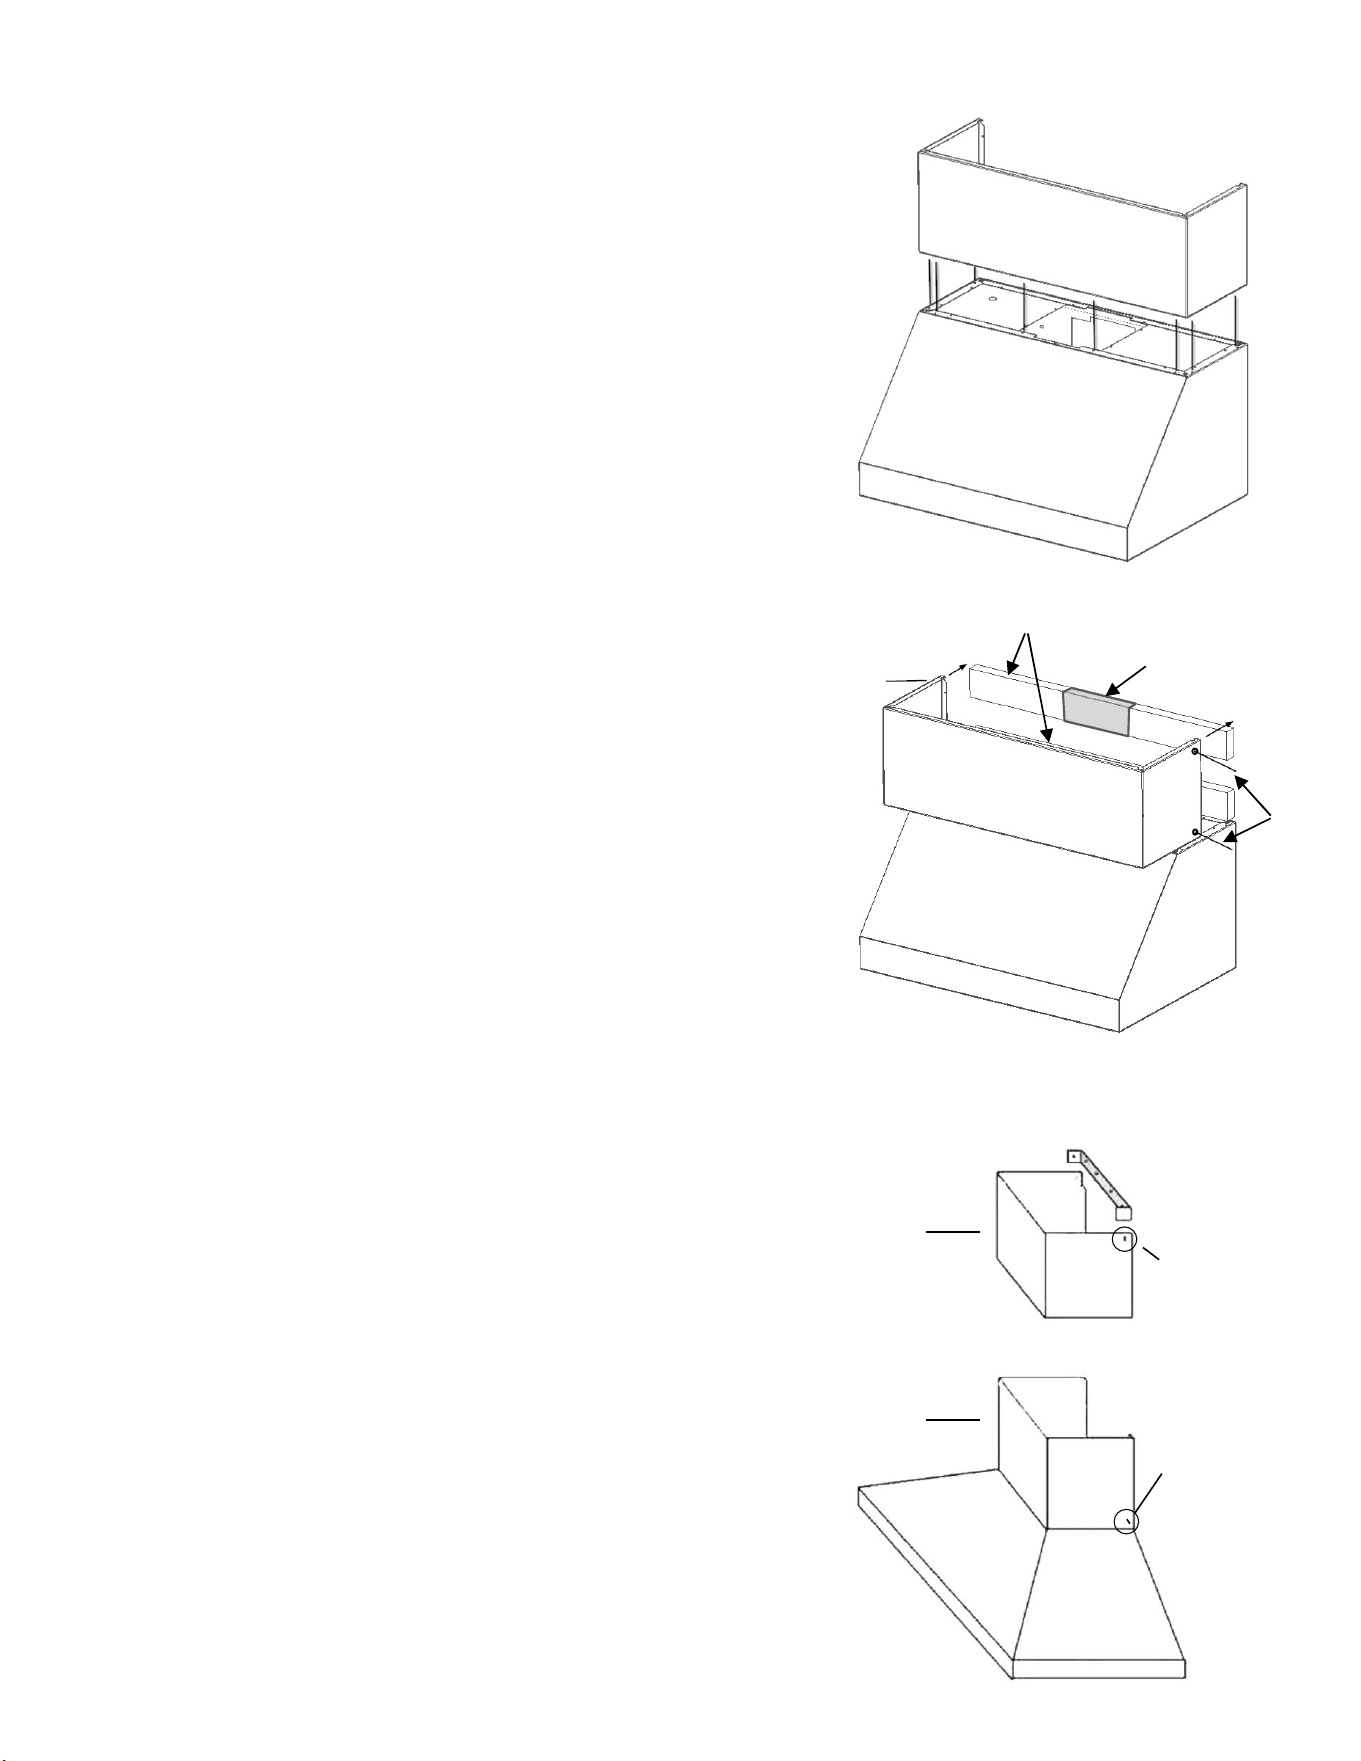
Installing a Telescopic Duct Cover
1. Attach upper mounting bracket to wall against ceiling and
centered with hood.
2. Attach lower mounting bracket to wall against top of hood shell.
3. Slide upper duct cover down into lower duct cover.
4. Place duct cover assembly on top of hood shell and raise the
upper portion so it is flush with ceiling. Drive screws into upper
mounting bracket to secure upper duct cover in position.
5. Drive remaining 2 screws into lower duct cover’s bracket.
(Duct cover should sit flush to ceiling, but gap could occur if wall and ceiling
are not square)
Upper Duct
Lower Duct
Upper
Mounting
Bracket
Mounting
Hole Location
Mounting
Hole Location
Installing a 1-Piece Duct Cover
1. Secure duct cover to top of hood using screws. Depending on the
site-specific installation of your hood and duct cover, the screws
may be driven from the top down or the bottom up. Additional
holes may be drilled in the flanges as needed to allow for secure
installation.
Installing a 1-Piece Duct Cover (Alternate Option)
If access to the install fasteners described in 8-1 is not possible in your
specific installation, wood blocking may be used to secure the duct
cover. Holes will need to be drilled into the duct cover to allow for
screws to be driven.
1. Secure wood blocks (not provided) on wall surface above hood.
2. If necessary, provide clearance for any ductwork exiting the top of
the hood shell
3. Drill holes in duct cover to align with blocking. Position duct cover
around blocks and secure with screws on each side near the top
and bottom of the cover.
2
1
3
15
Loading ...
Loading ...
Loading ...