Loading ...
Loading ...
Loading ...
51
MULTIPLE INSTALLATION — APPLIANCE PREPARATION
Install fasteners
kit
Barbed plugs (2)
Cabinet depth
alignment gauges
(4)
Top joiner
bracket kit
Central spacer
(1)
#8 x 16
Mush Washer
Twin Thread
Philips Screw
#8 x 16
Mush Washer
Twin Thread
Philips Screw
8Gx16 Mush washer
screw (2)
Tools
Cross-head
screwdriver
Powered driver
(optional)
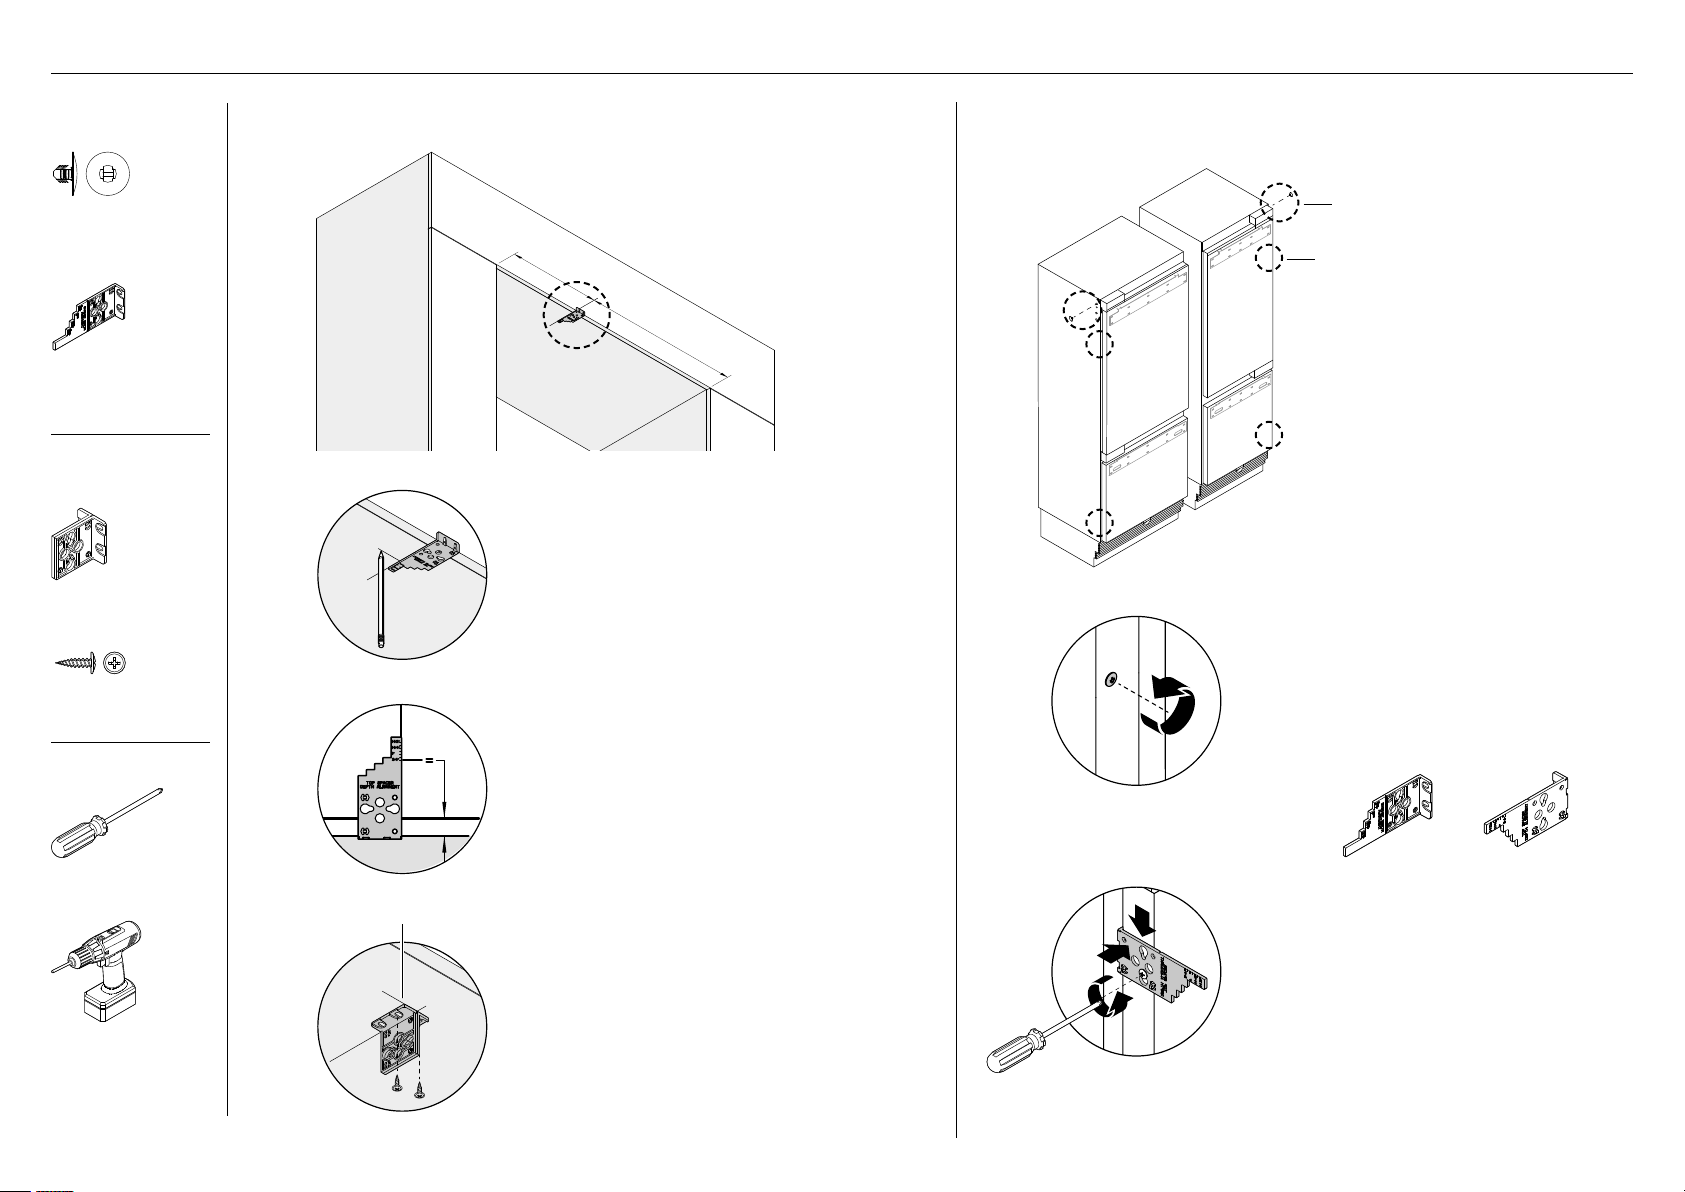
The central spacer must be installed
to ensure correct installation of the
appliances.
Measure the widths from left (A) and
right (B) cabinetry sides towards
thecenter to determine the attachment
location of the central spacer.
Refer to "Cabinetry dimensions' page for
correct cavity width.
On the 'Top spacer depth alignment' side
of the depth gauge, mark the attachment
location of the central spacer on the
cabinetry.
The depth position of spacer depends on
the door panel thickness.
Secure the central spacer to the alcove
ceiling with two 8Gx16 countersunk
screws.
Tightenthescrews with a screwdriver or
powered driver.
A
b
Attaching the central spacer to cabinetry Attaching barbed plugs and depth alignment gauges
1
2
3
central spacer
2
1
3
Left
Right
Place the alignment gauge by inserting
the screw head through the keyhole of the
gauge.
Push the alignment gauge down to lock the
position.
Tighten the screw just enough to firmly
hold the gauge.
z
The alignment gauges are only
temporary and must be removed after
installation.
Loosen the right and left screws at the top
and bottom sides of the door. (A)
Locate the alignment gauges at correct
orientation to the right and left screws.
Before rolling into the cavity, insert
the barbed plugs into large holes on
the top right and left sides of both
appliances.
The plugs protect the inside surface
of cabinetry from being damaged by
screws when pushing in the appliance.
barbed plugs
depth gauges locations
Illustrations may differ from your purchased appliance.
Loading ...
Loading ...
Loading ...