Loading ...
Loading ...
Loading ...
48
CABINET TRIMS INSTALLATION
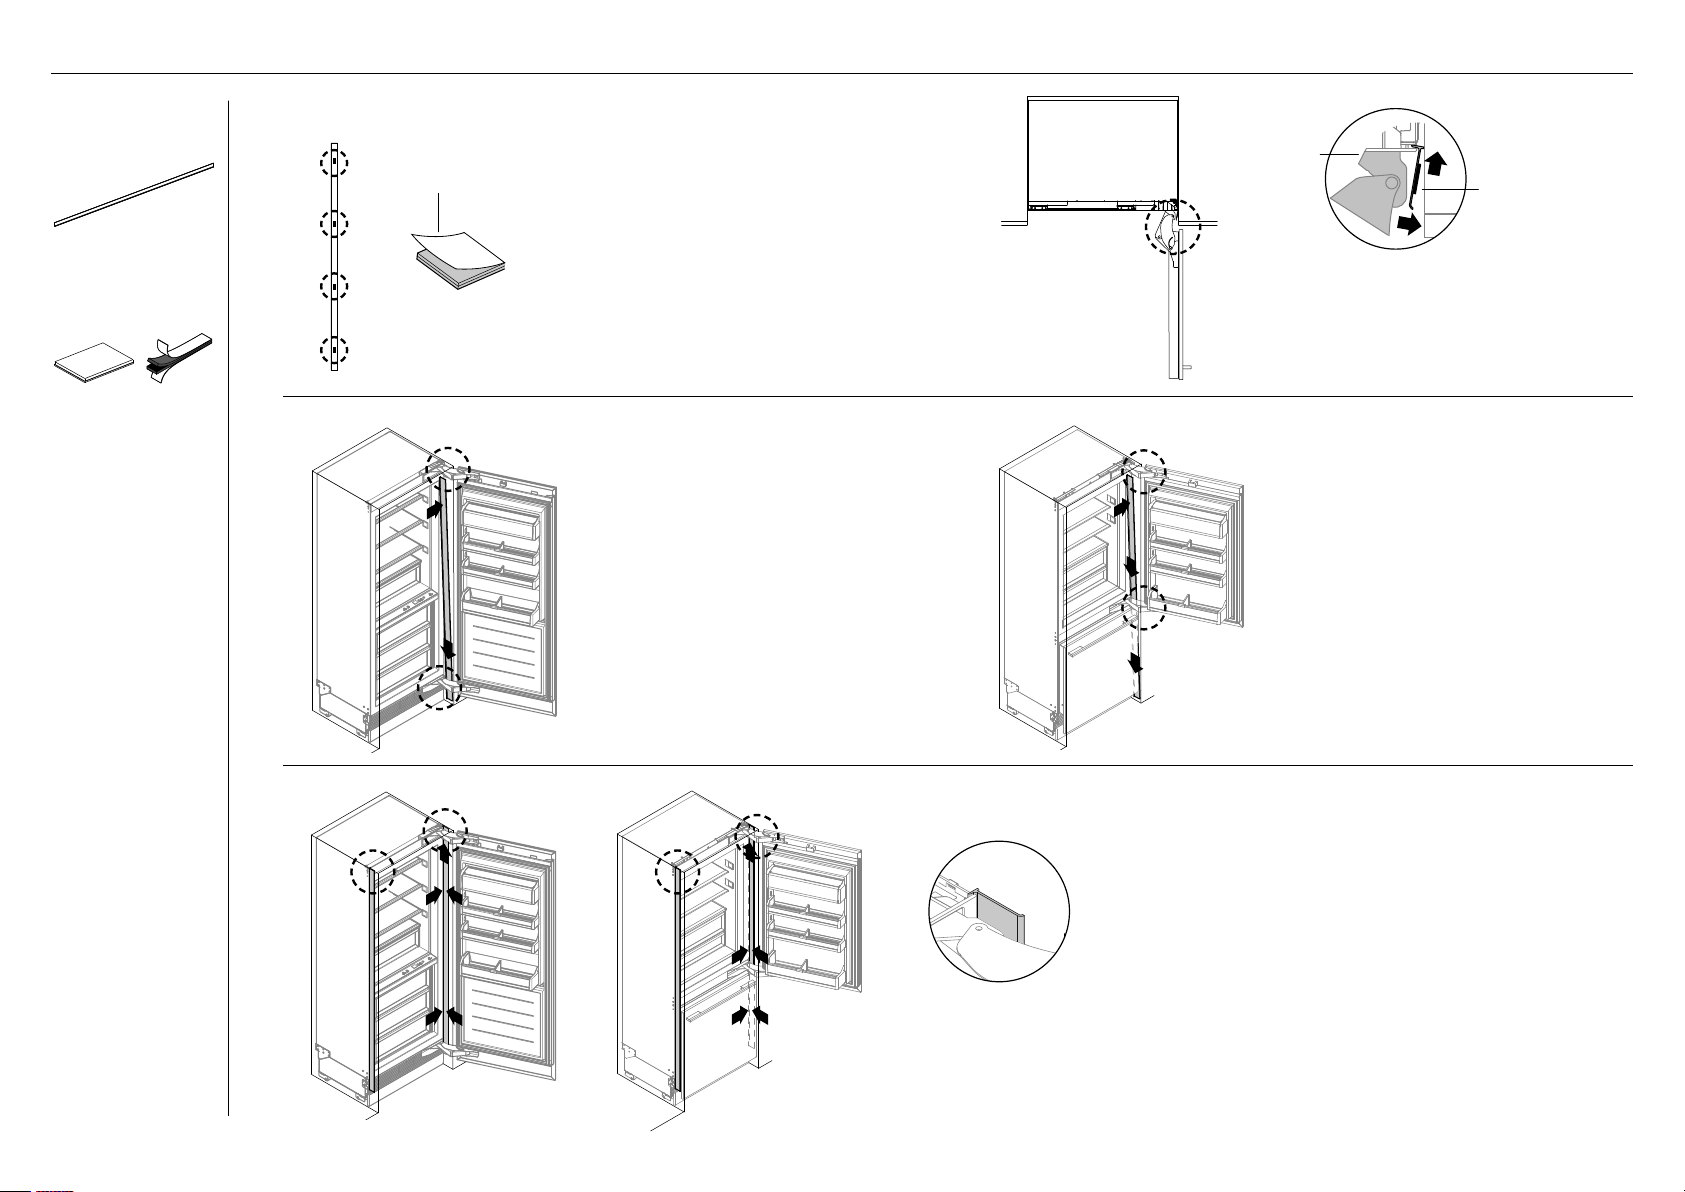
Installing cabinet side trimsTrims install kit
Cabinet side trim (2x)
Dual adhesive strips
(4x)
For Refrigerator-Freezer
Hold the same angle and slide the bottom
end of side trim behind the middle hinge
down to the bottom drawer side.
Slide the top end of side trim behind the
top hinge.
Dual adhesive strips are pre-attached at
four locations along the side trims.
z
Ensure the adhesive strips are pressed
firmly to the cabinet side trims.
Peel off the liners from the dual adhesive
strips.
z
Ensure the adhesive surface is clean
and free of dust or small particles.
For Refrigerator or Freezer/Wine cabinet
Hold the same angle and slide the bottom
end of side trim behind the bottom hinge.
Slide the top end behind the top hinge.
Slide trim in behind lower hinge, then top hinge
Reveal dual-lock adhesive
Slot trim in behind hinge pocket, then press adhesive to cavity
ensuring trim is also tight against fridge inner face.
door hinge
trim
Slide trim in behind lower hinge, then top hinge
Reveal dual-lock adhesive
Slot trim in behind hinge pocket, then press adhesive to cavity
ensuring trim is also tight against fridge inner face.
adhesive strip
Position the trim at an angle on
the throat of the door hinge.
Slot the side trim behind the top hinge pocket.
Press the adhesive strip to the cavity to ensure the trim is
also tight against the inner face of the appliance.
On the non-hinge side, slide in the side trim behind the
top trim.
Press firmly on the dual-lock strip locations to ensure the
side trims are securely attached.
Slide trim in behind lower hinge, then top hinge
Reveal dual-lock adhesive
Slot trim in behind hinge pocket, then press adhesive to cavity
ensuring trim is also tight against fridge inner face.
REFRIGERATOR OR FREEZER
WINE CABINET
REFRIGERATOR—FREEZER
Slide trim in behind lower hinge, then top hinge
Reveal dual-lock adhesive
Slot trim in behind hinge pocket, then press adhesive to cavity
ensuring trim is also tight against fridge inner face.
1
2
3
Illustrations may differ from your purchased appliance.
Loading ...
Loading ...
Loading ...