Loading ...
Loading ...
Loading ...
Installation
*INSTALLATION*
78
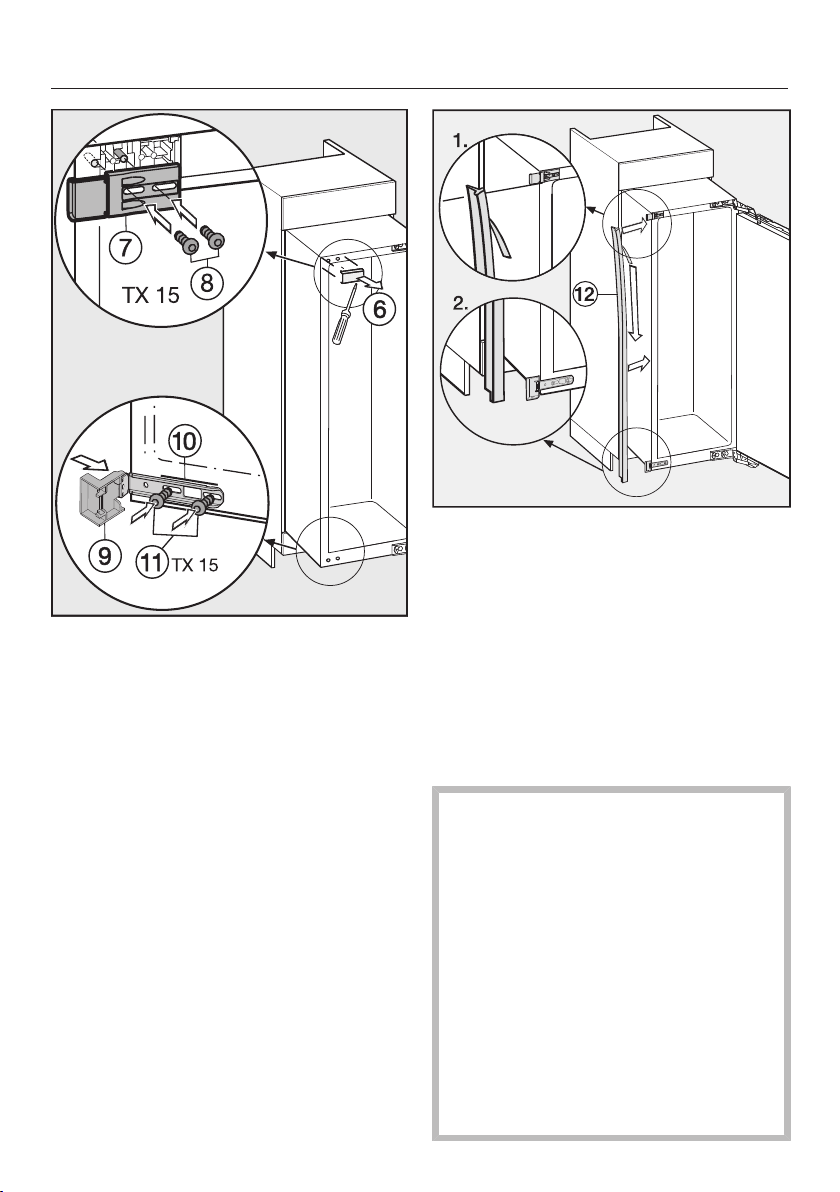
Remove the cover.
Loosely fit the connecting bracket
using the screws.
Tip: Do not tighten the screws, to allow
for the position of the connecting
bracket to be adjusted.
Push the contact component onto
the fixing bracket.
Loosely fit the securing bracket
using the screws.
Tip: Do not tighten the screws, to allow
for the position of the connecting
bracket to be adjusted.
Carefully remove the protective film
from the sealing strip.
Stick the sealing strip onto the
side of the appliance on which the
door will open, flush with the front.
1. Align the sealing strip with the bot-
tom edge of the top fixing bracket.
2. Stick it down along its entire length.
Building in the appliance
If the appliance is pushed too far into
the niche, the appliance door may
not close properly once the cabinet
door has been fitted. This can cause
ice to build up, condensate to accu-
mulate, and cause the appliance to
malfunction. These can all lead to in-
creased energy consumption.
Push the appliance into the built-in
niche, making sure a gap of
15/8" (42mm) is maintained all
around between the appliance cas-
ing and the front of the cabinet side
walls.
Loading ...
Loading ...
Loading ...