Loading ...
Loading ...
Loading ...
To delete a displayed image, press the QV/delete button.
• A confirmation screen will appear.
26 27
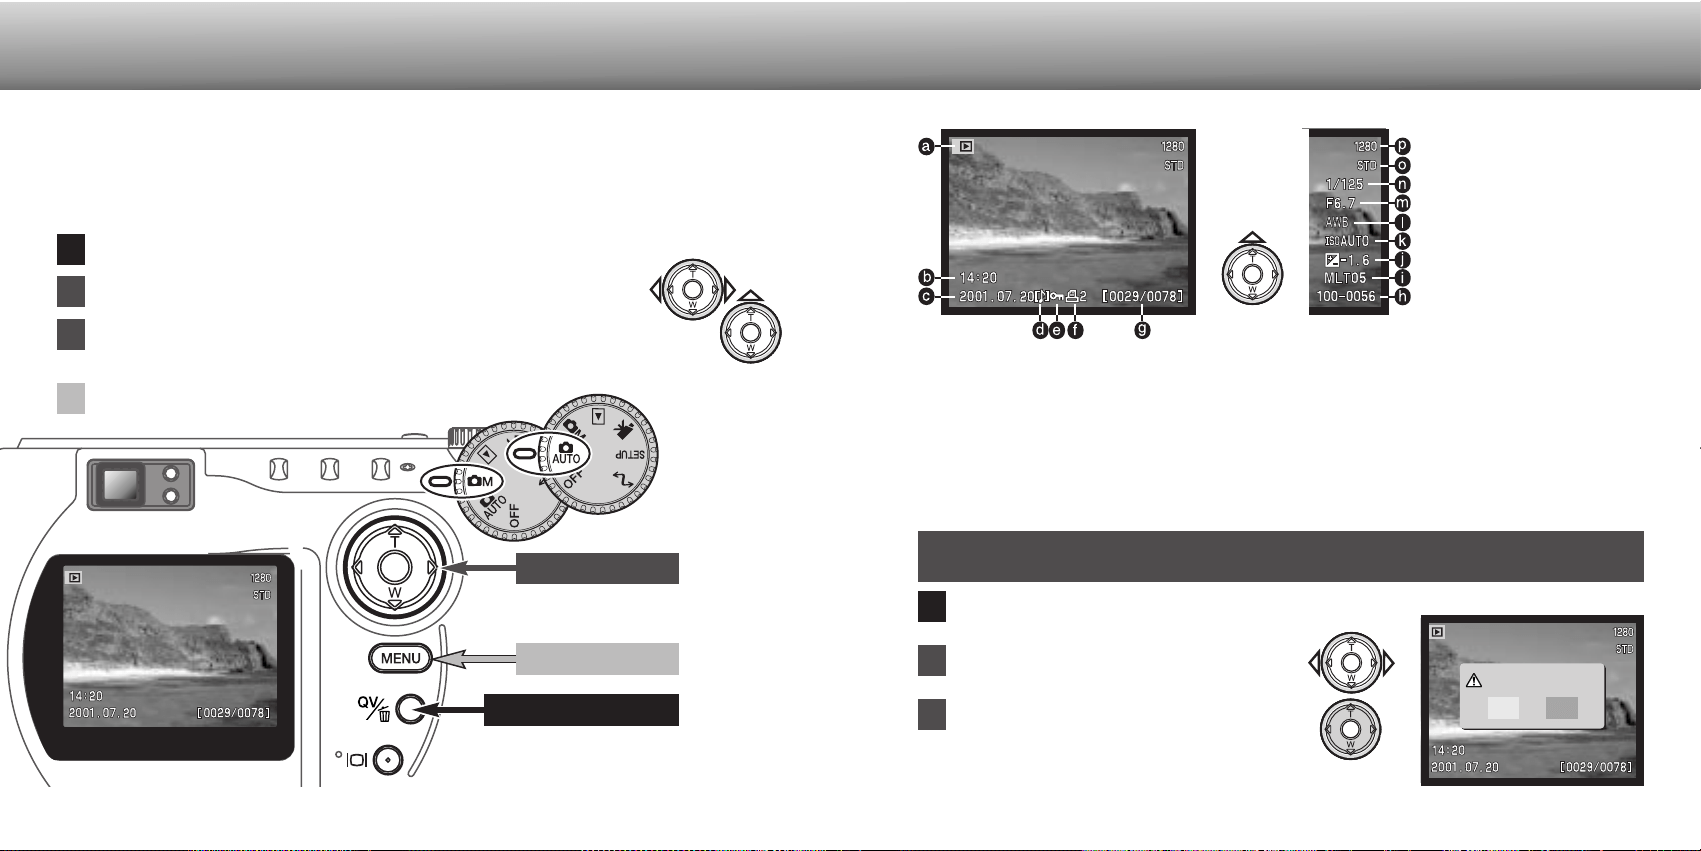
AUTO-RECORDING MODE
Captured images can be viewed in auto-recording and multi-function recording mode.
Simply press the QV/delete button to access the images, and use the controller to
scroll through the pictures on the CompactFlash card. Images can be displayed with
various information: date, frame number, printing status, and lock status. The camera
settings used to take the picture can also be displayed.
QV/delete button
In quick view, the displayed image can be deleted. When selecting an image for
deletion, a confirmation screen will appear before the operation is executed.
1
2
1
2
3
Pressing the controller will execute the
command on the confirmation screen.
• The camera will return to quick view.
QUICK VIEW
QUICK-VIEW DISPLAY
Once deleted, an image cannot be recovered.
Care should always be taken when deleting images.
DELETING IMAGES IN QUICK VIEW
Use the left/right keys to highlight “Yes.”
• “No” will cancel the operation.
4
c. Date of capture
g. Frame number/
total number of images
e. Lock icon (p. 75)
f. Print icon (p. 78)
p. Image size (p. 40)
o. Image quality (p. 41)
Controller
Menu button
3
b. Time of capture
a. Mode indicator
Delete this frame?
NoYes
Press the QV/delete button to play back the recorded images.
Use the left/right keys of the controller to scroll through the images.
To return to the recording mode, press the menu button.
Press the up key to see the shooting data for the displayed image.
• When the data is displayed, the left/right keys cannot scroll to the next image.
Press the down key to cancel the shooting-data display.
d. Voice-memo icon (p. 43)
To view the
shooting
data, press
the up key.
n. Shutter speed
m. Aperture value
l. White balance setting
(p. 54)
k. Camera sensitivity (ISO)
setting (p. 57)
j. Degree of exposure
compensation (p. 46)
i. Folder name (p. 100)
h. Folder number -
image file number
Loading ...
Loading ...
Loading ...