Loading ...
Loading ...
Loading ...
a
11
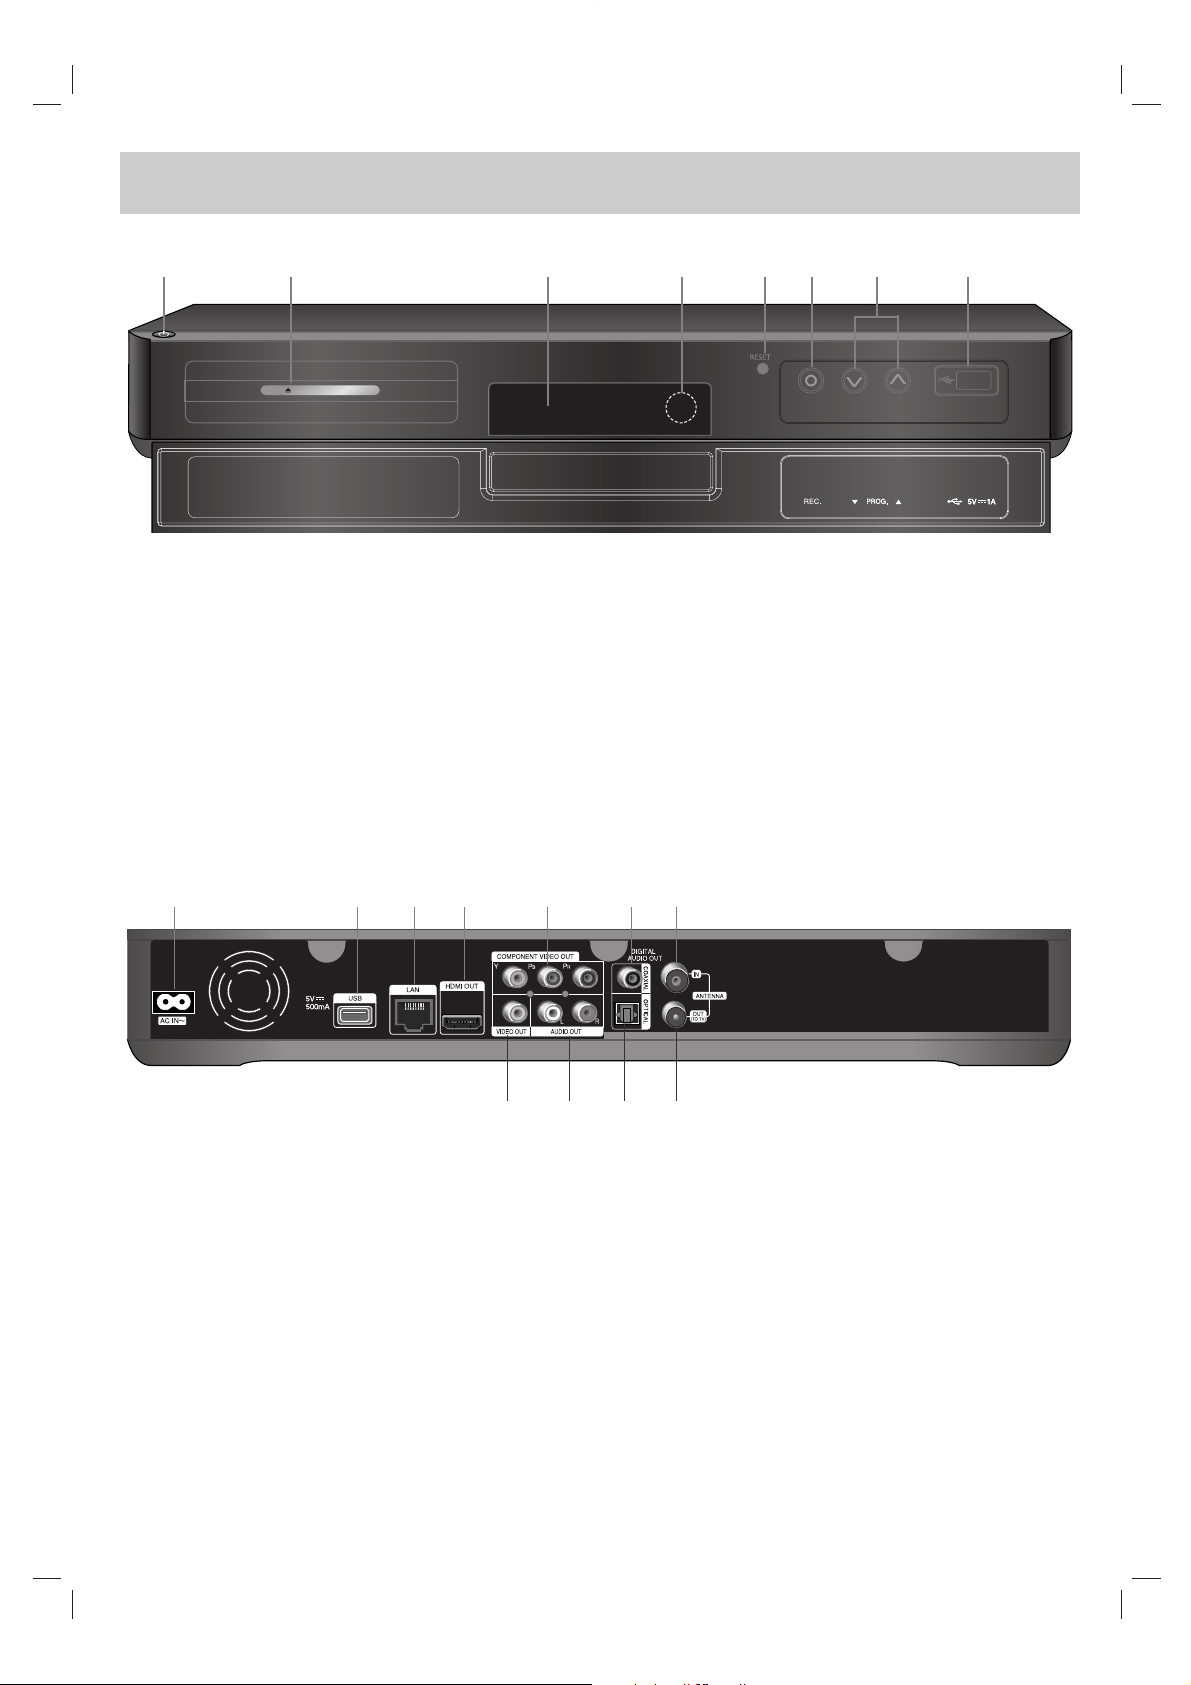
(POWER) Button
Switches the recorder ON or OFF.
b External HDD Slot
Mounting an additional HDD here.
c Display window
Shows the current status of the recorder.
d Remote Sensor
Point the remote control here.
e RESET
Press this button to reboot.
f z (REC.)
Starts recording.
g PROG. v/V
Scans up or down through memorized programmes.
h USB Port
Connect a USB Device.
9
Main unit
PUSH / OPEN
a AC IN connector
Connect the supplied power cord.
b USB Port
Connect the supplied Wireless LAN Adapter.
c LAN port
Connect a network with an always-on broadband con-
nection.
d HDMI OUT
Connect to TV with HDMI inputs. (Interface for digital
audio and video)
e COMPONENT VIDEO OUT (Y P
B PR)
Connect to a TV with Y PB PR inputs.
f DIGITAL AUDIO OUT (COAXIAL)
Connect to digital (coaxial) audio equipment.
g ANTENNA IN
Connect the antenna to this terminal.
h VIDEO OUT
Connect to a TV with video inputs.
i AUDIO OUT (Left/Right)
Connect to a TV with audio inputs.
j DIGITAL AUDIO OUT (OPTICAL)
Connect to digital (optical) audio equipment.
k ANTENNA OUT (TO TV)
Passes the signal from the ANTENNA IN jack to your
TV/monitor
hijk
abcdefg
ab c defgh
Loading ...
Loading ...
Loading ...